
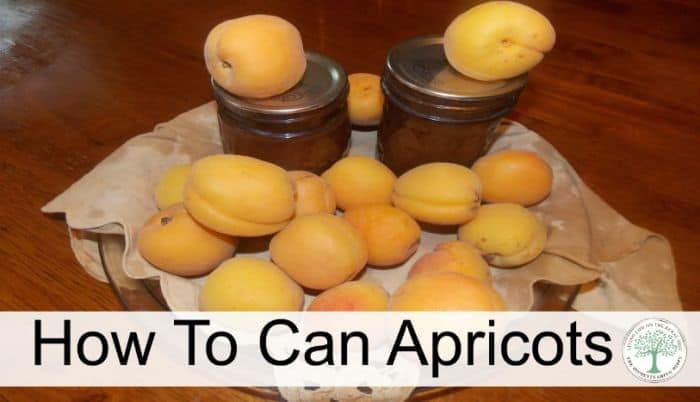
Learning how to can apricots is a great way to build your pantry.
Apricots are a great versatile fruit that can go from jams and jellies to sauces and savory compotes with ease. They are slightly sweet, with a unique flavor all their own. If you are blessed enough to have apricot trees on your property, you will often have an abundance of them.
For the rest of us, we have to get ours from local farmers and grocery stores. Fortunately, they will often go on a great sale in the mid Spring, so stocking up and canning them for later is an option.
Once they are canned, they are perfect for adding to roasts, chicken, or spooning on top of ice cream. If you shake the jar very vigorously, you will also create a beautiful apricot sauce that spreads easily on toast, bagels or in oatmeal bars.
To see what you need to get started canning, check out the post here.
How to can apricots at home:
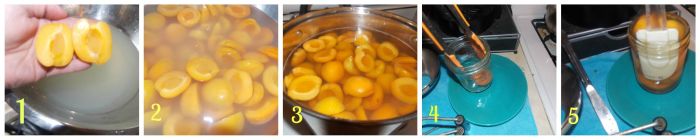
- gently wash to remove dirt. No need to peel.
- Slice down the “seam” of the apricot to split in half and place in an anti-browning solution. (translation: 1/4 cup of lemon juice to 1 gallon water)
- Keep the in the solution until you are finished with all the fruit.
- Gently heat the apricots in a simple syrup of 1 cup of sugar to 1 quart of water. This is known as a “light syrup”. You can make it more sugary if you want simply by adding more sugar to the water.
- Once boiling, place the cut side down in the jars. Using a tongs will help you flip any stubborn ones over. This is so you can add more into the jar.
- Use a non metallic instrument, like a rubber spatula, to remove all air bubbles.
- Wipe the lid with a clean towel, add the hot lid and band and pressure can at 5lbs pressure for 10 minutes for both pints and quarts!
- Once the canner has cooled, remove the jars and wipe off. Store in cool, dry place for up to a year.

Heather’s homesteading journey started in 2006, with baby steps: first, she got a few raised beds, some chickens, and rabbits. Over the years, she amassed a wealth of homesteading knowledge, knowledge that you can find in the articles of this blog.
Learn more about Heather and the rest of the writers on this page.
Oh boy does this look good! I absolutely love apricots – fresh, frozen, canned or dehydrated! Thanks for this quick and easy tutorial!