
The process of canning food is an effective way to preserve perishable items for extended periods of time. But, in order to be safe, canned foods must be processed at a high enough temperature to kill bacteria.
However, some bacteria are more heat-resistant than others, and this is where pH comes into play.
Botulism is the most important one to note. It is caused by the growth of Clostridium botulinum bacteria in anaerobic conditions.
These bacteria are found in water, soil, and sediments. When canning low-acid foods, the ph level must be below 4.6 to prevent the growth of these bacteria.
Botulism can cause paralysis and even death if not treated immediately. Therefore, it is important to follow directions carefully when canning low-acid foods.
Boiling the food for the recommended time at the correct pressure is essential to kill the bacteria and prevent botulism.
In order to can low acid veggies like corn, okra, green beans and peas, you MUST use a pressure canner. No amount of time in a water bath canner will safely do these. And, once you get the hang of it, it’s fast and easy to do!
Here’s a detailed guide to help you get started canning your favorite low-acid veggies!
How to Can Low Acid Vegetables
With a little care and attention, you can safely enjoy delicious low acid vegetables all year long! Here are some tips.
Canning Corn
This is actually best if you start outside. Trust me on this one. If you shuck all the corn outside, you will leave your mess there, instead of having to clean it a second time.
Take two bowls, a sharp knife and two towels, one wet and one dry with you as well.
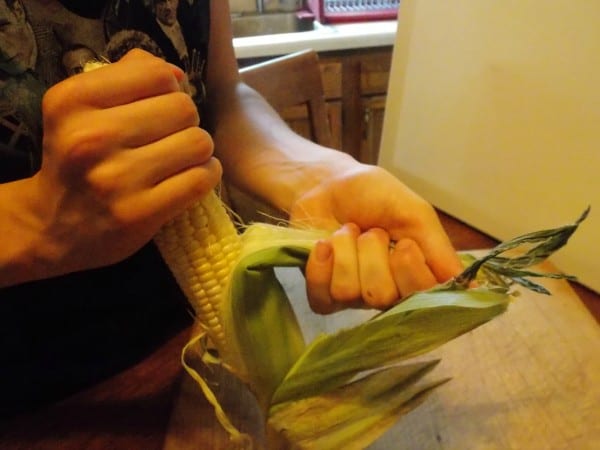
Begin by shucking the corn. Grasp the ear in one hand, and pull down the outer shell, and remove as much of the silk as you can. Remove all the leaves, and leave the “handle” intact.
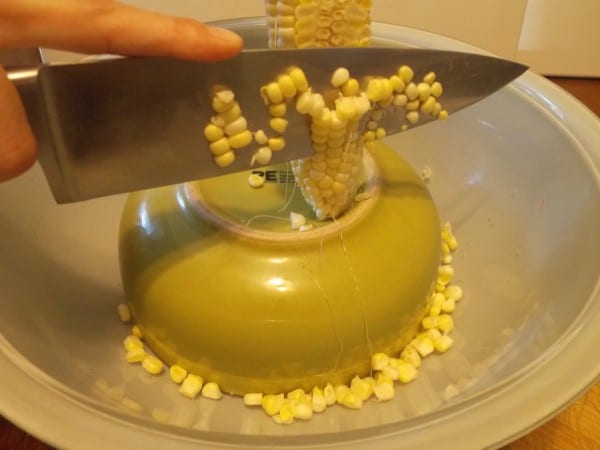
Place a smaller bowl upside down in a larger bowl, and place both on the dry towel to prevent slippage. Place the ear upside down so you can grasp the “handle”.
Using your sharp knife, carefully slide the blade down to remove the kernels, being careful not to cut into the cob.
Try to keep the cut to ¾ of the depth of the kernel. This will take a bit of practice. The kernels will slide right into the bowl as you cut. Neat, huh?
Toss the cob to the chickens and/or compost pile and continue with all your ears.
You will see why you wanted to have a wet towel with you, and why you want to do this outside if at all possible, as this process of removing the kernels can get very sticky. You will eventually be covered with corn “milk”, but that’s part of the fun, right?
To raw pack the corn, simply place the raw corn in a hot, clean jar. Add boiling water on top, leaving 1 inch of headspace.
Wipe the rim with a clean towel, add the hot lid and band, screw on finger tight, and process in a pressure canner at 10lbs pressure for 85 minutes for quarts, 55 minutes for pints.
Canning Peas
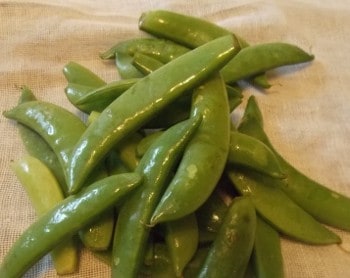
Shell your peas by sliding your finger right on the “seam” of the pod and remove the tender peas. Compost the shells, and rinse the peas.
To raw pack the peas, simply place the raw peas in a hot, clean jar. Add boiling water on top, leaving 1 inch of headspace.
Wipe the rim with a clean towel, add the hot lid and band, screw on finger tight, and process in a pressure canner at 10lbs pressure, and process in pressure canner at 10lbs pressure for 40 minutes for both pints and quarts.
See the full instructions and photos here.
Canning Carrots
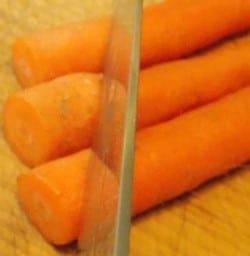
Peel the carrots and rinse. Save the peels for broth/soup later, if you can. Our rabbits also enjoy them as their treat if I’m not fast enough to put them away.
You can leave them whole, slice them, or dice them. I prefer to cut mine into coins. To do this, lay several carrots on a cutting board at once, and use a sharp knife.
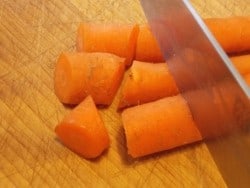
Alternate angles in how you cut them, and viola! Carrot Coins!
To raw pack the carrots, simply place the raw carrots in a hot, clean jar. Add boiling water on top, leaving 1 inch of headspace.
Wipe the rim with a clean towel, add the hot lid and band, screw on finger tight, and process in a pressure canner at 10lbs pressure pints 25 minutes, quarts 30 minutes.
Check out the carrots canning recipe here.
Asparagus
The key to successful canning is to use fresh, tender spears, and to pack the jars tightly without crushing the asparagus. You can either hot pack or raw pack the asparagus, but raw packing will result in a more tender product.
To hot pack, simply cover the asparagus with boiling water and boil for two or three minutes.
Then loosely fill the jars with the asparagus, leaving one inch of headspace. For a raw pack, fill the jars with raw asparagus, packing it as tightly as possible.
Again, leave one inch of headspace. Add one teaspoon of salt per quart, if desired. Finally, add boiling water to the jars, leaving one inch of headspace. Process pints for 30 minutes at 10 lbs pressure.
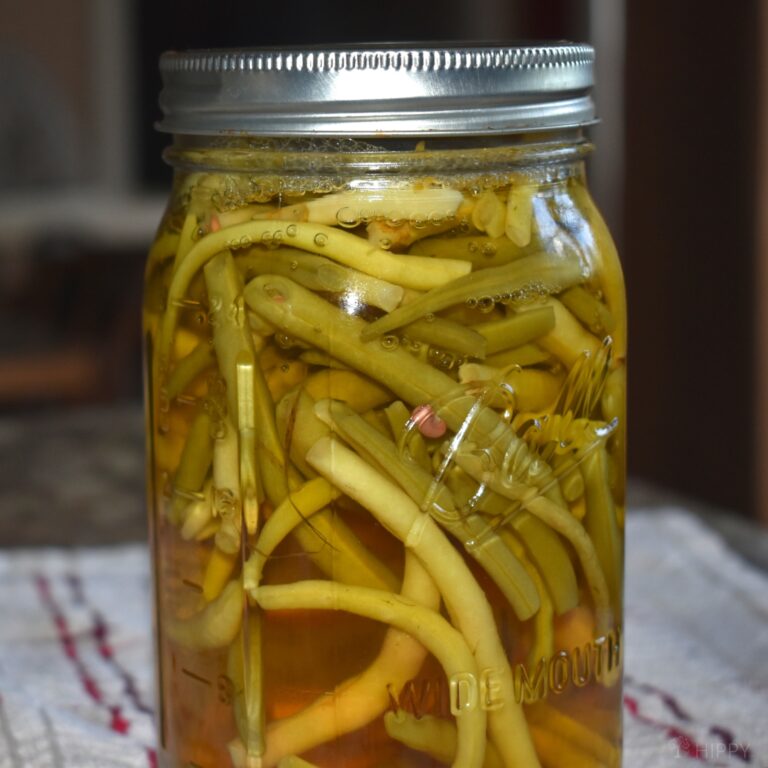
Beans and Peas
Canning beans and peas is a great way to preserve the harvest. Green and wax beans can be canned using the hot pack or raw pack method.
For the hot pack method, beans should be covered with boiling water and boiled for five minutes before being filled into jars.
For the raw pack method, fill jars tightly with raw beans and add 1 teaspoon of salt per quart, if desired. Add boiling water, leaving 1 inch of headspace. Adjust the lids and process for 75 minutes (pints) or 90 minutes (quarts) at 11 lbs pressure.
An average of 2 pounds per quart is needed. Quality should be confirmed by selecting filled but tender, crisp pods. Remove and discard diseased and rusty pods.
See these instructions for canning peas and green beans.
Beets
Beets are a nutritional powerhouse, and canning them is a great way to preserve their goodness. Here’s how to do it.
- Trim off the beet tops, leaving an inch of stem and roots to reduce bleeding of color. Scrub the beets well.
- Cover with boiling water and boil until the skins slip off easily, which will take 15 to 25 minutes depending on the size of the beets.
- Cool the beets, remove the skins and trim off the stems and roots. Leave baby beets whole. Cut medium or large beets into ½-inch cubes or slices, and halve or quarter very large slices.
- Add 1 teaspoon of salt per quart to the jar, if desired.
- Fill jars with hot beets and fresh hot water, leaving 1 inch of headspace. Adjust the lids and process for 30 minutes at 10 lbs pressure.
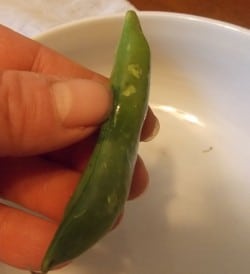
Peppers
First, select firm peppers that are yellow, green, or red. Avoid using soft or diseased peppers.
Next, remove the cores and seeds from the peppers. Small peppers may be left whole while large peppers should be quartered. Finally, blanch the peppers in boiling water or blister them using an oven or broiler method.
Then you can go ahead and can! Process the jars for 35 minutes (pints) at 10 lbs pressure.
See this full guide for canning bell peppers.
Potatoes
Canning potatoes is a great way to preserve them for later use. You will need about 20 pounds of potatoes per canner load of 7 quarts, or 13 pounds for a load of 9 pints. Select small to medium-size, mature potatoes of ideal quality for cooking.
Tubers stored below 45 degrees Fahrenheit may discolor when canned, so try to choose potatoes that are 1 to 2 inches in diameter.
Wash and peel the potatoes, then place them in an ascorbic acid solution to prevent darkening.
If desired, cut the potatoes into ½-inch cubes. Drain them, then cook for 2 minutes in boiling water and drain again. For whole potatoes, boil for 10 minutes and drain.
Add 1 teaspoon of salt per quart to the jar, if desired. Fill the jars with the prepared potatoes, leaving no more than 1 inch of headspace.
Cover the hot potatoes with fresh boiling water, leaving 1 inch of headspace and making sure all of the potato pieces are covered. Process for 35 minutes (pints) at 10 lbs pressure.
Full instructions for canning potatoes and pics are here.
Winter Squash
Pumpkins and squash should be washed, seeds removed, and cut into 1-inch-wide slices and peeled before being cut into 1-inch cubes. Boil the cubes in water for two minutes, then fill jars with the cubes and cooking liquid, leaving 1 inch of headspace.
Process for 55 minutes (pints) or 90 minutes (quarts) at 11 lbs pressure.
Greens
Greens are a delicious and nutritious addition to any meal, and canning them is a great way to preserve their fresh flavor.
However, it’s important to take care when washing and preparing greens for canning, as they can be easily damaged.
Only wash small quantities at a time, and make sure to rinse the greens until the water is clear. Cut out tough stems and midribs, then steam the greens for three to five minutes.
Add salt to each jar, if desired, then fill with greens and boiling water, leaving one inch of headspace.
Process at 10 lbs pressure for 70 minutes for pints and 90 minutes for quarts.
Learn to can greens here.
Tips for Canning Low Acid Veggies
Here are some tips for canning low acid vegetables:
Invest in a High-Quality Pressure Canner
Canning food is a great way to preserve your harvest, but if you don’t have the right equipment, it can be dangerous.
Pressure canners are designed to withstand the high temperatures and pressures required for canning low-acid foods. Without a pressure canner, you run the risk of botulism poisoning.
While there are other methods of canning, pressure canning is the only method that is approved by the USDA for canning low-acid foods. If you’re serious about canning, investing in a high-quality pressure canner is essential.
Process at 240-250 Degrees F (115-121 C)
Low acid foods are those with a pH level above 4.6. This includes most vegetables, with the exception of tomatoes.
Processing low acid foods at 240-250 degrees Fahrenheit will prevent them from spoiling. The higher temperature helps to destroy bacteria and enzymes that cause food to spoil.
However, it is important to not overcook the food, as this can result in a loss of nutrients and flavor.
Let the Canner Vent Once Pressure Builds
Letting the canner vent helps to prevent food spoilage and allows for even heat distribution. When pressure builds inside the canner, it forces hot air and steam out through the vent.
If the vent is covered, the steam and air will build up until the canner explodes. In addition, not letting the canner vent can cause uneven heating, which can result in under-processed food.
The best way to vent a canner is to place it on a burner and turn the heat to high. Once steam starts coming out of the vent, reduce the heat to medium-high and let the steam escape for 10 minutes.
After 10 minutes, put on the lid and start processing the food according to your recipe.
Allow it to Depressurize On Its Own
The key to safe canning is to allow the canner to depressurize on its own. Do not open the canner while it is still under pressure, as this can allow bacteria to enter the food.
Once the canner has depressurized, carefully remove the lid and check that the food is properly sealed.
Use Sterile Jars and Bands, Along With New Lids
If you’re planning on canning low acid veggies, it’s important to use sterile jars and bands, along with new lids. This will help to prevent the growth of bacteria, which can cause food poisoning.
To sterilize the jars, you can either run them through the dishwasher on the hottest setting or boil them in a large pot of water for 10 minutes. Be sure to sterilize the lids as well by boiling them for 5 minutes.
Always Follow a Recipe
Cooking is an art, not a science. This means that there is some room for flexibility and creativity, especially when it comes to recipes that call for low acid veggies.
However, it is important to remember that there are also certain basic principles that should always be followed.
And when you’re canning, you really need to stick to a tried and true recipe… otherwise, you risk getting extremely sick.
Do Not Retighten Lids After Processing the Jars
One of the most important things to remember when pressure canning is not to retighten the lids after processing the jars.
Once the jars have been processed, the vacuum created by the high pressure will seal the lids in place. Retightening the lids can break the seal and allow bacteria to enter the jars.
If you are not sure if the jars have sealed properly, wait 24 hours and then check them again. If the lids are still in place, then the jars have sealed and can be stored for future use.
Let the Jars Cool Before Storage
After you’ve canned your low acid foods, it’s important to let the jars cool before storing them.
As the jars cool, the food inside will contract, creating a vacuum seal. If you store the jars while they’re still hot, the vacuum seal may not form properly and air could enter the jar, leading to spoilage.
In addition, hot jars could break if they’re stored in a cold pantry or cellar. For best results, let the jars cool on a wire rack for 12-24 hours before storing them in a cool, dark place.
Common Questions you May Have
The time it takes to process low acid foods in a pressure canner varies depending on the size of the batch, the type of food, and the altitude.
For example, a small batch of green beans taking up only half of the canner’s capacity will take less time to process than a large batch of potatoes that fills the canner to capacity.
Always use a tested and proven recipe to make sure you’re canning your foods for an appropriate amount of time.
You can’t water bath can with low acid foods. Water bath canning is a method of food preservation that involves boiling jars of food in water for a period of time.
The high temperatures achieved during the boiling process kill bacteria and mold spores, which helps to prevent spoilage.
However, this method is only effective for high acid foods. Low acid foods, such as vegetables and meats, require pressure cooking in order to achieve the necessary temperatures for preservation.
As a result, trying to water baths with low acid foods is simply not possible. If you’re looking to preserve low acid foods, you’ll need to use a different method, such as pressure cooking or freezing.
Canning low acid veggies is a fun, easy way to preserve healthy food for you and your family all winter long. Follow these simple steps, and you’ll be enjoying your own homemade produce in no time!

Heather’s homesteading journey started in 2006, with baby steps: first, she got a few raised beds, some chickens, and rabbits. Over the years, she amassed a wealth of homesteading knowledge, knowledge that you can find in the articles of this blog.
Learn more about Heather and the rest of the writers on this page.
This article has many helpful cooking tips like how to peel corn off the cob. I didn’t know what the best way to chop an onion until recently.
Oh, these are great canning tips! I still haven’t actually tried canning yet, but it is on my to do list.
great ideas! Thank you. that corn looks so good, it is making me hungry lol
We actually have a cannery in my county that I’ve wanted to visit/ use. I’m kind of nervous about canning for the first time though. I like to know what I’m doing before I attempt anything in public so I don’t look foolish, ya know? This post is encouraging me to give it a try. Thanks for the info.
I have never canned my own vegetables and would like to do so.
All great tips. Maybe one day I’ll have the courage to try this myself when summer rolls around so we can can our own home grown veggies!
This is an absolutely amazing post. I get heartburn far too often, so I have to cut out the acidic foods.
We live at altitude, so we have to pressure can everything. I have never even done water bath canning! It’s really easy once you get the hang of it.
You make it look so easy! I only water bath ca..pressure canners sort of scare me. My grandma blew one up once, ever since that I’m scared. lol
Thanks for linking up with Green Thumb Thursday. We hope to see you again this week!
Lisa