
When your garden is overflowing, you want a way to preserve all your vegetables. You can dehydrate or freeze them for later, but what other options do you have? What if your freezer is full, or you don’t have the extra space to begin with?
With so many people gardening and wanting to preserve their own food these days, we are taking back what was once a lost art… the art of canning.
In order to can low acid veggies, you MUST use a pressure canner. No amount of time in a water bath canner will safely do these.
Learning how to use a pressure canner is easy, once you know some basics. I remember that I was once afraid to use it, due to the “horror” stories of the warning labels on the canner. It could scald you, it could release pressure too fast and hurt you….and on and on.
But, once you get started, you’ll find that pressure canning is the easiest thing to do. AND, for veggies like corn, green beans, potatoes, and peas, it’s the ONLY safe way to preserve your harvest.
Before you begin pressure canning, I always recommend that you read or re-read your manual. It’s amazing how much we think we remember, but when we go back new things can be revealed.
Now let’s get started with some basics, shall we?
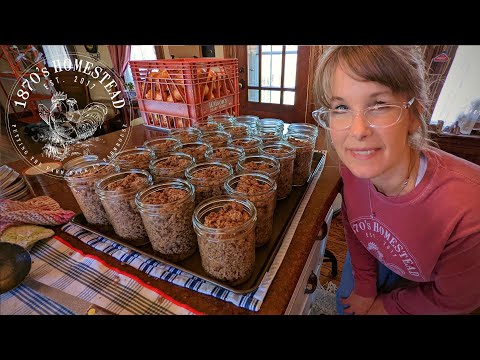
Table of Contents
Is Pressure Canning Dangerous?
Canning is a popular way to preserve food, but it can also be dangerous if done incorrectly. Pressure canning is a type of canning that uses high pressure to kill bacteria and seal the cans.
While this method is effective, it can also be dangerous if not done correctly. If the pressure gets too high, the cans can explode, causing serious injuries.
In addition, if the canned food is not cooked properly, it can contain harmful bacteria that can cause food poisoning.
For these reasons, pressure canning should only be done by experienced canners who know how to safely use the equipment.
What You Will Need
Pressure canning can be an enjoyable way to save your food if you follow just a few basic rules. To begin safe pressure canning, you will need a few items:
A pressure canner. Low acid vegetables are NOT safe in a water bath canner. Look for them in thrift stores, garage sales or estate sales.
If you find a used one you want to buy, be sure to look for holes in the metal, and that the pressure canner lid ring is intact. Older models may NOT have replacement rings available.
Glass canning jars. They come in many different sizes such as quart, pint, half-pint, and 1 ½ pint size (also called bologna jars) in both wide mouth and narrow mouth openings.
Once again, look at yard sales or thrift stores. Be on the lookout for cracks in the jar or on the lid itself. You can use both pint jars and quart jars in a pressure canner from most manufacturers.
Buying new jars is often considered an investment as they can be used over and over again. Half-pint size jars are perfect for jams, jellies, and salsa.
These are commonly not pressure canned due to the softness of the food, however. Meats, soups, and beans can go into the pint sized jars or even the bologna jars. Quart sized are great for fruits and veggies.
New lids. If you are using the commonly found metal lids, you will need new ones each time you can.
Reusing lids may not be safe as the seal may not be “true” and your food will grow bacteria that you can’t see. Hard plastic lids, like Tattler, are another investment as they are reusable.
Clean jar bands. Bands CAN be reused over and over for canning, as long as they maintain their shape. If they become bent or out of circular shape, they should not be used for canning as they may not seal as well.
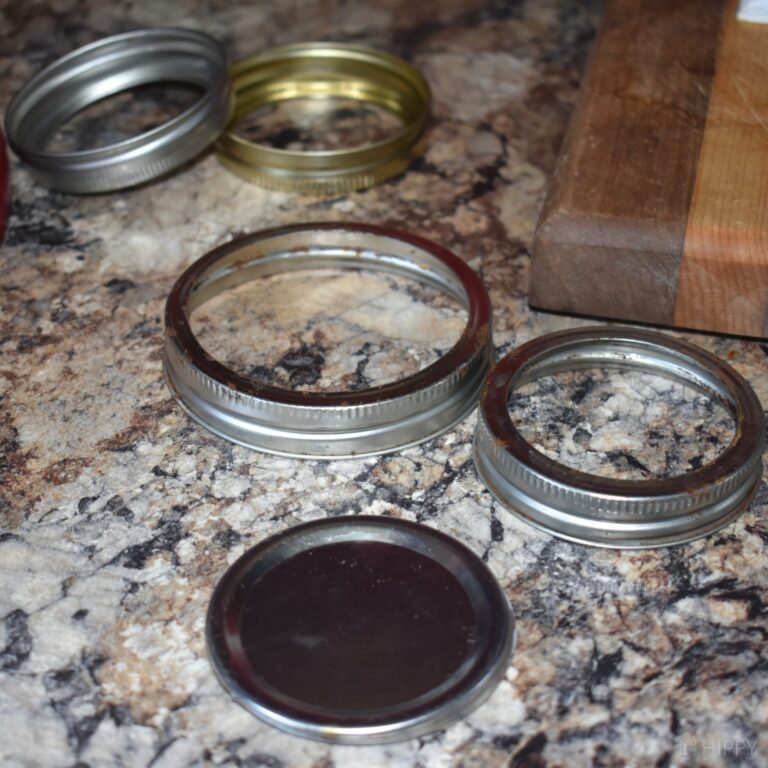
Bands are sold with new jars, or with new lids as well. Just remember to wash and dry the bands before storing to help avoid rust issues.
After the canning process, you keep the bands in place until the jar has completely cooled and had a chance to seal. You will then want to remove the bands.
Storing jars with bands in place can lead to a false seal, where the lid comes up on its own, and appears to re-seal.
Other necessary items to have are:
- lid lifter for lifting lids out of simmering water and placing onto jars
- jar lifter for holding onto hot jars
- jar funnel for filling jars with food
What Foods Can and Should Be Canned in a Pressure Canner?
Canning is a great way to preserve food, but it’s important to use the right type of canner for the job.
Pressure canners are designed to withstand the high temperatures required to safely can meat and poultry. In addition, pressure canners can be used to can low-acid foods, such as vegetables and fruits.
Foods that can (and should) be processed in a pressure canner instead of a water bath canner include low-acid foods like:
- Meats (chicken, beef, etc.)
- Broth and stock
- Seafood
- Vegetables (including onions, mushrooms, beans, peas, etc.)
Fruit, like peaches and apples, are high-acid foods that can typically be processed in a water bath.
You can process water bathed foods in a pressure canner but they may end up a bit more mushy – I’ve done pickles in the pressure canner and haven’t loved the results!
What Are the Different Parts of a Pressure Canner?
A pressure canner is a vital piece of equipment for anyone who wants to preserve food at home. The canner uses pressure to create an airtight seal, preventing spoilage and bacteria from multiplying.
In addition to the body and the lid, there are a few important components to know about.
Gasket
The gasket is a rubber ring that helps to create an airtight seal between the lid and the pot. This seal is necessary in order to build up enough pressure to properly sterilize the contents of the pot.
Over time, the gasket can become damaged or brittle and will need to be replaced. Without a proper seal, the pressure canner will not work correctly and could pose a safety hazard.
Therefore, it is important to check the condition of the gasket on a regular basis and replace it if necessary.
Vent Pipe
A vent pipe is an important safety feature of a pressure canner. It allows steam to escape from the canner while it is heating up, preventing the build-up of too much pressure.
Once the canner has reached the desired pressure, the vent pipe is then sealed off so that all of the steam stays inside, creating a tight seal.
This high level of pressure is essential for safely processing low-acid foods.
Without it, bacteria and other contaminants, including botulism spores, could potentially survive and cause food poisoning.
The vent pipe also allows pressure to be released gradually, which helps to prevent the contents of the canner from being forcefully ejected.
Overpressure Plug
One of the key components of a pressure canner is the overpressure plug. This plug is designed to release pressure if the canner becomes too hot.
Without the overpressure plug, the canner could explode, causing serious injury or property damage. The overpressure plug is an essential safety feature of any pressure canner.
Weighted Pressure Gauge or Dial Gauge
Using a pressure canner safely requires careful monitoring of the canner’s pressure gauge. The gauge may be either weighted or dial, and its purpose is to indicate the level of pressure inside the canner.
When the desired pressure is reached, the weighted gauge will release a small amount of steam to maintain that pressure, while the dial gauge will simply hold steady at the required reading.
Canning Rack
The purpose of a canning rack is to keep jars from touching the bottom of the pressure canner while they are processing.
If jars touch the bottom of the canner, they may not process properly and could break. A canning rack also allows for water to circulate around the jars, ensuring that they are evenly heated.
Canning racks are made of either metal or plastic, and many pressure canners come with a rack included. If yours did not, you can purchase one at a kitchen or home store. Be sure to get the right size rack for your canner so that it fits properly.
Checklist Before You Begin
- Review your canner’s directions and times suggested. (Don’t rely on memory-read the directions, please.)
- Inspect your equipment to ensure it’s in proper working order.
- Gather jars, lids and bands. If you have a dishwasher, you can run the jars and leave it on a “hot dry” cycle to keep them hot and to clean and sterilize them.
- Knives that you will use for cutting food need to be sharpened and cleaned. A sharp knife will reduce the chance of slippage and getting hurt as it will take less to cut through the food.
- Cutting boards should be cleaned and sprayed with vinegar to sterilize them as well. This will lessen bacteria getting into your canned foods.
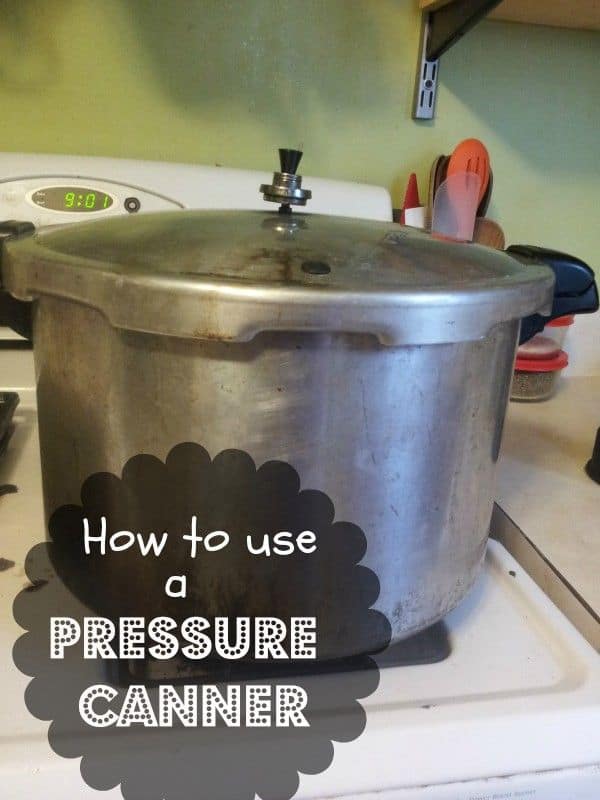
How to Use a Pressure Canner Step by Step
Pressure canning is a great way to preserve food at home. It is simple, safe and easy to do. Here are some easy tips on how to use a pressure canner.
1. Familiarize Yourself With the Instructions for Your Make and Model of Canner
Read the instruction manual that came with your pressure canner. This is the best way to familiarize yourself with the equipment and learn about any specific safety precautions.
Select the right size canner for the amount of food you want to preserve. Most canners come in either 8 or 16 quart sizes.
2. Clean Jars and Bands
Always start with clean jars and bands. My favorite way to do this is just to run them through the sanitizing cycle on the dishwasher.
3. Prepare the Canner with Water
Place the canner on a burner that is large enough to accommodate its size. Make sure the canner is level and stable before proceeding.
Fill the canner with the appropriate amount of water according to the instruction manual. In general, you will need 1-2 inches of water in the bottom of the canner.
4. Prep Your Food
Prepare your food according to your recipe.
5. Add to Jars
Then, load it into jars following any specific instructions from the recipe. Be sure to leave 1-2 inches of headspace at the top of each jar.
6. Remove Air Bubbles, Wipe Rims, Screw on Bands and Lids
Using an air bubble remover tool, get rid of any air bubbles in the jars. Wipe down the rims, then screw on lids and bands.
Place the jars into the canner, making sure they are spaced evenly apart. Fasten the lid securely and turn on the heat, bringing the water to a boil.
7. Put Lid On and Fasten it Shut
Put your lid on the canner and screw it shut. Make sure it latches properly for a good seal.
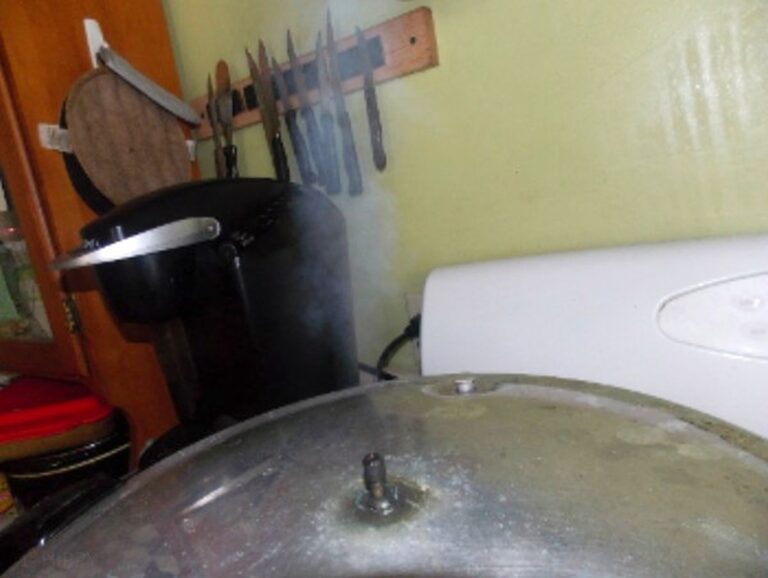
8. Vent the Canner for 10 Minutes
Let the canner heat up and once you see steam coming from the vent, set the timer for 10 minutes. Let it vent out for 10 minutes before proceeding.
9. Add the Weighted Gauge
Next, add your weighted gauge.
10. Let Pressure Build
Next, let pressure build until the gauge reads at your desired temperature (usually somewhere around 10-11 lbs).
11. Start Your Timer
Start your timer once you reach the right pressure. Keep a close eye on the pressure as the timer is running.
If you go above the ideal pressure, you’ll need to reduce the heat – if you dip below, you’ll need to increase the heat and restart your timer once you’re back up at the right pressure.
12. Turn Off the Burner and Let the Canner Cool
Once finished processing, turn off the heat and allow the canner to depressurize completely before opening it up and removing the jars of food.
Just turn off the burner. Allow them to cool undisturbed for 12-24 hours before storing in a cool, dark place.
Pressure Canning Tips
Some other key points to remember are:
Always work with clean hands, clean surfaces and equipment.
Wash out your pressure canner, especially if it’s the first time in use ever, or it has been sitting for more than a week or so. That will get rid of the dust, and any leftover oils or food and keep it from contaminating your new harvest.
Your knives and cutting board should be sanitized with vinegar and water before you begin.
This will minimize any cross contamination and introduction of nasty germs in the food. You don’t want to have those hanging around in your jarred food for 6 months before you eat them.
Use a TESTED recipe for the foods you are canning
Using tested recipes is crucial, as Grandma’s old ways are not always safe. Bacteria, soil quality and even our food has changed and we know so much more now about how to be safe. Some great books to look at for proper and safe pressure canning recipes:
When you visit a link in this article that takes you to a different website where you can purchase something, I may earn a commission. Read my full disclosure for more details.
Knives should be very sharp to minimize slippage when cutting meats.
Work with one kind of food at a time, and thoroughly clean all your equipment before beginning the next type.
Your jars should be clean, and should be sanitized in hot boiling water and held in boiling water until use.
This will keep the jar from being “shocked” when you put it in the canner, and will help minimize bacteria from entering your food.
A shocked jar is caused by a cold jar being filled with hot food and placed in hot water. This will lead to breakage.
You can wash them in the dishwasher, put the “dry” cycle on, and leave them in there while you work as well. Just make sure they stay hot. If they cool off before you can use them, the best thing is to run a rinse and dry cycle again.
Your lids should be washed, and held in simmering water.
This will soften the seal and help prevent seal failures. Bands should be washed, and can be left on a clean towel until use.
You can alternately keep them in the simmering water, if you wish but it’s generally not necessary.
Always use a non-metallic instrument, such as a rubber spatula, to remove all air bubbles from the food and jar.
Always let the pressure canner vent steam for a full 10 minutes. This will help increase the pressure faster.
Always let the canner cool on its own accord, and then remove jars.
When the jars are cool, usually after 24 hours, test seals by gently pressing on them. A properly sealed lid shouldn’t give at all, or “pop” when you press on it.
Any that haven’t sealed in this time should be refrigerated and used within a week.
Jars that have sealed should be wiped off with hot, soapy water to remove any residue and stored in a cool dry place for up to a year.
Safety reminders when you’re canning low acid veggies
Cut your food up into as equal size pieces as possible, to keep the canning times even in the jars.
Start the “clock” on the processing time when the water in the water canner is BACK to a full rolling boil or the pressure canner has reached the FULL pressure, either by the gauge or the rocker has started rocking.
Always allow the pressure canner to cool on its own. NEVER run water over it or lay cold towels on it.
This can cause jars to break inside, or even cause you to get burned. It only takes about 20 minutes to cool, so you can prepare another canner load of food while you are waiting.
Use the jar lifters to remove the hot jars from the canner. Using hot pads may not allow you to get a hard enough grip and cause the jar to slip or break. Bare fingers will get burned (trust me on this one, mmmkay?)
Shelf Life
Canned food DOES have a shelf life. 12 months is usually the recommended time for storing foods.
After that, the food can lose nutrients, or not taste as fresh. I have seen people store their food for up to 5 years before eating, but it’s best to use it within 12 months.
Enjoy your new skills in pressure canning, and being safe canning low acid veggies! You’ll feel great when you can feed your family food you grew and saved yourself!
Raw pack vs. Hot Pack
When pressure canning, there are two types of techniques used, raw pack and hot pack.
They are just what they sound like; raw pack is when you put the food in the jar raw and cover with boiling liquid, and hot pack is when you partially cook the food before you pack it in the jar and cover with boiling liquid.
The main advantage I have found with using the raw pack method is that it takes less time.
You clean your food, cut into the right sized pieces, pack in, and cover with boiling liquid. White potatoes are the only vegetable that I have canned that cannot be raw packed.
Please remember that pressure canning your low acid veggies is the ONLY safe way to preserve them. Water bathing at 212 degrees F is NOT high enough of a temperature to kill off all bacteria.
One exception to this rule is tomatoes. Water bath canning tomatoes CAN be safe, if you add a bit of acid to them, such as lemon juice.
What is Headspace?
You will hear the term “headspace” quite often, and wonder what that is.
That is the air space left between the food and the lid of the jar. The screw rings on the top of the jar are pretty good eyeing indicators. The bottom one is an inch from the top, the middle ½ inch, and the top ¼ inch.
To raw pack veggies, simply place prepared veggies into a hot, clean, canning jar and cover with boiling water.
Most veggies require 1 inch of headspace and pressure canning at 10 lbs pressure. Your elevation level may change this. Please refer to the users manual for specific instructions on this.
Can I Use a Pressure Cooker Instead of a Canner?
If you’re planning on preserving food for the long term, whether it’s for your own pantry or as a gift, you’ll need to use a canner.
Canning is a process of sealing food in an airtight container, typically a jar, in order to prevent spoilage. The high heat of boiling water kills bacteria and other microorganisms that can cause food to spoil.
Pressure cookers can reach high temperatures, but they don’t provide the same level of heat that canners do.
As a result, pressure cookers are not effective for preserving food. In addition, pressure cookers are not designed for canning large quantities of food at once.
If you’re looking to preserve food for the long term, invest in a canner. It’s the only way to ensure that your food will stay fresh and free of harmful bacteria.
Final Thoughts
A pressure canner is an essential piece of equipment for anyone who wants to home can their own food items.
It is important to follow all safety guidelines when using this appliance, as it can create high levels of heat and steam.
How often do you use your pressure canner? What are your favorite veggies to preserve?
Related Articles:
last update: August 19th 2022

Heather’s homesteading journey started in 2006, with baby steps: first, she got a few raised beds, some chickens, and rabbits. Over the years, she amassed a wealth of homesteading knowledge, knowledge that you can find in the articles of this blog.
Learn more about Heather and the rest of the writers on this page.
I am happy to see this post! I have an old pressure canner that a relative gave me and have been wanting to get the dust off and try it out. I have always canned with a water bath. Thanks for posting!
Karen
Thank you for empowering all people everywhere to not be terrified of their pressure canners! I was wary of using mine for a long time. You know that scene in Holiday Inn when the peach jam explodes – yeah, that’s what I kept picturing. Hilarious since you waterbath jam, but whatever.
I never thought about pressure canning! Definitely makes me want to take the leap!
I’ve never used a pressure cooker before. Thank you for the tips on how to do it!
Thanks for the post!! I have been using a pressure canner for years with no problems. I’m glad to see a post like this that explains everything for people.
I have never owned a pressure canner, but with our garden always expanding, it is something to look into!
Thanks for the instructional about using a pressure canner. I admit that I know nothing about this subject, although I would really love to make my own preserves.
I never knew these existed! I just made my first batch of refrigerator pickles today actually but would love to get into canning. Thank you
My friend does this canning, but I’ve not had the pleasure. I would love to do it sometime.
Thank you for sharing this information.
Thank You So Much For Writing This I Have Been Wondering How To Do This For About A Year Now But Haven’t Had Time I Think I May Have To Try This Sooner Than Later!!! Thank You!
I’ve been wanting to start a garden. I might get one of these to store my food.
I have a pressure cooker – this looks like the same thing. Where do you get your canning jars?
Amanda, I go to thrift stores, garage and estate sales, and ask from neighbors and friends….it’s amazing how many give away their jars!
I love canning and would love to have one of these in my kitchen! Never used one before!
I’ve wanted to know this for ages! I use to help my grandmother with canning, but when it came to that part, she never would let me. Thank you for sharing this!
I do some canning. But have never done anything like this! Pressure canner sounds like a great idea. I will look forward to your posts on recipes and food preservation that can be done with pressure canning 🙂
We have a pressure cooker at home. But I’m afraid to use it and we don’t use it frequently too. Your tips will be helpful so the next time I’ll use, I will not be that afraid.
What do you think of electric pressure cookers?
for canning? Unless it was specifically stated it could be used for that purpose, I wouldn’t. The ones I have seen are only cookers, not canners.
Fantastic tutorial! Thanks for sharing it with the Home Matters Party. Join us again next Friday!
Thanks for explaining how to pressure can! I have done some canning, but only water bath, and pressure canning seems like a quicker and easier option.
Thanks for sharing at #SmallVictoriesSundayLinkup …I’ve pinned this post and also featured it for our upcoming week… hope you stop by again to link up!
wow! thanks so much!!
My only memory of pressure canning was the rattle of the thingy on top and the one that blew up and we had stuff on the kitchen ceiling.
Thank you for posting this valuable information on pressure canning.
My Mom had one and used it all the time growing up but I never learned. This summer I will though! Thanks again! Very helpful!