
Mint plants are a popular addition to any household vegetable or herb garden. The mint family, otherwise known as the mentha family, has a myriad of health, culinary, and household benefits.
There are at least fifteen to twenty different species of mint and they are all are easy to grow and enjoy.
Mint Characteristics
All plants in the mentha family share similar characteristics. All mint species have a distinctive minty smell that varies subtly by type.
Mint plants are perennials that grow with branching stems to a height of one to two feet tall. Mint plants have tiny, tubular pink to purple flowers. The leaves have short stems and fine teeth. Some mint varieties have fine hairs while others do not.
The Benefits of Growing Mint
The benefits of growing mint are wide. They include a variety of health, culinary, and household uses.
For many years, fresh peppermint has been thought to ease digestion and digestive upsets. It has been used to soothe and relieve headaches and migraines. Mint oil has been used to ease symptoms of Irritable Bowel Syndrome and tension headaches.
The fragrance of mint essential oil could improve brain function because it increases the brain’s ability to focus. The mint plant and leaves are also full of vitamins, minerals, and antioxidants. The pleasant scent of the mint plant can mask bad breath.
Specifically, peppermint tea can reduce indigestion. Taken at bedtime, it can induce healthy, restful sleep. Peppermint tea can aid in hydration and weight loss when taken daily. Always see your doctor before beginning a weight loss or health supplement.
Mint is frequently used as a flavoring for candy, drinks, and salads. Fresh mint can be muddled in the bottom of a glass to make mojitos with seltzer, sugar, and fresh limes. Infuse your favorite flavor of mint into vodka or into a fine culinary oil.
Mint can be blended into your favorite smoothies, juices, or added to ice tea for a no to low calorie flavoring.
Try varieties such as peppermint, orange mint, and spearmint. You can make peppermint tea by pouring boiling water over fresh or dried mint tea leaves and allowing them to steep for several minutes. Strain the leaves, being careful not to get burned. Sweeten as desired.
Around the homestead, mint is used to deter mice and other rodents. They avoid the potent smell of mint oil, however, mint plants and leaves are also an excellent deterrent to small animals and bugs.
Plant mint along the border of your garden (keeping in mind its invasive properties) to attract predator insects and repel insects that are destructive to your garden.
The pleasing aroma of the mint plant to humans makes mint a great choice for lining walkways where the fragrance will be released as you brush up against it. Specifically, the mint species known as pennyroyal has been used as a flea repellent.
Mint Varieties
There are plenty of mint varieties to choose from. Some plants of the mentha family are better when used for culinary purposes, while others are more often used for their fragrance or health benefits.
Here are some of the most well-known varieties of mint to consider for your own garden or homestead.
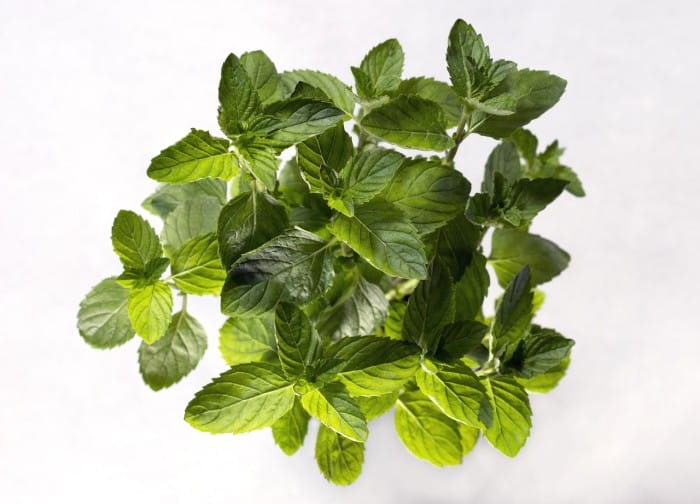
- Peppermint (photo above). Peppermint is also known as mentha piperita, and is probably the most common and readily available variety of mint plants. Mentha piperita has hairy, jagged leaves and comes in standard and the slower-growing variegated types.
- Spearmint (above). Spearmint, or mentha spicata, is also readily available and has hairy leaves. It is often found in backyards.
- Catmint. Catmint is not the same type of plant as the pet treat, catnip. Catmint can be used in cooking and is extremely drought tolerant.
- Chocolate mint. Chocolate mint grows brown-hued stems and offers a hint of chocolate fragrance. This mint works well in sweeter culinary dishes.
- Orange mint. Mentha peperita citrata has a mild citrus overtone and works well in beverages and cooking.
- Lavender mint. Lavender mint grows on red stems and bears a floral aroma.
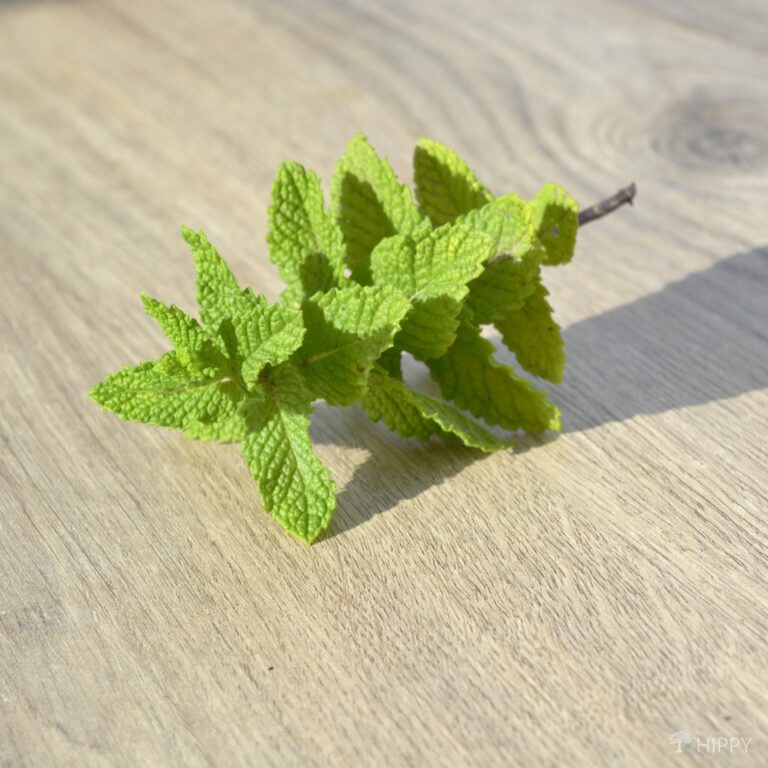
- Corn mint (photo above). Corn mint (mentha arvensis) is also known as field mint or wild mint. It is frequently made into essential oil and is sometimes substituted for peppermint oil. Corn mint has a strong and somewhat bitter flavor.
- Pineapple mint. Pineapple mint is also called apple mint or wooly mint. It is attractive as a ground cover with white edging on its leaves and offers a sweet flavor.
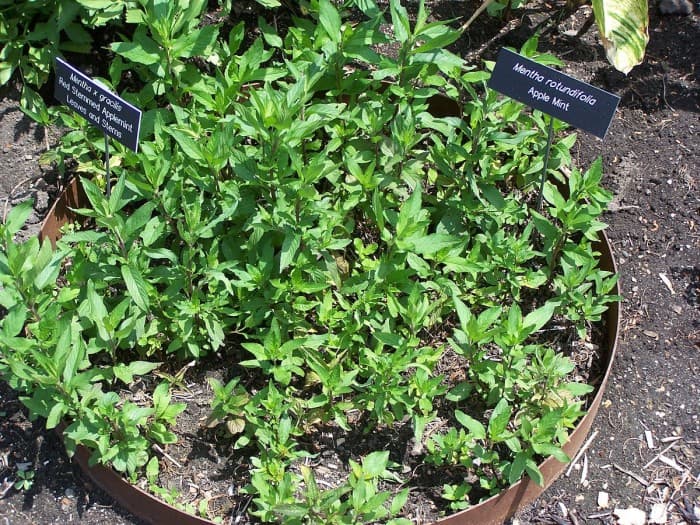
- Gingermint (left in the above photo) and applemint (right in the above photo).
- Calamint. Calamint, or calamintha nepeta, is a showy relative of the mint family. According to gardeningknowhow.com, it is a medicinal herb most often used in poultices. Calamint should not be handled by pregnant women.
- Licorice mint.
- Chewing gum mint.
- Egyptian mint.
- Moroccan mint.
- Banana mint.
- Basil Mint. Basil mint has a spicy flavor when compared to other, sweeter, mints.
- Pennyroyal. Pennyroyal is a type of ground cover often found in fields. It should not be used for culinary purposes.
Growing mint is not as challenging as it seems. Mint is a hardy and drought tolerant perennial herb with a shallow root system that can be grown indoors or outdoors. You can propagate mint from a plant or start it from seed without fancy equipment or expensive set-ups.
How to Start Mint from Seed
Tiny mint seeds are easier to start in a simple seed starting set-up than they are to start directly sown into the garden.
You could use small Jiffy peat pots, plastic trays, or extra small plastic pots that you have on hand. This will help you keep control of the tiny seeds that are easily lost in the garden or in large pots.
If you are planning on planting your mint outside, you will want to start your mint seeds approximately eight to ten weeks before the last frost date for your area, giving plenty of time for them to grow and harden off before planting.
Choose a seed starting medium that is well-draining and loose. Professionally made seed starting soil works well, as does compost mixed with vermiculite for drainage.
Fill your small seed trays or cups with seed starting medium, and make a small indentation in each section with your thumb to create a tiny nest to hold the seeds. Carefully place several mint seeds in each indentation.
Be careful because these tiny seeds are easy to lose. Lightly cover the mint seeds with a fine layer of vermiculite or sand to help them stay moist and germinate without getting lost.
Do not plant the seeds too deeply, a quarter of an inch is the best depth for the mint seeds to grow. Water lightly, being careful not to wash away the tiny seeds as you water them.
Seeds should sprout within twenty to twenty one days. If seeds do not sprout within three weeks, there may be a problem with seed fertility, soil condition, or some other problem that needs to be addressed.
After the seedlings have become well-established, be sure to harden them off over the course of a week to ten days before planting them in the garden. Begin by placing the seedlings outside for two to three hours per day, out of direct sun or wind.
Gradually increase this period over the course of a week, being careful to bring them in during unusually harsh weather.
After the seedlings have become accustomed to the outside weather you can plant them in the garden, being mindful of their propensity to spread quickly. When your mint plants have become well-established in your garden, they will come back year after year.
It takes approximately ninety days for mint plants to go from seed to harvest. Mint can be difficult to grow from seed, and some species, such as peppermint, are sterile and do not make seeds at all. In this case, you can try growing mint from a cutting.
How to Propagate Mint from Cuttings
Because mint can be difficult to grow from seed, you may want to start your mint herb garden with a cutting. Find a hearty, healthy mint plant that is a variety that you enjoy. Look for plants with sturdy and erect stems, healthy leaves, and lush green color.
Take several cuttings from the plant, about five to six inches in length. Place the stems in water, and allow the plant to grow roots over the course of several weeks. Once the roots are well-established, you can either continue growing the plant in water or plant the mint in soil.
If you grow the mint in water, change the water frequently so that it does not smell or grow bacteria that will harm the plant and caused root rot. If you want to grow the mint in soil, you can plant it in your garden or in a pot outside after hardening the plant off.
Choose well-draining soil, and loosely pack the soil around the plant’s roots. Water thoroughly as needed.
How to Dig Mint Plants from the Garden
The easiest way to grow your own mint is to find a friend with a healthy and hearty mint patch, especially if they allow you to sample their mint first. Use a shovel to separate a one foot square section of mint from the rest of the patch.
Dig from under the roots of the plants, trying to dig deep enough so as not to damage the shallow root system. Transplant the dirt and mint into your own garden or pot and water thoroughly. If the mint is dry and begins to droop, water some more. It will take a few weeks to establish it’s new root system and become accustomed to its new location.
Mint Conditions
If mint had its preference, it would live in full sun to part shade and grow in well-drained, loose soil. Surprisingly, this hardy plant will tolerate even average garden soil and is fairly forgiving to the newbie gardener’s mistakes.
Mint will usually thrive without fertilizer, however, if you have dense mint plants, you may need to move your mint beds after several years due to declining soil fertility.
Look for varieties of mint that have been grown in your area for the best results rather than purchasing mint plants from another part of the country or growing zone. Peppermint, for example, has a higher tolerance of dry conditions than spearmint. If you live in a drier area, then choose peppermint as your mint of choice to save time and energy on watering.
Growing mint indoors is highly possible, but it requires more careful attention to watering. Because mint prefers well-drained soil, it does not like to be overwatered. If your mint plant looks droopy but the soil is wet, it has probably been overwatered. Other signs of over-watering may include yellowing leaves, brown leaves, and rotting roots.
Adding vermiculite to your potting soil may improve its drainage and help prevent your mint plants from being watered too much. Keep your mint in a sunny window where it will get plenty of light.
Mint is often considered to be an invasive herb. Allowed to grow unchecked, it will spread throughout your garden, flowerbeds, or yard. Consider taking a few extra steps to keep mint from spreading invasively where you do not want it to grow.
How to Control Mint Growth
In order to control mint growth, it is best grown in containers. If this is not an option, you can keep mint separated with a garden divider, or a small brick or stone wall. Mint has a shallow root system and pulls out of the ground easily. You can pull out any sections that are growing where you do not want mint to grow and plant them elsewhere if desired.
Different mint varieties can cross pollinate. This means that if you have several different species of mint in the same location, they could intermix and create a different or off type of mint plant. The results can be unpredictable and less than desirable.
However, mint plants frequently grow into dense mats that do not allow seeds to grow into seedlings. Any resulting cross pollinated mint seeds may not grow for this reason. On the other hand, peppermint is a sterile variety of mint and does not produce seeds.
How to Harvest Fresh Mint
The new growth on mint is the part of the plant that has the best flavor. Trim or harvest your mint plant every two to three weeks by cutting or pinching off the stems before the plant flowers. Mint is still fine to use after flowering, however, the aroma and taste may not be as intense as it was before the plant began to flower.
Cut your mint stems above the first or second set of leaves. This will leave enough plant to allow it to quickly regrow. You should be able to harvest the same mint stems two to three times each growing season.
How to Save and Store Mint
You can store mint in the refrigerator or freezer, or you can preserve it by using a drying method. Fresh mint can be stored in the refrigerator for seven to ten days. Keep mint stems in water to keep them fresh.
You can freeze mint by washing choice leaves and placing them in an ice cube tray. Pour water over the mint leaves, and place the trays in the freezer, allowing them to freeze. Once the ice cubes are frozen solid, you can pop them right out of the tray and store them in a freezer bag in the freezer until needed. This is an easy way to store and use mint for teas and flavorings.
Drying mint is a practical way to store mint longterm. Make sure to harvest the mint plants before it flowers for the most intense flavor and taste for this application. There are several easy methods to dry mint.
The old-fashioned, tried and true method of drying mint has been used for many years. It is always best to start with freshly harvested mint. Wash the mint stems in cool water and gently shake the excess water off of the plant.
Loosely tie several stems together inside of a paper bag, and hang upside-down in a dry, warm area away from sunlight. The leaves will be dry in one to two weeks time. Crumble and store in a glass container out of direct sunlight.
For a faster means of drying mint leaves, use a standard home dehydrator. Rinse freshly picked mint leaves in water, and gently pat dry with a paper towel. Spread out the leaves on the trays of the dehydrator, then follow the directions that came with your dehydrator. Your mint will be dry in a matter of hours.
If you do not own a dehydrator, you can dry your mint leaves in the oven. Simple rinse mint leaves and gently pat them dry. Spread leaves out on cookie sheets and bake for two to three hours at 180 degrees or less. Leaves are ready when they are dry and crumbly.
After you have dried your leaves using your method of choice, you can crumble them into a mason jar or vacuum seal them for the longest lasting dried mint. For more information on harvesting and drying mint, check out this article by Heather Harris on How to Harvest and Dry Mint.
Where to Buy Mint Plants
Live mint plants can often be purchased at your local grocery store in the fresh foods section. These plants are great if you are going to use them for cooking in the next week or two. However, propagating grocery store plants can be difficult with mixed results.
For stronger, healthier plants, check your local nurseries for mint plants that are ready to go in your garden or for pre-potted window sill gardens.
You can also order mint plants online from places such as burpee.com, Amazon or other online nurseries.
The best means of acquiring mint is from cuttings from the established plants of families and friends near you. The plants will be more acclimated to your climate and ready to grow.
How to Use Up Your Mint Leaves
Here are a few ideas to use up all of your mint:
- Mint Chocolate Chip Ice Cream: This classic ice cream flavor gets a refreshing twist with the addition of fresh mint leaves. Just chop up a few leaves and mix them into your ice cream base before churning. You can also add some chopped chocolate chips or chocolate shavings for extra decadence.
- Mint Chocolate Brownies: For a rich and chocolaty take on the classic brownie, try adding some chopped mint leaves to the batter. The chocolate and mint flavors will complement each other perfectly, and your brownies will be extra fudgy and delicious. Top with a mint chocolate ganache for an extra special treat.
- Mint Chocolate Chunk Cookies: These cookies are like a cross between brownies and classic chocolate chip cookies. They’re packed with chunks of chocolate as well as fresh chopped mint leaves, so every bite is bursting with flavor. If you want an extra minty cookie, you can also add some peppermint extract to the dough.
- Minty Fruit Salad: Dress up your fruit salad with a flavorful mint dressing. Just combine some chopped mint leaves, lemon juice, sugar, and olive oil in a blender or food processor and blend until smooth. Pour the dressing over your favorite mix of fresh fruits and enjoy!
- Grilled Mint Lamb Chops: These lamb chops get their flavor from a delicious marinade made with fresh mint leaves, garlic, olive oil, and lemon juice. Let the chops marinate for at least an hour before grilling to allow the flavors to really sink in. Serve with a simple side of roasted vegetables for a complete meal.
- Mint Pesto: This pesto is great on grilled chicken or fish, stirred into pasta or rice dishes, or spread on sandwiches or toast. It’s also super easy to make – just combine fresh mint leaves, olive oil, Parmesan cheese, pine nuts, garlic, and salt and pepper in a food processor or blender and blend until smooth. Add more olive oil if necessary to reach the desired consistency. Taste and adjust seasoning as necessary. Store in a jar in the fridge for up to 2 weeks.
Of course, you can always use mint in teas cocktails, too. Mojitos are refreshingly delicious drinks that are perfect for summertime sipping. Peach mint juleps are delicious, too!
Get Some Mint Today!
Mint is a wonderful plant to grow on your homestead or in your backyard garden. There are varieties for every taste and desire, with peppermint and spearmint being the most common.
Mint can be used for culinary, health, and household use. With very little effort, your mint plants will grow and thrive, giving you years of delicious, fragrant mint to enjoy.

Amanda is a homesteader and a Jesus-loving, mother of 6 toddlers. She’s raising lots of fancy chickens and goats on her small homestead (among other things). Find out more about the team here.