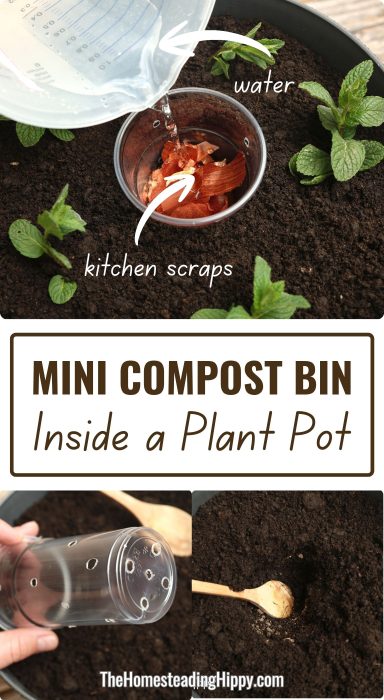
Compost is one of the very best things you can make for your plants, be they in your garden, beds, window boxes, pots or anything else. But creating and caring for a full-size compost bin or pile can be a pretty daunting prospect, especially if you’re just getting started or if you don’t have much room to work with. And what if you live in an apartment?

Not to worry, because you can get all of the benefits of compost on the micro level, in an individual pot, using this mini compost bin build. It seems crazy, but it really works and it requires next to no effort to make and to care for! Keep reading and I’ll tell you how to whip one up yourself.
What You’ll Need
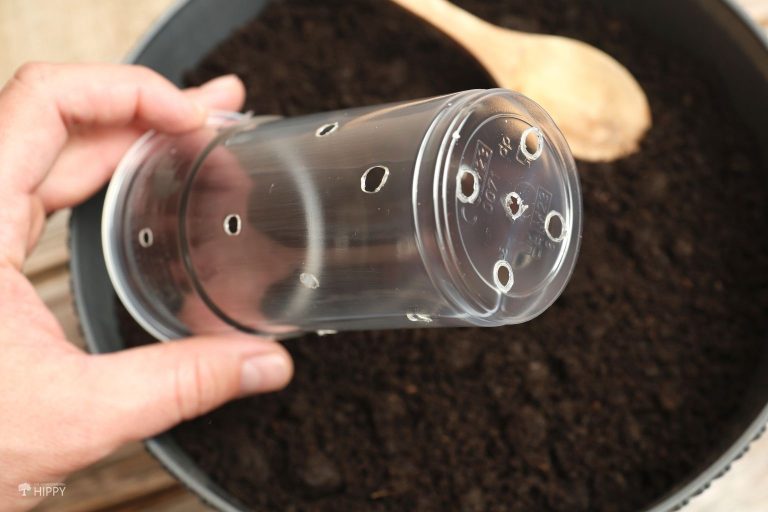
Plastic Cup or Jar: any basic plastic container that can hold water will work for this project. I like to use a simple, clear plastic cup, but if you have a food jar or something like that you can repurpose for the job that will be fine too.
Soldering Iron, Wood Burner or Drill: we’ll need to poke a bunch of holes in the above plastic container. I’ve found that a red-hot soldering iron or wood burner works better than anything else because it makes uniform, even holes that don’t close up and impede the flow of water like they would if you tried to punch them with a knife or spike. Lacking either one of those, you can use a drill, carefully, to the same ends.
Pot: any kind or size of pot you have will work for the purpose as long as it’s suitable for the plants you’re going to plant, and big enough to leave plenty of room for them after you place the compost container in the center of it.
Kitchen Scraps: all kinds of kitchen scraps work great for making compost: eggshells, onion skins, vegetable peels, and more. You can also include grass clippings, small twigs and yard waste. All this will break down into nutrient-rich compost over time, and even before that point regular watering of the pot and compost container will leach nutrient-rich water into the potting soil to help your plants grow.
Soil: any kind of potting soil or mix that’s suitable for the plants you want to put in your pot.
Step-by-Step Instructions
Step 1: Make holes in compost container. Turn on your soldering iron or wood burner if you have it, making sure you have a conical, pointed tip installed beforehand. Be careful, and never try to change out a tip on one of these tools when they are hot!
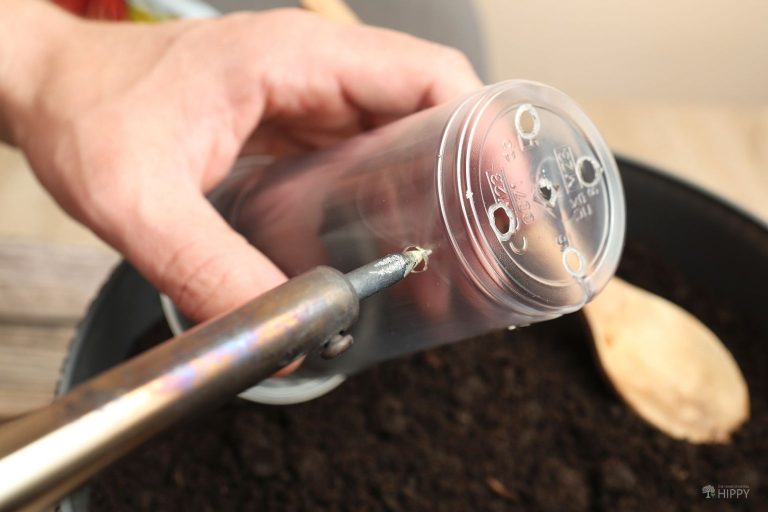
Once the tool is very hot, use it to carefully poke a succession of holes on all sides of the plastic container going from top to bottom and then poke at least four holes in the bottom. Avoid breathing in the fumes and you should do this in a place with good ventilation. Also be cautious to avoid any dripping, melting plastic which can burn you.
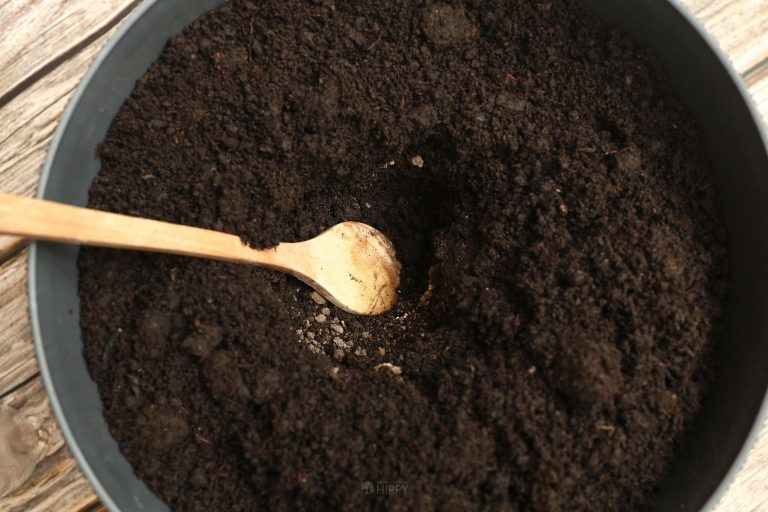
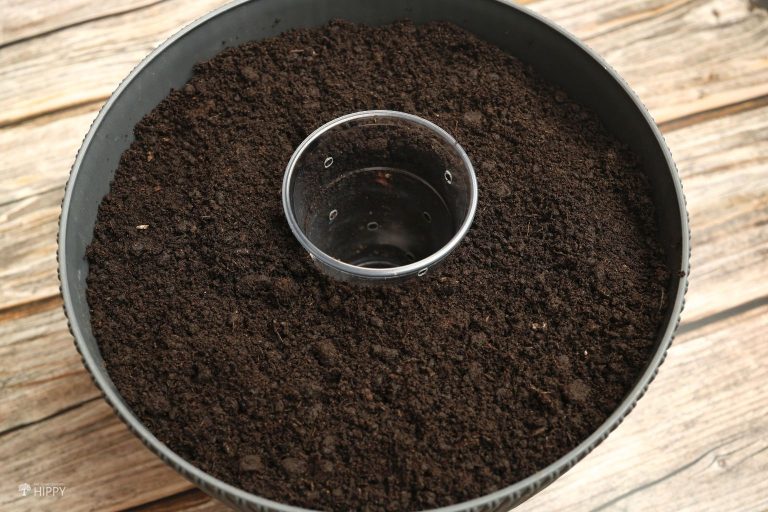
Step 2: Partially fill pot with soil. Next grab your soil or potting mix and fill up the pot about halfway, or to the level where the bottom of the container will sit if the neck is level with the top of the pot. Make a little depression in the middle.
Step 3: Place plastic container in pot. Now set your compost container in the middle of your pot and nestle it into the dirt so it will stay upright.
Step 4: Finish filling pot with soil. Carefully pour the rest of your soil in the pot, taking care to leave it a little loose around the walls of your compost container and be careful so you don’t accidentally fill it up. The container should be open so you can just toss your kitchen scraps inside. Note that it is okay if a little bit of soil or potting mix falls inside it; this won’t hurt your compost at all and you don’t have to dig it up if this happens!
Step 5: Load compost container with kitchen and yard scraps. Now fill up your compost container with your collected kitchen and yard scraps. Don’t pack them in. Leaving a little bit of space will make decomposition easier and allow water to reach the scraps and subsequently flow out into the surrounding soil.
Step 6: Water compost and stir periodically. Once you’ve added your compost scraps, pour water over everything to moisten it. Check for good drainage. If you ever get standing water inside the compost container, you’ve got a problem and should look to unclog it. As long as the water drains away in a reasonable amount of time, you’re good to go. IMG_7025
You should also use a chopstick or other similar, thin tool to stir the compost every few days as this will facilitate decomposition and improve results.
Step 7: Plant as desired. Now plant your seeds, seedlings, or young plants directly in the soil around the perimeter of the pot. Plant them just like you normally would or as the instructions indicate.
Step 8: Done! You are all set. Your compost container will start nourishing your plants directly every time you water the pot and the container.