
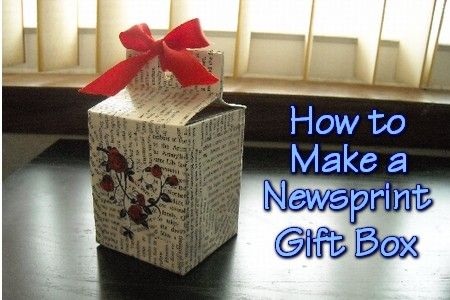
I love making things from scratch. I also love reusable gift boxes, bags and totes. So this morning I decided to make a gift box from scratch. The one I made was small, but they really can be made the same way in any size. I decided to decorate mine in newsprint pieces because I love the look, but you can decorate them with any type of paper or you can paint it, if the cardboard is heavy enough not to warp. Below are step by step instructions on how to make this box, it is really easy. Try one and see!
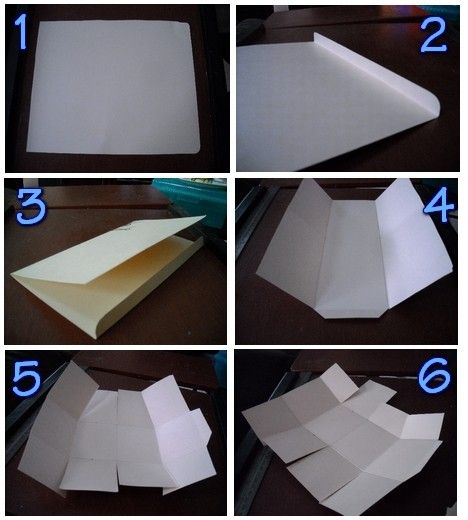
1. Take one side of a file folder and trim to a rectangle with corners.
2. Fold a lip about 1/2 inch on one of the short sides.
3. Fold the whole piece, matching the other side edge with the folded edge. Fold again, so the page is folded into quarters.
4. Folding in the other direction, fold the long way in equal thirds. Then, cut the lip off except for a tab the length of the middle fold. Slant the edges.
5. So now you have your cardboard folded in thirds the long way, and in fourths the short way. With scissors, cut on the folds on both sides through the outer thirds, leaving the center strip whole. On one side, trim three of the four tabs in half, leaving one full length.
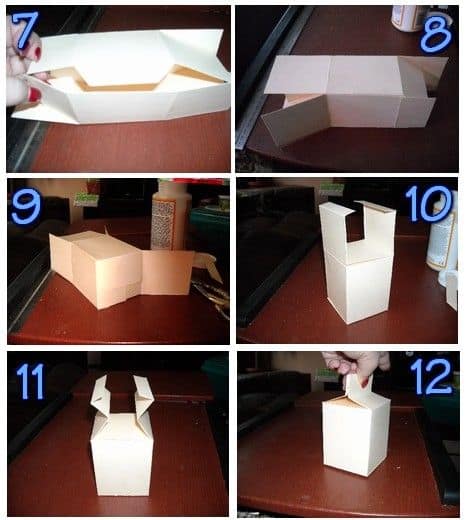
7. As shown in picture 7, roll the box and glue the tab to the other side, creating the body of the box
8. After letting the glue dry, fold in the side that has the three shorter tabs and glue securely.
9. Leave the one long tab to glue down last, to cover the others, creating the bottom of the box.
10. Fold in a 3/4 inch lip on the tabs of two facing sides. Trim the other two flaps so they fit when folded in.
11. Fold the tabs as shown, forming the peak
12. Glue down the tabs you folded in #10, making sure they fit together as shown in #12. Once the tabs are dry, punch a hole (I used an office single hole punch) in the center through both sides so the box top can be tied shut.
13. The next step is the fun part! Take a newspaper or magazine and cut out the print in all different shapes. Grab a sponge brush and your Mod Podge and start covering your box with the pieces, like this:
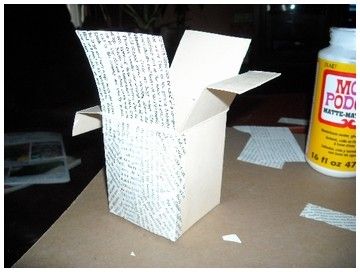
14. Make sure to put the print all different ways, even upside down and diagonally. This gives the piece character. Put the Mod Podge on the box, place your newsprint piece, and then cover it with more Mod Podge. If you want your piece to be colored, instead of black and white, pour your Mod Podge into a separate bowl and add a drop of food coloring; your newsprint will be stained the color of the Mod Podge.
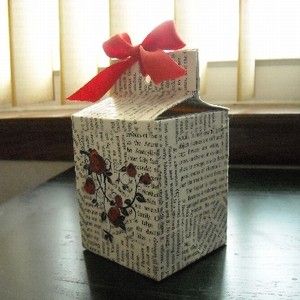
15. I decided to decorate my box a little by carefully clipping out a rose plant picture that I found in the newspaper. I glued it to the side and put a heavy Mod Podged over it. When it was completely dry, I put another coat of Mod Podge over the entire exterior of the box, let it dry and then I put a second coat on. After letting it dry overnight, I was ready to line the inside with sheets of tissue paper and tie the top shut with a satin ribbon.
These boxes make great reusable “wrapping” for gifts. They also make cute decor for shelves. Label them with herbs and jute bows for a rustic look, or pretty flowers and ribbons for a more frilly look. They look equally at home in the bathroom or kitchen.
Do you make your own gift boxes? Be sure to pin this for later!
Tracey Jade Boyer is a work at home lady that has been writing on the internet for 7 years. Homemade by Jade is her main site and blog which centers around homesteading, gardening, cooking, sewing and household DIY, which is her passion. You can follow her on Pinterest.

Heather’s homesteading journey started in 2006, with baby steps: first, she got a few raised beds, some chickens, and rabbits. Over the years, she amassed a wealth of homesteading knowledge, knowledge that you can find in the articles of this blog.
Learn more about Heather and the rest of the writers on this page.
What a fun idea! When I need a gift box or bag I’m always scrambling to come up with something so I’m pinning this to make when I need one!
I just love the contrast of the red flowers and red bow against the black and white newsprint!
I love that you made something so cute and unique out of things that most people already have at home – newspaper and file folders. Great tutorial!
This is such a neat idea! Thank you for sharing!
What a cute little box! It would probably be a great size for those tiny treats for Sunday School.
That is such a cute idea. I could see myself doing that for gifts.
What a great idea, and it is absolutely gorgeous! I am not crafty in the slightest, but this looks simple enough that even I could make one!
What a clever little craft to make. The kind I could make without failure… And the decorating possibilities are almost endless given the huge number of newsprints we can print from the Web…
I love it! What a creative and pretty way to give a gift! Thanks for sharing this awesome little tutorial!
This is an adorable idea! My hubby is a teacher and I’m going to let him know about this neat craft. He can do this with his 3/4 class and then they can also make something to go inside 🙂
What a fun and afforable idea, just in time for Valentines’ Day. Thank you.
Love it!!!
This is so cute! Pinned.
Love this- so cute and I adore making my own envelopes and gift boxes.
This is so cute and a wonderful idea! Adding this to my list of projects to do with the kids. Thanks!
I would have never thought to do that, but I love how it turned out, and repurposing. That’ would be fun to try and do different variations with. Thanks for the idea, and the clear instructions.
Do you have a template?
Thank you for sharing this information make newsprint gift box. It was useful and interesting. You indeed have written it in a layman way so that anyone can understand and work accordingly. You have done a great job.Come across Printstocknz.com and hope you can visit this too to get more information.