
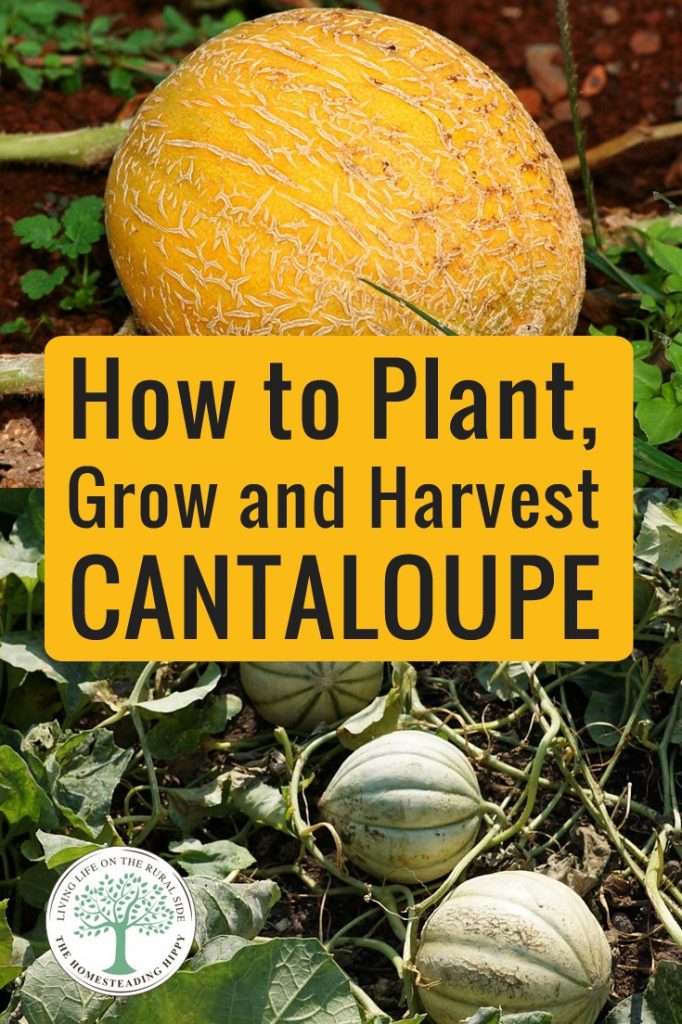
Nothing says summertime like fresh cantaloupe, with those grown on your homestead being the best by far.
However, as with anything planted in the garden, there is more to know than just the process of sticking the seed or the plant into the ground.
In this article, we are going to take a looks at how to properly prepare the ground for your cantaloupe as well as how to make sure your harvest is a most excellent one.
Before we start, keep in mind that no matter how you choose to plant, or where you choose to plant your cantaloupe, it will need plenty of water and at least eight full hours of bright sunlight each and every day.
Starting With Seed Or Seedlings
Planting your cantaloupe can be done one of two ways—with seed or a seedling. When sowing by seed, you will place the seed in the ground, cover it with dirt, and water well—easy peasy.
However, if you live in a cooler climate, you may be better served with starting your seeds indoors a few weeks in advance. The standard rule is to start your seedlings anywhere from 4-6 weeks before your last expected frost date.
This time frame will give your plants time to develop a sound root system, that will, in turn, give them a better head start on the growing season.
It is crucial to remember that cantaloupe plants are very tender, and it is highly recommended that they are not placed into the ground until all chances of frost have passed.

Preparing The Soil
Before planting your seeds or transplanting your seedlings into the garden, you need to make sure that you have amended your soil correctly. As a rule, cantaloupe plants prefer a loamy, loose, well-drained soil to flourish.
It is important to remember that, before you begin planting, you have worked the soil, adding in either aged manure or some type of compost.
Once you have your soil amended, and loose, it is now time to plant. You will want to plant your seeds or starter plants in small rows of mounds or hills. This will provide the maturing vines adequate drainage and will also serve to help to keep the ground warm.
Growing Cantaloupes In Pots
Contrary to what many beginners think, it is actually possible to grow cantaloupes in pots. This method is an ideal choice for those who are growing in a limited space.
However, there are a few rules and caveats to keep in mind that need to be considered for using this method. Quite simply, the type of cantaloupe you will have success in growing will be dictated by how large a post you use.
If you choose not to use something as large as a half whiskey barrel, then consider growing one of the smaller varieties.
These may include the more well known dwarf varieties such as the ‘Minnesota Midget,’ which standardly weights in at 3 pounds, or even the ‘Sugar Cube’ which standardly reaches the 2-pound weight.
For these varieties, you will need to use a container that will hold at least 5 gallons of potting soil.
Once you have your container and your variety to be planted, you can now begin. Start by filling your chosen container nearly full with your potting soil of choice.
I prefer to mix my soil, but if you decide to purchase yours make sure it either contains perlite, peat moss, or vermiculite or add one of these yourself.
You will need to plant your seeds, four to five at most, approximately two weeks after your area’s last estimated frost date.
You will need to cover the planted seeds with about one inch of soil, and then proceed to water well. You could, at this time, add a thin layer of mulch, will help to promote the consistent retention of moisture.
It is vital that you consistently keep the soil moist until the seeds have had a chance to germinate. Then, you will need to check the soil as often as possible, and if it feels dry to your touch, then water it regularly.
Your melon vines, once they are growing, blooming and then setting their fruit will need at least, on average, 1-2 inches of water per week. The best time of day to water your vines would be in the morning, and it is best to avoid wetting the leaves themselves.
If you should happen to receive a large amount of rain during the fruit ripening stage, you mind find yourself with a bland fruit. However, if the weather is dryer, then your fruit will prove to be sweeter.
Once your cantaloupe reaches the size of approximately a tennis ball, cut back on your watering, only doing so when it seems dry, and you notice any sign of wilting of the leaves.
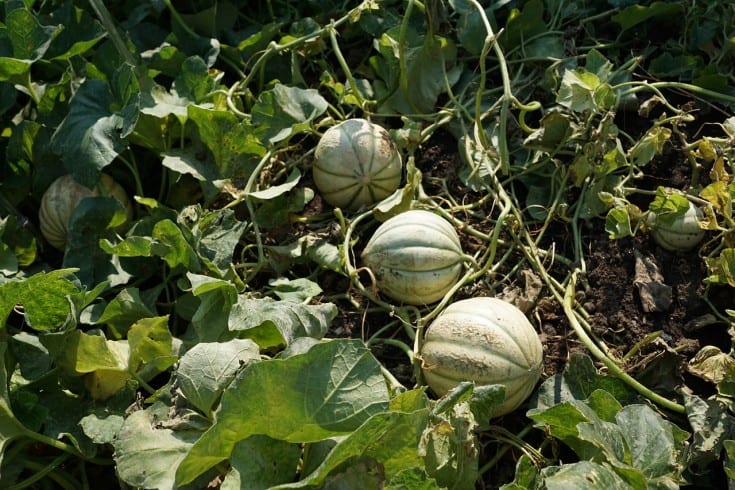
Ground Cover Or Trellis Method
Many gardeners choose to use the ground cover method when allowing their vines to grow. This method is excellent if you have adequate room. Cantaloupe vines will pretty much take over a garden if allowed to, and can quickly become quite invasive.
You have the option of training them up a trellis, or as I do up a tomato cage. The vertical growth of the vines is the perfect option for those who are short on space and have to maximize their growing area.
I do the raised bed gardening method, so the training of any vine type vegetable up a tomato cage is the method I prefer to use.
If you choose to use the trellis method, whether using a trellis or a tomato cage, the key to success is that you need to start training your vines as soon as they get some length on them.
I check my vines each day, and if I find any trying to begin their invasive journey across my garden, that is when I encourage them to climb up the tomato cage instead.
If you choose to use the trellis method, there is a little more you need to do. Because the melon fruit tends to have some weight on it, you may want to help the vines by securing them to the trellis.
This is achieved by way of using commercial soft plant ties, or any old pantyhose you may have around the house. It is a good idea to keep in mind that if you live in a warmer climate, you may very well need your trellis to be at least eight feet tall and around twenty feet wide.
Fertilizing Your Cantaloupe
When it comes to the fertilizing of your cantaloupe, there are two crucial areas to keep in mind: what type of fertilizer you are using as well as what stage of growth the vine is in.
If you use the wrong type of fertilizer, at the wrong point in the growth stage, you will only cause yourself both a headache and a whole host of problems. The most significant issue is that of very long vines, that will produce very little to no fruit.
Because any melon in your garden is known to be heavy feeders, as well as being very sensitive to drought, again water is your cantaloupes best friend.
When fertilizing your cantaloupe, it is best to wait unto the plant itself is at least 4 inches tall. At this stage of growth, it is perfectly fine to apply a dose of fertilizer.
Your best bet is a balanced combination, such as 5-5-5 or 10-10-10. It is of importance to understand these numbers, as they are your guide to the amount of nitrogen, potassium, and phosphate your particular fertilizer contains.
You should sprinkle the fertilizer around the plant, not directly onto the plant itself. If you are unsure of using this type of fertilizer, then it is fine if you choose to go the route of a water-soluble version, that’s formulated for fruit and vegetable varieties of plants.
If a more organic approach is to your liking, cantaloupes respond very well to this method too.
You may use either compost or very well-rotted compost, which you will need to mix into the soil before you plant your seed. You may also use fish emulsion or rabbit droppings for fertilizing as well.
Pruning Your Cantalope
With the planting of cantaloupe, keep in mind the more leaves on the vine, the sweeter the fruit will be.
Because of this fact, it is highly advised that any vine that appears to be producing fruit, should not be pruned.
However, it is also worth saying that the fewer melons you have developing at any one given time, the larger your fruit will be when ready to harvest.
Pruning the smaller vines will signal to the plant to place less concentration on the production of multiple melons, which in turn will help in the creation of larger, sweeter fruit.
To correctly prune your plant, it is suggested that you prune the lateral vines, growing from the main stem, out to the eight leaf node, by way of using pruning shears.
You should make sure the cuts are at least ¼ inch from the main vine, in order not to cause the main vine any damage. Once you notice that fruit is forming, remove all but one cantaloupe from each vine.
Make sure that you check the plant at least every two weeks or less, looking for any new melons that may be forming. When you harvest a melon, make sure to leave another melon on the vine, so that it may successful ripen.
Remove any blooms that you notice developing 50 days before your first expected frost, so that the plant can fully concentrate on ripening any fruit already growing. Finally, if you see any dried leaves or vines, make sure to prune them.
Harvesting Your Cantaloupe
We have now arrived at the most essential part of the planting and growing of your cantaloupe—knowing when and how to harvest your bounty. The proper harvesting of your cantaloupe can mean the difference between a good crop, and a total flop.
Keep in mind, once your cantaloupe is picked, no matter what you do, it will not continue to ripen. This can leave you with a hard, tasteless, and even in some cases, bitter fruit.
On the flip side, if you wait too long to harvest, you will only be left with a soft, watery, and mushy fruit that is very undesirable.
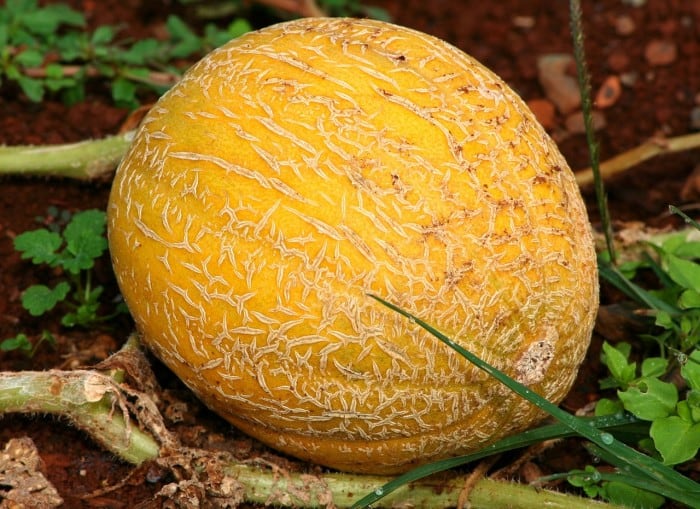
A cantaloupe is ready to be harvested when they are fully ripened. This is determined by the fruit changing from green, to a tan/yellowish-gray color between the outer rinds netting.
There should also be a slight exhibition of a pleasantly sweet aroma. If the melon is overripe, the outer rind will take on a yellow tint, and the fruit will be soft.
So, the question is, “when can I expect to harvest my cantaloupe?” The simple answer is anywhere from 70-100 days from the date of planting, depending on the variety. When collecting the melon, if it is genuinely ready for picking, you should not have to tug or exert much tugging to harvest it.
In fact, the melon should detach itself from the vine will little to no help. You can also check the stem, and if it has become brown, and has a crack where it is attached to the vine, it is ready for harvesting.
If when you choose to harvest your melon, as mentioned above, it should take little to no effort. However, if you find you are having a little bit of a stubborn time with the fruit, it is essential that you not pull or tug on the vine excessively.
This may cause unwanted damage to the vine, which can end up leading to disease to the vine. It is best to cut the fruit from the vine carefully. Once you are aware of how to properly harvest your melon, you will better benefit from the results.
Once harvested, your cantaloupe can be stored successfully, uncut for up to six days. However, if the fruit is cut up, and placed in the refrigerator tightly wrapped in plastic, it should be viable for up to about three days.
Pests That Affect Cantaloupe
Several types of pests will descend upon your cantaloupe vines the first chance they get that can do massive damage to your plants if left unchecked.
Aphids
Aphids are the bane of any gardener’s existence. They are small, soft-bodied insects that are capable of surviving in just about any growing zone. They multiply at an exponential rate, and the only method to get them under control is to do so before they start reproducing.
Both nymphs, the early stage of aphids, along with adults, feed on the juices within the plant. They do this by way of attacking the leaves, stems, buds, flowers, fruit, and roots.
Signs to look for to determine if you have aphids are those of misshapen, curling, or yellowing leaves. Aphids love to hide underneath the leaves, so when looking for any infestation, check there first.
Another sign of aphids is if the leaves or stems appear to have a sticky substance on them. This is the sure sign that the little buggers have been hard at work sipping on your plants.
Finally, some species of aphid can cause the forming of gall on the roots and/or leaves.
Cucumber Beetles
Cucumber beetles, despite their name, will attack and attempt to destroy your cantaloupe vines.
If you find that your vines, when it is a seedling, is being cut off, or the leaves are wilting and yellowing, you may very need to check and see if you have a striped, or a spotted, cucumber beetle issue.
The beetles come out of hibernation early into the season, usually from mid-April to as later as early June, to search out and feed on young seedlings as they are developing.
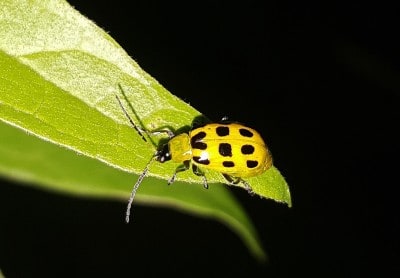
The larvae stage of the beetles is known to feed on the roots of the plants. The adults will then complete their cycle, by once again feeding on just about every part of the vine.
This usually happens in mid-July to September, and they will leave deep telling marks on the fruit’s rind.
Not only do the Cucumber beetles feed on, and destroy the vine, they hold a much more problematic threat. They are known carriers of bacterial diseases as well as viruses that they then proceed to carry from plant to plant on their search for food.
Types and Varieties
There is an extensive list of varieties of cantaloupes that you may choose to try. However, there are a few that should be pointed out for both their ease of growing, as well as the success of harvest.
Hales Best Jumbo
The first is the ‘Hale’s Best Jumbo’ which reaches an estimated time to maturity of 80-90 days. The result is an aromatic, 3-pound fruit that would be an excellent choice for vertical growth.
Minnesota Midget
Next would be the ‘Minnesota Midget.’ This variety has an estimated maturity of 70-80 days. This variety is an early one, that is best suited for more Northern climates and gardens.
The fruit is sweetly flavored, and usually around one pound in weight. Another excellent choice for vertical or trellis training.
Bush Star
This variety has an estimated maturity of 90 days. Although the maturation date is the longest of the varieties listed, what it has in slow growth time, is made up by the fact that it is the perfect variety for those individuals who are gardening in a small, limited space.
Ambrosia
The last variety is that of ‘Ambrosia.’ This variety has an estimated maturity of 85 days, and as the name may indicate, this variety is the sweetest amongst all the varieties that are offered.
Bees and Blooms
Cantaloupe vines produce both male and female blooms, on the same plant, but separately. The male flowers are usually first to begin appearing, typically several weeks before the female blossoms.
You mustn’t allow the fact that the first blooms may not produce fruit to discourage you. It is all part of natures process within the plant itself.
With everything said, the most crucial process that will determine whether or not you will have fruit to harvest is that of the cross-pollination process. The pollination of the flowers is achieved through a process that is provided by your neighborhood bees.
This is why it is essential that you be kind to, and respect the bees because they are taking care of the most vital part of your cantaloupes growing process. Without them, you would not have any fruit, no matter how hard you tried.
If you have been thinking of the possibility of growing cantaloupe, I would highly suggest you take the plunge. Like with any choice in the garden, there will be a learning curve, as well as successes and failures.
However, if you take the plunge, jump in with both feet, and give it a try, you may very well be pleasantly surprised.
Is growing cantaloupe in the future of both you and your garden?

Tracy lives with her furry baby, Chigger, in a small, quaint, country town nestled within the Appalachian Mountain range.
A mere four years into her homesteading journey to obtain a simpler, more self-reliant lifestyle, she finds that she always has something to learn, and there is always something to be grateful for.
When not researching or writing, she can usually be found working on one of the many tasks that always seem to be needing done on her homestead, tending to her garden, or laughing at the many antics of her chickens, whom she has affectionately named the “feathery five,” as well as Chigger himself.
Meet the rest of the team here.
Tracy, thank you for sharing this article! I am just in the beginning stage of planting some cantaloupe from seed. Just yesterday I witnessed one peeking its head up…so exciting!
I love this verse, “From the fruit of his mouth a man is satisfied with good, and the work of a man’s hand comes back to him. Proverbs 12:14.
May you continue to have great fruit.
Jennifer