
Ornamental gourds aren’t just fun to grow – they’re also incredibly easy to cultivate, too.
Many people avoid growing these plants because they think they will be too finicky. Plus, since they aren’t a major food crop for most people, they tend to be sacrificed in favor of other vine crops like squashes and pumpkins.
However, ornamental gourds have a ton of uses. They are decorative, and can be used to make birdhouses or other projects, too.
Gourd Varieties
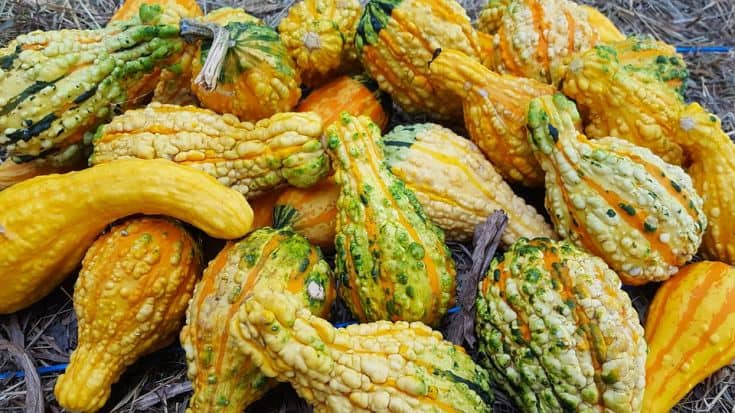
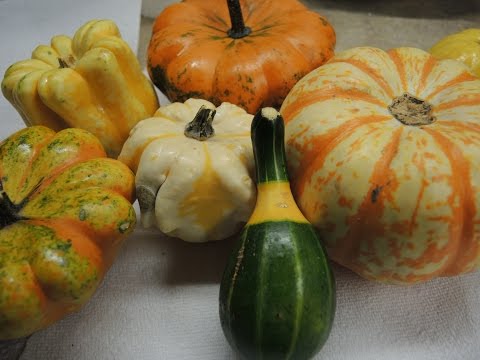
There are two major types of gourds. The first is a category including the small, odd-shaped gourds that you usually see in all decorations. These soft-skinned dates are part of the Cucurbita family. They can be dried and saved for many months, although the colors do fade over time.
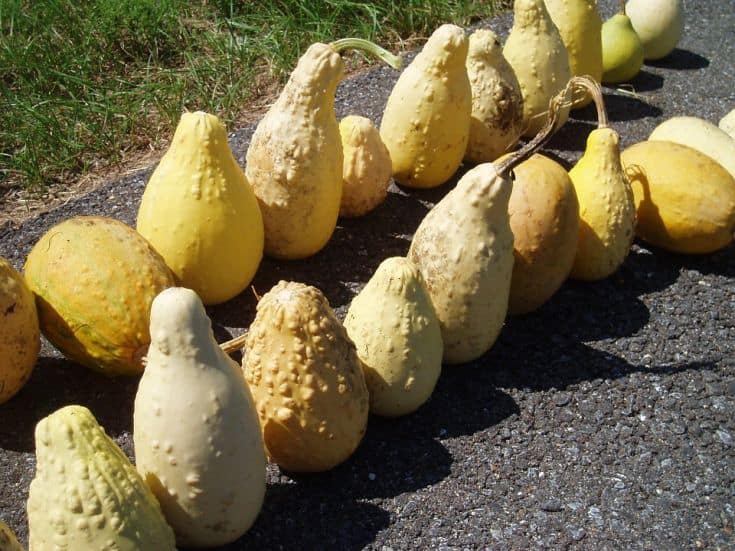
The other type of gourd you can grow is a larger, hard-skinned gourd in the Lagenaria family. Your options include Bottle and Birdhouse gourds, along with several others.
These gourds are usually green when on the vine, but they become brown and tan as they dry. They produce beautiful white blossoms.
Most gourds can be grown anywhere from zone 3 to 10.
Some popular cultivars you might want to consider include:
- Birdhouse Gourd: These are usually used for making hanging birdhouses, and have long necks with rounded bodies.
- Bule Gourds: Bule Gourds are French heirloom varieties that look just like apples, except with warts. They are great for drying.
- Daisy: Daisy grounds are small and brightly colored, producing beautiful shades of white, orange, green, and yellow. They only grow to about two or three inches wide.
- Gourd Mixture: Buy a packet of variety gourds from your favorite seed supplier, and you won’t be disappointed. You’ll get the best of everything!
How to Plant Gourds
Gourds are best grown from seed instead of transplant, as the roots of young seedlings can be quite fragile, and don’t hold up well when they are transplanted. However, if you have a very short growing season, you can start seeds indoors about 4 to 6 weeks before the last frost – just be aware that all of your plants might not survive.

Another tip you can follow when starting gourd seeds indoors is to plant in peat pots. When it’s time to transplant, you can plant the entire pot. The roots will just bust out of the peat pot when they’re fully formed, and the peat pot will decompose in the soil.
Instead, sow seeds directly in your garden. Wait until the danger of frost has passed, and the soil is warm (at least 60 F / 15 C or so). You should plant your gourds in full sun for the best and healthiest flower and fruit production.
In addition, you should make sure the soil is fertile and well-draining. Add some organic compost or other organic matter to the soil before planting.
It should have a neutral pH of roughly 6.5 to 6.8. Gourds are heavy feeders, and will love growing in soil that is rich in organic matter.
Sow your seeds in groups of four seeds about one to two inches deep. If you’ve planted other squashes or plants in the Cucurbita family before, the methods for planting ornamental gourds will be exactly the same.
When planting your seeds, plant them edge-down. This will cause water to run down the sides of the seeds, and will reduce the likelihood of rotting.
Your groups should be spaced about five feet apart in rows that are eight feet apart. The row spacing can vary a bit depending on how much room you have available, and your personal preferences – this recommendation is really just to give you enough room to walk through.
After your seedlings emerge, you will need to thin the seedlings to two or three in each group. Wait until a set of leaves has developed before you do this.
When you plant your seeds, it might make sense for you to set up a support system or trellis. This will keep the fruits off the ground while also preventing issues related to poor air circulation, like fungal rot.
Erecting your trellis before your seedlings emerge is a good idea so you don’t have to disrupt the fragile seedlings once they appear.
Caring for Ornamental Gourds
There is very little you need to do in order to care for your ornamental gourds. You will need to provide about an inch of water per week – perhaps more during hot, dry periods. You should give the plants a plight watering right after you plant, then water every two or three days for the first two weeks. Then, you can just water deeply at the base once a week.
When you water your plants, do so first thing in the morning. This will prevent water from lingering on the leaves, which can lead to fungal problems like powdery mildew.
The plants grow quickly, and can be trained up a trellis or similar support system. Do this gently to avoid tearing the plant out of the ground.
When you water your plants, do so first thing in the morning. This will prevent water from lingering on the leaves, which can lead to fungal problems like powdery mildew.
You may notice that your ornamental gourds have trouble with pollination. This is true if pollinators aren’t abundant where you live. If this is the case, you might have to pollinate by hand.
You can do this by removing your male blossoms, and simply dusting them onto the female blossoms (these blossoms have small immature fruits at the base).
Usually, you will notice many more male blossoms before you spot a single female blossom, though, so be careful. Your bloom times will also vary depending on the type of gourd you are growing. Hard-skinned gourds grow in the evening while soft-skinned gourds bloom at night.
If your vines start to overtake the rest of your garden, don’t think you just have to grin and bear it! You can easily prune these, just be careful when you do so. Wait until the vines are at least ten feet, which will encourage the growth of female blossoms on the side stems.
Fertilizing your ornamental gourds isn’t necessary unless you skipped amending your soil before you planted. To fertilize gourds, you will want to use compost or a similar balanced fertilizer. Apply fertilizer just as the vines start to bloom.
Mulching isn’t usually necessary, as the vines often are self-mulching. These vines usually keep out weeds, and help keep the soil moist, too. However, if you do notice weeds forming, be careful when pulling them. Gourds have shallow roots and are easy to pull up.
If you are really concerned about weeds, you may want to consider planting your ornamental gourds in black plastic. Laying down black plastic presents two major benefits for gourd-growers.
First, it will help warm the soil up a bit more prior to planting. If you live in a cold climate, this is essential! Doing this will also help keep weeds out, as plants can only grow in the small holes that you end up cutting to plant your seeds.
Ornamental Gourd Pests and Diseases
Most large gourds are rarely bothered by pests and diseases. Small gourds, on the other hand, can be prone to the same issues that affect pumpkins, cucumbers, and other members of the Cucurbita family.
To minimize the risk of disease, watch how and when you water. Make sure water doesn’t splash up on the leaves. You can also rotate your crops every two years, which will prevent the likelihood of diseases and pathogens being harbored in the soil.
When it comes to pests, you’ll want to watch out for the same bugs that pester other members of the squash family. These include aphids, squash bugs, squash vine borers, and cucumber beetles. You can get rid of them by hand-picking them, and using floating row covers.
Harvesting Gourds
Ornamental gourds are ready for harvest as soon as they develop their full color, and are firm to the touch. At the very least, make sure you harvest before the first frost.
When you harvest, try not to use the stem as a handle. If the stem breaks off, you won’t be able to dry and store the gourd, as it will create an entry point for disease and rot.
When you harvest, get rid of any gourds that are bruised or soiled. They will be more likely to rot after harvesting.
Drying Gourds
Gourds that you plan to dry need to be harvested very late in the season. It’s up to you whether you decide to wash and dry them before storage or if you’d rather just leave them be. It’s up to you.
No matter what you do, make sure you handle the gourds carefully to prevent bruising them. If you decide to wash your gourds, make sure you put them in a spot with good air circulation so they can dry out.
Either way, make sure your gourds are left to dry in a place that is dry and warm. Like a garage or covered porch. Air circulation is essential, so a basement usually will not be a good option.
To dry your gourds, hang them by a string, with the other end of the string attached to the stem. You can also lay your gourds out on a pallet and just turn them on a regular basis to make sure they dry.
Although you’ll want to aim for dry, warm conditions whenever possible, keep in mind that a bit of rain shouldn’t hurt your gourds as long as you have good air circulation.
Check the gourds every week. Get rid of any with soft spots. These will never use appropriately, and won’t last.
Some gourds may develop mold spots on the skin while they are drying. This isn’t necessarily anything to worry about – it simply tells you that moisture is escaping through the skin. As long as the gourd itself is not mushy, the mold shouldn’t harm the gourd in the slightest.
Drying gourds requires a bit of patience! It can take up to six months to totally dry your gourds. As soon as they are hard and lightweight, they’re good to go (you’ll also notice that the seeds rattle once they are fully dried).
Now, you can do whatever you’d like with your finished gourds. Leave them to be decorative features on their own, or carve them for crafts or birdhouses.
You can even apply a layer of polyurethane if you want!
Get Going with Gourds This Spring
If you’re ready for a gorgeous crop of decorative ornamental gourds this fall, you’ve got to consider growing gourds this spring. These plants are easy to grow and, once the seeds are sown, are also a mostly hands-off crop. Consider picking up a few varieties of seeds today!


Rebekah is a full-time homesteader. On her 22 acres, she raises chickens, sheep, and bees, not to mention she grows a wide variety of veggies. She has a huge greenhouse and does lots of DIY projects with her husband in her ever-growing homesteading endeavor. Learn more about Rebekah here.
While some types of gourds may be edible at some point in their developmental stage,most gourds are toxic to humans. Please inform people of this. I love your writings but please make sure your information is clear and concise with these types of caveats.