
Each year, we purchase a side of beef, or a whole cow, depending on prices. While it’s awesome to have all that meat, storing it used to present a problem.
I don’t have a lot of freezer space. And there was this one time that the freezer went out on me days after I got the full cow in there.
So, we had to make a bit of a change. We no longer rely solely on the freezer to store our beef. I am going to share with you how canning beef will help you stock your own pantry.
This is great not only for when you purchase in large quantities, but we love to be able to take it camping with us.
Home pressure canning beef, ground or stew meat makes it so much easier to “dump and heat” for a quick and easy meal. It’s all the convenience of fast food at your fingertips and much healthier to boot.
Table of Contents
Can Raw Meat Be Canned?
While it may seem counterintuitive, raw meat can be safely canned. The key is to use a pressure canner, which will cook the meat during the canning process.
Raw meat should be placed in jars along with any desired seasonings or sauces, and then the jars should be sealed and placed in the pressure canner.
The canner should be filled with enough water to cover the jars by at least an inch, and then it should be brought to a boil. Once the canner has reached a boiling point, the jars should be processed for the appropriate amount of time (usually between 75 and 90 minutes).
After processing is complete, the jars should be allowed to cool before being stored in a pantry or other cool, dark place. When done correctly, canned raw meat can last for years.
While canning was originally developed for storing fruits and vegetables, it can also be used for meat products like beef. There are several benefits to canning beef as opposed to other storage methods, such as freezing or drying.
One benefit is that canned beef has a longer shelf life than frozen or dried beef. Canned beef can last for years if stored properly, while frozen beef will only keep for a few months and dried beef has a shelf life of only a few weeks.
Another benefit of canning beef is that it is easier to use than other methods. Canned beef can be eaten directly from the can, while frozen beef needs to be thawed and dried beef needs to be reconstituted.
Finally, canned beef is often less expensive than other types of stored beef. Canning is a convenient and cost-effective way to store beef for long-term use.
Can You Can Beef Without a Pressure Canner?
While you only need a few things for canning beef, keep in mind safety factors. First, pressure canning beef is a MUST.
It doesn’t matter if your great aunt or grandma used to water bath it, it’s not safe. We know more about germs, botulism and such than they used to.
Canning meat without a pressure cooker is not enough to kill those germs. You won’t be able to taste, smell or see the toxins there. So, just don’t. Please.
Can You Water Bath Can Beef Broth?
You know you can’t water bath and eat meat chunks. But what about broth or stock? Can you use a water bath canner for that?
NO!! Absolutely not! Water bath canning is a method of canning high acid foods, like fruits and pickles, in boiling water. Low acid foods, like vegetables and meat, need to be pressure canned in order to be safe.
Pressure canning heats the food to a much higher temperature than boiling water, which kills any bacteria that could cause illnesses.
So no, you cannot water bath with beef broth. If you want to safely store beef broth (or any other low acid food), you’ll need to pressure it.
What Meats are Best for Canning?
When it comes to canning beef, there are a few things to keep in mind.
First, you’ll want to choose a cut of beef that is relatively lean. Fatty cuts of beef can cause the cans to spoil more quickly.
Second, you’ll want to choose a cut of beef that is easy to dice or chop into small pieces. This will make it easier to pack the beef into the cans and ensure that it cooks evenly.
Finally, you’ll want to select a cut of beef that is not too expensive. Canning is a great way to save money on beef, so you don’t want to spend more than you need to.
With these guidelines in mind, some of the best cuts of beef for canning include chuck roast, rump roast, and round steak. I would save “premium” cuts like T-bones and rib eyes for the freezer!
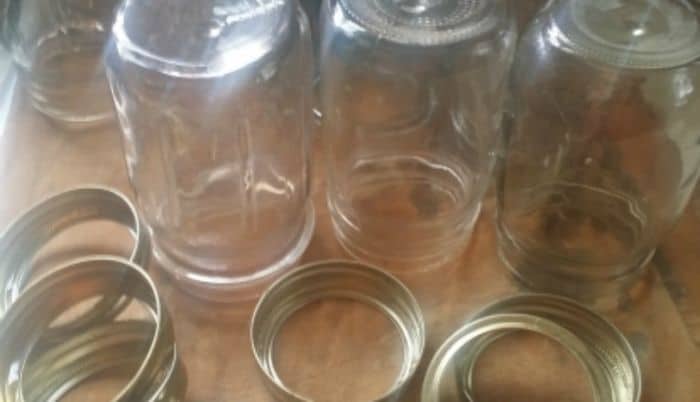
What Do You Need for Pressure Canning Beef?
There are two methods to canning beef, and you will use them for canning venison meat, or elk. When getting ready for canning beef, or any canning, you’ll want a few things:
- A clean surface to work on
- Pressure canner
- clean jars and bands
- new lids (use new lids EACH time)
- rubber spatula to remove air bubbles
Raw Pack vs. Hot Pack Canning Beef
Canning beef is a great way to preserve meat for long-term storage. However, there are two different methods that can be used- raw pack and hot pack. Each method has its own set of pros and cons that should be considered before deciding which one to use.
The first pressure canning method we will discuss is the raw pack method. This is just like it sounds, adding raw meat to the clean, sanitized jars. I use this for stew meats and roasts cut down into chunks.
Raw pack canning is the simpler of the two methods. Beef is simply placed into jars and covered with boiling water or broth. This method is quick and easy, but it can result in meat that is tougher and less flavorful.
The second is the hot pack pressure canning method which involves pre-cooking the meat. I use this for ground meats.
This will involve pre-cooking the meat, mainly ground beef or ground venison to before pressure canning. This reduces the amount of grease that will wind up in the jar.
This extra step of cooking takes more time, but it results in beef that is more tender and flavorful. I
Both raw pack and hot pack canning are effective methods for preserving beef. The best method to use depends on personal preferences and the amount of time that you have available.
Preparing Meat for Canning
To fill the jars, you will need a pound per pint, or 2 pounds per quart. Remember the old saying, “A pint’s a pound, the world around”? Totally true here.
When preparing any kind of meat for canning, whether it’s meat for bone broth, beef, chicken, rabbit, whatever – it’s a good idea to trim off as much fat as you can.
While a small amount of fat won’t be a big deal, too much fat can result in a product that’s greasy and unpalatable.
Raw Pack Canning Beef: Step by Step Instructions
For canning beef chunks, such as stew meat, use the canning raw beef, or raw pack method.
- Add the beef into the jars.
- Cover with boiling broth or water. I like to use broth to add an element of flavor.
- Leave 1 inch headspace.
- Using a rubber spatula, run along the inside of the jar to remove air bubbles.
- Load the jars into the canner. Put the lid on and secure.
- Allow the canner to heat up and vent steam for 10 minutes.
- Add the weight.
- Allow the canner to build pressure up to 10 pounds.
- Wipe the jar rim, cover with a new lid and clean band and finger tighten.
- Process for 80 minutes for pints, 90 minutes for quarts at 10 pounds pressure, adjusting for altitude. Remember, if the canner loses pressure at any time during this time, going below 10 pounds, you need to restart your timer. If it gets too high, simply reduce the heat – you don’t need to restart the timer.
- Allow the canner to cool on its own, remove jars and set in a non drafty place for 24 hours to cool.
- Any jars that don’t seal need to be used up within 3 days, while being stored in the fridge.
Hot Pack Canning Beef: Step by Step Instructions
For the canning ground beef, you will want to use the hot pack method.
- Precook the hamburger. Remove most of the grease, and put 1/4 of the remaining grease into the jars with the meat.
- Fill the jars with hot broth or water, leaving 1 inch headspace.
- Run a rubber spatula along the inside of the jar to remove air bubbles.
- Wipe the lid of the jar with a clean, damp cloth to remove food residue.
- Add a new lid and clean band, screwing on finger tight.
- Add new lid and clean band, screwing on finger tight.
- Load the jars into the canner. Put the lid on and secure.
- Allow the canner to heat up and vent steam for 10 minutes.
- Add the weight.
- Allow the canner to build pressure up to 10 pounds.
- Process for 80 minutes for pints, 90 minutes for quarts at 10 pounds pressure, adjusting for altitude. Remember, if the canner loses pressure at any time during this time, going below 10 pounds, you need to restart your timer. If it gets too high, simply reduce the heat – you don’t need to restart the timer.
- Process both for 80 minutes pints, 90 minutes quarts at 10 pounds pressure, adjusting for your altitude.
- Allow the canner to cool on it’s own accord, remove the jars and set in a non drafty place for 24 hours.
Can You Add “Extras” to These Recipes?
When canning beef, lots of people want to know if they can add extra ingredients to the cubes of beef.
While things like salt, spices, and herbs (such as thyme, pepper, garlic, etc) are generally fine, I would steer clear of adding more vegetables (like celery, carrots, or even tomato juice) unless you have an established recipe to follow.
These ingredients, when added to the meat drippings or strips of meat, can alter the preservation times and finished product. For the most high quality and safest finished product, stick to the recipe!
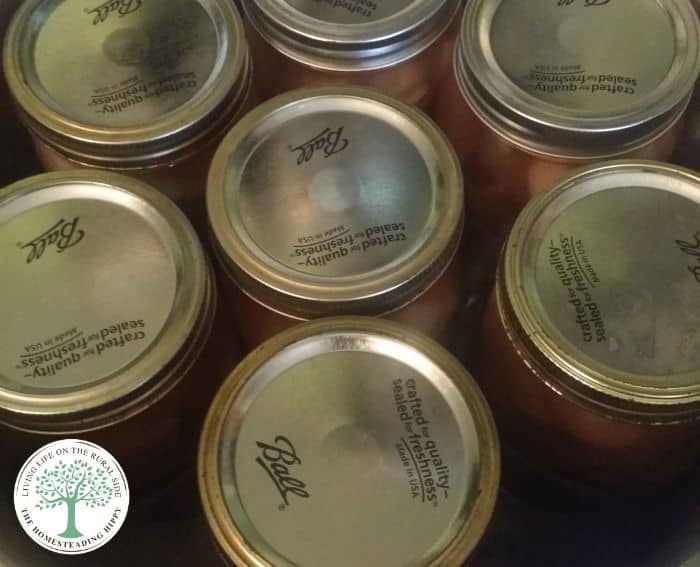
What to Do if Your Lids Don’t Seal
Check your lids for sealing after canning.
Any that didn’t seal need to be used up within 3 days, while being stored in the fridge.
If you have a lot of jars that didn’t seal, check that your lids are brand new. Reusing lids can cause faulty sealing.
When canning beef and the seal fails, it is possible to re-process the meat by following the directions above. Make sure to use a new lid when re-processing.
How Long Do You Cook Meat When Canning?
If you’re planning on canning meat, it’s important to know how long to cook it for. The type of meat will affect the cook time, but in general, most beef should be cooked for 80 minutes for pints or 90 minutes for quarts.
This article is not about other types of meat, but if you’re curious, in general, chicken and pork can be cooked for 75 minutes for pints or 85 minutes for quarts. These times are at 10 pounds pressure, so be sure to adjust for your altitude.
Always follow a recipe to make sure you’re staying safe, too! The National Center for Home Food Preservation is an excellent resource for this and has lots of information that you can tailor to your specific needs.
For example, whether you are using a weighted gauge or dial gauge canner, if you’re canning in pint jars or quart jars, and so on.
Is Canning Raw Meat Safe?
Canning raw meat is a safe and effective way to preserve food. The high temperatures of the canning process kill bacteria and other microorganisms that can cause food poisoning. In addition, the sealed cans create a sterile environment that prevents new contaminants from entering. As long as the cans are properly processed and stored, they will remain safe to eat.
However, there are some potential risks associated with canning raw meat.
Again, that’s why it’s so important that you follow a recipe and don’t “wing it.” Now is not the time to get creative!
How to Use Canned Beef
To use your canned meat, simply add to your favorite recipes. When canning meat shelf life is approximately 1 year.
We like to add a bit of butter while heating the ground beef, and the canned stew pieces make for a wonderful beef and noodles, or beef soup.
What are some of the ways you would use the canned beef? Tacos, spaghetti, pizza? Have you tried home canning beef before? What are YOUR reasons for doing so?

Heather’s homesteading journey started in 2006, with baby steps: first, she got a few raised beds, some chickens, and rabbits. Over the years, she amassed a wealth of homesteading knowledge, knowledge that you can find in the articles of this blog.
Learn more about Heather and the rest of the writers on this page.
Can I just come over the next time you can beef or peaches? I’ll bring wine! Or tequila!! I learn better “hands on”!!
Sure thing! Bring the wine and I’ll bring the canner 😉
First time canner here…was wondering about the raw meat canning method – will the meat cook when pressure canned?
Yes the meat cooks to a delicious tenderness.
Have you ever canned London Broil after ‘cooking it’? I would expect the canning process (Cooked meat packed in hot broth) would further ‘tenderize’ and keep the meat tender.
It sure will be cooked. Under pressure at 10 lb for 90 min does it!
Actually, the rule has always been that you don’t add any boiling water or hot broth when raw pack canning. The meat produces, and cooks in, its own juices. You add liquid to already cooked meat.