
A member of the cabbage family, kale is a cool-season green that grows well in the spring and fall months. It is resilient to fall frosts and is easy to grow in most areas.
By incorporating these easy-to-follow tips, you’ll be serving up a bountiful harvest of this delicious superfood throughout the entire year.
Benefits of Kale
Any kind of green is good for you, but kale reigns champion when it comes to its nutritious goodness.
This plant is packed to the brim with beneficial compounds, many of which have medicinal properties and can enhance your overall health – all while adding a boost of flavor to your meals.
Often considered a superfood, kale is a cruciferous vegetable that has more nutrients than almost any other kind of food. A cup of kale contains twice the amount of Vitamin A you need in your daily diet, along with nearly seven hundred times the Vitamin K necessary.
It is also packed with Vitamin C, manganese, copper, calcium, potassium, magnesium, beta-carotene, thiamin, vitamins B2 and B3, riboflavin, iron, and phosphorous.
For all of this, kale has only about thirty-three calories and six grams of carbohydrates (a third of which come from fiber). There is very little fat in kale, but what it does have is a healthy omega-3 fatty acid called alpha linolenic-acid.
It also contains beneficial flavonoids kaempferol and quercetin. These substances are powerful antioxidants, working to lower your blood pressure and prevent viruses, depression, cancer, and more.
Kale can help lower your cholesterol and fight off colds. It also contains a good deal of calcium, which is important for bone health and vital cellular functions. It can even help you lose weight and protect your ocular health.
Long story short, kale is a tasty food that should be part of everybody’s healthy diet. If you aren’t already growing kale in your backyard garden, you need to start – your body will thank you.
Types of Kale
There’s no arguing that kale is delicious and easy to incorporate into your daily diet, but when it comes to planting it, there can be some confusion over what kind you should grow.
Luckily, all kinds of kale are tasty and can be incorporated in your diet, but they each have slightly different culinary purposes.
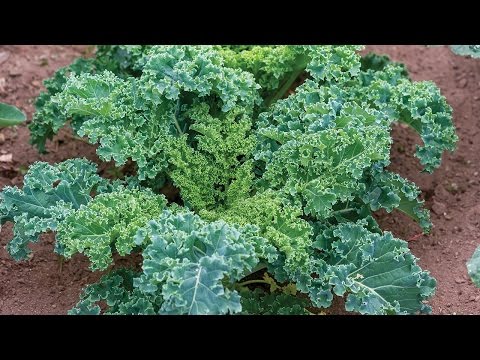
Common kale is the type most often found at the grocery store. A pale green, it has large, frilly leaves and long stems. This kind of kale grows as a loose head but is sometimes sold as loose leaves. You can use it in soup, smoothie, salad, or even saute it.
Lacinato kale, also referred to as Tuscan or Dinosaur kale, produces dark, blue-green leaves that don’t have the curls common in other kinds of kales. Instead, as it grows it looks a bit more like cabbage.
This kind of kale gets its name from its puckered, dimpled leaves that look not unlike dinosaur skin. It is great for using in soups, pasta, and stews, but could also be used in salad.
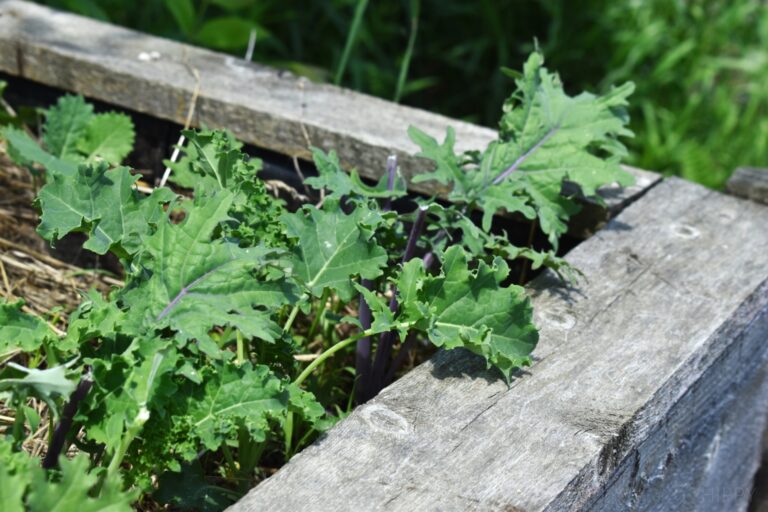
Red Russian kale is ideal for growing in cold weather, which intensifies its flavor. It tends to be a bit sweeter and more tender than other kinds of kale, and produces blue-green or purplish red leaves. It looks pretty and can be eaten in salads and other dishes.
Chinese kale, on the other hand, is more like broccoli. It can be substituted for broccoli in most recipes in a pinch, and it’s exceptionally high in vitamins A and C along with iron and calcium.
Siberian kale is one of the most cold-hardy types of kale available (hence the name). It has large leaves and is resilient to low temperatures and pests alike, making it a good choice as a winter crop in the United States.
It tastes better cooked, ideally sautéed or steamed. Redbor kale is the perfect choice for an ornamental garden.
This kind of kale produces three-foot-tall leaves that are purple and curly. It can thrive in cold weather, growing a more vibrant shade of purple as the temperatures drop.
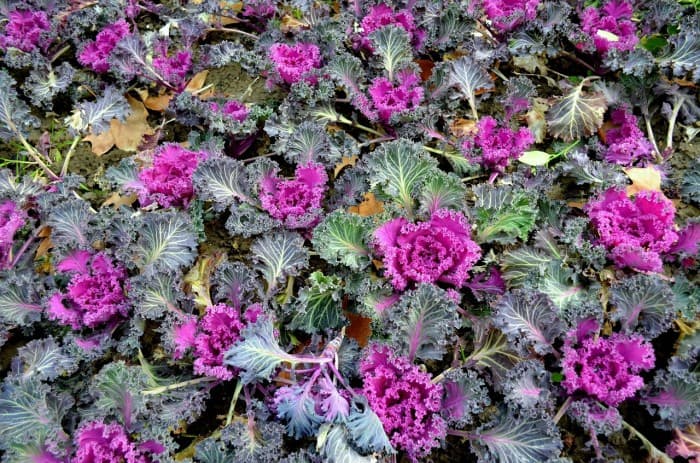
Ornamental kale (see above), commonly referred to as Salad Savoy, is another decorative type of kale that has a place on any dinner table.
It isn’t terribly tasty, as its leaves are somewhat coarse, but it adds color and texture and can make a lovely garnish. It grows in colors ranging from white to pink to purple, and a little bit goes a long way in making a statement.
Preparing the Soil for Kale
Kale grows best when planted early in the spring. If it lives through the summer months, it may become bitter when hit by intense summer heat. You can keep the plants cool by mulching around them and providing them with ample watering.
This will protect the leaves and roots, keeping the plant cool and thriving until you reach the cooler fall months.
Kale loves nutrient-dense soil. Mix about two cups of fertilizer for every 25 or 30 feet of row, blending it into the top three or four inches of soil.
If you prefer, you can also spread organic compost or aged manure a few months before planting. This will allow it to leach naturally into the soil so that you don’t need to worry about tilling it.
You can also work materials like cottonseed meal or blood meal into your soil if you are lacking in a specific nutrient. The soil pH should be roughly 6.5 to 6.8 to discourage pests and diseases.
If weeds are a concern, mulching before you get ready to plant will help prepare the soil for weed-free planting, too. Kale also grows just fine in raised beds or containers.
Select a site that is filled with light, rich soil. Kale grows best in full sun, but can also tolerate partial shade.
Kale that receives fewer than six or seven hours of daily sun won’t be quite as vivacious and leafy as those that receive full sun throughout the day, but they will still be plenty edible.
The more important factor is that you make sure the soil is nice and fertile so that your kale plants grow quickly and productively.
If you are interested in companion planting, consider planting kale near plants like celery, cucumbers, herbs, onions, spinach, chard, potatoes, or beets.
It should not be grown near beans, tomatoes, or strawberries, which can affect its susceptibility to pests and diseases and also affect the flavor of nearby crops.
Planting
Kale can technically be planted at any time from early spring to early summer. Just remember that planting in the summer can lead to a more bitter-tasting plant.
You can also wait to plant kale until late in the summer, which will allow you to harvest crops all the way into the fall, until the ground freezes solid.
If you are planting kale by seed, spread them about a quarter to a half an inch deep into well-drained soil. You can thin seedlings after two weeks, making sure they are spaced eight to twelve inches apart – kale does not like to be crowded.
You can start seeds for kale indoors, too. You should do this in the late winter months so that the seeds have time to germinate before the plants are moved outside. You will need soil temperatures between 55 and 75 degrees Fahrenheit (that’s between 12 and 23 Celsius).
If you prefer to plant in the fall, start your seeds in July. Seeds are ready to be transplanted when they have three or four leaves and the daytime temperatures are around 50 degrees Fahrenheit (10 Celsius).
If you prefer, you can plant your kale plants in two-week intervals so that you have a staggered harvest.
Kale is one of the few leafy greens that can be started as a seedling in the garden. If you choose to do this, set out your plants in the spring, usually three to five weeks before the last frost.
If you are planting in late summer, go ahead and plant about seven weeks before the first frost in the fall.
Set plants at the depth in which they were growing in their containers. Space the plants about eighteen to twenty-four inches apart – the further apart they grow, the bigger the leaves they will produce.
Tending to Your Kale Crop
After you have planted, you need to make sure you water and fertilize regularly. You must be patient, as spring-planted kale will grow slowly until soil temperatures have warmed enough to trigger intense growth.
On the flip side, if you plant n the summer or early fall, your kale’s growth may be stunted until temperatures cool slightly. Once it hits proper temperatures, however, you’ll likely be overwhelmed by how much kale you have all at once!
Water kale regularly, providing about an inch to an inch of half of water per week. Installing soaker hoses or drip irrigation systems is a good idea, as is mulching.
Use a compost, hay, straw, pine needles, or bark to help hold in moisture and keep the soil cool. This will also help to repel weeds and keep the leaves free of dirt for when you are ready to harvest.
Kale is a heavy feeder. You should provide plenty of nitrogen during their growth so that they can develop optimally. Apply fertilizer when you thin your seedlings, and consider adding compost tea every few weeks during their growth.
When you weed, remember that kale has very shallow roots. It is easy to accidentally pull up your plants when you’re tugging at a stubborn weed.
Adding mulch can help conserve soil and limit weeds, making it easier to remove the occasional unwanted and encroaching plant.
Kale is an easy crop to care for, but there are several pests to which kale is prone. Cabbage worms are some of the most damage-inflicting. These pests chew holes in kale leaves, and appear later in life as white butterflies.
They are more likely to munch on other brassicas, like cauliflower, broccoli, and cabbage, but if you fail to rotate your crops or grow kale in close proximity to these other plants, you may have issues with cabbage worms.
Harlequin bugs are also common on kale plants, particularly those that are beginning to age. Harlequins are black-and-orange and can provide the final kiss of death to your plants.
In most cases, it’s easiest just to pull up the old plants and compost them, particularly as this is the time that kale begins to decline in production and taste, anyway.
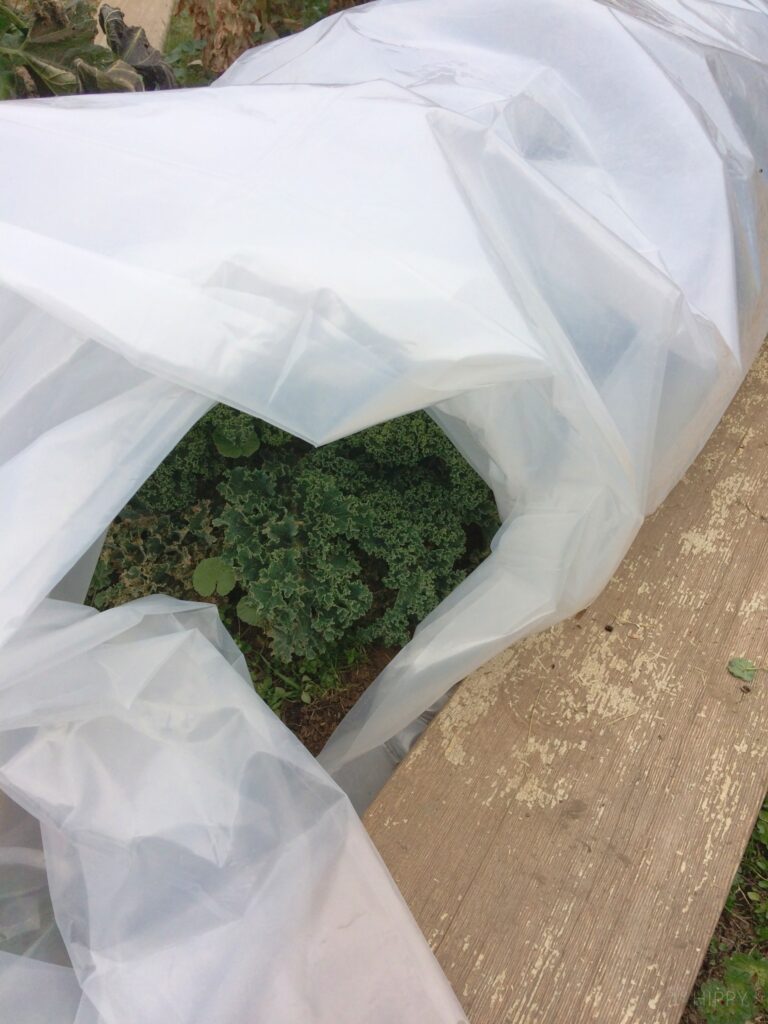
If your plants are otherwise still thriving, consider covering them with row covers or lightweight fabric until the pest populations drop in the fall.
Cabbage aphids are another common pest. These usually gather in clusters, affecting the leaves and folds of kale plants. You can treat outbreaks with insecticidal soap, or cut off the affected leaves to prevent them from spreading to your healthy pieces.
It is not likely that your kale plants will develop disease. However, those that do arise generally do so as a result of insufficient watering – or overwatering.
Black spot is the most common disease. This disease produces spots on the leaves of kale and kale-like plants (such as collards).
Caused by fungi, this disease is not harmful to humans but can damage your kale and surrounding plants. Remove the affected leaves and be sure to monitor the amounts of water your kale plants are receiving.
Harvesting
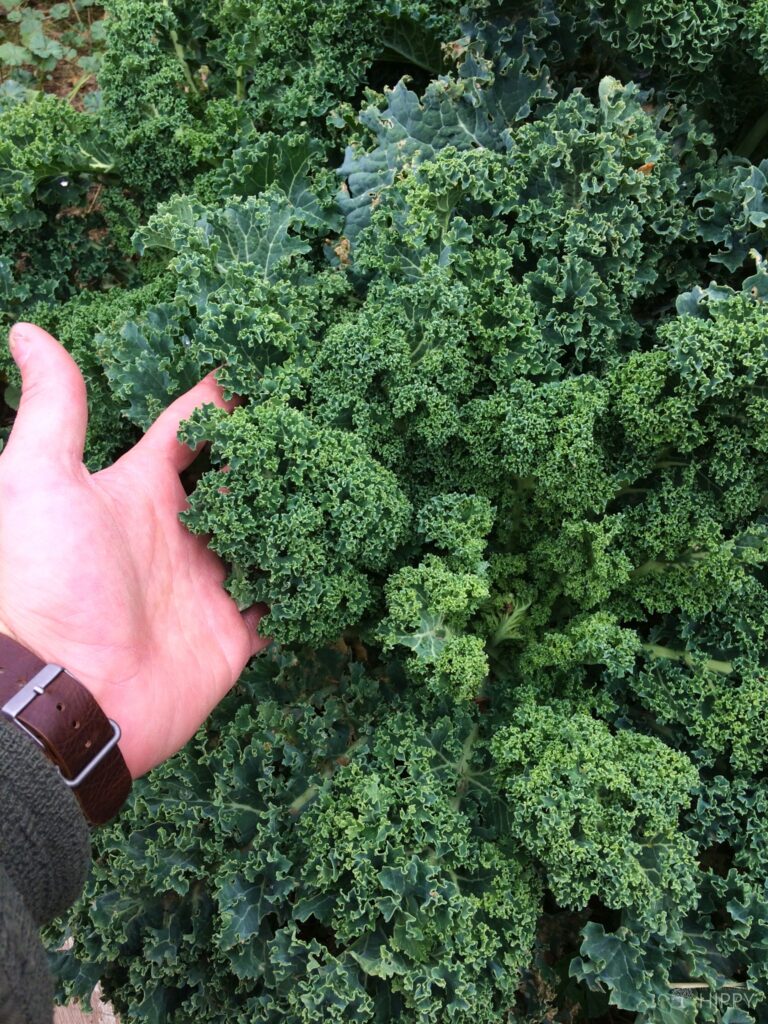
You can harvest kale as soon as the leaves are large enough to eat -generally, this is when they are roughly the size of your hand.
Allow the center leaves to continue growing and instead harvest larger, outside kale leaves first. This way, you will be able to enjoy a continuous harvest throughout the year.
When you regularly harvest your kale plant, you will be rewarded with plants that produce new, tasty leaves for several months at a time.
Their growth is really only determined by the weather – as long as it stays cool, you will be in a good supply of kale.
You can even harvest kale after the first frost. Cool temperatures cause the carbohydrates in the leaves to turn to sugar, meaning they will taste even better after they’ve been hit with cold weather.
Just keep in mind that when the weather is truly freezing, you will want to harvest your kale leaves before they stiffen and wilt.
To harvest, cut leaves one by one using garden scissors or even a knife. You can also cut away the whole head, but new leaves will not grow as they would if you had simply cut a few leaves at a time.
If you notice that your plants are developing yellow leaves, make sure you remove them more often. Yellowed or holey leaves are a sign that you are not harvesting your leaves quickly enough.
Kale is a perennial crop, meaning it will thrive for multiple years when cared for correctly. Good harvesting practices are paramount in getting your kale to last for several years.
Generally, kale is ready for harvest about 55 to 75 days after it has been sowed from seed. It can survive in areas where winters are cold, even living to temperatures down to 14 degrees Fahrenheit.
If you receive colder temperatures and a hard freeze, you can keep kale alive and thriving under row covers or within cold frames. Just make sure the leaves are covered during sub-freezing temperatures.
Storing and Preserving Kale
After harvesting your kale, make sure you wash the leaves well with a steady stream of water. Kale tends to accumulate dirt and other debris as it bounces up onto the leaves during watering, so a thorough rinsing is essential.
Kale can store for two or three weeks in your refrigerator, provided that the leaves are kept moist.
You might consider wrapping the leaves in a damp paper towel and then keeping them in a perforated bag in the vegetable crisper. This will prevent your leaves from drying out, while also providing essential airflow.
There are multiple ways you can preserve kale if you find you have a bumper crop. Perhaps the easiest way to do so is to freeze it.
Select only young, tender leaves, and wash them thoroughly. Cut off the woody stems, and then blanch them for about two minutes. Let them cool and then package them in freezer bags, leaving about an inch of headspace.
Kale can also be pressure canned. You will need about 28 pounds of greens for a canner load of seven quarts – this equates to about eighteen pounds for nine pints. Can only freshly harvested greens, discarding any woody or bitter-looking pieces.
You will use hot pack procedure, placing about a pound of greens at a time in blancher basket. Steam the greens for about four minutes and add a teaspoon of salt to each jar. Jars should be processed at eleven pounds of pressure for seventy to ninety minutes.
You can even dehydrate kale. Again, use only young, tender leaves, and be sure to wash them thoroughly.
You should blanch the greens before dehydrating to remove excess water. After blanching, dip them in cold water to stop the cooking action, and let the greens cool to about 120 degrees F.
Put them on the dehydrator racks and let them dry for about eight to ten hours. You will be rewarded with tasty, crunchy kale chips.
Uses for Kale
There are countless uses for kale, providing you with great versatility and options for including it in your daily diet.
You can make a super-healthy salad with kale, using it to replace romaine or iceberg lettuce. It does not wilt easily, making it a good choice for a potluck lunch.
You can also blanch the leaves of kale and toss it with grains or pasta. This makes a tasty side dish or vegetarian meal. You can grill it for a summertime staple, or even bake the leaves into kale chips that you can then serve with a dip.
Many people also use kale as a pizza topping. It tastes great with parmesan cheese. Add kale to a Tuscan- or Mexican- inspired dish, or serve it in a breakfast casserole, hash, stuffing, or soup. The opportunities are virtually endless.
Wrap-Up
No matter how you choose to incorporate kale in your daily diet, it will be much easier to do so if you are already growing it in your backyard garden. Easy to grow and even easier to harvest and preserve, kale is a superfood that should be on every gardener’s bucket list.

Rebekah is a full-time homesteader. On her 22 acres, she raises chickens, sheep, and bees, not to mention she grows a wide variety of veggies. She has a huge greenhouse and does lots of DIY projects with her husband in her ever-growing homesteading endeavor. Learn more about Rebekah here.