
Dealing with a broken bathroom mirror is one of those household repairs that will often wind up being far more difficult than you might imagine.
Mounted in a medicine cabinet or directly to the wall, removal and replacement is tricky, and can be quite dangerous. It does not have to be an exercise in frustration if you know the right way to tackle the problem.
In this article I will tell you about my experience replacing a broken medicine cabinet mirror on a budget, and also give you three proven ways to safely remove common wall mounted mirrors.
My Experience Replacing a Medicine Cabinet
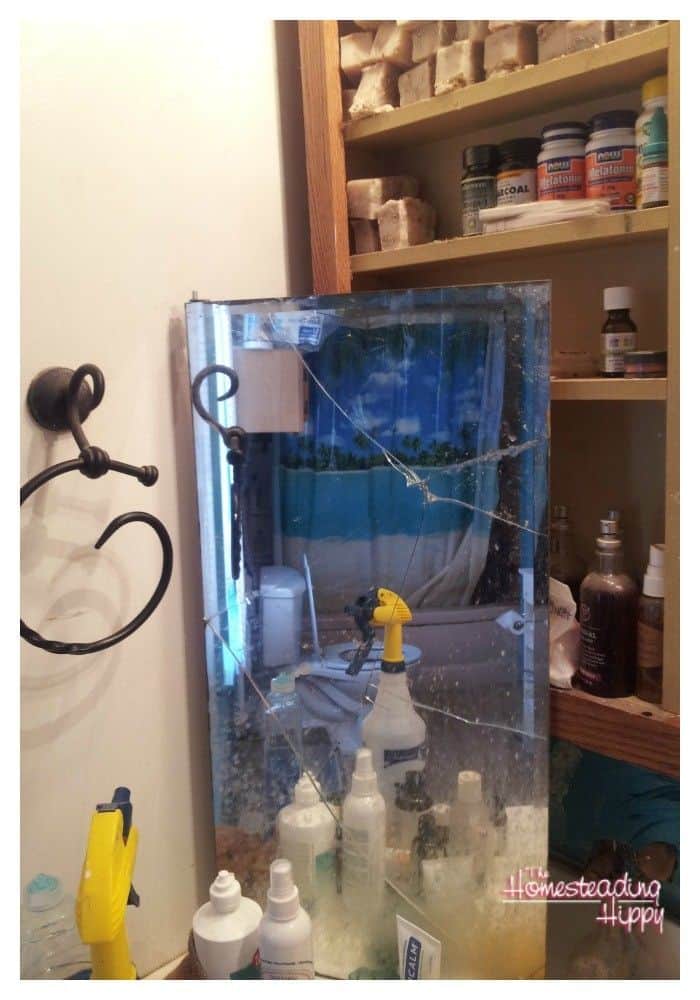
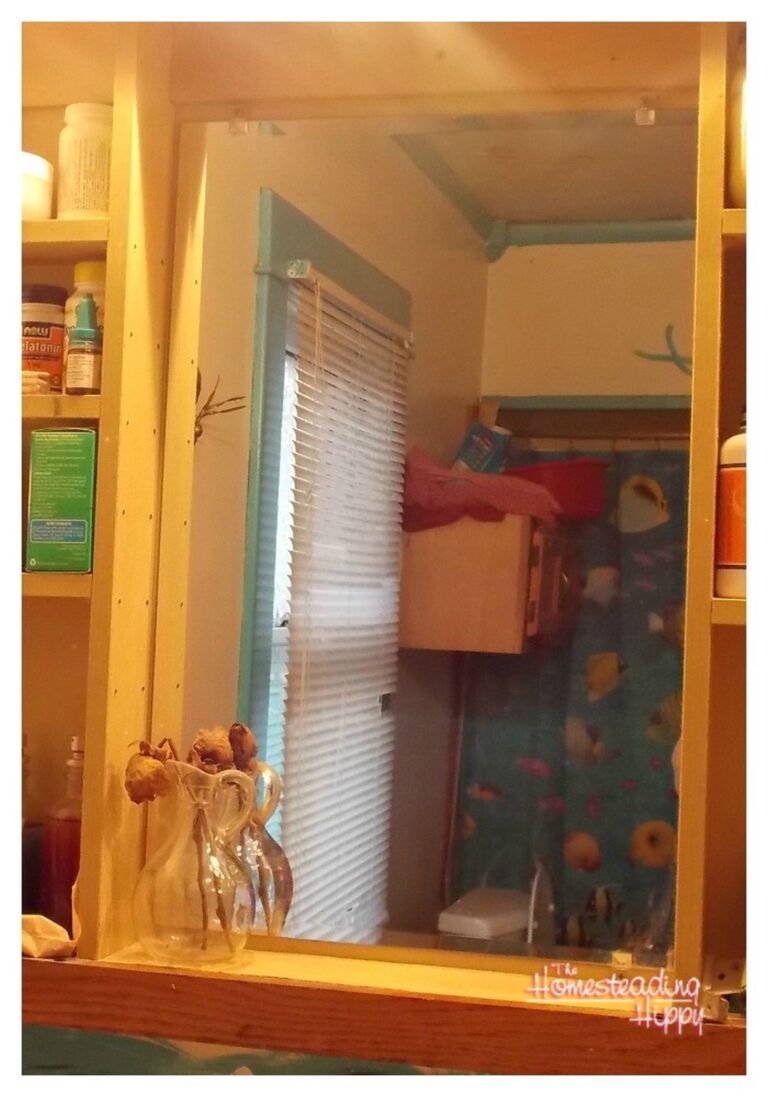
This was our old bathroom mirror. Sad looking, really. It was a 3 part medicine cabinet with mirrors that was rather brittle.
Most of the mirrors broke off the hinges, and this was the only mirror left. We propped it in the corner on the sink in order to be able to see ourselves, but it really wasn’t that convenient. (please ignore the fact that it’s grossly messy, okay?)
However, not really knowing what we wanted to do in the bathroom, we stalled on replacing it. Do we replace the whole vanity? Or just the broken bathroom mirror?
If we do, should we take out the sink as well? What color paint would we put up? New flooring? Yes, all that over a mirror.
So, one day, while we were shopping at Menards, we passed the “DIY mirror” display. Lightbulb! We would fix it ourselves. And, the total cost of this project was $29.86 and took approximately 1 hour to complete.
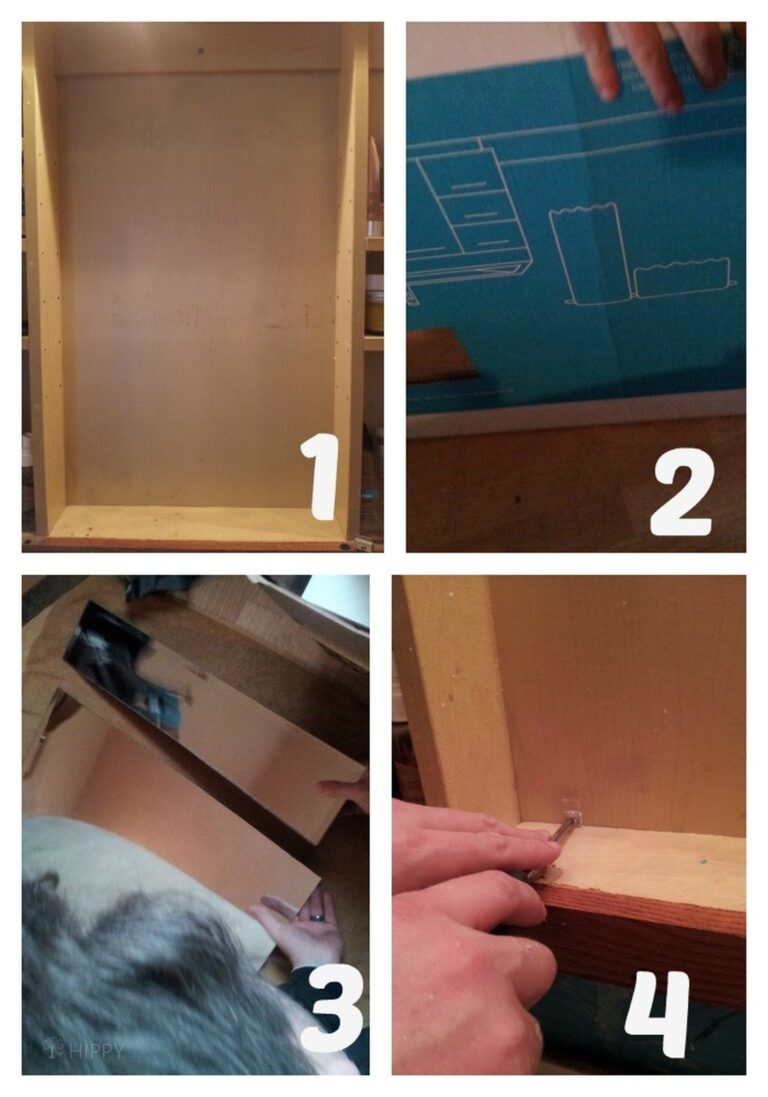
First, you want to clean off the sides and bottom of where the old mirror was. I used just basic soap and water for this. It was amazing how dirty some of it was, really.
Then, carefully remove the mirror from the box and measure to fit. Like my grandfather always said, “Measure twice, cut once”.
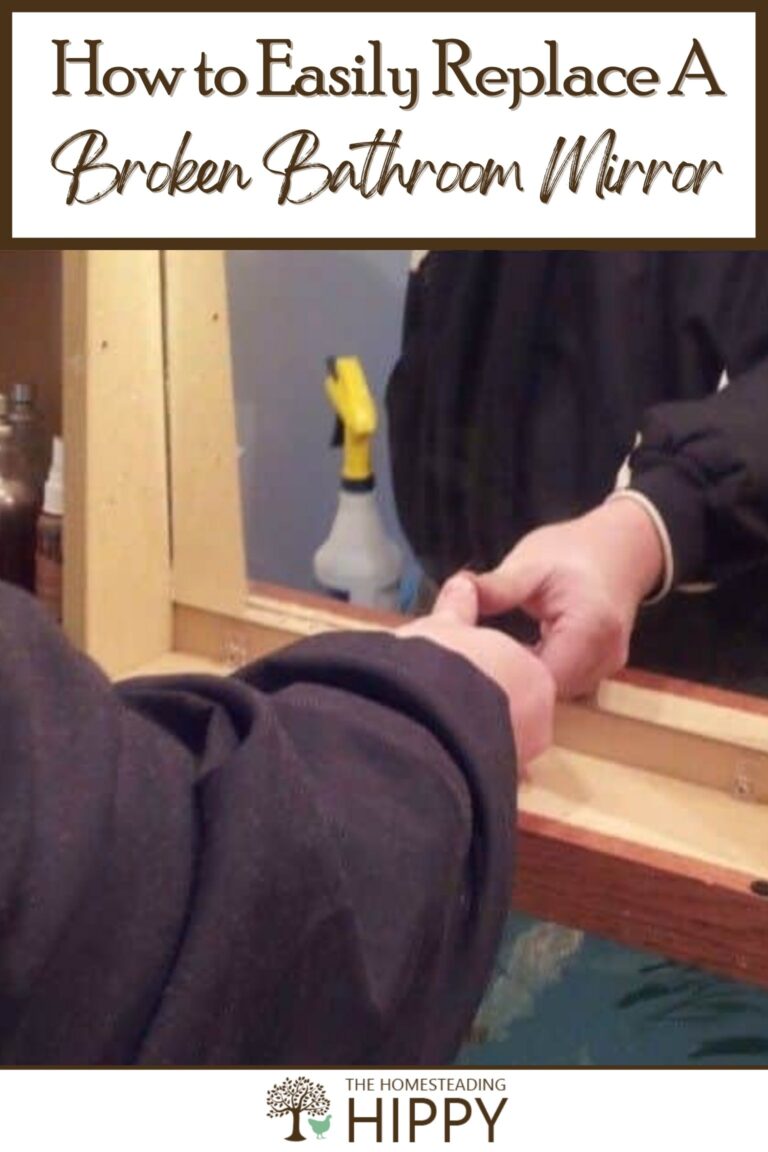
The mirror should come with holders to put it into place. Carefully screw those in, but keep them loose so you can manipulate them.
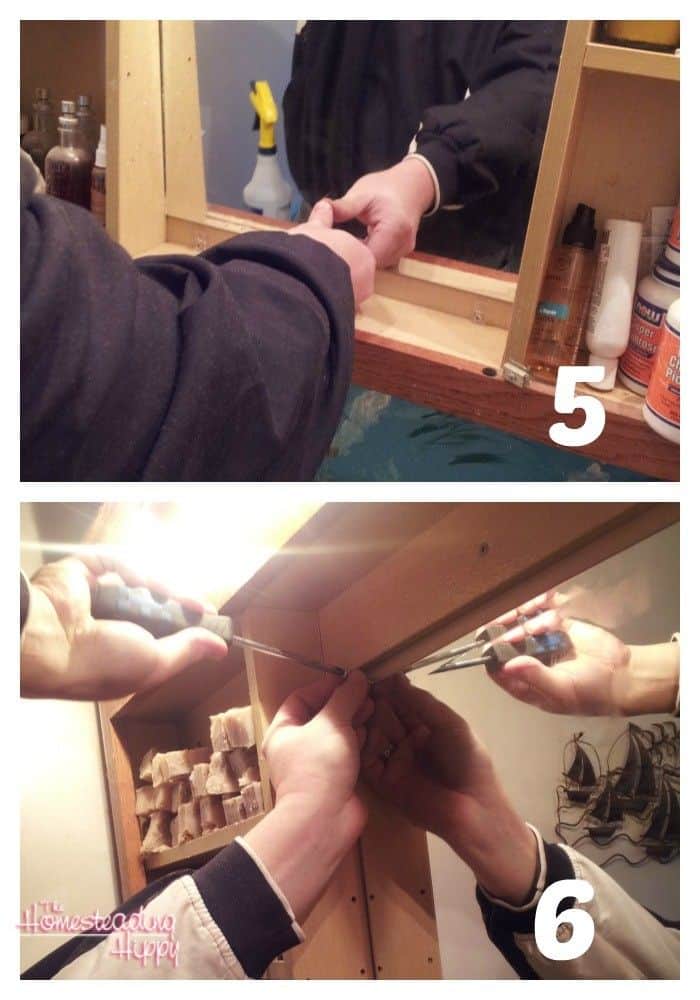
Place your mirror into the holders and once in place, screw them down tight.
Viola! A new mirror for under $30!
Removing a Flat Wall-mount Mirror
Custom installations and medicine cabinet mirrors always require a specialized approach for repair or replacement.
But most homes have bathroom mirrors that are thin, flat and direct mounted to the wall, typically by construction adhesive and sometimes with screwed-in escutcheons.
When these mirrors start to degrade by showing blemishes on their silver backing or get broken, you’ll need to remove them from the wall and replace them. Regrettably, that is much easier said than done!
These mirrors have a large surface area and are thin, so they are invariably highly vulnerable to cracking and shattering. When that happens, shards will go everywhere.
This is a major safety hazard and will also be a huge pain to clean up. I can guarantee you this is what’s going to happen if you just try to pry or tear the mirror off the wall willy-nilly without knowing what you are doing.
Luckily, we are here to help you with a comprehensive guide that will help you tackle any flat wall mirror installation safely.
Safety First!
Now, you might be pretty handy around the house, but if you don’t have legitimate experience as a construction worker, contractor, renovator or in demolition, you probably have not tackled one of these bathroom monsters before.
I must impress upon you how dangerous this job can be if you approach it in a sloppy or careless manner.
These mirrors are notorious for shattering into long, scythe-like shards that can cut you open and send you to the emergency room in the blink of an eye. Proper preparation, protective equipment and protection for the space around the mirror is essential. After that, it is all about taking your time and gently coaxing the mirror off the wall.
No matter which of the following methods you are using, you’ll want to wear full safety goggles, sturdy work gloves, boots and long sleeves and long pants at the minimum.
For all but the smallest of mirrors having a partner to help you is also recommended.
Now, with the safety brief over let’s get on to the methods.
Heat Gun Method
Generally, most flat bathroom mirrors of this type are affixed directly to the wall with construction adhesive, and sometimes with screws that help hold it in place.
This is standard practice, and modern construction adhesives last so long there is virtually no risk of the mirror coming unstuck unless the adhesive is defective.
However, a thick slather of adhesive makes the mirror all but impossible to remove in one piece, and even trying to chip it off piece by piece can prove to be a nightmare and dangerous.
There is a solution, however, and that is the application of intense heat. Most construction adhesives don’t hold up well under sustained heat, becoming soft and pliable at the minimum.
You can leverage this fact to your advantage by using a heat gun on the mirror. This is a great tactic if you want to salvage the mirror without breaking it.
Follow the steps below:
- Apply packing tape or duct tape to the mirror in a grid from one edge to the other before applying two long strips from corner to corner. This will hold the mirror pieces together in the event that it breaks or falls unexpectedly.
- Cover the area immediately below the mirror with sturdy drop cloths.
- Carefully unscrew and he screws or bolts visible on the surface of the mirror. Pay close attention and make sure the mirror remains fixed to the wall; it might be held on by screws alone!
- Plug in your heat gun and start applying heat to the mirror. Hold the heat gun about a foot away from the surface and keep it moving slowly but steadily in a logical pattern to soften the glue. Most of these mirrors will be glued across the entirety of their back surface, but some will only have a bead of glue at the perimeter.
- After getting the mirror good and hot, have your partner use a putty knife to probe beneath the edges of the mirror. If the adhesive does not feel like it is yielding, keep applying heat.
- Remain alert and cautious in case the adhesive fails suddenly. Keep probing with the putty knife until you can start to chop away at the adhesive near the edges.
- Repeat steps four through six as you slowly pull the mirror away from the wall, working from top to bottom.
If you apply a ton of heat to the mirror and there is no detectable degradation in the adhesive, you’ll have to try another method.
Pry and Wedge Method
Although trying to pry off your mirror with a trim bar, pry bar or other tool sounds like a surefire way to break it, believe it or not it is possible to salvage a mirror intact and uncracked if you are cautious.
You might or might not want to try this method if the heat gun option fails, as the following method is arguably safer and less destructive though more laborious.
Follow the steps below:
- Tape up the mirror for safety as described in Step 1 of the preceding section.
- Don’t forget to put down your heavy drop cloth over your sink and vanity or the surrounding area.
- Remove any screws or bolts that are visible, taking care to secure the mirror in case it comes free.
- Starting in the middle of one side of the mirror, insert a slim trim or pry bar behind the mirror.
- Place a non-marring wooden or plastic shim behind your tool and gently attempt to work the edge of the mirror loose.
- Repeat this process around the perimeter of the mirror, stopping at several inches short of the corner on either side.
- If you make any progress, insert wooden or plastic wedges behind the mirror on the sides you have worked on and tap them until they are snugly in place.
- Repeat Step 7 on all sides of the mirror.
- You should notice the mirror beginning to work loose. Some popping is to be expected.
- As the mirror begins to work loose, insert your pry bar further behind the mirror and repeat the process, replacing the wedges as they come loose.
- Try to work generally from the top down, saving the bottom side for last or until you have a way to secure the mirror with the help of a partner.
- Take care that you do not over stress the mirror. Any deflection or bending of more than half an inch risks cracking or breaking the mirror.
Slow, steady and conservative does the trick with this method. Steadily increasing pressure through the use of wedge-shaped shims will defeat even the most stubborn adhesive most of the time.
Where you’ll go wrong is if you try to exert too much leverage too quickly. Get your broom and dustpan ready!
Wire Saw Method
For the widest mirrors, or ones that are stuck to the wall with truly hardcore adhesive, you’ll need to break out a wire saw. A wire saw is exactly what it says on the label, a thin metal or fabric cord that will cut through material like a saw when it is pulled back and forth.
These tools are thin and flexible enough to sneak behind even the most snuggly mounted mirror and then nibble through the adhesive securing them to the wall slowly but surely with a ton of elbow grease applied.
The following steps will tell you how:
- Tape up the mirror as described in the first set of procedures.
- Place your drop cloth over your sink and the surrounding area.
- Remove any visible screws or bolts holding the mirror in place. Again, be ready to fully support it in case it comes loose, particularly in the case of wide mirrors.
- Starting at an upper corner, snake the wire saw behind the mirror until you meet resistance.
- Grasp the handles of the saw and pull it back and forth, taking care to stay as close to the wall as possible. If you pull toward you, you run the risk of breaking the mirror.
- Work back and forth with the saw to slowly but surely cut through the adhesive holding the mirror to the wall. Make sure you have a partner handy to steady the mirror.
- Take breaks when you need to. This is a lengthy and tiring process. You don’t need to remove the saw, just let it dangle until you are ready to pick it back up and begin again.
- Once you cross the halfway point, you’ll need to brace the top of the mirror to keep it from leaning away from the wall and potentially cracking or snapping.
- When you reach the final few inches of adhesive near the bottom of the mirror you might try to carefully, gently lean the mirror out to break the last bit holding it to the wall. If that doesn’t work, keep cutting or use a putty knife.
It sounds simple, and it is, but it isn’t easy. This method takes time and a fair bit of effort, so make sure you are logistically set up with help when required. You might convince your partner to take turns with you on the sawing.
Replace your Broken Mirror Today
And there you have it, several time-tested ways for replacing a broken mirror in your bathroom, no matter if it is a fixture, custom installation or a thin, wall mounted mirror.
So long as you pay attention to safety procedures and take your time, it is usually well within the reach of the average homeowner to replace a mirror with a minimum of fuss.

Heather’s homesteading journey started in 2006, with baby steps: first, she got a few raised beds, some chickens, and rabbits. Over the years, she amassed a wealth of homesteading knowledge, knowledge that you can find in the articles of this blog.
Learn more about Heather and the rest of the writers on this page.