
I love sourdough. Pure and simple.
It helps break down the gluten in grain to make it easier to digest, and it has a wonderful flavor that can’t be beat.
Did you think that sourdough was only for English muffins or bread? Well, we love to make it into sourdough pizza crust and it’s super-duper easy!
Not only is the dough easier to digest, but sourdough pizza crust turns out much crisper than my old regular yeast pizza dough for some reason. Maybe it’s just me?
What is Sourdough Pizza Crust?
It sounds like some fancy gastronomical feat – but really, sourdough pizza crust isn’t all that advanced! In fact, it’s quite easy to make.
Instead of using yeast to leaven the crust (make it rise), you’ll be using sourdough starter or sourdough discard. This will yield a crust that is chewy, crispy, and airy – making it easy for you to make your own pizza at home.
The starter is made from a combination of flour and naturally occurring lactobacilli – you don’t need to add these. They’re already there! The bacteria produce lactic acid, which ferments the dough and leads to its characteristic sour taste.
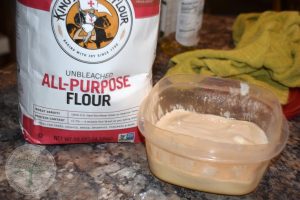
The best type of flour to use for such a crust is bread flour, although all-purpose flour can certainly be used, too. Bread flour has more protein, which will make it easier for you to stretch your crust.
Is Sourdough Pizza Better?
In my opinion, sourdough pizza definitely tastes better – but it also offers a variety of health benefits.
For one, since it doesn’t rely on commercial yeast, it has all kinds of enzymes that make it easier for your body to digest proteins, sugars, and other ingredients. Sourdough in general has been linked to a healthy gut!
Not only that, but the long fermentation process involved in sourdough releases vital nutrients like zinc, iron, magnesium, folic acid, antioxidants, and B vitamins.
Sourdough, including sourdough pizza crust, is low on the glycemic index – this means that sourdough converts to blood glucose more quickly. It’s not lower in calories but your body will process it a lot easier than traditional pizza crust made with yeast.
Sourdough Starter Tips
To make the sourdough pizza crust, your starter should have been fed in the last 12-24 hours.
Don’t have your starter yet? Go here to get yours going! Your starter has two stages, one is well fed, but not active. You can also buy a premade starter that will be ready to use as soonas it arrives at your door.
The other is well fed and active. You’ll see all sorts of bubbles all over in the active stage.
For this recipe, it does NOT need to be in the active stage, just fed sometime in the last 12 hours or so.
There are a few dynamics to keep in mind. The less often you use your starter and the more liquid that is sitting on top, the more sour it will be. A sourdough starter that hasn’t been fed for weeks will have a slow-rising crust and taste extremely tangy!
If you use this kind of starter for your pizza crust, it will likely be quite tangy and it will rise However, a sourdough starter that is fed regularly will rise more quickly. If you feed your sourdough starter daily, you can shape the crust in the morning and have pizza in time for lunch.
Sourdough Pizza Crust Recipe
Ingredients
- 1 cup of starter
- ½ cup of water
- 1 cup of flour
- 1 Tbsp celtic salt
- ¼ cup olive oil
- ¼ cup honey optional
- Basil, garlic, oregano, salt optional – to taste
- Pizza toppings of your choosing
Instructions
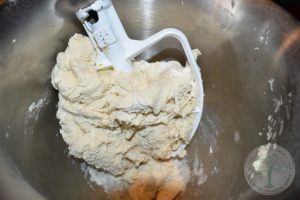
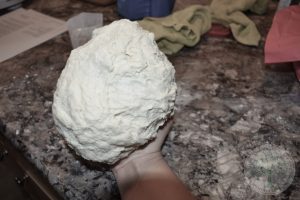
- To get the dough going, take 1 cup of the starter and mix with 1/2 cup water.
- Add up to 1 cup of flour, in 1/4 cup increments. You want your dough to be a bit on the wet and sticky side at this point.
- Mix well, cover and allow to sour for 3-12 hours. I usually only go at 3, because I am not organized enough to think ahead 12 hours, and my family is not as fond of the sour taste as I am.You can also allow the dough to rise once at room temperature, then deflate it and cover it up to stash in the refrigerator overnight. The next day, you can remove it and stretch it into its pan. Let it warm up until it’s a little puffy, then proceed.
- After it has soured to your liking, mix in 1 Tablespoon Celtic salt, and 1/4 cup olive oil and mix well. You might have to get your hands in there to get it all mixed in. You can add 1/4 cup honey at this point as well, if you like your crust to be a bit “sweeter”.Sometimes I do this, just to make the kiddos happy. You can also add tasty pizza crust additions like basil, oregano, salt, or garlic. Whatever you want to get the crust of your dreams!
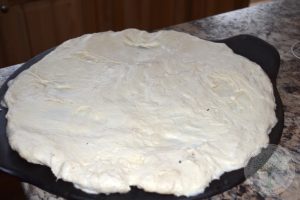
- Roll out your crust on an oiled pizza pan, pizza stone, or baking sheet and “dock” with a fork. I prefer to use a baking stone to make my pizza, as it turns the pizza a deep golden brown color with a nice, crispy crust.
- If your dough is a bit sticky, you may want to grease your pan or put some flour down to prevent it from sticking to the stone when you bake it. This means making little holes all over the crust to allow air to flow through.
- Bake in a preheated 450° oven for 10 minutes.
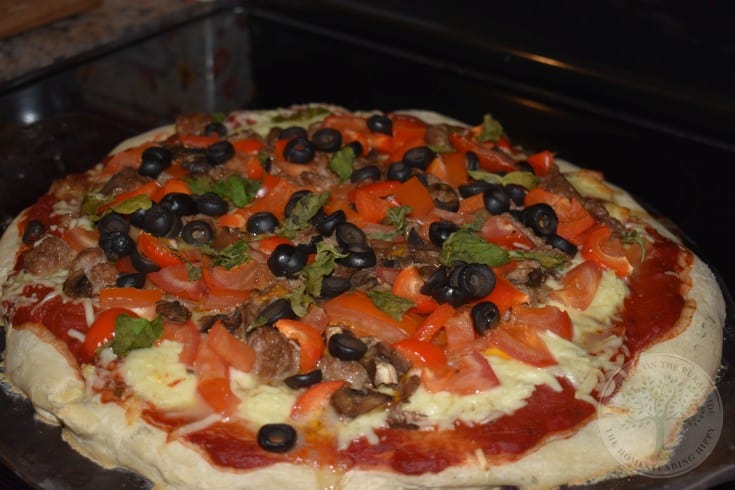
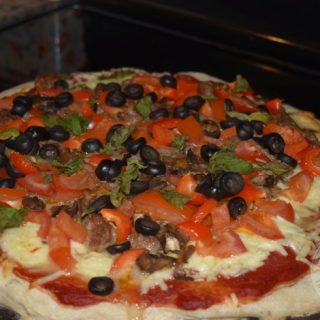
- Remove the crust and add your toppings.
- Return to the oven for an additional 15-20 minutes until the cheese is melted and bubbly. Allow to cool for 5 minutes before slicing. This lets the cheese, sauce and toppings “settle” and you won’t have as much of an issue losing them when you serve.
- Another option? Instead of baking the crust first, you can leave the cheese off for the first twenty minutes of total cook time. Add it for just the last ten minutes, which will let some of the liquid from the sauce to evaporate. Melted cheese has a tendency to trap moisture and it can make your dough soggier than it needs to be.
Viola! Sourdough pizza!
The most common reason for sourdough pizza crust getting tough is that it contains too much flour. It can have too little hydration, too. If there’s too much flour compared to water, the dough will be tough and hard to work with – so the simple solution is to add more water!
On the flip side, if your sourdough pizza crust is too watery or slippery, it could need to have more flour added.
Hydration isn’t’ the only culprit behind a tough crust. It can also become tough if you work it too much. There is a delicate balance here – if you don’t work your crust enough, it won’t be light and airy, instead lying flat on the baking sheet. If you work it too much (more than 15 to 20 minutes of kneading), it’s going to be tough.
Separate the dough in half, pulling the sides of each piece of dough around the sides and then toward the middle to form a ball. Push the dough back and forth on a lightly floured surface, using a little bit of pressure from your hands to stick to the surface.
This friction will help form a ball. Use your hands to pull and pat the dough into the round shape of your choosing (don’t use a rolling pin, as this can remove the air bubbles).
If you like your pizza to have a deep golden brown, crispy crust, bake it on a baking stone. Preheat the stone for up to an hour in the oven before baking your pizza. While you wait, you can shape and then top your pizza on parchment paper or on a pizza peel. Once you’re ready to bake, all you need to do is slide the pizza into the oven!
If you’re baking this pizza in the summer, you may need to make some adjustments for humidity and higher temperatures. Reduce the amount of water you add to your sourdough starter by about 25 grams. If the dough is too stiff, you can add more water until you get there.
You can easily store wrapped pizza in the refrigerator for up to five days. If you just have the crust to store, that can be saved, too! It can be frozen for use later on but it can also be stashed in the fridge for several days.
If you freeze the leftover crust, just know that the amount of time spent in the freezer will affect the overall “porosity” of the dough. Dough that has been frozen for a longer period of time will be less bubbly and bake into a thinner, crispier crust.
Yes! The key to making a same day sourdough pizza crust that’s ready for baking in just a few hours is to use a sourdough starter that has been fed frequently. It will allow the dough to rise faster (and will also be less sour-tasting).
Pizza crust isn’t the only thing you can make with sourdough starter or discard! Consider making sourdough pretzels, biscuits – even brownies! There are so many recipes out there to try, so don’t limit yourself to just one.


Heather’s homesteading journey started in 2006, with baby steps: first, she got a few raised beds, some chickens, and rabbits. Over the years, she amassed a wealth of homesteading knowledge, knowledge that you can find in the articles of this blog.
Learn more about Heather and the rest of the writers on this page.
Okay, I’ve been wanting to try to make sourdough for a while now and this recipe has me properly motivated now ~ gotta just do it!
oh sweet mercy I miss sourdough! I need to try getting some gluten free starter going. my one year anniversary of reading gluten free is just around the corner, too. hoping I can handle wheat in this form after giving my body a break. your pizza looks sooooooooo good!
Oh my goodness, I love you for posting this. I’m getting off the computer right now and going to go make some!
Just made this tonight. It was delicious! I used my cast iron pizza pan and the crust turned out perfectly crispy. Thank you for sharing!