
If you’ve got chickens, you’ve got egg shells. And if you’re anything like me, you eat a lot of eggs, so you end up with lots of egg shells.
We eat a lot of fresh eggs for their excellent nutrition and protein. And after awhile, the egg shells can start to pile up.
But don’t let those egg shells go to waste! Egg shells contain plenty of nutrients and other good stuff that will benefit your homestead garden.
What’s Good about Eggshells?
Egg shells contain calcium, in the form of calcium carbonate, and protein. But they also contain other minerals, such as magnesium, fluoride, selenium, and strontium.
These minerals offer a host of benefits for people, such as stronger bones and stronger teeth. Not surprising, these minerals are also great for soil and plant health and will be beneficial in your garden. Here are thirteen ways you can use egg shells right in your garden.
#1. Seed Starters
I never liked using plastic containers for seed starters. Not only are they expensive and difficult to remove seedlings from, they also are bad for the environment and break easily. Peat pots and biodegradable pots work well, but they are also rather pricey.
So I’m always looking for better, less expensive, more environmentally friendly ways to start seeds. Egg shells just might be the answer. For a creative and inexpensive seed starter, use your egg shells to start seeds for your garden.
After you’ve made your breakfast, save the larger half of your egg shells, and let them dry out a bit. For best and safest results, you may want to sterilize your shells before you use them, as discussed below.
After your shells are dry, take a small nail and pierce the bottom side of the egg shell to create a hole for drainage. This may take a little practice so you don’t crack the shells. Even if the shells are cracked, they may still hold enough of their shape to work as seed starters.
Set the shells with their holes up in an empty egg carton. Fill each shell ¾ of the way with some kind of compost, peat moss, or your favorite seed starter.
Plant your seeds in your egg shells just like you would plant them in a peat pellet or small pot, following the seed packets directions. Water the seeds as needed, and soon your tiny seedlings will appear.
The egg shell will provide fertilizer and nutrients to your seedlings, while the shell acts as a tiny, biodegradable pot for them to grow in. When it comes time to transplant your seedlings (after you have hardened them off, of course), gently crack the egg and plant it.
The shell will continue to biodegrade and the plant will be able to push its roots through the cracks in the shell.
No more plastic pots, expensive peat pellets, or seed trays. Just a few egg cartons and your used egg shells will help you get your seeds started for the garden.
Tip: For a cute table setting, plant tiny flowers such as Johnny Jump Ups in your egg shells. When the plants begin to flower, you can use them as a cute table centerpiece until they are ready for your garden or flowerbed.
#2. In the Compost Bin
A great way to maximize the nutrients in those egg shells is to compost them.
I remember my grandmother carrying her coffee grounds, egg shells, and vegetable scraps to the edge of the yard to her compost pile every afternoon. It seems Grandma knew best, because eggs make great addition to your compost pile.
Toss those egg shells right into your compost pile with your coffee grounds, unused vegetables, chicken poo, and anything else you normally put in your bin.
According to Michigan State University Extension, any salmonella pathogens will be killed if your compost reaches a temperature of 140 to 160 degrees Fahrenheit.
As long as your compost is mixed with one part greens (kitchen scraps, grass cuttings, etc.,) and two to three parts browns (paper, dried leaves, or straw) and turned and watered correctly, it will easily reach this temperature. Then there will be no need to be concerned about infecting your garden or soil with salmonella.
Tip: It is not a concern if the shells do not completely break down in the compost pile. You will probably see left over pieces here and there throughout your compost.
However, if the aesthetics of left-over bits of shell is troublesome to you, you can dry the shells out ahead of time and crush them before mixing them into your compost.
The nutrients are still viable and the shells will be invisible. Otherwise, bits of shells will work just fine when mixed with your garden soil and may even be beneficial for repelling pests.
#3. In the Worm Bin
Maybe gardeners prefer vermiculture, or worm composting, over regular compost piles. If this is true for you, rest assured you can still use egg shells in your worm compost.
Instead of the heat of the compost pile processing the egg shells, this time, the worms will eat the egg shells and process the nutrients into worm castings, which can then be harmlessly mixed into your garden.
Because worms do not have teeth, it would be helpful for your worm composting to dry out the shells first, then pulverize them into a fine grit. Simply sprinkle the grit on top of the worms’ bedding.
The worms will eat the crushed shells, which will provide grit which aids in their digestion. The nutrients are good for the worms, and also create highly nutritious worm castings and worm bedding.
Tip: After the worms have broken down the shells, put the worms castings into potted plants, or directly into a hole where you will transplant seedlings.
#4. As a Calcium Supplement for Tomatoes
Tomatoes can suffer from a condition called blossom end rot. This is a spot on the bottom of the tomato, usually where the blossom would be found. It starts off as a small, watery looking spot, and eventually grows larger and turns dark.
Blossom end rot can be superficial, with just a few small blemishes, or it can overtake up to a third of the fruit, making for a very unappetizing veggie. It doesn’t just affect tomatoes, it can also affect plants such as peppers, melons, cucumbers, and squash.
Blossom end rot can happen to the most experienced gardener, so do not despair if it happens to you.
Blossom end rot is a symptom of uneven water distribution in the plant, possibly due to cold soil, too much salt in the soil, or uneven moisture fluctuations in the soil. This puts stress on the plant, and the plant is unable to adequately move calcium through the plant where it is needed.
One means of preventing blossom end rot is to make sure there is plenty of calcium in the soil. There are several ways to go about this. You can till egg shells right into your soil, or even sprinkle crushed egg shell into the hole where you will be transplanting your plants.
You can also sprinkle crushed egg shells around the base of the plant, and allow rain to soak the nutrients into the ground and down to the plant’s roots. One caveat; some experts say that the type of calcium in eggshells, known as calcium carbonate, is not directly bio-available to plants.
Instead, it is recommended to compost or vermicompost your egg shells to make the calcium more usable by the plant. Regardless, the extra calcium in the soil should help in the prevention of blossom end rot. To further prevent blossom end right, try to keel the soil moisture consistent and avoid placing extra stress on the plant.
Tip: If you tomato only has a small amount of blossom end rot, it is still edible if you cut away the affected portion of the tomato.
#5. Egg Shell Tea
Although egg shells alone will not provide enough nutrition to fertilize your plants, they do provide some essential minerals such as calcium, potassium, and magnesium which help plants grow and may even be necessary for the cellular structure of the plant.
You can provide this to your plants through an application of egg shell tea. Egg shell tea is simple to make. Just boil a gallon of water, and then add ten to twenty clean, dry egg shells and allow it to sit overnight or even for a few days.
After you ‘tea’ is finished steeping, strain out the egg shells, and pour the cooled water around the base of the plant. This will help the plant absorb the nutrients in the water.
Tip: You can use composted egg shells, compost, or worm castings to make compost tea to fertilize your plants as well.
#6. pH Balance
The calcium found in egg shells can moderate the pH balance of soil that is too acidic. Simply crush or pulverize dried egg shells and add it to your plants’ soil to balance the acidity.

Keep in mind however, that it would take a large number of egg shells to balance the pH of an entire garden.
Tip: A soil test kit or a soil meter can help you figure out the pH of your dirt. Some plants prefer a more acid soil, while other plants prefer a more alkaline soil. Do your research to know which is better for your garden and your plants.
#7. Snail and Slug Repellent
Diatomaceous earth is often used as a physical barrier to keep bugs away from your precious plants. It’s minute sharp pieces of mineral injure small pests and create a physical barrier that prevents them from attacking plants.
However, if snails and slugs are your problem, small pieces of crushed up egg shell can deliver a similar punch. Crush, but don’t pulverize, dried egg shells and sprinkle around your plants to keep snails and slugs at bay.
Tip: For even better results, use both diatomaceous earth and egg shells together in your garden.
#8. Beetle Repellent
If beetles are a problem in your garden, try this all natural repellent. Pulverize dried egg shells into a fine powder, and sprinkle on your affected plants. Flying insects will naturally want to avoid this powder and will avoid those plants.
Tip: You may want to sterilize your egg shells before putting then on your vegetables.
#9. Mulch
Create a striking mulch by crushing up multi-colored egg shells and mulching around your plants with them. Even a fine layer of egg shells will help control moisture and weed growth while adding calcium and other minerals to the soil. The colored shells will provide a striking contrast to your beautiful plants.
Tip: Chickens that lay blue or green eggs will make your ‘mulch’ look even more interesting!
#10. Deer Deterrent
Old wives tales claim that deer do not like the smell of eggs. Toss some egg shells around the perimeter of your garden to keep those deer from dining on your vegetables.
Be forewarned, other animals are drawn to the smell of eggs, so you might be trading one nuisance for another. It’s good to know which pests are munching on your veggies before you use egg shells for this purpose.
Tip: It is the smell of albumen that deer do not like. You can use the ‘insides’ of eggs to deter them, as well.
#11. Seeds Eggs
You’ll need to use eggshells that are mostly intact for this fun project. This is a great way to use up those eggs that are past their prime and no longer edible or appetizing.
Cut a small hole in the top of an egg, and dump out the yolk and whites. Rinse and allow your shells to dry thoroughly. Carefully fill the eggshell with some compost, peat moss, and wildflowers seeds of your choice. For best results, choose a species that is native to your area.
Have a blast tossing your eggs anywhere you want wildflowers to grow. Throw the eggs hard enough to break open so the seeds and compost can spill out on the ground. Always make sure you have permission to throw them before starting this project.
Tip: You can tell if an egg is no longer good by putting it in a bowl of cool water. If the egg lays on the bottom, it’s good. If it stands up but still touches the bottom, use it right away. If the egg floats, it’s past it’s usable date.
This method works because every egg has a small air cell inside of it. As the egg ages, it dries out, and the air cell gets larger. One the air cell is large enough to make the egg float, it is no longer edible.
#12. Sidewalk Chalk
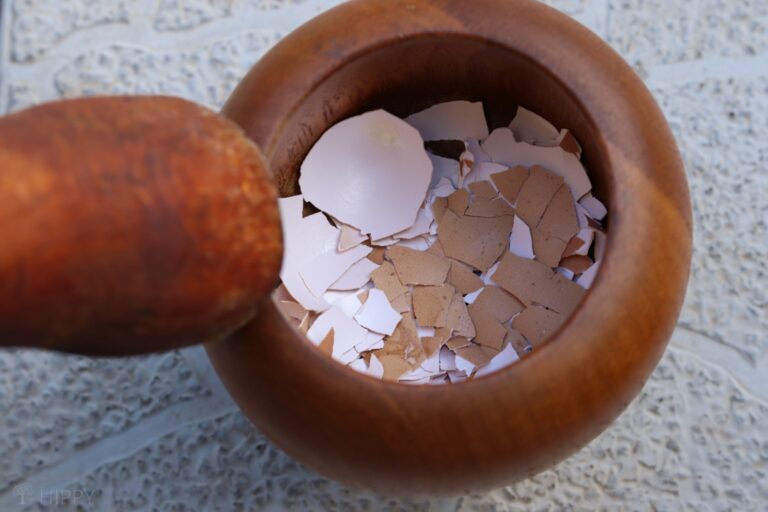
For a fun way to decorate your garden walks, make your own eggshell sidewalk chalk. Sterilize, clean, and dry ten egg shells, or more. Pulverize them into a powder using a coffee grinder, Vitamix, or even a mortar and pestle.
Mix your powder in a bowl with two teaspoons of flour and enough water to make a thick paste. Don’t make your paste too wet or it will take a long time to dry. Add in a few drops of your favorite color of food dye and mix well.
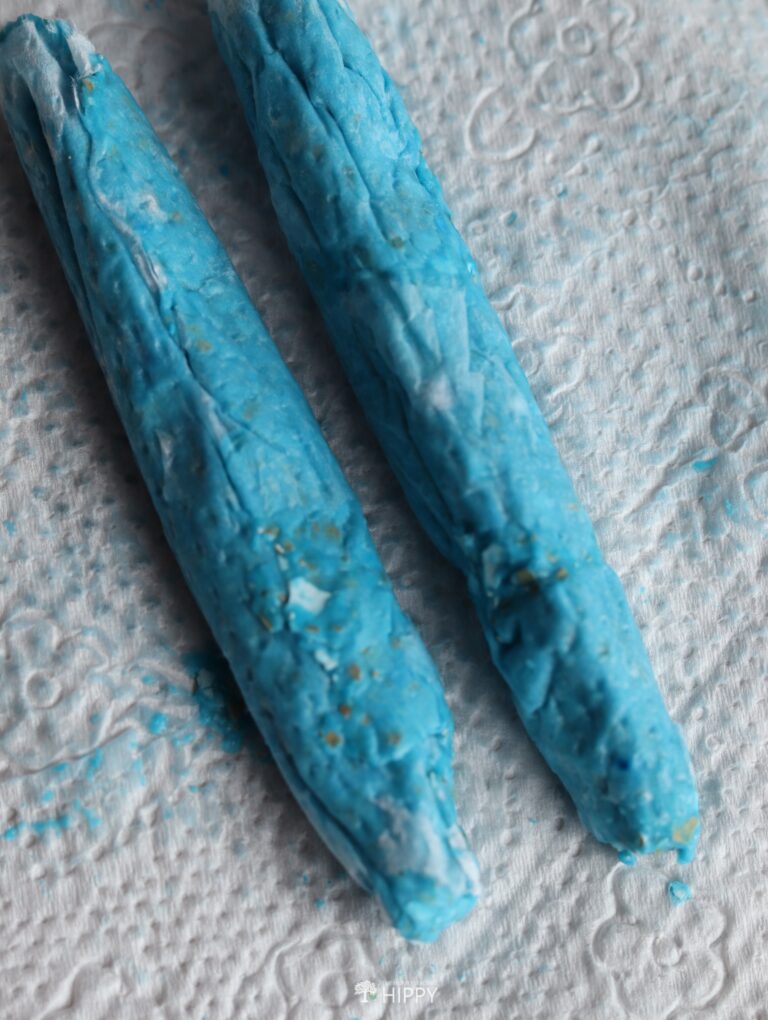
Push your paste into a silicon mold or ice cube tray, paper cupcake liners, or even rolled up into a tube shape in a paper towel. Allow your egg shell paste to dry for several days to a week. When your chalk is dry, pop it out of the mold and get decorating.
Tip: High humidity will make your sidewalk chalk take longer to dry.
#13. Egg Shell Scrub
You can get rid of garden grime by adding some egg shell powder to your favorite hand soap. Sterilize, dry, and pulverize your egg shells into a gritty powder. Mix a few tablespoons into your hand soap to help get garden dirt off your hands. You’ll have clean, smooth, exfoliated skin.
To clean tools and buckets, add baking soda and dishwashing soap to your egg shell powder for strong cleaning power. Make sure to rinse thoroughly and dry your tools so they do not rust.
Tip: Leave your powder a little extra gritty (less fine) for extra scrubbing power.
Other Uses for Egg Shells
- If you still have some leftover egg shells, consider using them as a calcium supplement for your chickens. Just sterilize, pulverize, and offer it to them alongside of their regular feed.
- For a fun art project, fill empty egg shells with water based paint and throw them at a canvas for a fun, modern painting.
- Use egg shell halves as molds to make your own tea lights.
Preparing Your Egg Shells for the Garden
If you are going to be using egg shells in the garden, you will want to consider how to prepare them for use. Remember that any chicken can carry salmonella, and the pathogen can be transferred to their eggs, especially if there is a small crack in the egg. You can avoid putting salmonella pathogens into your garden by sterilizing your egg shells before you use them.
There are several ways to prepare your egg shells. Some folks feel confident simply removing the inner membrane of the shell and thoroughly rinsing the shells. After the shells are rinsed and air dried, these folks feel confident that the shells are safe enough to use.
You’ll have to decide if you are comfortable with this method or if you would like to go one step further to protect yourself and your family from salmonella or other germs by sterilizing the shells.
If rinsing well is not enough germ protection for your sensibility, you can fully sterilize your shells in one of two ways. First, make sure the shells are well-rinsed so there is no egg white or yolk left inside.
You can sterilize the shells by placing them in a pot, covering them with water, and bringing them to a full boil for five minutes. Drain the eggs and set them on a cookie sheet to dry completely.
You can also sterilize your egg shells by baking them in the oven. Preheat your oven to 250 degrees Fahrenheit. Place your shells on a cookie sheet and bake them for ten minutes until they are dry. Do not bake your shells for too long or they will begin to turn brown. Allow your shells to cool completely before use.
Final Thoughts
If you are like me, and have an abundance of egg shells on your homestead, you may want to consider some of these ideas to feed your garden with your extra shells. Whether you want to compost, vermicompost, or simply plant those extra shells right into the ground, there are plenty of ways you can use up all those shells.

Amanda is a homesteader and a Jesus-loving, mother of 6 toddlers. She’s raising lots of fancy chickens and goats on her small homestead (among other things). Find out more about the team here.
Feed the outer shell membrane to your mating pairs of caged birds (zebra finches, parakeets, etc.) to encourage egg production. Years ago when I began raising Zebra Finches my first mating pair – “Flip and Flop” – weren’t producing eggs. Some book research (this was before Google) yielded a tip suggesting I gently pull away the “outer shell membrane” (the membrane still attached to the shell) from carefully opened fresh chicken eggs and provide it for the finches to feed on. The birds would snatch it right from my fingers and hungrily gobble it down. Though I cannot say for sure it was the membrane that jumpstarted egg-production, within a few days we were rewarded with the first clutch of Zebra Finch eggs. As long as I was raising ZFs (several years) I fed them the outer membrane from our breakfast eggs. Also, crushed eggshell sprinkled on the cage bottom provides caged birds with additional dietary minerals.