
You can easily make your own diy aromatherapy candles for aromatherapy, or just emergencies!
We usually order a full cow every 12-15 months, and when we do, we order “everything but the moo”. If I could figure out how to fix “moo”, I would get that as well.
The butchers are awesome enough to allow us to get all of the fat off the cow, turning into a year’s worth of tallow for frying, cooking, and soap making.
However, there are many other uses for tallow, especially for emergency situations.
During the storm seasons, in the Spring and in the Winter, we are likely to lose power. Not my favorite scenario, but one that I need to be prepared for. What if we lost power and didn’t have batteries in the flashlights, or we had lost them?
I got tired of buying batteries and having them go into remotes or other items, and the flashlights being used outside and left out in the rain by my kids.
I know, I know…but I had to make adjustments to reduce the stress of items being lost. I tried out some candles to see what I could do with them.
By making tallow candles, you are able to use up all the fat of the cow, the beef tallow, like our prairie-dwelling ancestors did.
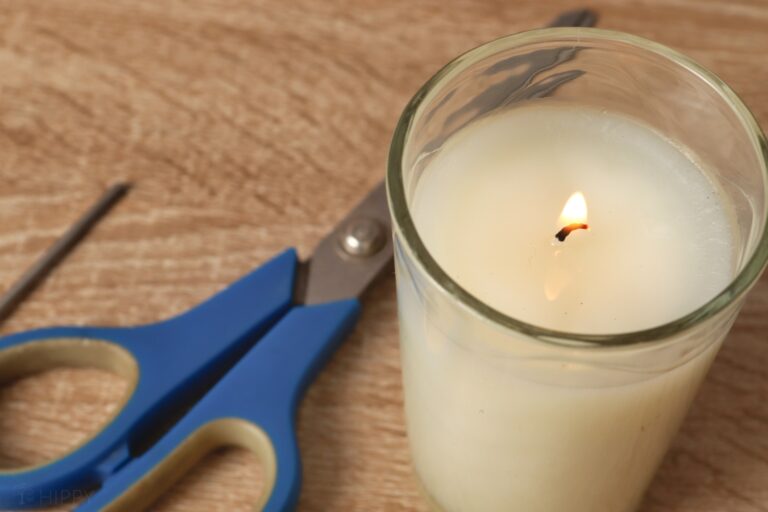
You can also add essential oils to the candles to make aromatherapy candles, or mosquito reducing candles. These particular homemade candles are in 1/2 pint jars. You can use old jelly jars, recycled jars, or canning jars.
The solid fat burns about 8-10 hours for each candle, making them a long-lasting item in our storm preps. They are also rather romantic, as they give off a soft glow.
And let’s not forget the health benefits of homemade tallow container candles. These candles are free from toxins like benzene and toluene – no harmful dyes or chemicals here.
Let’s get started!
Table of Contents
Safety Tips and Precautions for Making Tallow Candles
Be sure to use pre-molded containers for your candles – don’t try to pour melted tallow directly into any open container, as that could be a fire hazard! When melting the tallow in a double boiler, be sure you supervise the tallow at all times.
Make sure you’re wearing oven mitts when handling hot melt pans, and work in a well-ventilated area so that fumes won’t build up too quickly.
Before you start making candles, do some research and read up on the techniques involved…
Making Tallow Candles Step by Step
Ingredients, Tools, and Materials
- Tallow (about ½ lb for every two pints of candle mixture)
- Essential oils (optional for scents)
- String cotton wicks
- Candle holder or jar
- Stainless steel straw or pencil to wrap wick
- Scissors
- Strainer
- Double boiler
Instructions
To begin making your own scented tallow candles, here’s an easy recipe:
Step 1. First, render the fat down. You can use any animal fat with this, from beef tallow to deer tallow. Lard will also work to make these.
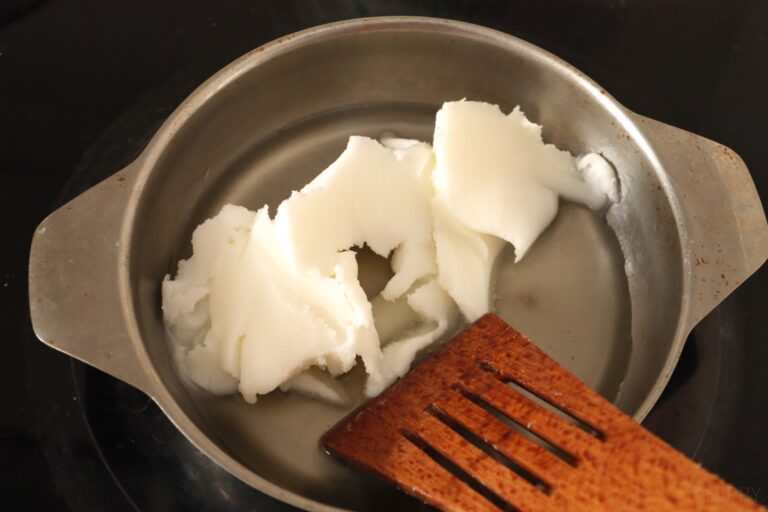
Fully melt the lard until it looks like this:

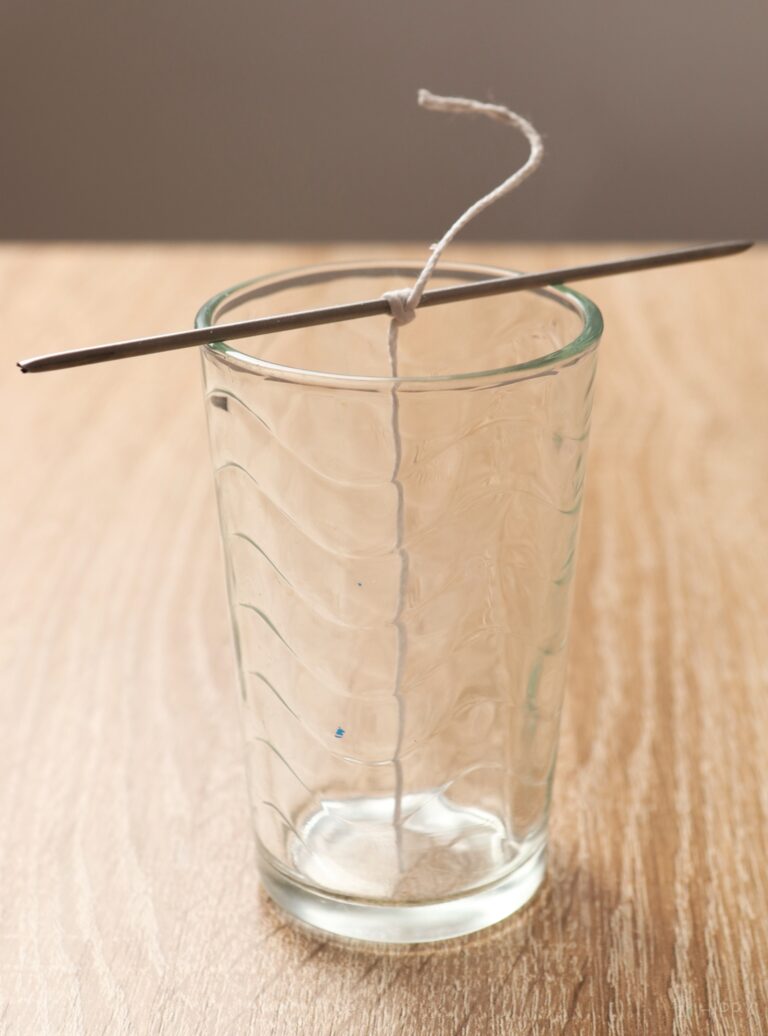
Step 2. Then, take your wicking and cut it about an inch taller than your desired candle holder:
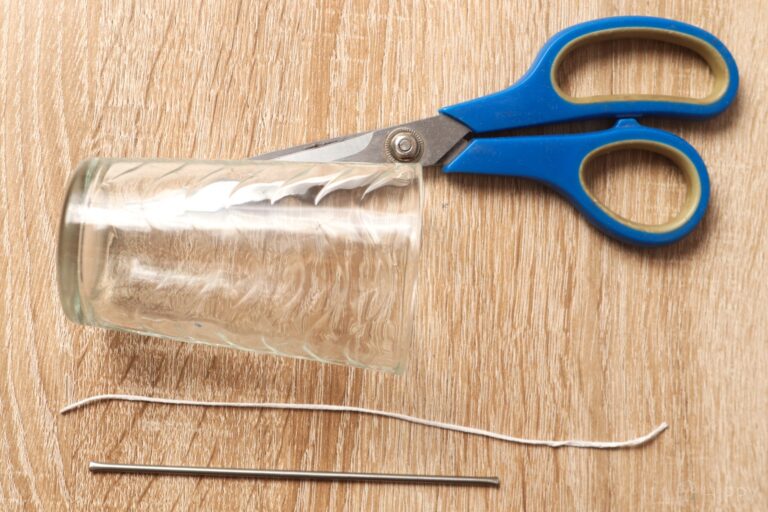
Step 3. Wrap the wicking around a stainless steel straw or a pencil so the wick stays in the middle:
Step 4. Carefully filter the melted tallow to reduce as much sediment as possible:
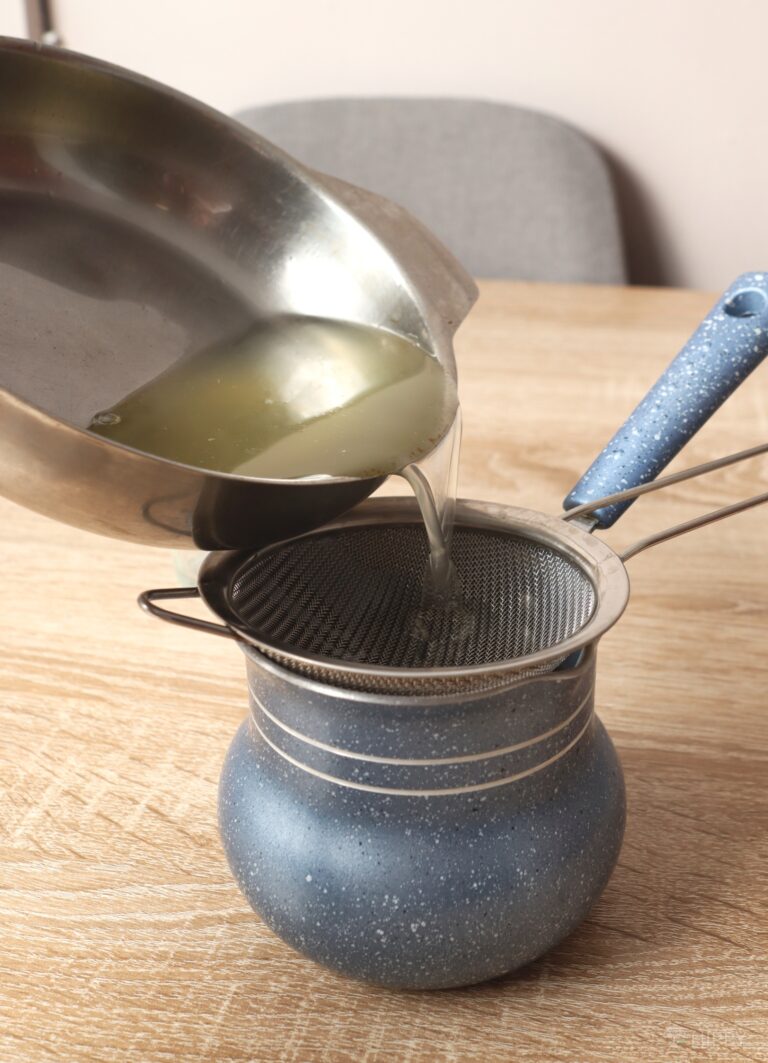
Step 5. Pour the hot oil into the candle holder:
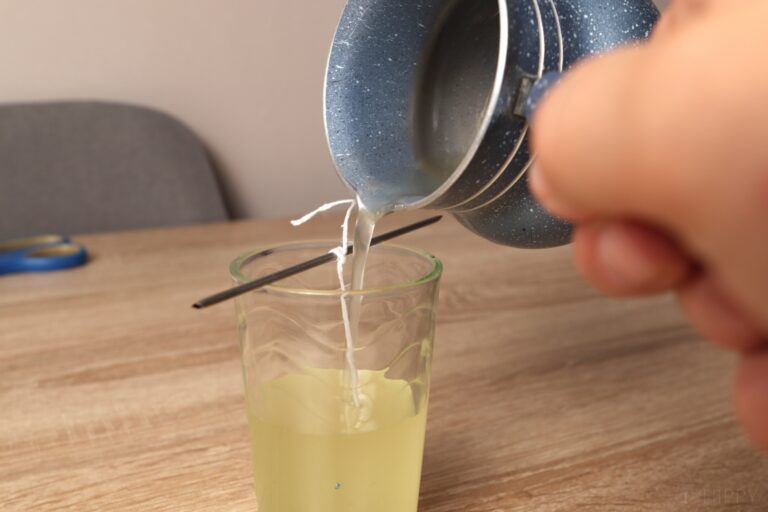
Step 6. As the oil begins to cool, you can add essential oils to it as desired:
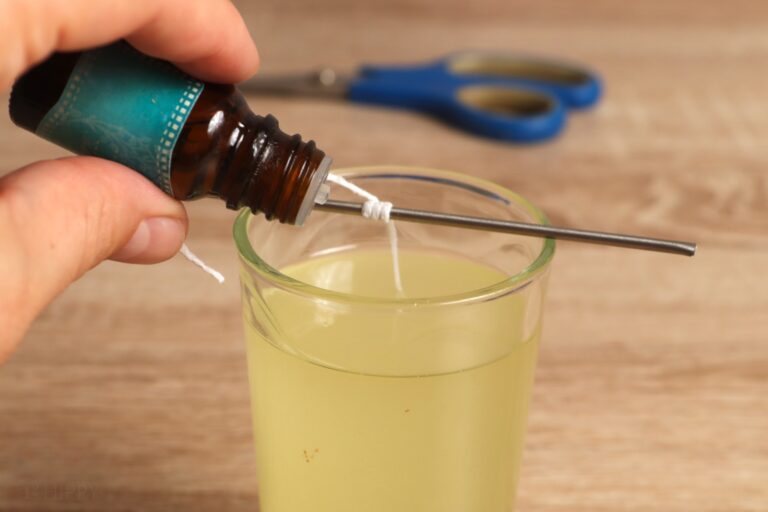
You want to add the essential oils to the cooling tallow oil and stir gently to mix them in. Essential oils are highly volatile and can burn quickly or start a huge fire if they are not stirred in well.
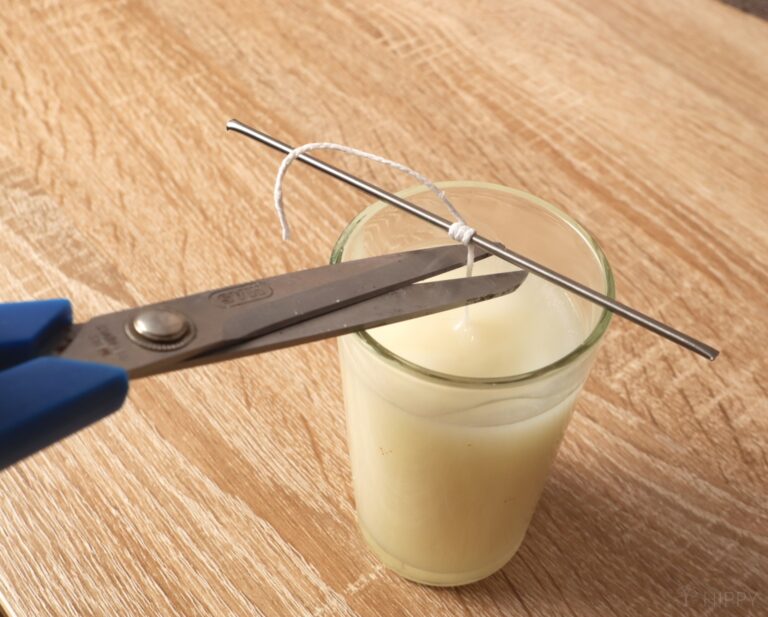
Step 7. Allow the tallow to cool completely, and cut the wick about 1 inch above the tallow.
Scented Tallow Candles with Essential Oils
Bug off candle:
- 25 drops lemon citronella
- 25 drops mandarin orange oils
For a soothing aromatherapy candle
- 25 drops of lavender
- 25 drops of bergamot
For a memory boosting candle
- 25 drops of rosemary
- 25 drops of cedarwood
- 10 drops lemon
How to Make Dipped Candles With Tallow
Here are some easy candle-making tips – whether you want emergency candles to get you through a power outage or just want to make the most of all that leftover tallow with a zero-waste product, this is a fun recipe to try.
1. Choose Your Tallow
When it comes to making dipped candles, you want to use a high-quality tallow that will burn cleanly and evenly. Use tallow from grass-fed cows or other high-quality tallow you get from a local butcher. Again, lard from pigs or even deer fat will work for this, too.
2. Prepare Your Wax Mixture
Now that you have the perfect tallow, it’s time to make your wax mixture. You will need 3 parts tallow to 1 part beeswax (or paraffin if you prefer). Melt the waxes together in a double boiler over low to medium heat until they are fully melted and combined.
If you don’t have a double boiler, simply place your waxes in an oven-safe bowl over another pot of boiling water and stir occasionally until melted.
Once melted, allow the mixture to cool slightly before continuing.
3. Dipping Time!
Once your wax has cooled down enough to handle, it’s time to start dipping!
Place your wicks (preferably cotton) into the wax mixture one at a time, using tongs if necessary, then lift them out slowly while turning them so that they become evenly coated with wax as they come out of the mixture.
Hang them on racks or line them up on trays and allow them to cool completely before removing them from their holders or racks. Once cooled, trim any excess wick off the bottom of each candle and enjoy!
How to Make Tallow Candles With Rush Wicks
Making a tallow candle with rush wicks is surprisingly simple and fun, and the best part is that they smell great! Here’s how to do it.
Gather Supplies
Here’s what you’ll need:
- 2 cups of tallow (this can be rendered beef fat or mutton fat)
- 1 roll of rush wick (you can buy this online or from your local craft store)
- A double boiler
- A glass jar with a lid (this will be used for melting the tallow)
- Scissors
- Essential oils (optional)
- Wick clips (also optional)
- A heat-safe container for pouring your candles into
Instructions
1. Prepare Your Tallow
To do this, we will use a double boiler on low heat. Place the tallow in the top pot of the double boiler and wait until it melts completely. This should take about 10-15 minutes, depending on the amount of tallow you’re using.
Once melted, add any essential oils you’d like and stir until fully incorporated. Remove from heat and set aside to cool for about 30 minutes or until it has reached room temperature.
2. Prepare Your Wicks
Start by cutting your rush wick into pieces that are about four inches long each. You should have enough pieces for as many candles as you plan on making plus a few extras just in case some don’t turn out perfectly!
Take each piece of rush wick and dip them into the melted tallow one by one until all of them are coated evenly. Let them cool for about 5 minutes before moving on.
3. Pour The Candles
Grab your heat-safe container and place it on a flat surface before carefully pouring your cooled melted tallow into it using a small ladle or spoon if needed. Make sure not to overfill the container—you don’t want any spills!
Once filled up halfway, place your prepared rush wick in the center of the wax and press down lightly so that it stays in place while cooling off completely (about six to eight hours).
How to Store Tallow Candles
When stored properly, tallow candles last through multiple lightings before needing to be replaced. Unfortunately, many people are unsure of how best to store them–luckily, it’s actually quite simple.
Tallow candles store nicely on a shelf and offer no danger of melting in the summer heat, nor do they risk getting moldy if kept at room temperature. You can opt to store your tallow candles in the refrigerator or freezer as well.
When you burn your tallow candles, you may notice that tunneling occurs (which is when only a small circle of wax melts around the wick, wasting some wax and making it harder to light the wick later on).
To avoid this, let the wax melt to the edge of the candle’s container each time you burn it.
Have you ever made tallow candles before? Will you try these? Be sure to pin this for later!


Heather’s homesteading journey started in 2006, with baby steps: first, she got a few raised beds, some chickens, and rabbits. Over the years, she amassed a wealth of homesteading knowledge, knowledge that you can find in the articles of this blog.
Learn more about Heather and the rest of the writers on this page.
That is pretty ingenuous. I was wondering if they smelled.
I’ve been rendering the beef fat down all day. I’ll be making candles as Christmas gifts for friends.
I’ve always wondered about this…I wonder if they’d burn longer with something like beeswax added in? Quite nice!
Awesome! I just rendered a bunch of deer tallow last week, and was thinking about trying candle making with it too. 🙂
Thanks so much, what a great idea!
How interesting!
I’ve always been fascinated by candle making. Great pics!
This is so easy! Now I’m curious where to get tallow since we don’t have any cows. 😀 I’d love to make some of these.
try your local butcher…they usually sell it really cheap 🙂
Who knew? Great idea for emergencies
What a great post! I had no idea what “tallow” was, but I’ve made candles from various fats in the past! I love the way you use everything but the moo! lol
I do this also – but add about 10 drops of lemon essential oil in bottom of candle jar prior to pouring in the tallow — I like the smell!
thats a great idea 😉
So resourceful! I love it!
I’m so excited about farmers market season to be open soon because I’ll be able to get tallow so I can make candles, this is so cool!
This is AWESOME! I always have “leftover” tallow when I make my beauty cream… totally making these next time too! I think I’ll try adding some essential oils to enhance the experience 🙂 Thanks for the great tutorial!
You are amazing! You find a way to use everything….Love it! <3
thank you, my friend!
Those are nice.
Tried this last week . Added a few different essential oils and they seem to have held the scent just fine. Haven’t tried burning them yet they have stayed soft about as solid as crisco or lard , shouldn’t they be harder. Did I miss some step ? Thanks
no, that’s about how hard mine are. Crisco type soft. They still work very well, though.
thank you for sharing, can not wait to try myself ….
When the wiick is gone can u reuse the fat again for a new candle?
If you don’t scent the candle, does it smell like beef? I would like scent free if possible.