
**Warning: some of the pictures may be graphic and unsuitable for some viewers, as it shows butchering a chicken from start to finish. Full video tutorial at the end as well**
Whether it’s home grown meat chickens, or that noisy rooster, a good homesteading skill to have is how to butcher your own chicken.
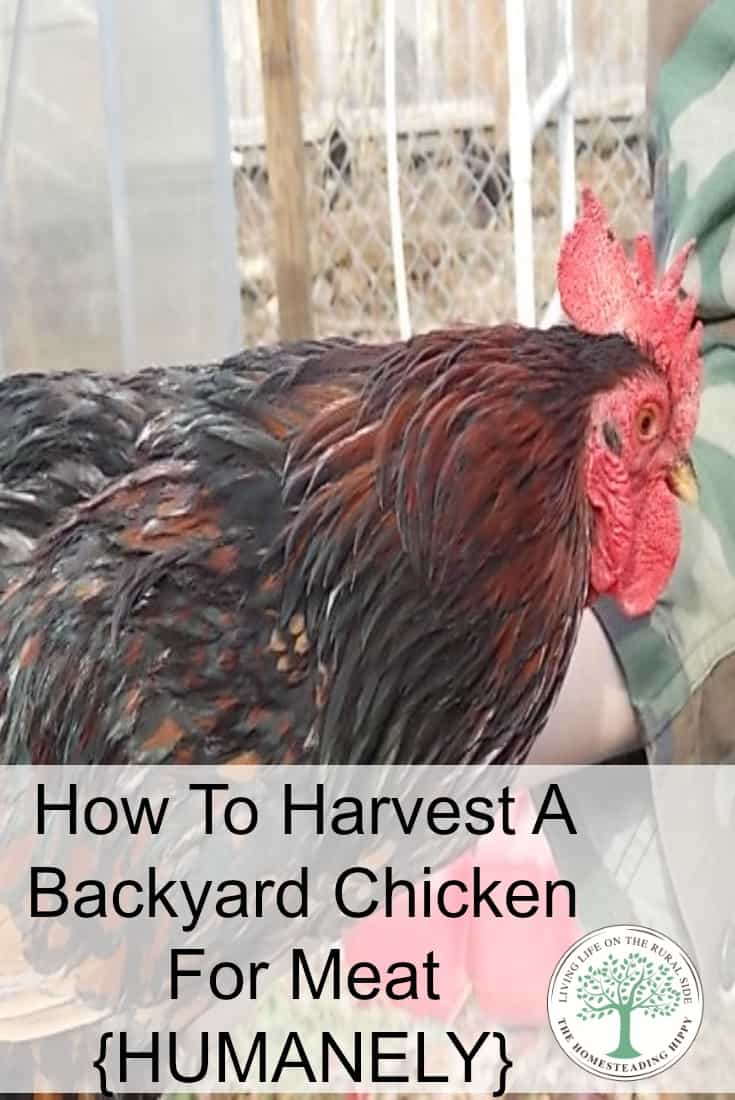
We had to learn how to butcher a chicken for ourselves, and that was a scary thing the first time. While roosters are beautiful and can be useful, we aren’t able to keep them due to their crowing.
Wanting to be good neighbors, we made sure they didn’t stay very long. However, our regular chicken processor isn’t wasn’t able to take care of them, so it was up to us.
But, we pulled up our big kid pants and got to work. Here’s the rooster we did first. Beautiful, yes. Irritating as all get out! All day and night he would crow, so he had to go! (got my Dr. Seuss on there)
This was also a good skill for us to learn, as you will see in the video. We raised our own meat chickens, and butchering them ourselves meant we saved $3 per bird. After 50 birds, that was $150 to toss back into our savings account.
To get started butchering a single chicken, you need to first kill them. Just cutting their neck is NOT humane, and it can cause them to have an increase in adrenaline, which will ruin the meat.
Equipment Needed
There are a few things you’ll need to butcher chickens. Some of the equipment I’ll discuss below is optional, while other pieces really aren’t. You can DIY or get by with makeshift improvisations of some items, but for others, you cannot.
Knives
The most important thing you need (besides the chicken itself, of course!) is a super sharp knife.
Get that knife as sharp as you possibly can before you start butchering – and if you’re going to be processing multiple chickens, bring a knife sharpener outside with you.
Otherwise, you’re going to end up with a dull knife that isn’t very effective at cutting up chickens. You risk hurting yourself and taking longer to get the task done, too.
In fact, in addition to that sharp knife and a sharpener, bring a few extra knives outside with you, too.
This is especially important if more than one person will be butchering. That way, both of you can be cutting and processing at the same time.
Killing Cones
You will also need cones. Some people don’t use cones to slaughter chickens, preferring instead to chop their heads off on a chopping block.
I’m against this technique for several reasons, the first being that it’s not quite as humane. Yes, the chicken will be dead as soon as its head is severed, but there’s a lot of stress leading up to that point.
Instead, suspend the chicken upside down in a cone with its head coming out the bottom, and it becomes instantly calm. Then, you can cut its jugular, which is far less stressful.
It also produces far less mess. Once you cut a chicken’s head off, the rest of the body doesn’t die right away. It will flop and flail around, sending blood everywhere. This can be a real pain, especially if you’re doing multiple chickens in one day.
You can buy killing cones online or you can fashion them yourselves out of old windshield washer fluid jugs.
These DIY versions work perfectly fine for heritage breed chickens that are under five or so pounds in weight.
For larger birds – like the hybrid Cornish Cross chickens many people raise for meat – you may want to buy a store bought cone to make sure it can accommodate the larger bird.
Tables, Cutting Boards, and a Cooler
You’ll also need some tables to work on as well as some sanitized cutting boards. I like to keep some bleach and old rags around too for quick clean-up along with a cooler filled with ice. As soon as I finished the chicken, I dropped it into the ice bath.
In addition to one regular folding table, we also use a fish cleaning table. These are the tables you can buy from sporting goods stores to clean fish after catching them.
These have built-in faucets so they’re helpful when you’re butchering chickens. Not a necessity, but definitely helpful, to say the least!
Pluckers and Scalders
We use a drum plucker to remove the features from each of our chickens. You can pluck by hand, but if you’re processing lots of chickens – we usually do around 75 to 100 in a day – a drum plucker is essential.
There are other types sof pluckers you can use instead of drum pluckers (which tend to be the most expensive). There are tabletop pluckers and even some that attach to the end of a drill. Of course, you can always pluck by hand, again, too.
A scalder is also something that’s useful to have. You don’t have to buy a scalder – you can also use a turkey fryer and a large stock pot – but a scalder is advantageous in that it offers more precise temperature control.
We use a heat gun to keep track of the water temperature to make sure it doesn’t get too hot or cold.
Other Tools
You’ll need some hoses with water hooked up to them for clean-up. Having some bags on hand to store your chickens for the freezer is a good idea, too. We use shrink bags that are specially designed for this purpose.
After killing and eviscerating a chicken, it goes into the bag and then into a pot of scalding water. This seals the bag to keep out air.
Of course, Ziploc bags or vacuum seal bags are totally fine, too.
Last but not least, there are some specialized tools that people use when killing chickens that I do not. For example, you might want a lung remover tool.
This helps get the lungs out of a chicken, which can be one of the most challenging organs to remove. I find that I can usually get the lungs out with the tips of my fingernails, but if this is what makes your task easier, then go for it!
Butchering a Chicken Steps
Here’s how to butcher a chicken quickly and easily – and in the most humane way possible.
Catch the Chickens
The first thing you need to do is catch the chickens you plan to kill!
I always try to get my birds in as confined of an area as possible the night before they are going to be slaughtered.
That way, they’re easier to catch and I’m not running around (like a chicken with it’s head cut off – is that an appropriate joke here?) trying to catch them the morning of.
We use a large fishing net to catch the chickens we need, then secure the ankles with zip ties. That way, we can do the catching all at once and not have to go back in the pen.
Another tip – you may want to withhold feed the night before you slaughter.
This can make it easier to catch them, since you can bribe them with food, and also makes for an easier clean-up when you’re saluting since there’s less manure to deal with during the gutting process.
Secure the Chickens
After catching the chicken, you need to secure it. There are a few ways you can go about doing this.
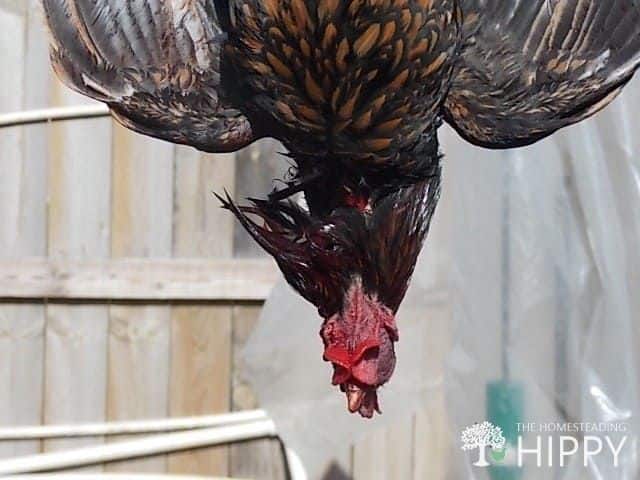
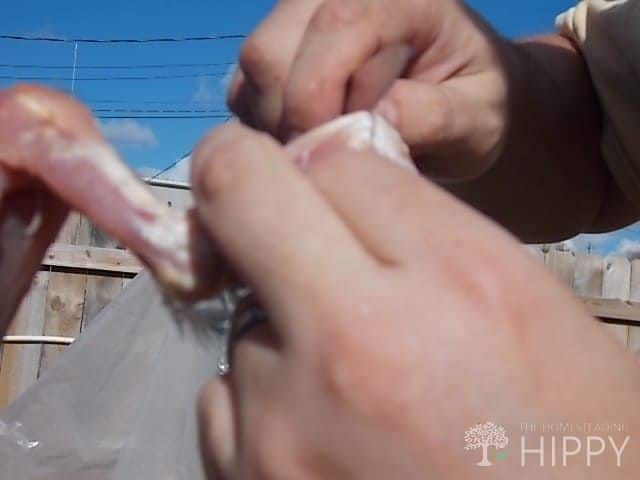
In the image below, you’ll see that I simply hold the chicken to pierce through its brain.

This style of holding a chicken works well for this method because you don’t have to worry too much about the bird moving, or you accidentally cutting yourself.
However, if you use the jugular vein slicing method (instead of piercing through its brain), you may be better off using a kill cone. This will secure the bird so that it remains calm and so you don’t acaccidentallyut yousrelf.
Put the chicken in the kill zone. Turn it upside down, then gently guide its head into the opening.
Pierce the Brain
Take a knife and pierce the brain. You have to go through the beak and up a bit.
Make sure your hand isn’t holding the back of the chicken’s head when you do this, in case your knife goes all the way through. This kills them immediately, and is MUCH more humane than just slicing his neck.
Slit the Jugular Vein
There are a few different methods you can try when it comes to slaughtering chickens. Everybody has their own preferences. Again, I mentioned that the old- school technique of chopping off a chicken’s head doesn’t always work that well.
Another technique that some people use is to insert a knife into the chicken’s skull and into its brain. I find this technique to be very easy to mess up – so I avoid it.
My favorite technique is to cut the jugular vein.
To do this, you’ll need a very sharp knife with the chicken upside down in a kill cone.
Again, you can also just hold the bird, as I showed you in the picture above.
You don’t need to cut the trachea, as you would if you were chopping the bird’s head off. Instead, you’ll make a jugular cut along the side of the neck. This will be directly under the chin, parallel to the jaw bone, slicing the artery instead of the trachea.
If you cut straight across the throat, you’ll have to go deeper, which will be more painful and lead to a slower death. It also causes the chicken to bleed out more slowly.
Of course, there’s also the “chop”, which is the easiest for beginners but not the cleanest.
Some people even do the twist – which is wringing the chicken’s neck until you hear a crack or the head disconnects.
This is a very violent method of killing a chicken – although it can be humane and painless if done correctly, it requires a lot of skill and precision. You can’t hesitate or you’ll really hurt that bird.
Regardless of the option you choose, you’re going to find that it takes a few minutes for it to die – it’s not instantaneous. It will twitch and confuse strongly for around 30 seconds to a full minute.
This can be unsettling the first time you see it, but know that the chicken is no longer feeling any pain.
The chicken can be considered dead when the eyelids are limp and the pupils stop moving. The faster you can kill the chicken, the better. Give it a few minutes (I prefer about five minutes) for it to bleed out.
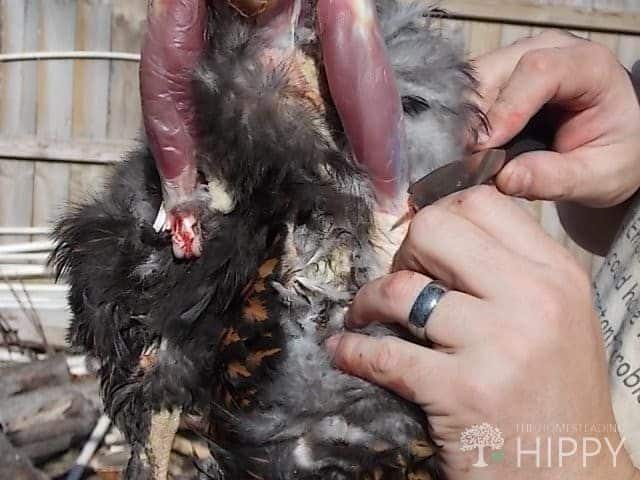
Skin or Pluck the Bird
Once you have killed the chicken, you need to remove the feathers. You have two options. You can skin it or you can pluck it.
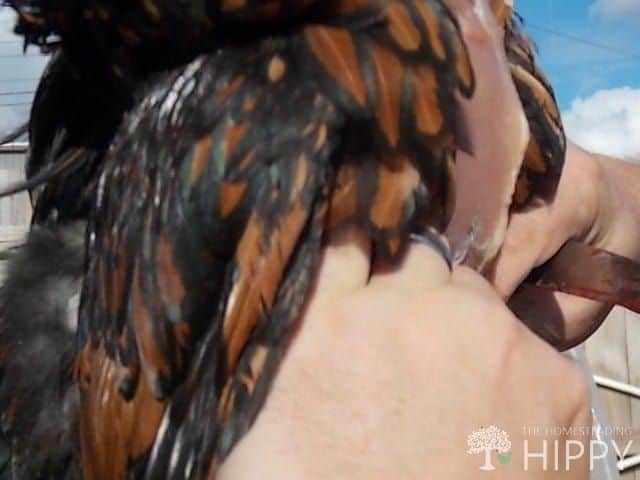
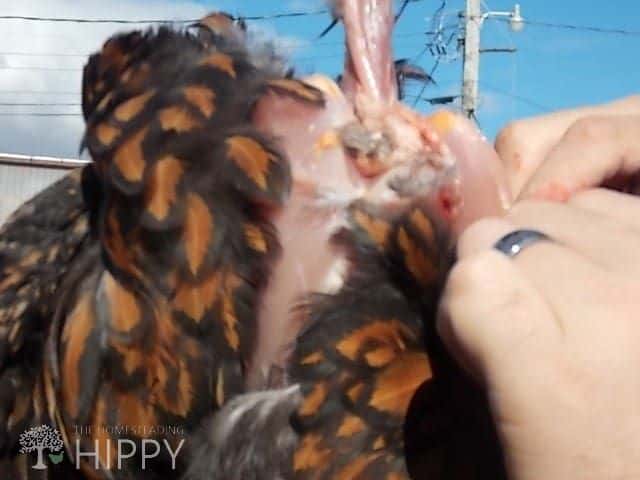
Skinning a Chicken
In the picture above, you’ll see that I am skinning the bird. This is a great option if you are just going to eat the breasts and thighs – and not use the chicken as a whole roaster. You’ll simply use your fingers to peel back the feathers.
Use a sharp knife to cut through the membrane between the meat and the skin.
Start at the breast with an incision along the breast bone, then put your fingers beneath the skin and tug. You should be able to loosen up the skin along the entire bird until you get to the wings and feet.

Cut off the feet and make extra incisions around the wings to loosen the features there. Easy as that!
Plucking the Chicken
If you’re going to be eating a whole roaster, I recommend plucking it. The skin will leave some fat on the bird for a better flavor.
If you are going to pluck the chicken, you will need to scald it first. Use a pot of water that is around 140 degrees Fahrenheit (60 degrees Celsius).
Test it with your heat gun to make sure it’s the right temperature. If it’s too cool, the feathers won’t loosen up, but if it’s too hot, the chicken will begin to cook and you’ll take chunks of meat off the carcass instead of just feathers.
Another trick is to add a few drops of dish soap to the water. This helps loosen up the feathers, too, making them easier to remove.
Dunk the chicken for about 15 seconds and remove it. Pull a feather from the wing – if it comes out easily, the chicken is ready to be plucked. If you’re met with a lot of resistance, you may need to scald it again.
Then, you can drop it in the plucker for a few seconds (or use the plucking method of your choice).
You may have to pull a few small pin feathers by hand but all the large ones should come off easily.
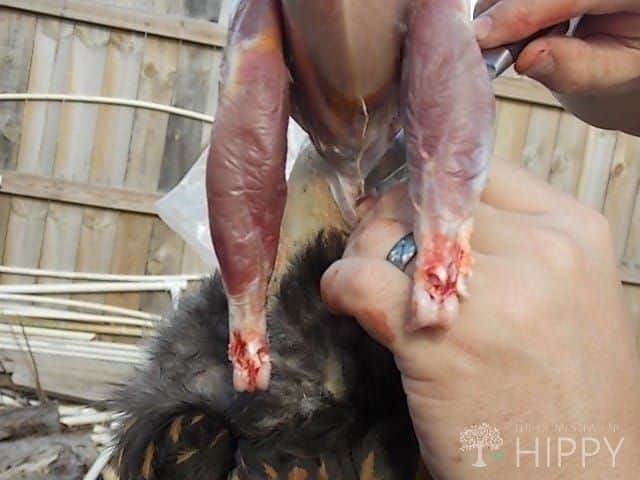
Remove the Head and Feet
Have a couple of buckets on hand for the guts. This is my least favorite part of butchering a chicken, but of course, it’s necessary/
If you plan on saving any of the edible organs – like the heart or gizzards – keep separate buckets for these and for the ones you don’t want to eat (like the intestines).
Use the knife to remove the chicken’s head and its feet. I like to make a cut at the ankle joint, then pop the feet off easily. For the head, it can help to pull on the neck gently, then make a cut, so there’s less neck to deal with afterward.
Some people save the feet to boil into stock later on – I don’t do this, but if you do, have a separate container on hand so you can clean these later on.
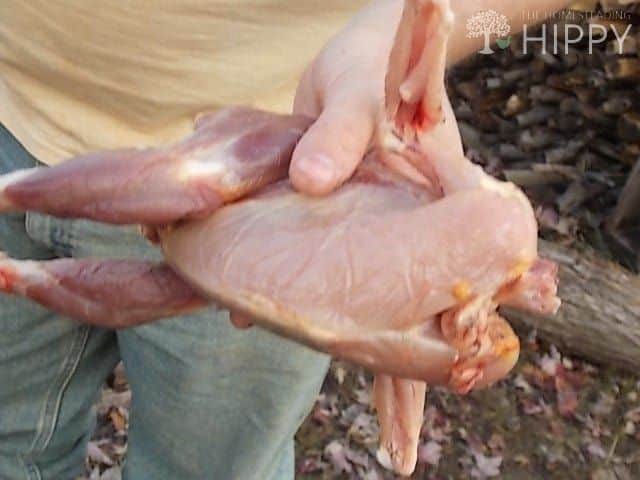
Remove the Organs (Evisceration)
Now is the process of evisceration, which is removing the organs. Cut around the cloaca (the butt!). Make an opening that is large enough for your hand to get into, but be careful as you’re cutting that you don’t puncture the guts.
This can be a bit disgusting – this is why I recommend withholding feed the day before slaughter. It can reduce some of the manure that you have to contend with.
Use your fingers to gently pull the guts out. You’ll likely find that most of them come out in one clean pull – usually, the intestines, heart, liver, and all those other larger organs come out together.
Some people say you should tie the intestines together to prevent manure from coming out as you eviscerate the chicken, but I’ve always found it easier and more effective just to try and get everything all at once. I have small hands, and I’ve never had a problem doing this.
You might have to use your fingers or even a small knife to get some of the other organs. The lungs, in particular, are difficult to get, as are the kidneys. The lungs have a tendency to stick to the inside of the rib cage.
You may need to use a tool as an engineer, but as you get used to butchering chickens, you’ll find that you can pick these out quite easily.
Make sure you remove the crop, too. This small, nubby portion of the esophagus above the gizzard stores the food. Pull hard to get this out. You’ll need to grip tightly on the esophagus.
You can also remove it from the top of the neck, but it’s often easier to do it from the bottom after the other organs are removed.
As you’re processing your chickens, it might make sense to set up an assembly line.
One person can kill, one can scald, one can pluck, one can cut…and so on. If you have multiple people butchering, this can help you be much more efficient. It will also help you cut the whole chicken up into separate parts and pieces.
Wash Thoroughly
Some cities have regulations on how you can slaughter chickens. In most places, you can butcher chickens in your own backyard – but check on this before you do so.
If you’re planning on selling the chickens, there are other regulations you might need to keep in mind, too, to keep yourself safe.
Regardless of what the rules are where you live, take the time to wash your chicken carcasses thoroughly.
I always do one thorough rinse before I put the chicken in the cooler on ice, then another before I package. You want to make sure you remove all traces of blood, guts, and manure!
Freeze
After eviscerating and cooling the bird, it’s time to package and freeze. Again, I use shrink wrap bags to freeze my whole chickens, but the method you use is entirely up to you.
Get the chickens into the freezer as soon as you can after killing them so that they don’t have a chance to spoil. It’s a good idea to let the chicken rest for six to 24 hours. This cna prevent them from becoming tough as the meat settles.
Most chickens last at least a year when frozen!
Slaughtering Chickens – Humanely!
Chances are, your stomach is turning a little bit after reading this tutorial – but just know this. This is the best possible way to provide food of your family.
The chickens were given the best life possible, from being able to roam free and be the “best chicken they can be” and were harvested with the best practices.
Now that you know how to do it correctly, you can continue raising and slaughtering your own chickens for years to come.
Feel free to pin this to your favorite board for later.

Heather’s homesteading journey started in 2006, with baby steps: first, she got a few raised beds, some chickens, and rabbits. Over the years, she amassed a wealth of homesteading knowledge, knowledge that you can find in the articles of this blog.
Learn more about Heather and the rest of the writers on this page.
Thanks for sharing and teaching me something new. I’ve never heard of piercing the brain as a way to butcher a chicken.
glad you came by, Diana! We learned about piercing the brain from an Amish farmer just recently ourselves. It really did make the kill a lot more humane and quicker. 😉
AND And He Didn’t Run Around the Barn Yard Like the “Chicken With His Head Cut Off”…..
AND he will Not be Running Around the Barn Yard as in the “Chicken with his Head Cut Off” routine.
~ Mike ~
***********
Good for you! I have read about piercing the brain, but I wasn’t sure if I’d do it right. So I just chop the head off with a hatchet while holding them still in a feed bag with a hole cut in one corner for the head.
You can still use the meat after simmering for a good long time. He would make an excellent pot of soup!
PS…following on facebook, pinterest, twitter…from The Good Neighbor Hop!
This is good useful information and a very clear tutorial. I do recall how it was done when I was a kid and this is much simpler. Thanks so much for sharing your method on the Good Neighbor Hop. I’m a fan.
I never heard of this method before – interesting. I really dislike chopping their heads off. Thanks for sharing.
We have taken our chickens to a family who would process them for us. Great tutorial on showing how it’s done! We really need to learn how to do it ourselves.
Mary
I love “pulled up our big kid pants and got to work”. We have not done any butchering ourselves, but still I have never heard of the through the brain method. This is good to know.
I’ve never seen this done this way. I have seen the old – chop the head off and let it flop around way… It’s good to see the different ways of processing our food supply. Thanks for sharing!
Thank you for the excellent tutorial. I learned something new and will have to apply this knowledge in the future.
Lisa
I always butcher chickens by pulling their head off. Even my youngster can do it this way: grab a bar, lay your chicken down, put the bar across his neck, step on both sides of the bar and quickly pull his legs up while applying pressure on the bar with your feet. Head is off In seconds. You don’t want to know how many chickens I could kill in 5 minutes
I could never get the hang of doing it that way…wanna come over and teach me please? 🙂
Love your blog, we have several similar interests. Just found you through pinterest. We’ve kept chickens for about 10 years now (which makes me sound like I know what I’m doing but I so don’t) I’ve never had the guts to kill the birds myself. We’ve either traded plucking services for the butchering (with a neighbor) or found someone else to do the whole job for us. Maybe I’ll get there yet!
Welcome Vanessa! I’m so glad to have you here! Please feel free to ask any questions you have!
Place the chickens in the cone. Their head hangs down enabling you to make a neat and tidy. Dunk chicken in the scalding tank. Place chicken in the culling machine. Make a sequential line. Remove the feet. Evacuate the neck. Gut your chicken. Have a can to dispose of guts and digestion tracts.
Great I formation! I’m needing to thin out the liars at this point. Did you notice that the meat was much dryer when you skinned instead of plucking?
Are you saying that chickens butchered by the “chopping off the head” method renders the meat not usable for human consumption ? ? ? I’m in my 70’s, butchered chickens with my mother using the beheading method and continued to do it this way during all my years of raising poultry. Ate a lot of chicken processed by this method and have had no ill effects. We use cones to confine the birds up-side-down. My husband cuts the head off using a sharp knife and the bird bleeds out completely. I never agreed with chopping the head off and allowing the bird to flop all over the barnyard. They get dirty and quite frankly, it is just a disgusting thing to do. My mother didn’t have cones so she hung them up side down with twines hanging from a cross-piece between two trees. Then beheaded – there was lots of fluttering, but they were secured by their legs and remained clean at least.