
There are many reasons people take sponge baths instead of taking full baths or showers… In South Africa, the population consists of roughly 60 million people. Of the 60 million people, only 48 million have legal access to electricity for heating water; only 13 million have access to piped water.
The majority of homes are situated in large townships where three to four homes (with many occupants) share access to 1 outhouse toilet.
The sad thing is, I count us lucky! Globally, only 1 in 3 people has access to clean, piped water.
The issue of water conservation has become a global hot topic. With climate change, we are seeing more and more droughts than ever before. Areas that once were lush are slowly turning into arid deserts.
People who are ill, disabled, elderly, nursing surgical wounds, or even plaster casts on broken limbs, all are often unable to climb in the bath or even sit inside a shower.
For them, keeping clean is not only about smelling nice; preventing injury to their skin, bedsores, or infection to their wounds is of utmost importance.
Of course, there are also those, like me, who love the great outdoors. We love the scenery, the smells, the exercise, and the feelings we experience as we tackle the next mountain and rest in the valley below.
We all want to feel fresh and clean; our spouses certainly want us to at least smell clean. So, how can we stay clean if the only water source we have is a river, dam, the ocean, a communal tap, or even a swimming pool (for the doomsday preppers out there)?
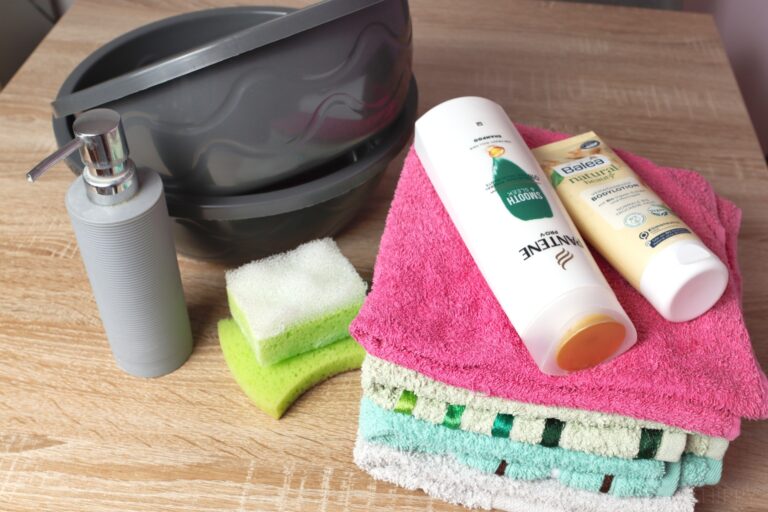
What You Will Need
Taking a sponge bath is really about using what you have access to.
Whether you are cleaning up in a river, a tub in your home, or just a couple of basins, there are a few things you will need to gather together before you start cleaning – you do not want to get halfway through and discover you forgot to grab a towel.
Prepare your bath by deciding where you are going to bathe and then collect the following items and set them where you are bathing.
- Two washbasins – one for soapy water, the other for rinsing the soap off. You can use a bowl, tub or anything else that is convenient and won’t tip over.
- At least two washcloths or sponges – again, one for soap, the other for removing or rinsing the soap off
- Soap – I prefer liquid soap added to the soap basin as this reduces the problem of too many suds, but you can use a bar of soap
- A table on which to put your items
- Thin shampoo, no-rinse shampoo, or dry shampoo
- Three towels – or more – plus either a towel or a bathmat on which to stand to prevent a wet mess (I recommend having a couple of extra towels ready in case there is a wet accident)
- Body lotion – optional
Choosing Between Washcloths, Loofah, or Sponges
There are pros and cons to using different ‘tools’ for cleaning up.
Sea Sponge Pros and Cons:
| Pros | Cons |
|---|---|
| ☑ Inhibit the growth of bacteria | ❌ Can be too abrasive for damaged skin, sores and rashes |
| ☑ Are 100% biodegradable | ❌ Can cause acne flare-ups |
| ☑ Are environmentally friendly | ❌ Are a sustainable resource |
| ☑ Are long-lasting | ❌ Are affordable |
| ☑ Are less abrasive on the skin | ❌ Do not retain odors |
| ☑ Great for exfoliating |
Artificial Sponge Pros and Cons:
| Pros | Cons |
|---|---|
| ☑ Have antimicrobial additives | ❌ Antimicrobials can irritate the skin |
| ☑ Good for exfoliating | ❌ Contains triclosan, which can negatively impact hormones and your nervous system |
| ☑ Made to look attractive | ❌ Can cause flare-ups of acne and eczema |
| ☑ Easy to clean | ❌ Polyester can be too abrasive |
| ❌ Can leave chemical particles on your skin |
Loofah Pros and Cons:
| Pros | Cons |
|---|---|
| ☑ Excellent for exfoliating | ❌ Harbors mold, germs, and bacteria |
| ☑ Enhance circulation | ❌ Trap moisture, so they need thorough cleaning every time |
| ☑ Encourages pores to expel oil | ❌ Can contain yeast |
| ❌ Can cause skin irritation and flare-ups of acne and eczema | |
| ❌ Can cause inflammation in hair follicles |
Washcloth Pros and Cons:
| Pros | Cons |
|---|---|
| ☑ Can gently or intensely exfoliate | ❌ Can harbor bacteria if not cleaned, rinsed, and properly dried |
| ☑ Gentle on sensitive skin | ❌ Dirt, oil, and dead skin can build up if not properly cleaned |
| ☑ Inexpensive | ❌ Can spread infections like staph and pink eye if shared without properly cleaned |
| ☑ Easy to clean | ❌ Can aggravate psoriasis and eczema if too much pressure is applied when washing |
| ☑ Enhance circulation | ❌ Can clog Pores |
| ☑ Long-lasting |
My recommendation is that you use either a sea sponge or washcloths. I prefer using washcloths because they exfoliate gently, and are easy to keep hygienically clean.
Problems You May Face
There are two main problems people report with taking a sponge bath:
- Privacy
- Suds
Both problems can be easily dealt with.
For privacy, simply hang a hula hoop and hang a shower curtain on the hoop.
The suds problem comes from using too much soap, the type of soap, and especially from using strong shampoo.
Try adding liquid soap to the soapy basin instead of applying soap directly to your skin. The shampoo can be thinned by diluting it a little before washing your hair; alternately, look for a very thin (fluid) shampoo.
How to Take A Sponge Bath
Once you have gathered together everything, you need you are ready to start bathing. Depending on the size and location of your basins, you can either stand inside a tub or on the bathmat or a towel.
If your tubs are small, you can put one foot in the tub as you wash that leg and switch when you are done with that side. Either way, you will wash and rinse one small area at a time.
Large tubs are great for eliminating a mess. If you have two, you can step from the soapy basin into the rinse basin.
If you are bed-bound, use a couple of towels to put under you to keep your bed dry. The bedding should be changed as you clean an area.
If you are hiking, you may not have three towels or multiple washcloths.
Rinse the washcloth thoroughly as you wash each area. Use organic soap to lessen your footprint on the environment.
Bathing in a river or small body of water can be very refreshing, and it makes rinsing off very easy.
The same process can be used to bathe newborn babies or small children.
Now:
Step 1. Fill both basins with warm water – make sure the water is not too hot before you start – and place a washcloth or sponge in each basin:

Step 2. Add a little liquid soap to one basin (try leaving the soap in the warm basin to make the water soapy:
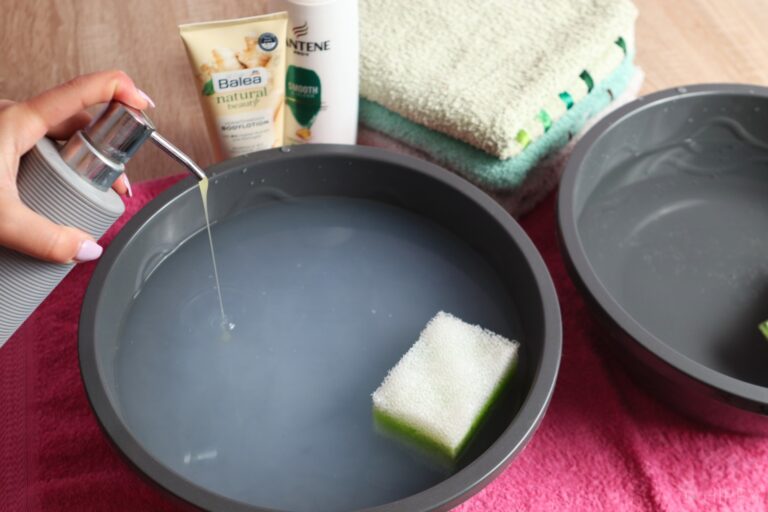
This way you are not directly applying soap, so you have less suds to clear off) – do not use soap that has exfoliating beads, your sponge or washcloth will be sufficient for exfoliating.
Step 3. Wash your hands before you start to make sure you are not adding dirt to areas as you wash.
Step 4. Undress – you can undress one section at a time if it is cold, but make an effort to not let the dirty clothes touch areas you have washed.
Step 5. Start at the top and work your way down.
Step 6. Wash your face, neck, and ears, and shave with the soapy washcloth and soapy water, and immediately rinse with the clean water and dry off with a clean towel.
Step 7. Wash your arms, one at a time, rinse, and dry – remember to wash, rinse thoroughly, and properly dry your underarms:

Step 8. Wash your chest and belly, rinse, and dry.
Step 9. Wash, rinse, and dry one leg at a time.
Step 10. Wash your feet – make sure you wash between your toes to ensure your toes are not a breeding ground for fungus like athlete’s foot:

Step 11. Wash your back, you may want to use a back brush to get to all areas of your back, rinse and dry.
Step 12. Replace the water, this is essential because you do not want to use dirty water to clean your genitals.
Step 13. Use a clean washcloth to clean, rinse, and dry with a fresh towel your genitals – it is safest to use unscented, organic soap on the genital area.
Step 14. Finally, wash your butt, rinse and dry.
Step 15. At this point, wash your hair in clean water – washing your hair will require clean water, this can be done before or after bathing, but do not reuse the water for bathing.
Step 16. If you like lotion, apply it after washing, rinsing, and drying your whole body – this is always advisable for men and women to prevent your skin from drying out.
Step 17. Dress in clean clothes.
Tips and Advice
- If you are hiking, waterfalls are great showers.
- Do not wring the water out of the washcloth, the wetter the better for washing and rinsing.
- Add soap to the soap basin, not directly on your skin.
- Rinse well; use extra water if necessary.
- Do not wet your skin before soaping up, you will struggle to get rid of all the soap as it will lather on your skin.
- Wet wipes are great if you are hiking, they will serve multiple purposes. They may add a little weight to your pack, but they are always worth having.
- Wet wipes are perfect for washing the belly button, genitals, and buttocks.
- Use a drop or two of shampoo in your soap basin instead of soap.
- Leave the shampoo in your hair for 5 minutes to make rinsing easier. Less foam = easy to rinse!
- Stand in a tub or large basin to avoid a watery mess.
- Use baking soda instead of soap – it aids exfoliation and replaces oil ensuring your skin does not dry out. This is a hiker’s best friend. It is light to carry and fits into the smallest pockets of your pack.
- If you are in the great outdoors using water from a lake or spring, first boil the water to eliminate germs and bacteria. Make sure you let the water stand for a while to cool down so that you do not burn yourself.
- If you need to wash your hair, dry shampoo or rinse-less shampoo are very convenient and easy to use.
Giving a Sponge Bath to Someone in a Bed
There are times that you might need to give a sponge bath to someone who is in a bed. Sometimes called a bed bath, you’ll use most of the principles you just learned above for typical sponge bathing.
However, there are some important differences you’ll need to know about, and proper preparation can make things easier for the person giving the bath as well as for the person receiving it.
We will outline all of these considerations below.
Dignity and Comfort are Important
Before we go any further, we need to touch on one of the most important facets of giving someone a bed bath. Even more than a typical sponge bath, someone who needs a bath while still in bed is probably in very bad shape.
They could be paralyzed or just temporarily crippled. They might be very elderly and unable to even assist with bathing themselves. In all cases, the person giving the bath will need to assist even more than they normally would.
Even when someone is helpless, it is important that you help them maintain their dignity. You should always try to be calm and pleasant, even if the situation is very uncomfortable for both people. This will reduce the stress of what might already be a stressful situation!
And keep in mind that even though it could be impossible to respect normal privacy boundaries for this task, you should do what you can to help reassure the person receiving the bath.
Make sure all drapes, curtains and blinds in the room are drawn, if applicable, or at the very least set up a partition to help block the view of people that might walk by the door, or other people in the room with them.
Undressing and Positioning
It can be tricky to undress someone who is it sitting in a chair or even able to stand upright with assistance, but undressing them while they lay in the bed increases this difficulty significantly.
Keep in mind that you will likely need to roll the person one way or the other to complete undressing, and then again to position a waterproof sheet beneath them.
This should always be done with the greatest possible care, but must also be done with an eye towards avoiding injury yourself.
If you require the assistance of another person to help you, do everything you can to reassure the person receiving the bath and make sure your helper is on the same sheet of music with you regarding privacy and dignity concerns.
Once you have the bather undressed and a waterproof sheet or curtain positioned beneath them, it is time to begin.
Giving a Bed Bath
To give someone a bed bath, follow all of the steps detailed above in sponge bathing with just a couple of important modifications.
First, you’ll want to wash and dry as you go. Work in the same logical pattern as detailed above in the instructions for normal sponge bathing, but once you are done rinsing a section you should pat it dry thoroughly with a towel.
Try to be as gentle as possible, as the skin of bedridden people already has to put up with a lot of abuse, and injuries in the form of sores are quite common.
Next, speaking of sores, make it a point to carefully check all parts of the bather’s body for injuries in the form of rashes, sores, bruising, and the like.
Pay particular attention to areas that would normally be out of sight, particularly behind wrinkles and folds of skin, behind joints, and around the genitals.
Bed sores and other irritation can quickly turn into major health concerns, and bacterial or fungal infection is common when these sores become moist such as after bathing.
Washing the Hair
Washing the hair of a bedridden person is particularly challenging, but can be made much easier with a specialized basin design for the purpose.
These portable basins look very much like the sinks at a barber shop or hair stylist, with a deep, ergonomic notch for the bather’s neck and a deep bowl that can allow for thorough and convenient washing of the hair even when lying down.
I highly recommend that you get or improvise one of these basins if you’ll be regularly engaged with giving a bed bath to any disabled person.
Cleaning Up
Once the bath is finished, take great care to remove the waterproof sheet or curtain placed beneath the bather without spilling any excess water on the sheets beneath.
If the sheets of the bed did get wet during the bath, make it a point to change them out for dry ones. No one needs to lie on wet sheets!
After that is done, redress the bather and make sure they are comfortable. You’re all done!
Conclusion
As a disabled person, I have had a lot of experience with sponge bathing. I can vouch for the techniques and order listed in this article.
It is a bit of a learning curve. When you start, you will have to struggle with soap – or I should say rinsing the soap off. Less is best! Don’t lather your skin with soap; it will be a nightmare to rinse the suds off.
Being disabled, nursing a wound, protecting a plaster cast, or simply not having a tub or shower is no excuse for not keeping up with your hygiene.
A well-executed sponge bath can be just as effective and rejuvenating as a bath or shower.


Di-Anne Devenish Seebregts was raised in an environment where daily life consisted of hiking, environmental conservation, growing fruit and vegetables, and raising poultry for meat and eggs.
She combined her passion for the writing word with her love of the pride that comes with not relying on others. She raised three children (who are now adults) to value the environment, and understand the value of being self-sufficient.
Find out more about Di-Anne on our About Us page.
Thank you, I’m living off grid and needed this advice.
Friends want me to move into an old age home where individuals will give me a bath at least once a week. I am hoping that your ideas on how to give myself a great sponge bath will keep me out of that situation, at least until I am too old and decrepit to prevent it. I may be pushing eighty years of age, but my mind is still fine. Thanks for taking the time to write this article. I appreciate it. Steve