
For the purposes of this article, I will define a greenhouse as a standalone structure built for the purpose of growing plants.
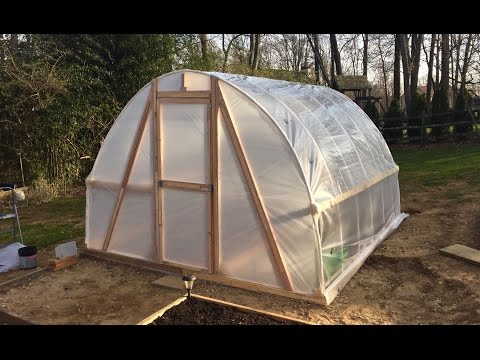
While there are multiple types of greenhouses, the one I would like to describe in this article is also variously referred to as a hoop house or as a poly-tunnel, depending on who you ask.
The polytunnel is affordable to build, and doesn’t require specialized materials or skills to construct. I will also proceed under the assumption that the polytunnel is built tall enough that you can stand up and walk inside.
The term poly-tunnel does imply a hoop shape, which requires a flexible plastic sheet to construct (polyethylene).
However, most of the information in this article, apart from the construction guide, also can apply to a polycarbonate greenhouse, which is functionally similar but is shaped more like a long shed because its roof is rigid and slanted.
Greenhouses are often built as nurseries or conservatories, which is because the structure aids in the climate control of more vulnerable plants. In some climate zones, it is very difficult to grow food at all without the aid of one or more kinds of greenhouses.
Climate Control
Easily the number one reason cited by greenhouse builders and users is that they want to “lengthen their growing season”. Here, we need to understand the concept of a growing season and what it means to attempt to control the climate.
Different parts of the world have different climate types, owing to a combination of factors, perhaps the most influential of which is latitude.
Your latitude has a direct effect on insolation – how many hours the site receives sunlight per day, and how extreme the difference between summer and winter is.
In the United States, the southernmost state, Hawaii, is the one with the least difference between summer and winter insolation.
Meanwhile, the northernmost, Alaska, will present the most striking difference, with some parts of Alaska so far north that they lie beyond the Arctic Circle.
A polytunnel does block some light from getting in – usually between 23 and 9 percent, depending on how clean it is, the quality of the polyethylene, and how long it’s been since you’ve replaced it.
However, the significance of season extension cannot be denied – Steve Upson estimates that building a polytunnel can give you up to 60 extra growing days, which can be equivalent to moving your farming operation 400 miles to the south!
In Permaculture zoning, a homestead polytunnel is most appropriately placed in Zone 2. This means that it should be between a one-minute and two-minute walk from your kitchen door, while also being no more than one minute’s walk from your tool storage room or shed.
While it is possible to place the polytunnel closer (Zone 1), it means that you may not then have space for a kitchen garden, herb spiral, or vertical gardens.
Reasons you Might Want a Greenhouse
If your growing season is short or your climate is challenging, a greenhouse helps to lengthen the time you can spend growing plants. This season extension is very useful for homesteaders and market gardeners, who depend on their gardens for subsistence and income.
Building a greenhouse requires an energy and financial investment, and so will ideally produce an equivalent or greater yield or value of plants sold. There are many articles online that describe low-cost polytunnels, but don’t underestimate the time required to construct one.
You will have far more control over the times of the year that you plant, and can use a planting schedule with less risk of interruptions from unexpected weather.
As a result, you can plan to have plants alive at a time few other people nearby do, and your produce will be available more reliably. These factors may allow you to sell produce consistently, even at a premium price.
A polytunnel is effective at keeping out frost in the winter and spring, and also effective at keeping out rain and hail all year round. This change in environment can help your plants survive, which may have been otherwise weather-damaged.
Polytunnels help with pest and disease control. When soil, stems, and leaves stay wet for a shorter time, this keeps infection risk lower.
Furthermore, it is much harder for many pests to access your edible plants, because they are kept out or deterred by the physical structure. Weed seeds are also less likely to blow inside, decreasing competition from unwanted plants.
Polytunnels also make harvesting more efficient by allowing you to do it in almost any weather conditions and stay dry and comfortable while you do so. This condition is most beneficial to market gardeners running small operations.
Reasons You Might NOT Want a Greenhouse
If farming and gardening are more of a hobby for you and less of a business or a way to provide sustenance for your family, then it will be hard to justify building anything except the smallest polytunnel.
While not especially complex structures, they do require a significant capital and energy outlay that a time-stressed, full-time salaried employee could have difficulty finding the time to build, grow plants in, maintain, and sell the produce.
If you live in a climate zone or microclimate highly favorable to growing plants, with temperate heat levels, moderate precipitation, frost-free winters, mild summers, and medium-high humidity, such that you may find in parts of Florida, California, or Hawaii, you may find that a greenhouse offers less economic incentive when competing with other growers in your area.
The construction costs and efforts will be similar to more northern states, but the competitive advantage it provides is smaller.
If your business is operating at peak capacity, greenhouses may complicate and increase capital demand in the short term, so building one or more greenhouses is definitely a financial risk.
How much will it cost?
Polyethylene is flexible, it is easy to cut the exact amount, and is available for around $0.12 per square foot.
Maintenance is inexpensive. However, you will be required to replace the sheets often, around once every 5 years, as the polyethylene will turn yellow and become more brittle.
The more yellow the plastic turns, the more light it will block, which will reduce the number of growing days that you gain over the winter.
While not following the structure of a hoop, polycarbonate is another possible choice. Its rigid sheets are close to being transparent, letting in almost as much light as glass.
This material will last longer than polyethylene, but will most likely cost more upfront, as each 8’x4’ sheet will cost around $55.
This makes its minimum materials cost $1.72 per square foot, or 14 times as expensive as polyethylene. This setup could be more vulnerable to hail damage.
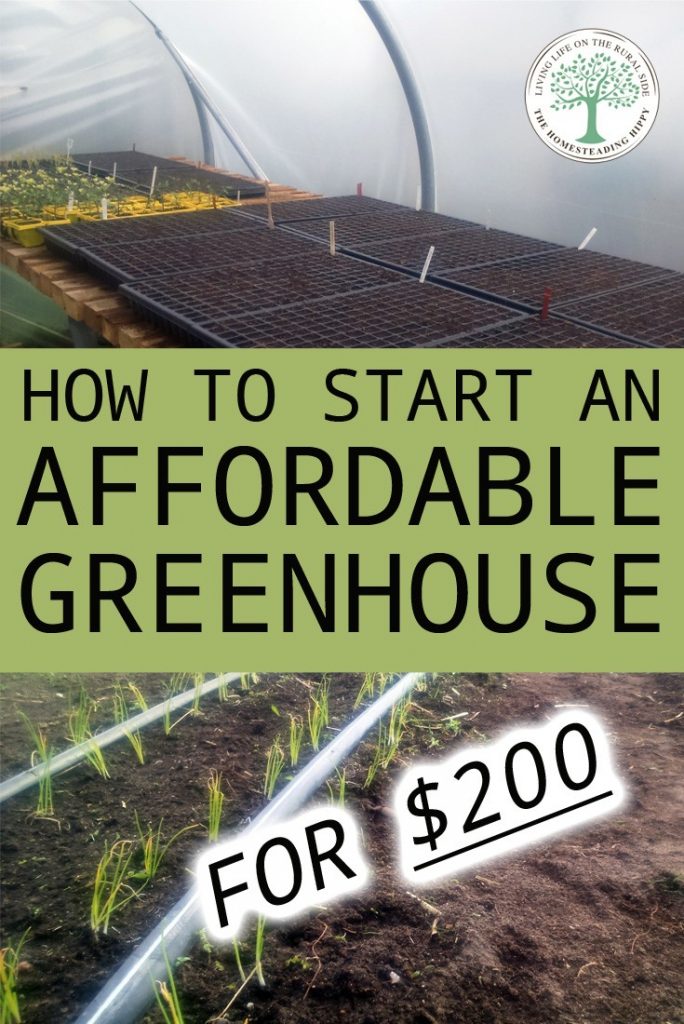
At the low end of the cost scale, one DIY enthusiast, David LaFerney, built a hoop house 15’ by 11’ by 7’ 6” high and spent only $50 on construction materials, in the year 2008.
However, he had access to many up-cycled and free materials, and he expresses that the cost of entirely new materials would have likely set him back more than $200.
Many homestead-scale growers choose gray UV-resistant PVC Conduit pipes for framing polyethylene roofing. This is the cheapest way to hold up the structure.
Here is a video that contains a step-by-step guide with simple instructions for a $100 polytunnel. Its dimensions are 10’ by 12’.
Tools and Materials
The following tools and materials are recommended by Steve Maxwell of Bailey Line Road:
Tools
- Sledgehammer
- Saw
- Drill
- Wooden stakes to keep the frame in place during construction
Materials
- 6 Ground frame sides of rot-resistant lumber – 2 x 6 x 12’
- 2 Ground frame of rot-resistant lumber – 2 x 6 x 12’
- 11 long hoop pipes of schedule-40 PVC – 20’ x 1.5” diameter
- 11 short hoop pipes of schedule-40PVC – 10’ x 1.5” diameter
- 22 ground pipes of schedule-40 PVC – 36” x 2” diameter
- 88 ground pipe bolts – 5” x 0.25” diameter
- 3 long purlins of schedule-40 PVC – 20’ x 1.5”
- 3 long purlins of schedule-40 PVC – 10’ x 1.5”
- Greenhouse grade 6mm UV-resistant polyethylene – 35’ x 32’
- End wall framing – 2’ x 4’ planks as needed to stand up against wind conditions
- End wall 6mm UV-resistant polyethylene – 32” wide x 10’ long
- PVC cement
- Lock bolts
- Carriage bolts
- Wiggle wire
What should you put inside of them?
The question posed above depends most on what you want to grow. It makes sense that we won’t try to grow a tree or plant that is likely to become taller than the structure!
Likewise, it pays to take into account the conditions wanted by the plants of your choice. Different plants will have different requirements for sunlight hours, shade hours, and times of year to grow them.
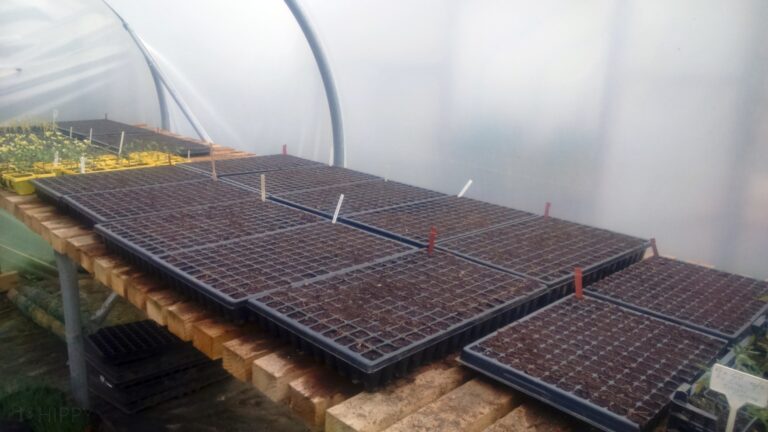
Most people would choose to put either a garden bed (possibly a sheet mulch bed for low cost) or a nursery table inside their polytunnel.
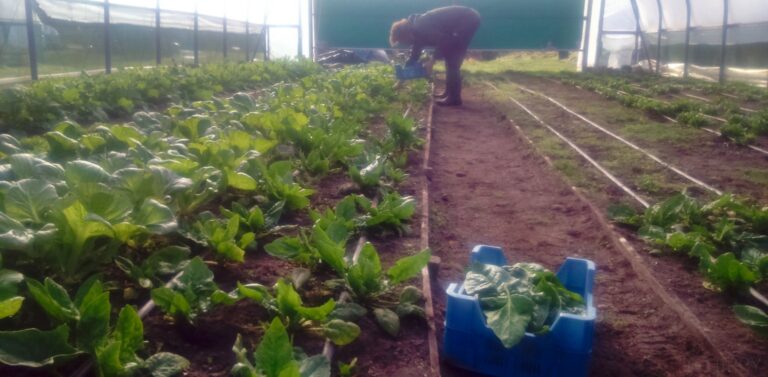
The most common use case I’ve seen is either two long garden beds on the left and right sides of the tunnel, with space to walk in between the beds, or two long sets of tables on the left and right sides, full of seedling trays and seedlings.
A good recommendation is to put straw or sawdust on the paths of any walkways that will be used. This technique will help to prevent your shoes from becoming extra muddy as you walk in and out, watering plants and seedlings, fetching tools, and working in the polytunnel.
It is also common to keep one’s most-used tools and items inside the tunnels. If you’re growing seedlings, you may keep soil bags, hand trowels, and spare seedling trays under your tables.
If you’re gardening in beds, saving a small space inside for compost, nutrients, fertilizer, gloves, spades, and produce boxes will save you a lot of walking back and forth.
You may also need other tools, but I would recommend allowing some space for your most commonly used ones inside the tunnel itself.
Most growers build polytunnels for vegetables that they would have a harder time growing outside. Some common plants grown in polytunnels include strawberries, cucumbers, cauliflower, beans, cabbage, spinach, onions, potatoes, chilis, and tomatoes.
Optional Accessories and Ideas
Some people choose to install ventilation fans in their tunnels. This is definitely an additional expense, and it is avoidable. However, If you don’t install ventilation, you will need to remember to open and close the doors whenever applicable, such as having them wide open on hot summer days and always closing them on winter nights.
Plants need fresh air to promote healthy conditions. Most people who don’t install ventilation fixtures would still benefit from adding a small electrical fan inside.
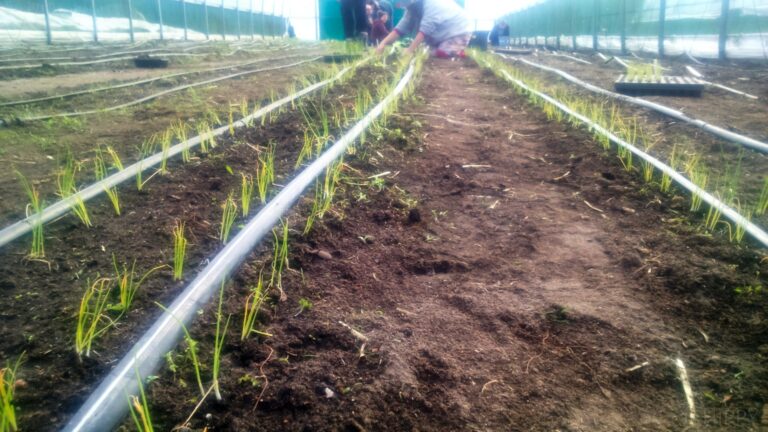
Farmers may also choose to install irrigation, usually in the form of drip irrigation pipes that run through their beds. These tend to work well on a timed switch, where the switch is on for a few hours during the day.
If you don’t install irrigation fixtures, remember that you will have to water your plants regularly with a hose pipe or a watering can.
Water requirements on hotter days may be a little lower than for your plants outside the tunnel because water ordinarily lost to transpiration will collect on the ceiling and some will drip back onto plant beds.
If you’re planning on growing tomatoes or beans, it may help to install a light wooden grid that you attach to the ceiling framing of the tunnel. This way, you can tie ropes or string down and let them touch the beds below, which you can train your vines to grow up.
It is also possible to use an aquaponics setup inside of a polytunnel, if your fish prefer warmer climates, this is one way to keep them happier and heat the water at a lower cost. Aquaponics is also a great way to fertilize your plants.
Some more unusual ideas for accessories include having a compost pile or keeping small animals such as chickens inside the polytunnel.
If you have at least a cubic meter (36 cubic feet) of compost in a pile and you turn your pile regularly, the heat given off by the compost pile provides heating without any electric costs.
This may extend your winter growing season without requiring you to pay any extra bills. This means that it is even more important to keep the doors open or ventilation running during summer, as the heat will now be higher owing to the compost pile.
Conclusion
Hopefully, through reading this article, you will be able to make a decision about whether or not building a greenhouse is right for you, and which type of greenhouse is most appropriate for your needs.
You should also have found that while professional installations can be prohibitively expensive for some, it’s also possible to build a low-budget greenhouse for under $500, especially if you have time to spare to build it, or are extremely resourceful in finding low-cost or free materials.
Overall, I would rate greenhouse construction as being an endeavor of moderate, but not excessive difficulty. If you also take accessories such as ventilation, retractable sheets, and plumbing into account, you are certainly looking at a higher level of difficulty.
Therefore, for the determined but small-scale homesteader, I would recommend starting small, and constructing a greenhouse no longer than fifteen feet long, eleven feet wide, and eight feet high.
As you continue to experiment and learn, you will gain the confidence to build bigger and more complex structures. Happy gardening!

David Dornbrack is a permaculture designer and author from the Austin area of Texas, USA. He first achieved his PDC in South Africa in 2013, and has since traveled to the world’s prototypical intentional community and ecovillage, Findhorn Foundation in Scotland. He has gardened in three different climate types – Mediterranean, Cold Temperate, and Humid Subtropical. His favorite plants are tomatoes, chilies, and potatoes. He believes that humans function best when interdependent – able to take good care of themselves so that they can be generous and giving to others. He would like to gain experience in house-building, carpentry, and solar electricity installation. Meet the rest of the team here.
My husband bought me a 12×16 greenhouse for Christmas. I have searched far and wide on what to use for the flooring? Right now we have a beat up concrete pad within our fenced yard and I would love for it to go there. Is it best to cover that with weed barrier black fabric then cover that with stone?
What is best to use to construct shelving in there?
Thank you for your guidance