
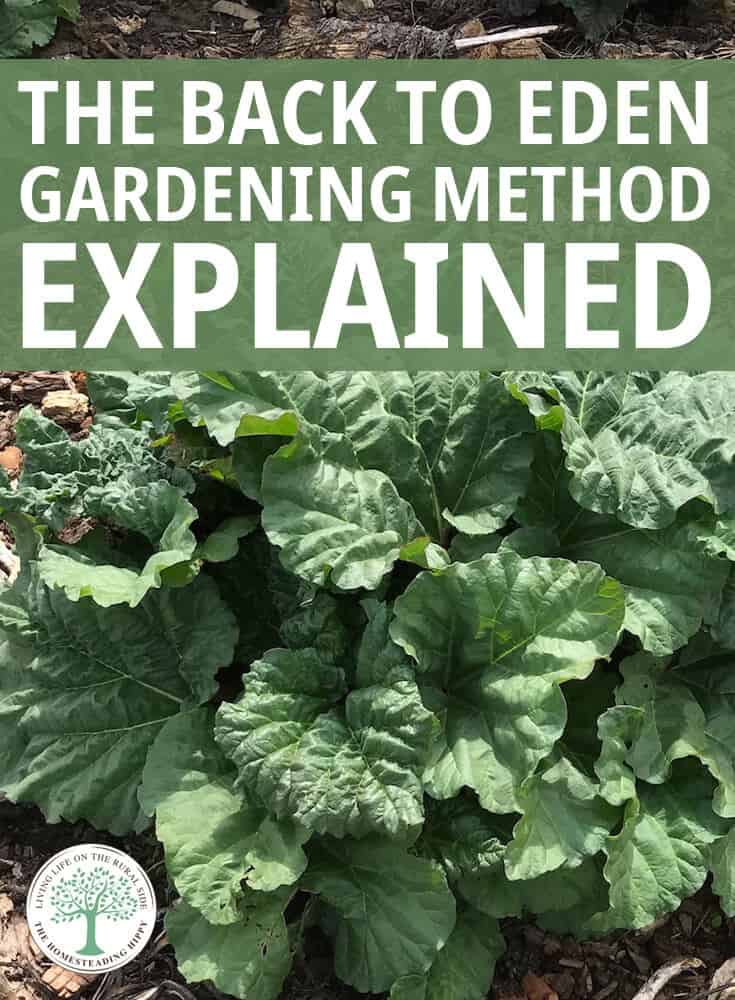
There has been a lot of talk lately of the Back to Eden method of gardening. I, personally, have seen it all over the homesteading blog-o-sphere as well as on multiple YouTube channels. But, many don’t really know what set this method of gardening separate from what they’re already likely doing — which is raised bed gardening.
Back to Eden gardening is pretty much like the phrase implies. It is the return to the way nature intended for plants to grow:
- no watering,
- no weeding,
- no ground tilling,
- and completely organic.
I will warn you, though, many seem to think the only steps involved are just throwing out of seeds onto the ground, sitting back, and waiting for them to produce. There’s a bit more to the process, but once the preliminary work is done, there is little if any hands-on after that.
It is no wonder that this type of gardening is quickly catching on with gardeners and homesteaders alike due to it offering a more straightforward method of preparing the soil as well as its continued virtual low-maintenance appeal.
As any homesteader or gardener can tell you, the more time that they can save on all of those numerous chores that need to be done on a daily basis, all the better for them.
The question still remains though, precisely what does the Back To Eden method of gardening mean and what does one need to do in order actually to get such a garden started?
Table of Contents
What is Back To Eden Gardening Exactly?
In a nutshell, the Back To Eden method of gardening involves a minimal amount of work, after the initial step of the soil being properly prepped, that will provide an environment in which your plants will grow and thrive.
If done in the correct manner, the resultant garden recreates the essential growing environment that nature had initially intended.
With as little as two hours of bed prepping, which includes the actual planting of your plants, your new garden is good to go, with the added benefit of no need of future watering or weeding on your part — period!
To better understand the method, let’s look at the example of wild blackberry bushes. You probably have your favorite patch, way back up on a hill, that you make it a family-centered event to harvest each year.
However, when not collecting the berries, you are not spending countless hours hauling water to water them, or even weeding around them.
Yet they continue to produce beautiful fruit abundantly year after year. The Back to Eden method is based on this very same principle.
Pros
- Once the principle work is done, the hard part is over, as from then on out it is just a matter of simply maintaining and caring for the garden.
- Over time, your soil will become more and more fertile, with little to no work on your part.
- You can use whatever is readily available for your ground covering…it doesn’t have to be mulch.
- There is no tilling of the ground needed with this method.
- Your top coat of mulch will help to keep the underlying soil moist, negating the need to watering on your part.
- This method is simple to maintain from year to year.
- Little if no weeding on your part is needed.
- Once established, the garden is ready to go each year with a little soil amending.
Cons
- The initial creation of your garden will need some upfront time, and yes, even some hard work.
- For the best and most rich soil, you may have to wait until the following gardening season.
- As the mulch starts to break down and become compost, you’ll need to make sure to add more to the top coat. This may be needed each subsequent year.
- In the first year, you will most probably find that you will need to add some form of fertilizer to aid as a kickstart to the process.
Setting Up Your “Back To Eden” Garden
I know what you are thinking, “There is no way that this will work for me.” This is the first reaction most people have, and yes I’ll admit it, I was skeptical myself when first heard about this too-good-to-be-true simpler method of gardening.
But once you see the steps that are involved in setting up the garden, I am confident that you will see that the whole process is pretty easy – maybe you’ll give it a try…
Location, Location, Location
The first step is to figure out just exactly where you want to locate the garden, just like you would when starting any garden. What’s great about this method is that it works for both big and small backyards.
It doesn’t matter how much space you have, this method revolves around how you choose to put that space to good use.
There are little to no limitations as to where you can choose to put your garden. You may want to place it in an area that formerly contained a garden, or even in the location of your current garden.
Maybe you prefer using a part of your land that was never a location for a garden but still contains grass, dirt, or rocks. As long as there is soil, you are pretty much good to go!
It really doesn’t require that the lot be perfect because one of the main things about this method is that you do NOT have to till up the soil of the location you have chosen.
That’s right, no tilling or turning of the earth in the traditional sense is needed. So, as you can see, we are already making your gardening process that much less tedious.
The Bare Bones
The next step is optional, but I highly recommend it: choose some form of ground cover. Avoid traditional landscape fabric — it won’t give you the best weed protection for this method.
I, myself, like to use old packaging for the ground cover with my gardening and have even found that old newspapers will work just as well. Contractor papaer will work even better because it’s less likely to be blown by the wind since it’s heavier. My aunt is a fan of breaking down cardboard boxes and using them in her ground cover for her garden.
Both of these work well, and besides, they’re fully biodegradable and won’t harm your soil as they break down naturally.
For best results, make sure that you leave no gaps between your chosen pieces of ground cover. I always overlap my newspaper layers by 4–6 inches to make sure every bit of soil is covered. Any gap — or an overlap that’s too narrow — invites weeds and grass to push through, which defeats the whole purpose.
It’s best to place the ground cover in layers—at least three layers in all, laid out over the entire area that you are intending to plant your garden.
Adding Compost
Once you have the ground cover in place and all the gaps are sealed, now is the time to cover the area with at least three to four inches of compost such as cow manure or even chicken poop.
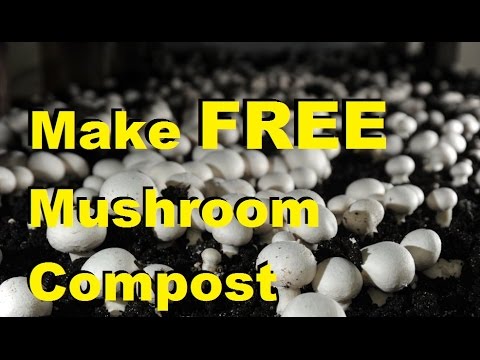
Some go the route of using a mushroom compost. However, if you do not have access to this type of compost in the area in which you reside, several videos on there are plenty of YouTube videos showing how to mix your own “mock” mushroom compost at home.
Adding the Wood Chips
Once you have your ground cover down, and your even layer of compost on top and evenly spread across the gardening space, you will now add the final layer of wood chips. Aim for a layer 3 inches thick for the veggie garden, but double that to 6 inches for your orchard.
Make sure that this layer of wood chips does not contain and are not made from treated lumber, as many lumber yards incorporate this type of wood in with their other types of wood chips.
Sizr also matters. Ideally you want to use finer wood chips for the most part, but larger ones can also work if you have an orchard.
Second, and this is something we’ll talk about below, you want the chips to be partially composted (pre-composted). For the orchard, you don’t need to compost the larger pieces.
Now The Magic Starts
This final step involves the actual planting of your plants into your newly created gardening plot. One crucial thing to remember: that your seeds and/or plants will not germinate and grow if planted in just the upper mulch later.
You will need to make sure they are being appropriately planted into the next layer of soil if they are going to grow and thrive.
For planting your seeds and plants, this is best achieved by way of pulling the upper layer of wood chips back, exposing the soil/compost underneath, and then digging a hole about 1-2 inches deep. If the seeds are on the smaller size, you can skip digging holes and just sprinkle them.
If you want amazingly fertile soil, prep your garden bed in advance, as early as the entire growing season the year before.
If you don’t want to wait a whole season to plant, you have the option to do it as soon as you have finished all prepping the beds.
Challenges Do Exist, As Always
Soil Quality
It goes without saying that when you cover currently poor soil with a mulch covering, you’ll be well on your way to improving and enriching that very same soil. But keep in mind that good soil is not something that happens overnight.
It’s worth noting that if you find you do indeed have poor soil, the simple addition of compost will significantly aid in going a long way to improving it as well.
For the first few years, make sure you’re maintaining a decent layer of mulch on top. If you choose to only add the mulch one time only, you’ll find out down the road, in three years or so, that you’re not getting as many crops as you were hoping for…
If your soil is poor, it is essential that you not only make sure to lay down the mulch, but you will also need to add a good layer of compost on a somewhat regular basis as well.
As time goes by, you will start to find out that you need to add less and less of each, and you will, in turn, begin to reap the rewards of your efforts.
Germination And Planting
Mulch is excellent at preventing weeds precisely because seeds that land on it can’t take root and germinate. That’s the sole purpose of using it — but it also means your own seeds won’t grow if you plant them into the wood chip layer instead of the soil beneath it.
The fix is simple: move a layer of the chips of wood aside, and then directly planting the seeds and/or plants into the underlying soil—and not into the top wood chip layer.
The thing to be remembered is that the seeds and/or plants themselves need to be planted into the soil, but after that, they may then be covered back over with the upper layer of wood chips.
There can be instances where through the blowing of the wind, the driving of rain, or other such naturally occurring circumstances, that the seeds will somehow work out of the soil and into the mulch later. In this instance, there will be little if any germination or growth achieved.
To avoid poor germination, you should plant your seeds earlier in the season and slightly deeper into the soil layer.
Although deeper planted seeds will take longer to germinate, in the long run, it will result in both sturdier and much healthier plants that will result in a more productive harvest.
For smaller seeds, it is best to take advantage of good, fertile soil, or even the suggested use of compost as a cover to nurture and protect the seeds. Make sure that you keep the soil of newly planted seeds watered and moist.
Once the they’ve started to sprout, even if you see gaps in the planting, you will not regret your efforts, as your yield will be both bountiful and magnificent.
Here Come The Slugs
No gardening method is without its headaches, and for Back to Eden, slugs are the main one. Wood chips and mulch create exactly the kind of damp, sheltered environment slugs love — and if you live somewhere with a lot of rainfall, the problem can multiply quickly. That said, for most gardeners, the benefits of the mulch method far outweigh the occasional slug.
One method that will keep their numbers low is to make sure that your wood chips are composted. Ideally, they should look less like wood chips or mulch and more like compost. Or, you could go another route and use compost for all your layers and leave out any actual wood.
After all, the most important part of the whole process is to make sure that the soil is significantly and sufficiently covered.
Generally, the use of mulch or wood chips is not only for the ground cover aspects but also for the valuable benefit that they are an excellent means in helping to hold moisture in the soil layer underneath.
Would You Try This Gardening Method?
What it all boils down to is this: when you weigh it all up, the pros clearly outweigh the cons. With a little prep work on your chosen area, and the following of a few simple steps, you too will be well on the way to your very own low — if any — maintenance-free garden.
Nature is much more efficient of a gardener than man will ever be, so if we take her example, then we can only expect to produce a wonderful and bountiful harvest with little to no work on our part. I don’t know about you, but that sounds like a plan to me!


Tracy lives with her furry baby, Chigger, in a small, quaint, country town nestled within the Appalachian Mountain range.
A mere four years into her homesteading journey to obtain a simpler, more self-reliant lifestyle, she finds that she always has something to learn, and there is always something to be grateful for.
When not researching or writing, she can usually be found working on one of the many tasks that always seem to be needing done on her homestead, tending to her garden, or laughing at the many antics of her chickens, whom she has affectionately named the “feathery five,” as well as Chigger himself.
Meet the rest of the team here.
When the woodchips get composted, do you add another layer of compost and wood chips and also how often do you need to add to what is composted?
By not having planting all year you are not using the sun to the BEST.