
At-home canning is the perfect way to preserve all kinds of different foods. Meats, veggies, fruits—oh, who am I kidding? Home canning is awesome because we can make jams, jellies, and all sorts of other sweet treats that are perfect on toast, English muffins, ice cream, and a lot more!

I don’t know about the rest of you, but if I’m hauling out my canning equipment, there is about a 75% chance that I’m using it to make jam or jelly.
One recipe that I’ve recently gotten addicted to is watermelon jelly. This isn’t something you’re going to find on the shelf at your local grocery store!
Watermelon jelly tastes amazing, makes for a unique gift, and is the perfect way to preserve a big summer harvest of these big melons. Keep reading, and I’ll tell you everything you need to know…
Is Watermelon Acidic Enough to Can?
Good thinking! And, by itself, it isn’t. However, by adding lemon or lime juice, it will be, and we’ll be able to make jelly out of it just like any other fruit that we normally could. Plus, the flavor profile of these citrus fruits works wonderfully well with the watermelon itself.
Supplies and Tools
You’ll need the usual round of gear and equipment that you would for water canning anything else, along with an assortment of typical kitchen tools. Luckily, we don’t need much in the way of ingredients. Gather all of the following, and we’ll be ready to get started.
Watermelon: If you want watermelon jelly, you’ve got to have watermelon to begin with. You can use any size or any variety of watermelon that you want to, including exotic yellow varieties. Seed or seedless, it doesn’t matter. We’ll strain out all of the bits that we don’t want.
One medium-sized watermelon will give you about eight cups worth of flesh, which is the equivalent of four cups of juice. That’s enough to fill two pint jars. Plan accordingly based on how much jelly you want.
Lemon or Lime Juice: Citric acid is necessary for acidifying the melon enough to make it safely can-able.
Either will do, but I prefer lime juice because it works wonderfully well with the flavor of watermelon. Talk about a tropical treat! You’ll need 3/4 of a cup of fresh lemon or lime juice for every four cups of watermelon juice.
You can use bottled juice if you want, just make sure it doesn’t have any preservatives or other weird stuff in it. Pure juice only!
Sugar: White granulated sugar is all you need, but how much you need depends on how sweet you like your jelly. Most folks will add anywhere from one cup to four cups for every four cups of watermelon juice.
Pectin: Pectin is the vital ingredient that will turn the juice into a semi-solid jelly. There are many products on the market specifically for canning and making jellies, jams, preserves, and more.
I recommend you get a low-sugar type since it is more adaptable to using more or less sugar in the recipe.
Water: You’ll need water to facilitate the canning process. Tap water is fine here since it’s not going into the mixture.
Food Processor: A food processor will make short work of blending the watermelon into a slurry, and then we will strain it into juice later. Without a food processor, you’ll need to use a manually cranked food mill or something similar.
Canning Rack: This is the vital component in the water bath canning process. The canning rack holds the jars securely, keeps them up off the bottom of the pot, and prevents them from clattering into each other. Both of these occurrences can cause breakage!
Large Pot: Any pot large enough to hold your canning rack and ensure that the jars are covered by at least 2 inches of water is needed for this procedure.
Medium Saucepan: A medium-sized saucepan that can hold several quarts worth of liquid is sufficient for making a pint jar load of jelly.
Canning Jars: You can use any canning jars you want here as long as they are in good shape. I recommend you use pint jars to ensure even, reliable heating and to facilitate portion control; your jelly won’t last forever once you crack the seals on it. Never use a jar that has a crack, chip, or other defect.
Jar Lids: If your jars don’t come with attached and especially designed reusable lids, you’ll need an equivalent quantity of brand-new disposable lids.
Never, ever reuse a disposable lid, even if the ring of sealing compound looks like it’s in good shape; they will invariably fail.
Jar Bands: Jar bands that are the proper size for your jars. You can reuse jar bands as long as they’re in good shape, meaning no dents, cracks, or rusting, so don’t be afraid to haul out your older supply.
Canning Funnel: A canning funnel comes in really handy to prevent spills and keep your jars clean during filling. It is especially vital when working with liquids like we’re going to be doing.
Jar Lifter: A jar lifter, also known as jar tongs, will allow you to safely grip and maneuver the hot jars without hurting yourself or breaking the jars.
Measuring Cups: You’ll need measuring cups for several steps, including measuring out the watermelon and citrus juice, along with sugar and pectin.
Kitchen Knife: Watermelon flesh is easy to cut with anything, but the rind can be dense and tough. I like to use a stout, sharp kitchen knife to make the job a little easier and maintain better control.
Cutting Boards: Break out the biggest cutting boards you’ve got for this job because juice will be going everywhere, and it can get messy. Cutting boards also do double duty for protecting your countertops from hot jars.
Use a wood cutting board, not a stone or metal one. Either one of those could potentially cause issues when cooling the jars. I’ll tell you more later.
Whisk: Used for blending sugar and pectin with the juice.
Ladle: A ladle will make filling the jars so much easier than trying to maneuver the saucepan full of liquid. Ask me how I know…
Cooking Spoon: Used for mashing watermelon pieces, stirring, and more.
Large Sieve: We won’t waste time trying to pick out seeds or clumps of pith or rind from our blended watermelon. A sieve will help us make quick work of that.
Cheesecloth or Jelly Bag: Setting a cheesecloth or jelly bag inside your sieve when you are filtering your juice will prevent the sieve from clogging up, something that will necessitate cleaning for the process to continue.
Paper Towels or Kitchen Rags: You’ll always have to cope with spills, drips, and drops when canning, so be ready to tackle them with paper towels or kitchen rags. You’ll also need them for wiping off your jar rims prior to capping them.
Timer: Lastly, you’ll need a timer of some kind. There are several steps in this procedure that call for accurate timekeeping for good results and safety.
You can use a kitchen timer, stovetop clock, phone app, or your wristwatch. Just make sure it’s accurate and keep an eye on it when needed!
Step-by-Step Instructions
Before you dive in, read over all of the following steps. Several are time-sensitive, and you’ll have to move quickly to manage them. It will help you if you know what to expect and can set yourself up for success.
Step 1: Clean all utensils, containers, and equipment. This is always the first step when you are getting ready to can anything.
Every utensil, container, and all of your other equipment that could come into contact with your watermelon at any phase of the process must be scrupulously clean.
Give everything a wash in hot, soapy water or run it through the dishwasher on the hottest possible setting immediately before you begin.
Step 2: Clear your workspace. Processing even a small watermelon will quickly turn very messy. This means you’ll need lots of counter space and more to set up all of your canning supplies.
Go ahead and clear your counters, lay out your tools, and get organized. It really helps!
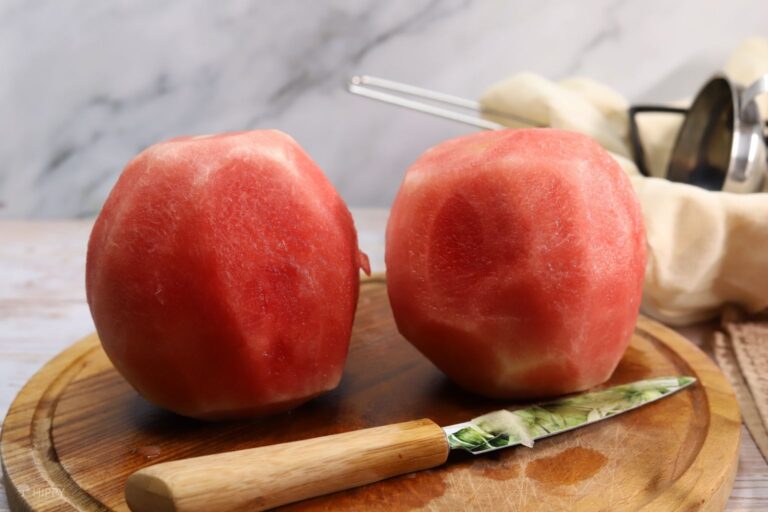
Step 3: Wash and peel the watermelon. Start by washing off the exterior of the watermelon. No, we aren’t keeping the rind, but this will help prevent contamination.
Once it is washed, cut off both of the ends, then stand it up like a barrel and peel it, making sure to get all of that pale-colored pith on the inside, which can make your jelly bitter.
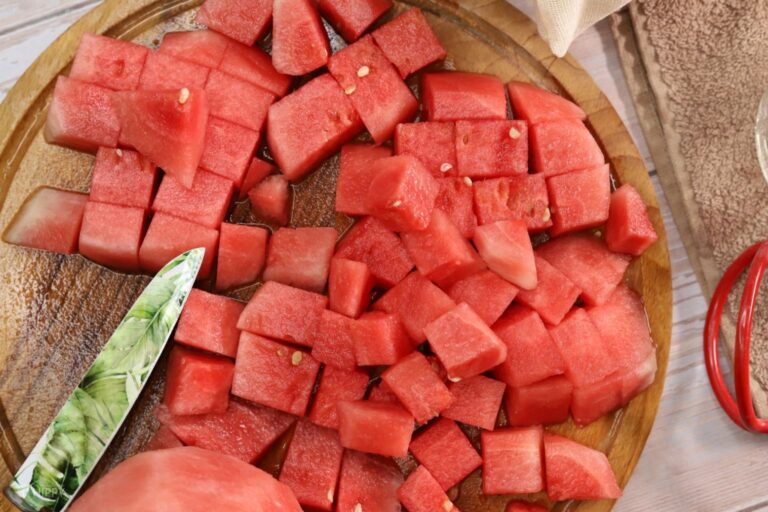
Step 4: Slice watermelon into cubes. Once the watermelon is completely peeled, start cutting it up into small cubes or chunks. Pieces that are about 1 inch square or a little larger are ideal, but don’t worry about being super consistent because we’re going to blend it all.
Step 5: Blend the watermelon. Throw all of the watermelon pieces into your blender or food processor pitcher. Don’t overload it, but don’t worry about seeds if your watermelon has them; we will strain these out in the following steps.
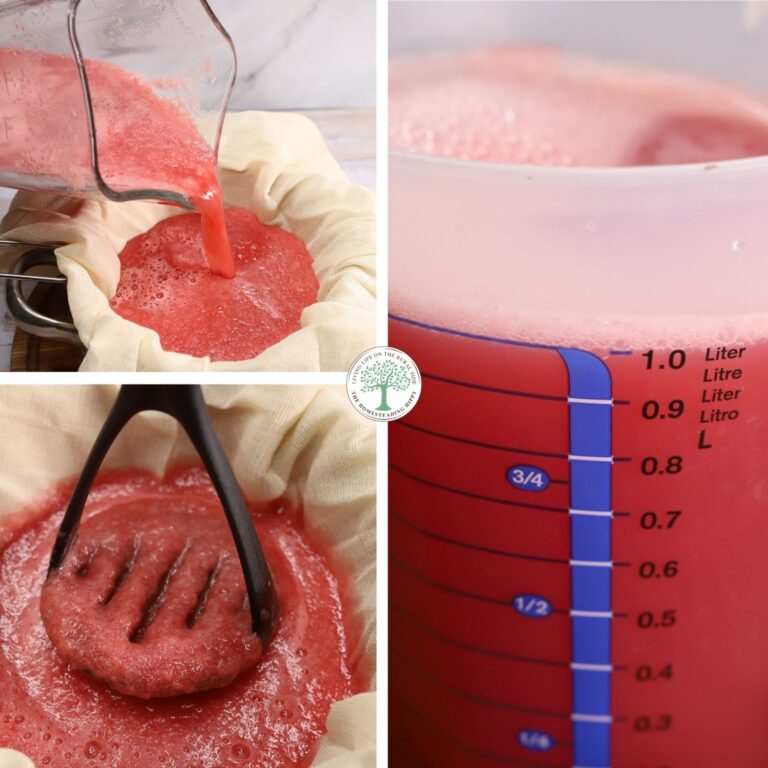
Puree the watermelon chunks until it is a smooth, consistent liquid, and then pulse it a few more times for good measure.
Step 6: Strain juice, measure, and pour into saucepan. Line your strainer with your jelly bag or cheesecloth and pour the watermelon puree into it.
Strain the juice directly into your measuring cup and then pour it into the saucepan, keeping track of how many total cups of juice you’ve got.
Use a cooking spoon to help you mash the puree down and get the juice through, and if needed, stop to wash out your strainer.
If you are making a larger batch, you’ll need to do the previous two steps in batches until you have processed it all into juice.
Step 7: Fill pot with water, preheat jars. Load the jars into the canning rack and place it in your large pot. Fill the pot with water until the level is about 2 inches over the tops of the jars.
Place the pot on the burner, turn the heat up to high, and get the water boiling to preheat the jars.
Step 8: Add lime or lemon juice and pectin to saucepan, whisk. With all of the watermelon juice in the saucepan, pour in your lemon or lime juice. You’ll use 3/4 of a cup for every 4 cups of watermelon juice. Once you’ve added the juice, give it a quick whisk.
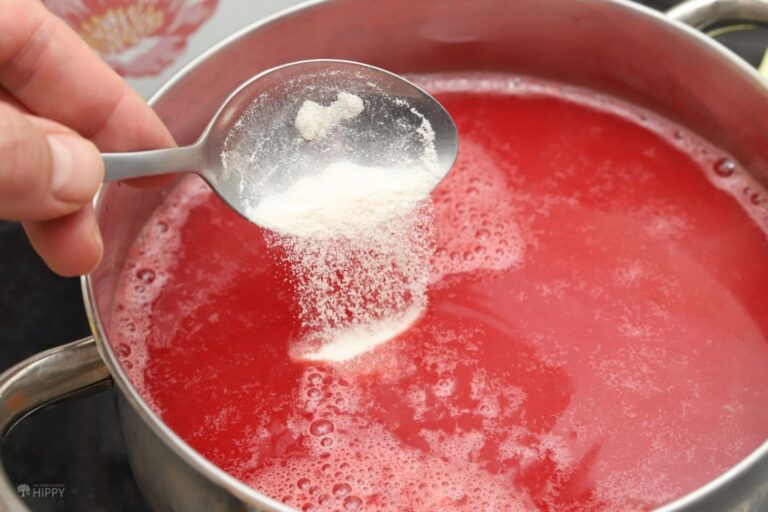
Then add the pectin. Pour in three and a half tablespoons for every 4 cups of watermelon juice. Once you’ve added all the pectin, give it a thorough whisking.
Step 9: Boil juice for 1 minute. With the previous ingredients added to the juice, turn on the heat under the saucepan and bring it to a boil. Once it starts to boil, set your timer for 1 minute and stay close.
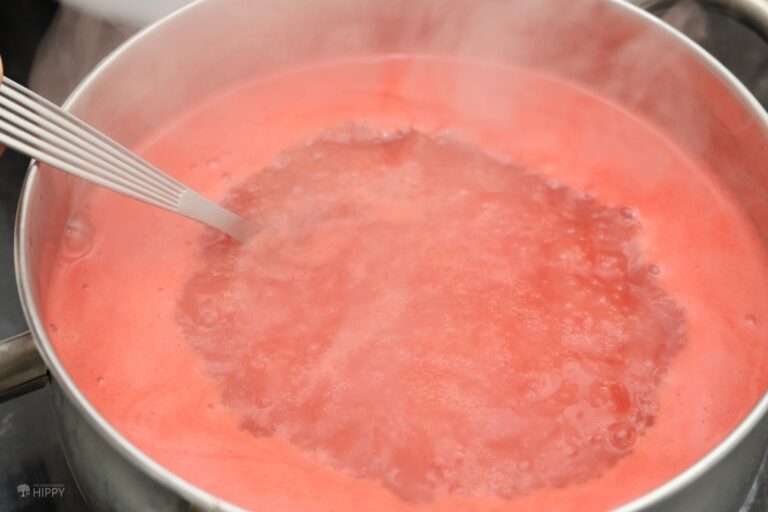
Step 10: Add sugar to juice, whisk, and boil for 2 minutes. Once the timer goes off, add your sugar to the juice mixture. You can add between 1 and 4 cups of sugar for every four cups of watermelon juice.
If you have very sweet watermelon, I recommend one cup; otherwise, add two. If you and your family like it super sweet, add more as indicated.
With the sugar poured in, whisk vigorously until it is completely dissolved and it all comes together. Boil for 2 more minutes. Move quickly on to the next step to get ready for filling.
Step 11: Remove jars, set aside, cut heat. Working quickly but carefully, remove your jars from the pot of boiling water and set them on a cutting board with the mouths facing up.
Be ready for your timer to go off, and once it does, cut the heat to the saucepan with the juice and remove it from the hot burner.
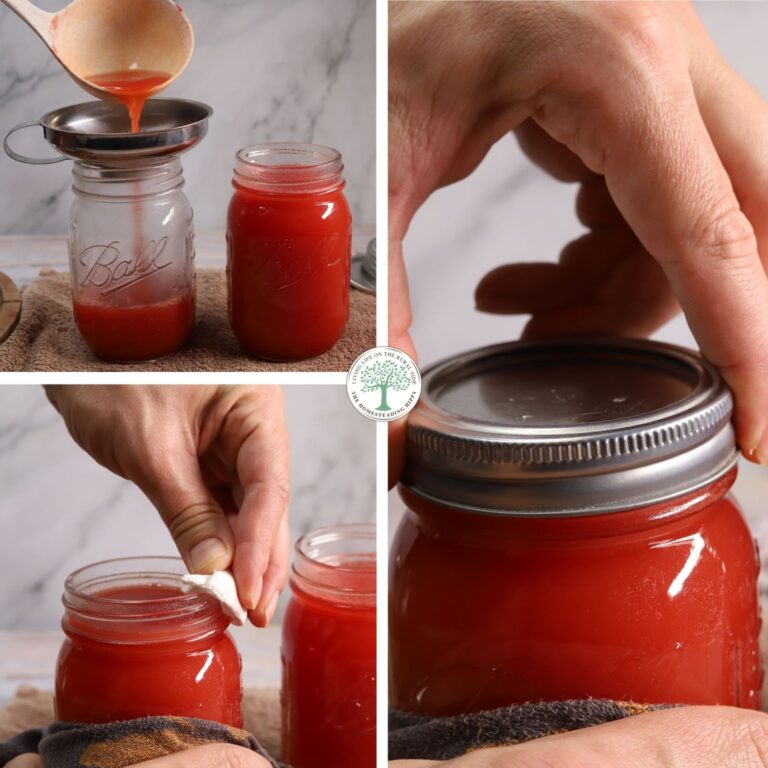
Step 12: Ladle juice into jars, wipe rims, and cap. Still working quickly, grab your ladle and jar funnel and ladle the hot juice into the jars, leaving a quarter inch of head space at the top. Repeat for each jar, then use a clean paper towel to wipe off the rims.
Place a brand new lid on each jar (if your jars don’t have reusable lids), then secure each finger-tight with a band. Do not overtighten the bands!
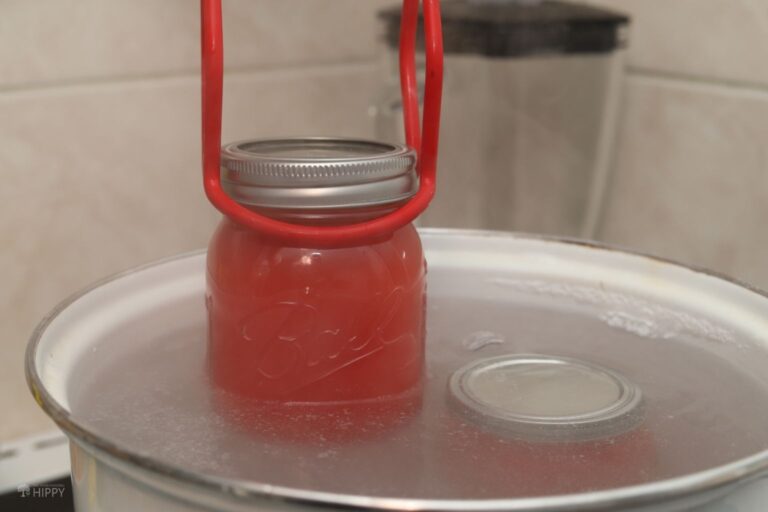
Step 13: Load jars into canning rack. Using your jar tongs, and being very careful to keep the jars perfectly vertical, load the jars back into the canning rack. Be especially cautious to avoid tilting or sloshing the contents of the jars against the lids; this can lead to a seal failure.
Step 14: Process jars. Once all of the jars are safely back inside the canning rack, make sure the water is still covering the tops of the jars by at least 2 inches. If so, once the water is back to a rolling boil, set your timer. Process the jars for 10 minutes if you are under 6,000 ft in elevation, or 15 minutes if over 6,000 ft in elevation.
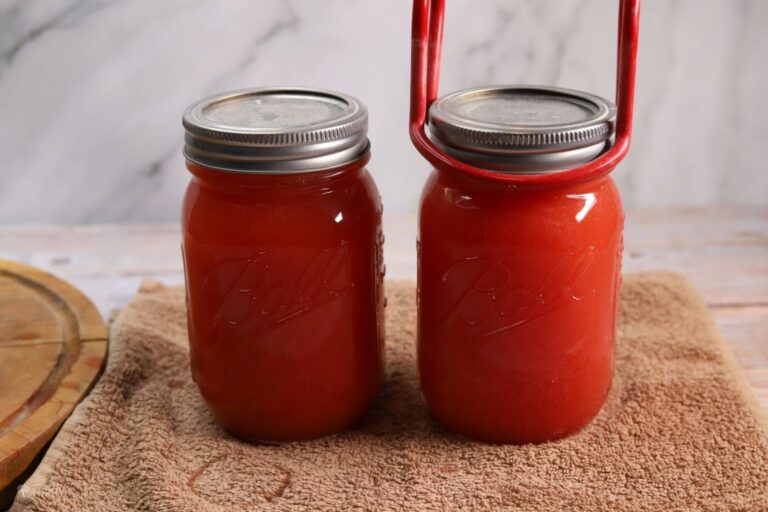
Step 15: Rest jars, then remove to cool. Once your timer goes off, cut the heat to the pot. Don’t remove the jars; let them rest for 10 minutes and then carefully pull them out with your jar tongs. Make sure to keep them perfectly upright and avoid sloshing them as before.
Set the jars aside on a clean wood or plastic cutting board, or lacking that, a folded kitchen towel. Do not set them on a metal or stone surface, or anywhere where they could be exposed to a draft from a door or window.
Sudden temperature shifts can cause them to crack or shatter! Leave the jars to cool down completely for 12 hours, but they might take longer.
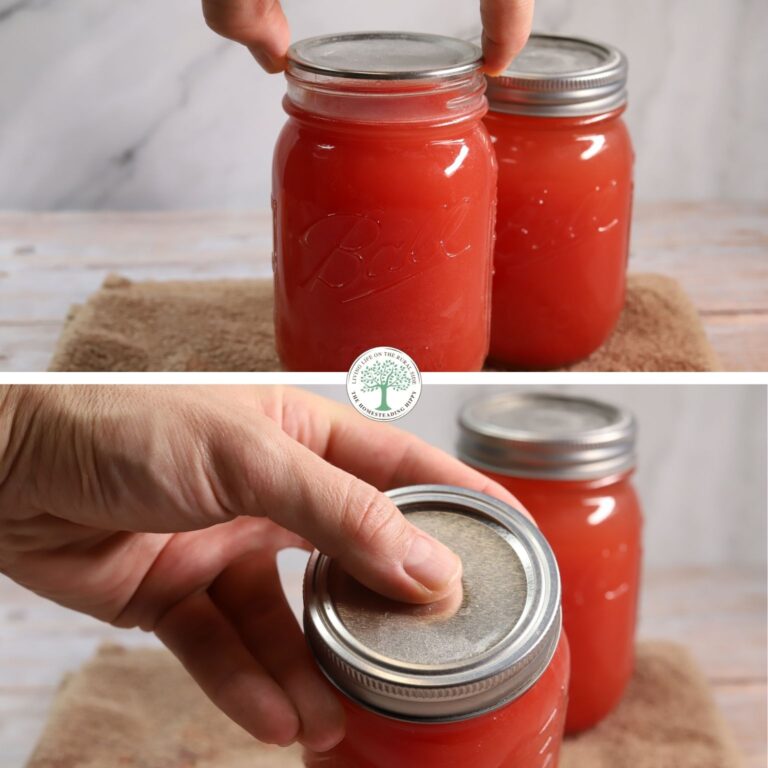
Step 16: Check lids for good seal. Once the jars are completely cool, it’s time to check them for a good seal before we store them. Take a finger and press on the lids; they should not pop or move.
If that test is good, carefully remove the bands and then gingerly lift the jar straight up, holding just the edges of the lid by your fingertips.
You only need to pick it up about an inch off the counter. You should not hear any hissing or bubbling, the lid should not pop, and there should be absolutely no movement.
If your jars pass both of those tests, they are good. If they fail either, set them aside, and I’ll tell you what to do with them in the next section.
Step 17: Store. Wipe off the outside of your jars and the lids carefully with a damp towel. Stick your jars in a cool, dark place such as a pantry or a cellar that’s protected from temperature extremes of hot and cold.
Step 18: Done!You are finished. Now you, your family, and friends can enjoy this delicious taste of summer all year long.
Is Your Jelly Bad Because a Lid Seal Failed?
Not necessarily… If any of your jars fail the lid test above, you have a choice to make.
You can open it up and enjoy the jelly right away, or stick it in the refrigerator where it will last for a couple of weeks. There’s nothing wrong with it, it isn’t spoiled or anything, but it just did not seal properly and so we can’t count on it to last as long as it should in storage.
Or, if you want, you can spoon the jelly into a new jar and, using a new lid, process it again. This will degrade the quality a little bit, but if the lid comes out okay on the second round, it is good to store as usual.
Don’t ever give in to the notion of storing a jar of watermelon jelly, or any other kind of jelly, that has a bad seal! It will not last!
How Long Will Watermelon Jelly Keep?
Your watermelon jelly will last for at least a year in storage if kept between 50°F and 60°F, and if it’s protected from sunlight. Sunlight and temperature variations are two things that will greatly reduce shelf life. Also, in my experience, most cans keep closer to a year and a half if protected, so a big batch of this jelly could last you for a long time.

Tim is a farm boy with vast experience on homesteads, and with survival and prepping. He lives a self-reliant lifestyle along with his aging mother in a quiet and very conservative little town in Ohio. He teaches folks about security, prepping and self-sufficiency not just through his witty writing, but also in person.
Find out more about Tim and the rest of the crew here.