
There’s a saying among farmers and homesteaders in my area that goes something like this – don’t ever leave your windows down or doors unlocked this time of year or you may find your car filled with zucchini.
For anyone who has raised and harvested squash varieties, it’s laughable because at harvest time the squash are in full swing and the early season excitement has worn off.
Zucchini bread, baked dishes, and the like are way past the welcome stage and by late September and early October, the leftovers wind up on doorsteps, in truck beds, and on and on as people find ways to offload their extras. But what about the potential for preservation of these nutrient-dense foods?
While wandering the freezer section, I noticed there were no hashed zucchini, squash, beets, or any other root or flower vegetables and I couldn’t help but wonder why.
Most zucchini recipes call for wedges or cube-like sections for baked dishes, or for cakes the vegetable needs to be shredded. Why not shred and freeze them for use in baking later in the year?
And, with a mountain of shreds, you have an option to pickle them. When shredded and processed, zucchini will yield a similar texture and mouth feel as traditional sauerkraut but with a far more robust flavor.
However, dollar for dollar, zucchini at the market will cost more than your average cabbage, so the most cost-effective way to make zucchini kraut is by taking full advantage of the late season harvest and using up those 4- 5- and 6-pound monster zucchinis before they go to waste.
So, let’s take advantage of our own modern-day freezers and unused mason jars by packing them full for the season.
Shredding Your Zucchini
First, you’ll need to process the raw vegetables and have them ready for one or both forms of preservation. Follow Step 1 through Step 4 to get your base materials ready.
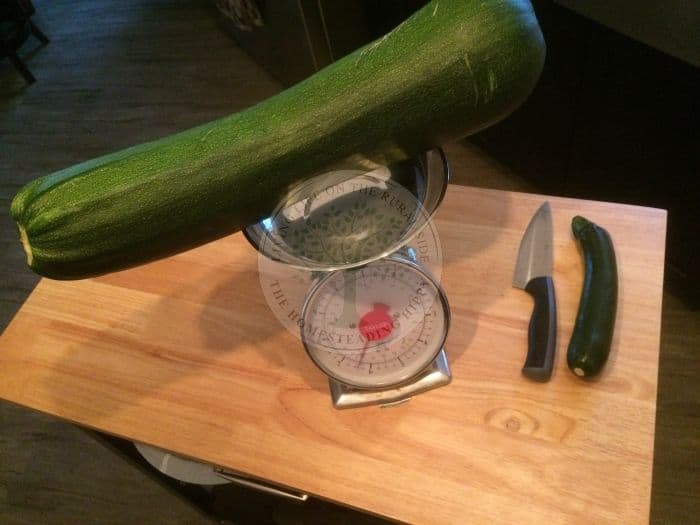
Step 1 – Find a good one.
Zucchini generally grow late into summer and early fall after most garden vegetables have long gone. And, since the leaves are generally massive, they tend to hide some of the fruits from plain view so they tend to grow large, fast, and abundant when you’re not looking.
In most cases, overgrown vegetables tend to lose flavor, but in my opinion there is little difference in the taste at all when it comes to larger zucchini.
The larger ones are perfect for this process so find one that is full, heavy and reverberates when you knock it with your knuckles. If it is large and ready but knocks solid, give it a day or two on the counter and check it again.
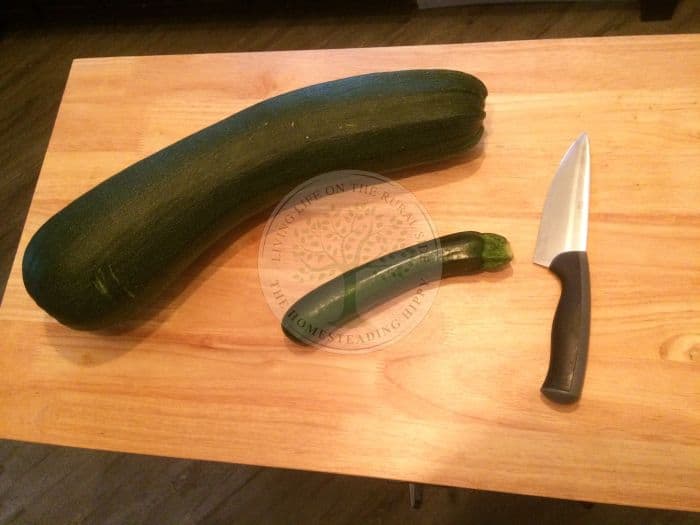
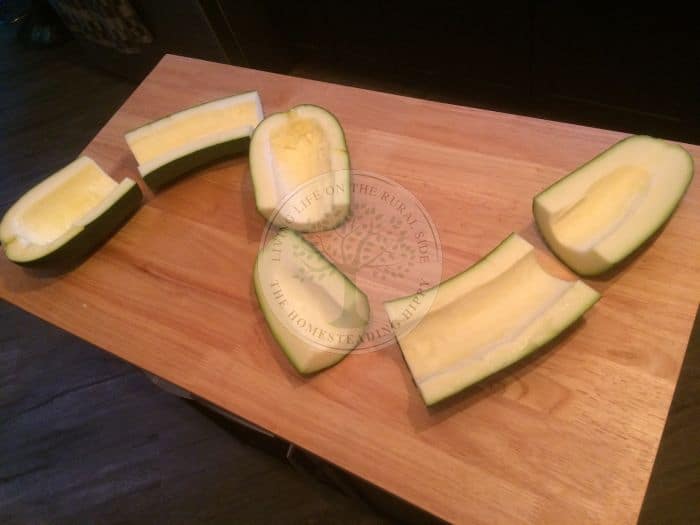
Step 2 – Clean and cut.
Always wash your vegetables before slicing into them. Between dogs, wildlife and everyday pollution, it is virtually impossible to have a clean vegetable straight from the garden. I use a drop of Dawn dish soap and wash by hand until it squeaks by running a hand across it.
You shouldn’t need to scrub unless you have significant dirt deposits. You can cut away any dings or gouges you find. When finished, rinse thoroughly and slice into two halves.
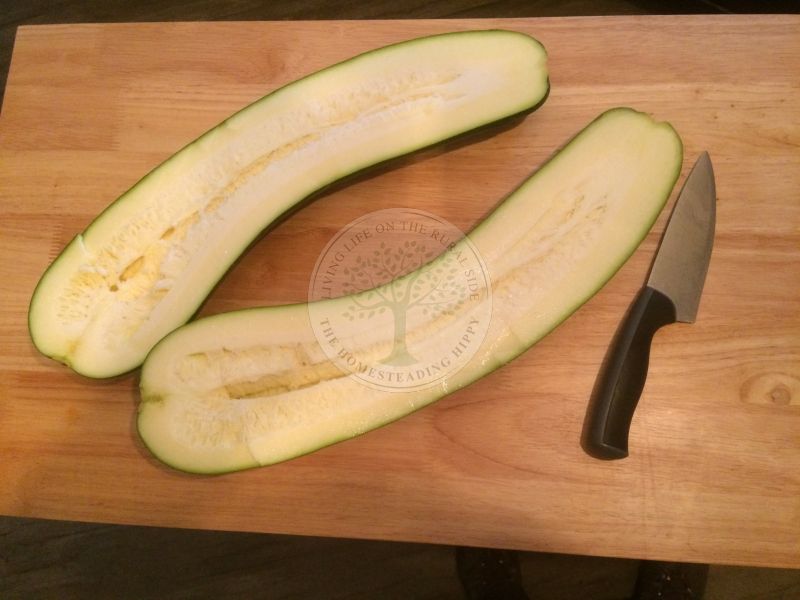
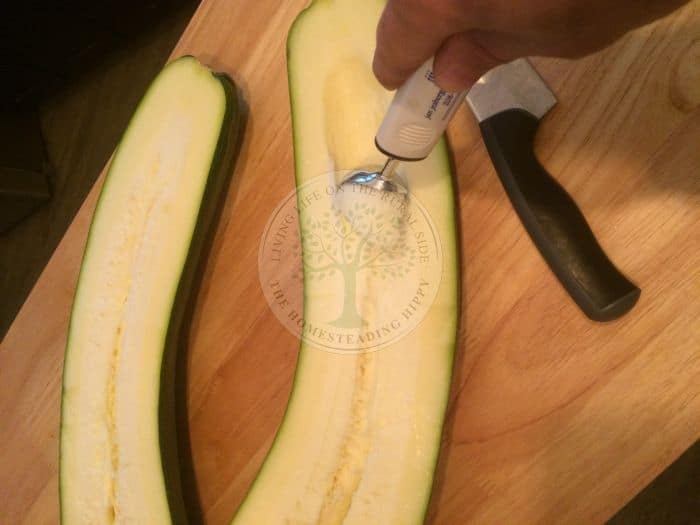
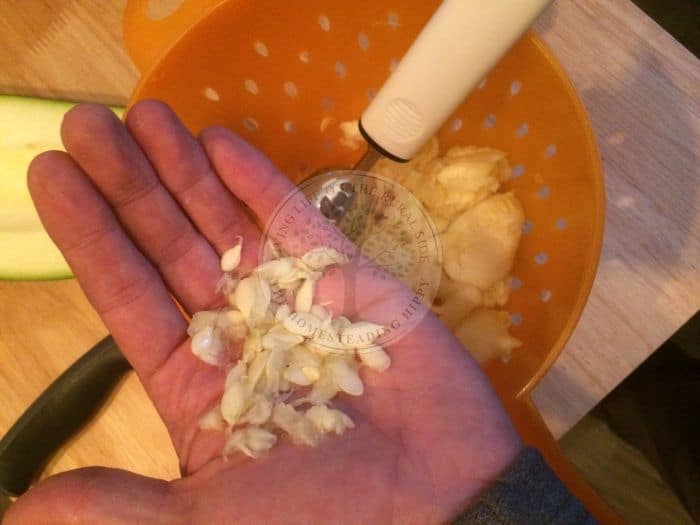
Step 3 – Scrape loose the seeds.
Field dressing squash serves two purposes: first, it prevents seeds from getting into your shredded mess later on, and second, it allows you to separate the seeds for saving. Seeds can be roasted like pumpkin seeds or dried and stored for next season’s planting if you started with an heirloom seed.
Don’t pass these up as they are a valuable part of the whole. If neither seed saving or roasting is your thing, cast them out for the birds or toss them into your compost pile. This is generally only possible with the larger, late season zucchinis. Smaller ones or store-bought produce don’t have the larger seeds and can usually be shredded without removing the seeds.
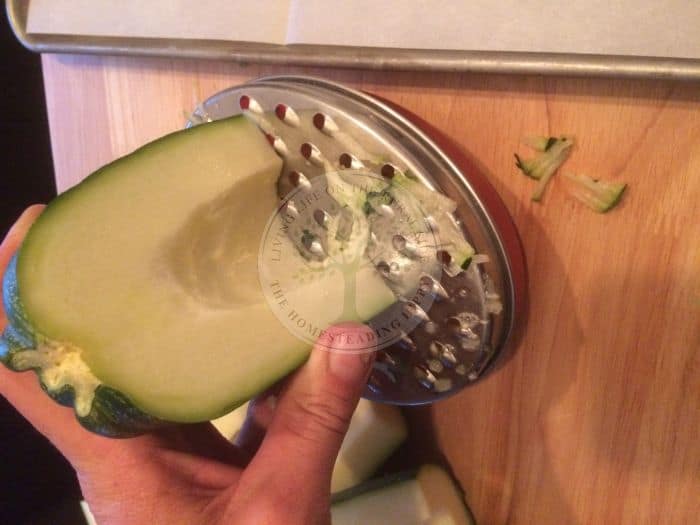
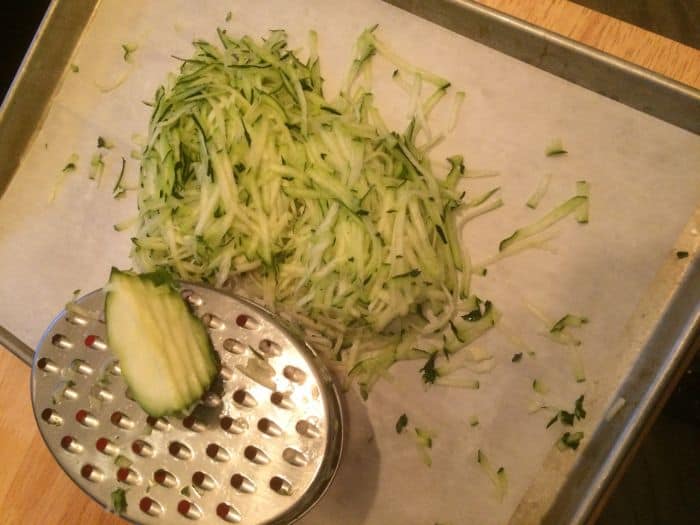
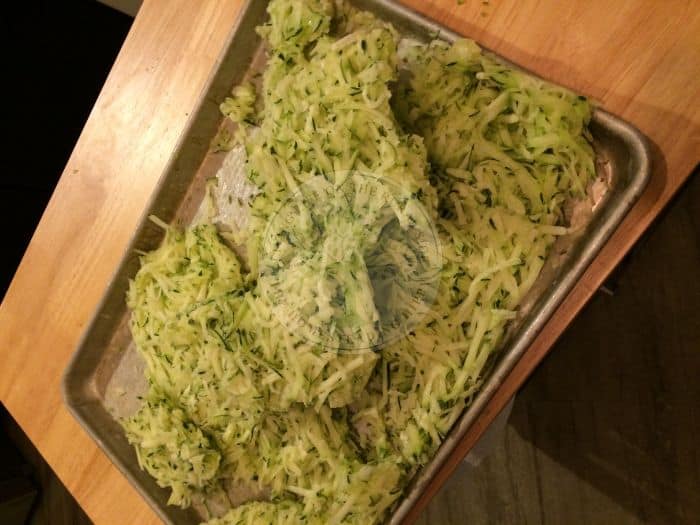
Step 4 – Break out the grater.
Roll up those sleeves because this is where things get messy. Using a cheese grater, take the halves (or quarters or eighths depending on the size of your zucchini) and run them through the larger holed grater. If you have a vertical grater it will be easier to grate these into a large bowl.
Zucchini have a significant amount of moisture in them when sliced, so collect as much as you can.
You may need multiple bowls so be prepared but work quickly to prevent the shavings from drying out too much. If you leave, cover your work with a cheese cloth or paper towel to keep moisture in.
Now that you have the messy part mostly done, follow steps 5-8 below for the frozen preserves or skip down to steps 5A-8A for pickling:
Freezing Zucchini
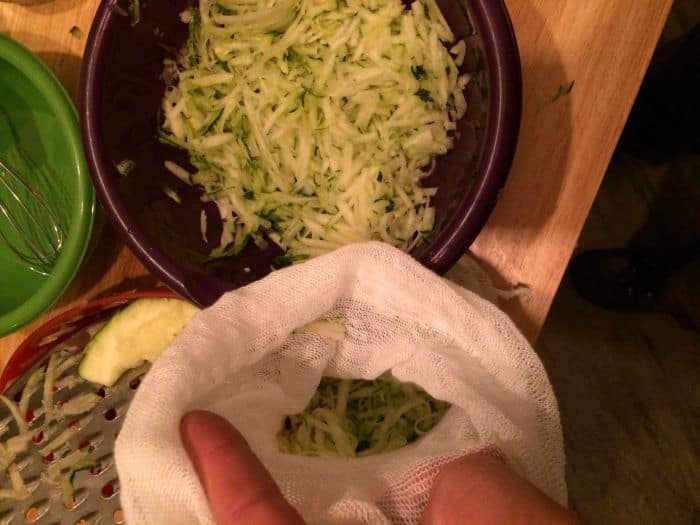
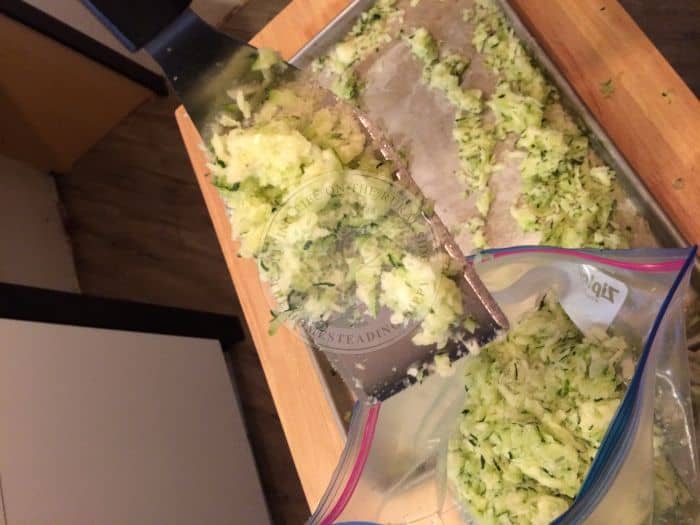
Step 5 – Strain and set.
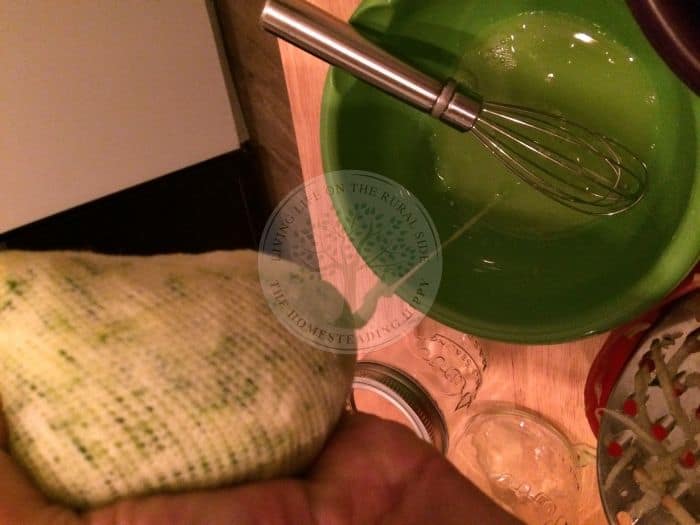
Now that you’ve got a mound of shavings, you’ll need to reduce the moisture content a little. Use a cheesecloth bag and fill with as much as it can take, then squeeze out as much of the moisture as possible.
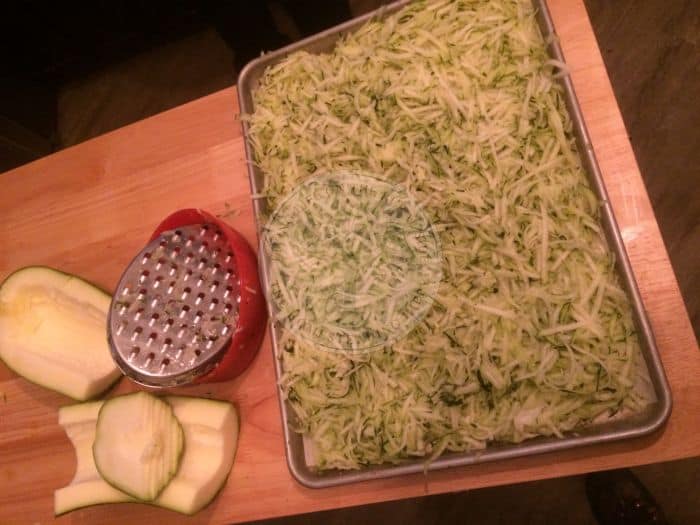
If you don’t have cheesecloth on hand you can always pat it down with paper towels. From here, you’ll need to transfer the pressed shavings to a lined cookie sheet.
Use wax paper – not foil! Wax paper has a greater tensile strength than foil and won’t fall apart after the next step. You can generally fill the pan evenly about 1-2” deep.
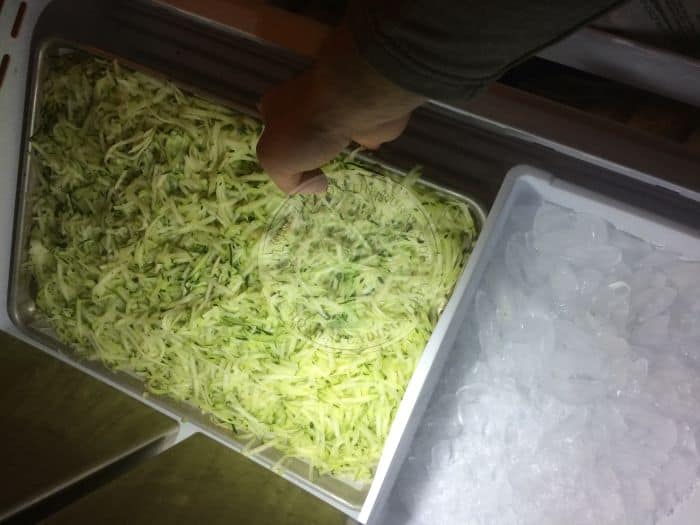
Step 6 – Freeze and don’t forget.
Place your filled pan into the freezer. (Did I mention your pan needs to be able to fit in the freezer?) Use multiple pans if needed.
Because of this step, I generally perform steps 1-5 after work, then get the pressed trays in before bedtime. This will allow them to freeze overnight and through the next working day.
Step 7 – Get aggressive.
Now’s the perfect time to get some workday aggression out, or if you have a particularly angsty kid, hand them a meat tenderizer and get them ready to go to town. Remove the frozen tray (or trays) from the freezer and pull up on the wax paper.
The entire brick of shredded zucchini should pull free from the tray. But this is a pain to store long-term, so get the mallets ready. Remember those hashed brown potatoes I spoke about earlier? That’s what we want: a bagged, ready-to-use, measurable end product.
Using mallets or even a large bowl with a rolling pin, bust the bricks down to just the shavings. By breaking apart these frozen shavings, you can pour them into individual freezer bags for portioned use later. Just remember not to overfill so you can have room to break them apart if they freeze together over time.

Step 8 – Label, Share and Serve.
Once you get your quart- or gallon freezer bags filled to your liking, make sure to put a date on them. It’s easy to fill a chest freezer with several pounds and there’s a chance you may need to cycle through what you have before next season.
If you feel you have more than enough, sharing the finished, bagged product with friends is one way to offload the portions you won’t use.
It’s much less daunting to the recipient than getting a giant zucchini and having no clue how to use it up. This step alone is a great way to introduce others to the world of food preservation and preparedness.
You may also want to throw in a chocolate-chip zucchini bread recipe and leave them just enough for a single loaf so they can make their own. Lastly, you can serve yourself bits at a time without forking out for strange produce.
Having this ready-made form of frozen zucchini is a great way to add flavor to breakfasts (just like hashed browns) quiches, lasagnas, pastas, breads and more.
For the pickling work, complete steps 1-4 above, then follow the directions below:
Pickling Zucchini
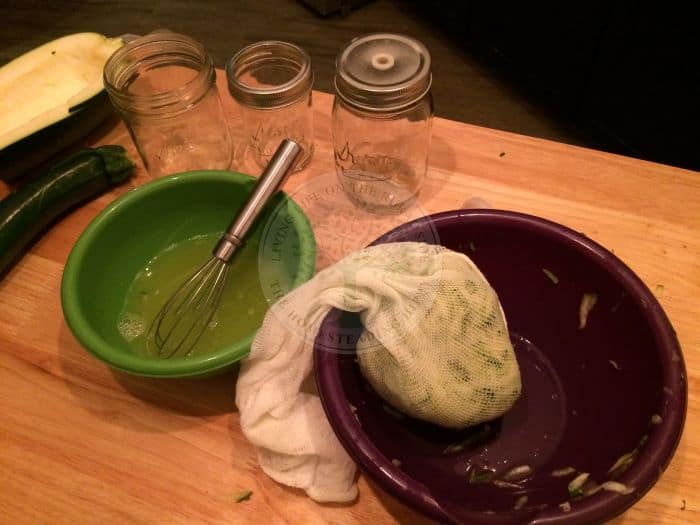
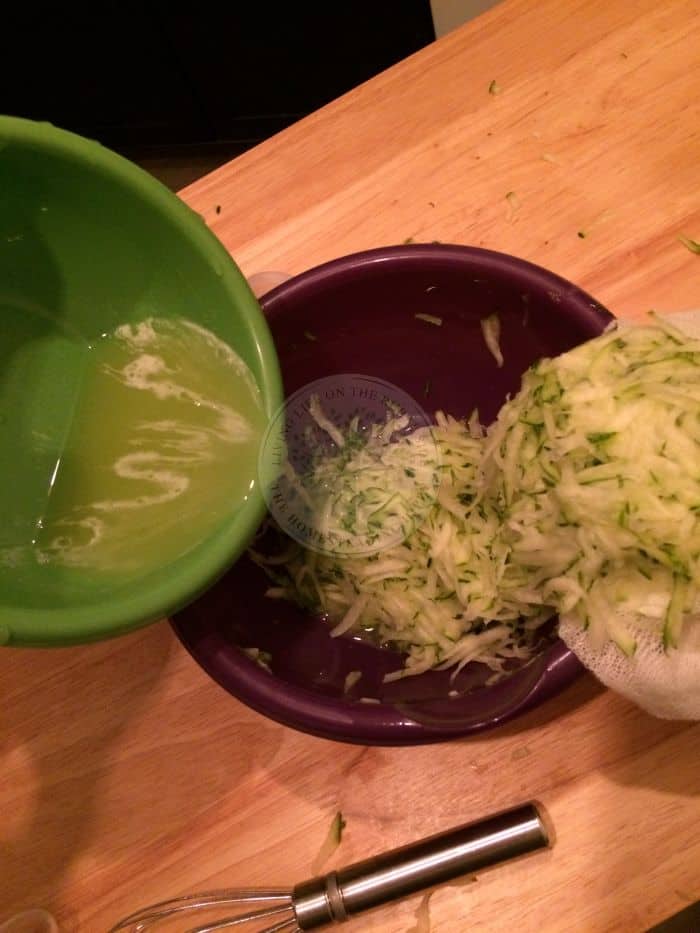
Step 5A – Strain and save.
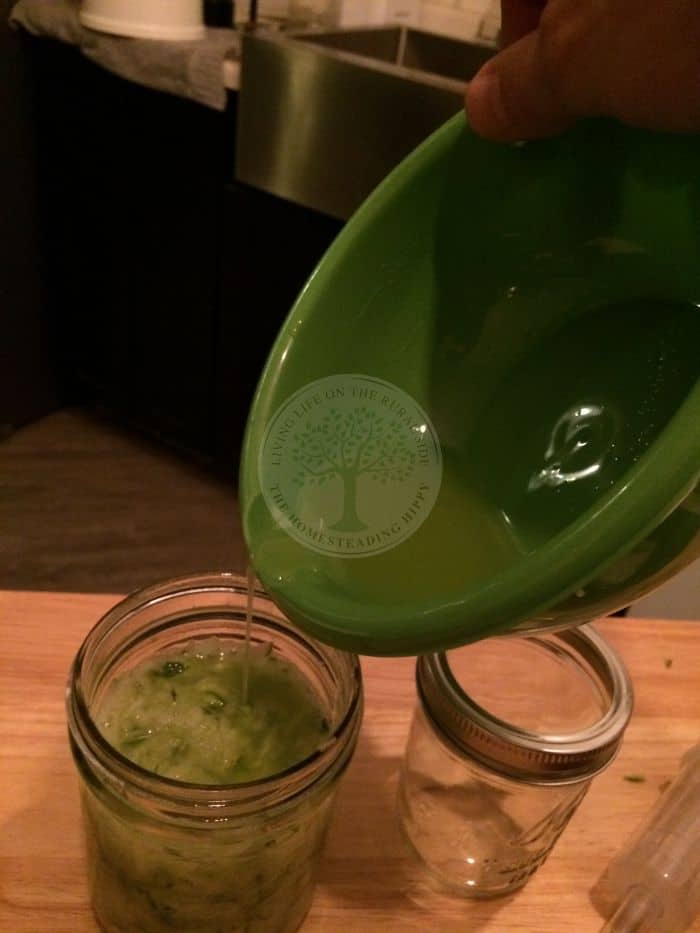
Now that you’ve got a mound of shavings, you’ll need to collect some of that moisture. Use a cheesecloth bag and fill with as much as it can take, then squeeze most of the moisture – but not all of it – and save it for Step 6.
If you don’t have cheesecloth on hand you can always squeeze it out by hand. From here, you’re almost ready to transfer the pressed shavings to pickling jars.
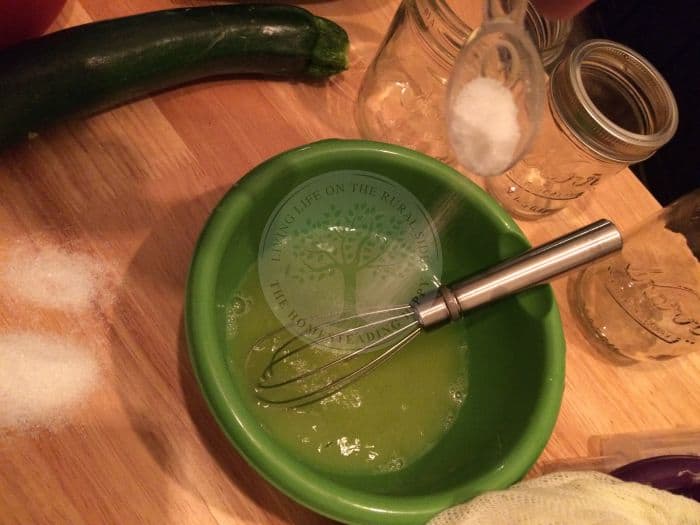
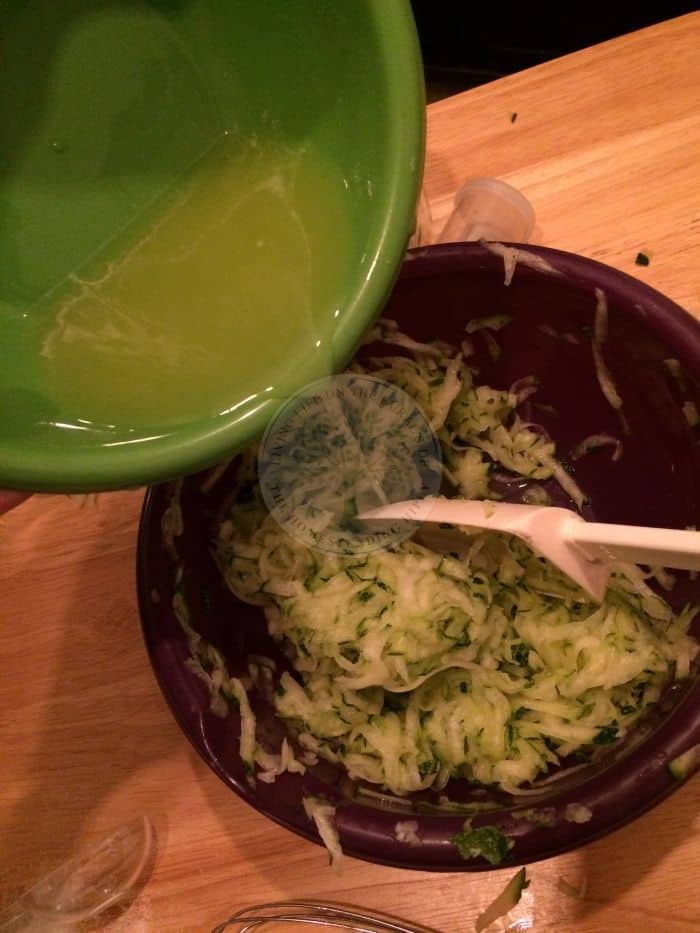
Step 6A – Begin the brine.
With the shavings ready to go, create a brine by adding salt and mixing it to a portion of the zucchini shavings and the moisture you were able to squeeze out of them.
You shouldn’t need much additional water in the mix, just squeeze and press what you can out of the existing shavings and save the fluid in a bowl and add non-iodized salt.
About 1 tbsp. per quart jar should do. It should taste slightly salty but not overwhelming. Allow the brine to set up while you get your jars boiled and ready for packing.
Once you’ve got a good brine going with the salt and vegetable juices, fold additional strained shavings back into the brine. You can let it set up if you want the salt and brine to soak in more.
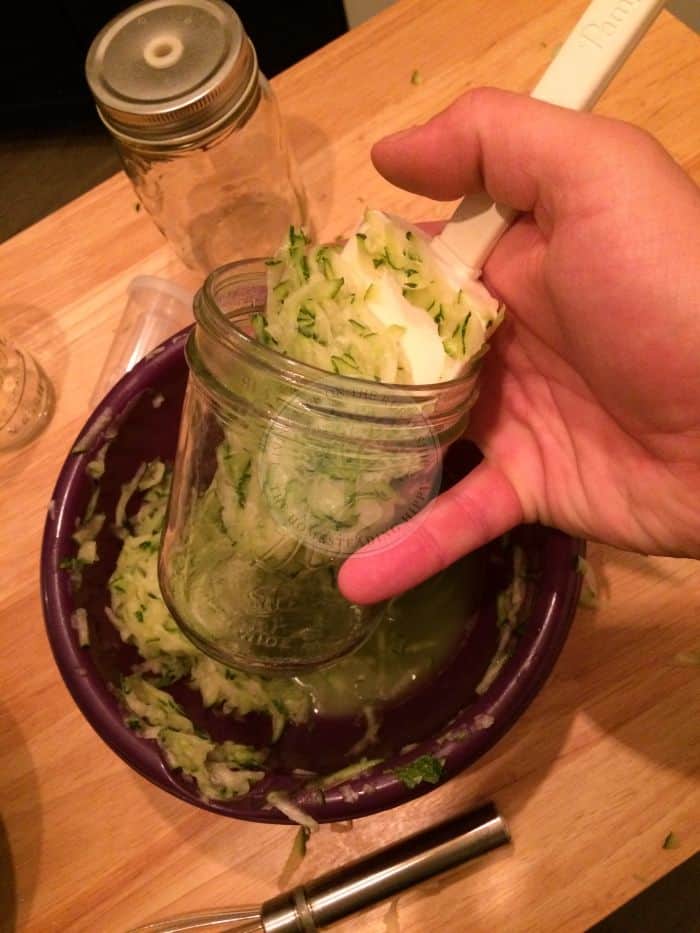
Step 7A – Get aggressive.
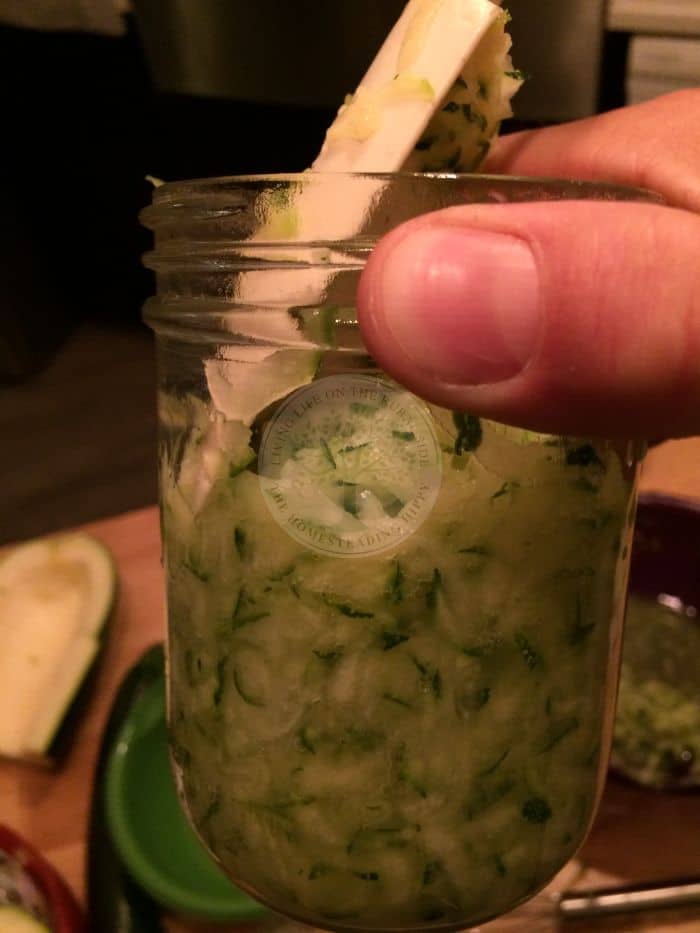
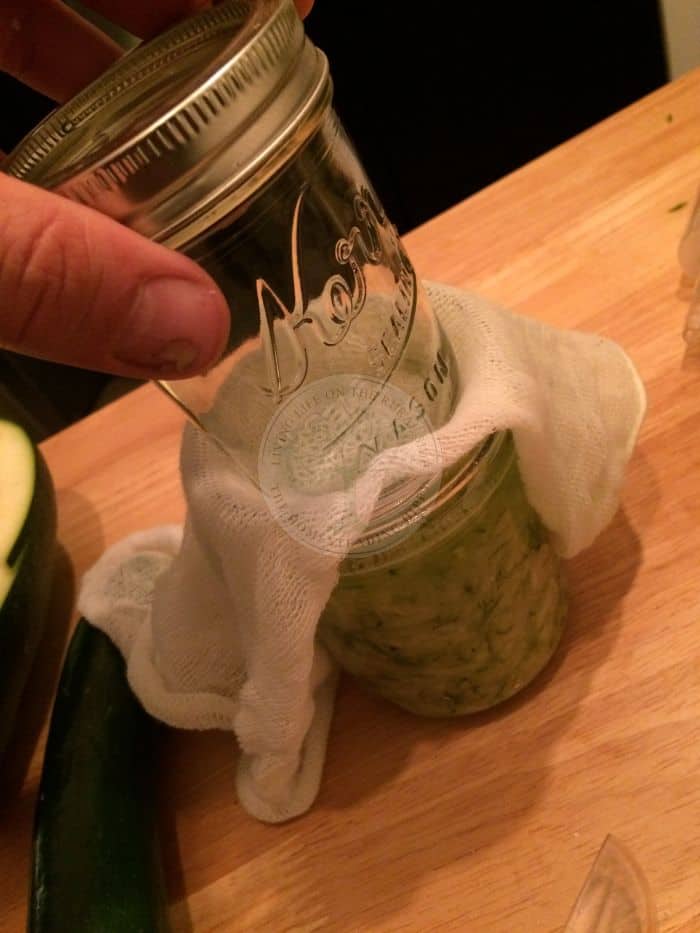
Pack the brine-soaked zucchini into sanitized mason jars. Using a ladle, muddler or rolling pin, mash the mixture to the bottom of the jar. Pack tightly and make sure the top is completely submerged. Top off the jars with remaining brine to within an inch of the top of the jar.
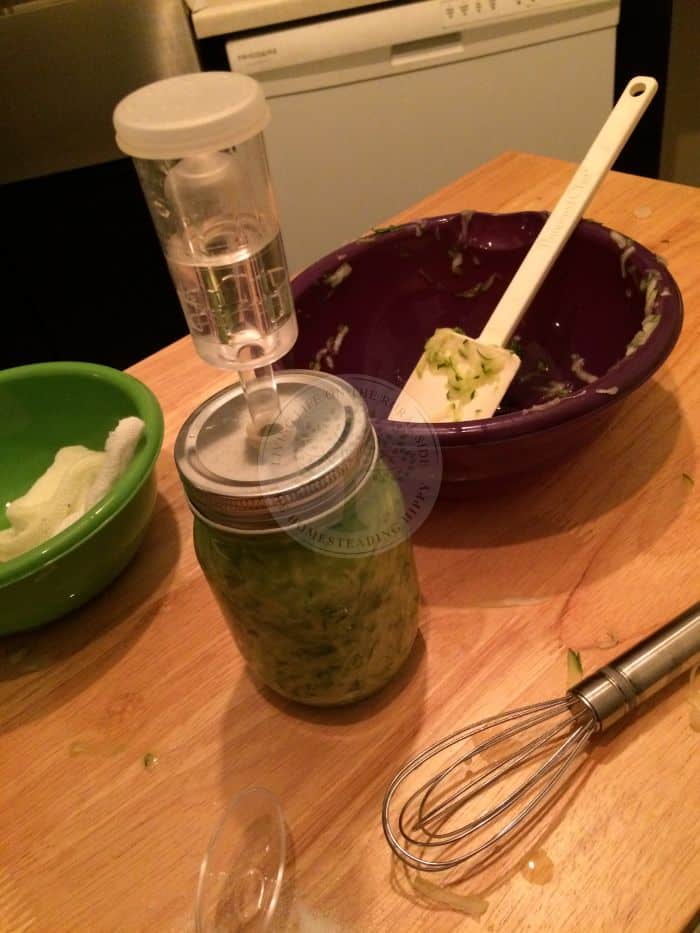
The fermentation process will take about a week upfront, during which time you have a few options. You can either press the mixture daily for the first 2-3 days or put a cap on it and allow the mixture to ferment with an airlock.
Mason jar airlock systems can be found at most farm and home stores, or even at home brew stores. You can fill the airlock with water and allow the fermentation to happen without outside contamination.
The pressing method is equally effective, but all the shavings must be submerged or the mixture will go bad. Harmful bacteria will not be able to penetrate a liquid brine layer or the airlock. You can cover with cheesecloth and weigh it down with something heavy to prevent stray shavings from crossing this liquid barrier.
Note – If you have a massive amount of shavings, you can perform this same procedure using a bowl and sheet of cheesecloth. If you have extra brine after filling your jars, save it and store it in the refrigerator in case the brine level drops and use it to top off your jars and keep them full.
Step 8A – Label, Share, and Store.
After two weeks, you should notice the fermentation slows and no more bacterial activity (bubbling, etc.) is taking place.
This means you’re ready to store the jars in a dark room with a steady temperature of 60-65 degrees. If you want to add a kick at this point, slice a pepper up, drop it inside, and enjoy the heat.
Clean and sanitize all lids and rings and seal tightly. If properly fermented and stored, each jar should last several months. Be sure to label the date they were packed and pay attention to the lids. If they start to bulge, toss them out.
Once they’ve been opened, you’ll want to keep them in the refrigerator until used up. By the holiday season, this harvest packaged food will add tremendous flavor to overcooked turkey, Super Bowl party Kielbasas, and more.
So, for those of you out there struggling with a basket full of squash in the bed of your truck, don’t fret! Give either of these little processes a try and take advantage of this season’s extra harvest.
When winter sets in and you have all the makings for a fresh chocolate-chip zucchini bread at a moment’s notice, or a kraut ready for kickoff, you’ll be glad you took the extra time and effort.
D. Ryan Buford is a professionally trained writer and journalist from the Pacific Northwest region of the United States. He currently hosts “The Next Generation,” a live, weekly internet radio show on Prepper Broadcasting Network that focuses on parenting and preparedness. Learn more about our team here.
As an advocate of the preparedness and homesteading world, Ryan left behind a successful, fast-paced urban job for a more sustainable life among farm fields, wildlife and family. In addition to leading a self-sufficient life, he writes as a freelancer and maintains a blog and magazine at www.dryanbuford.com.