

Growing tomatoes and squash crops is a common first step for beginning homesteaders looking to garden. Growing in the warmer seasons is very common even among hobbyists who just like to garden as a hobby.
But, cool weather gardening is a necessity for those in cold climates and when looking to produce healthy food year-round on the homestead!
Brussels Sprouts are a cool-weather crop that many homesteaders have yet to try. Now is the time to start growing your own sprouts!
What Are Brussels Sprouts?
Brussels Sprouts are known as a Cole crop, being part of the same Brassica family as broccoli and cabbage. Just like the others in the family, the sprouts are best when harvested after being exposed to a light frost or two to enhance the flavor.
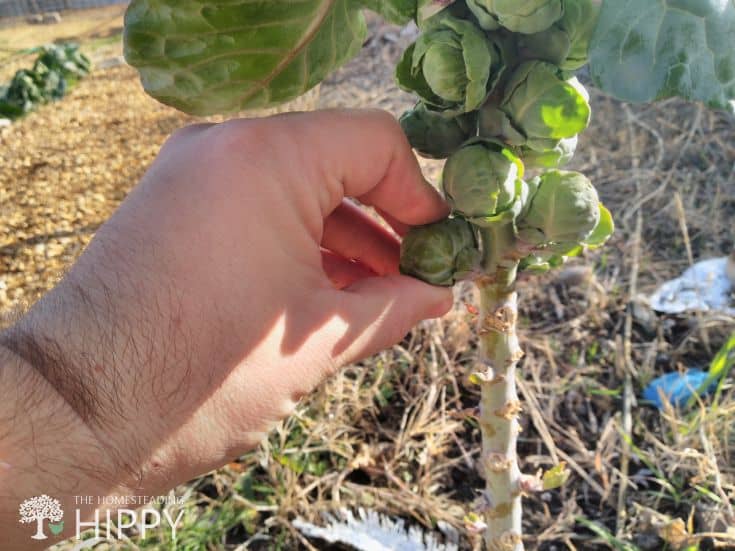
They are a unique looking plant, producing small, cabbage-like sprouts on the main stalk of the plant. Right below each sprout is a leaf. As the growing season progresses, leaves continue to develop and sprouts form at the base of each.
While many who eat Brussels sprouts only focus on the sprouts themselves, the leaves are also edible and have a similar texture and flavor, meaning you can get more from each plant if you’d like!
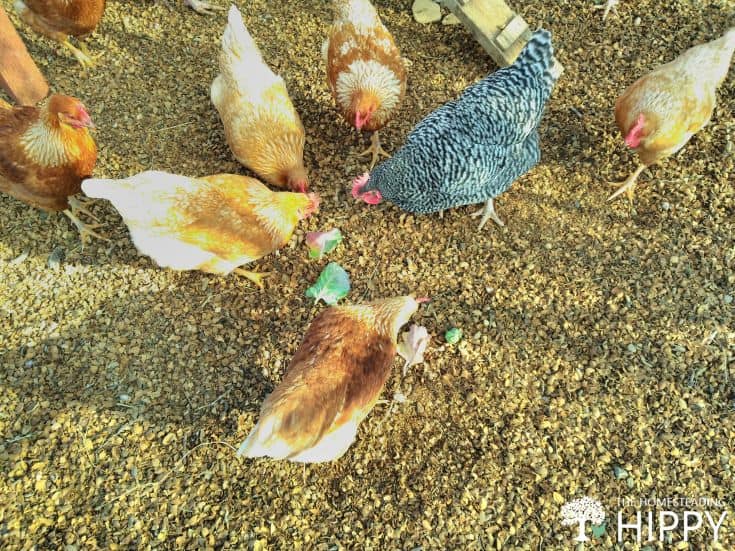
Each plant can produce around 50 sprouts on average, meaning you also have around 50 leaves to consume or feed to your chickens for a healthy source of greens in the cool season.
They are named after the city of Brussels in Belgium, where they were originally discovered growing as a descendant of wild kale.
Unlike many garden crops, they are a biennial plant. The first season is for the sprout production, and the second season produces flowers and seeds, meaning seed saving is a bit more work with Brussels sprouts compared to annual crops.
Brussels sprouts are very nutritious and are rich in vitamins, minerals, and antioxidants, making them an obvious choice for health-conscious homesteaders!
Growing Conditions
Brussels sprouts do best in cool weather. While there are varieties that are labeled as heat tolerant, most of them don’t like temperatures above 80-85 degrees Fahrenheit (26-30 Celsius).
They tend to do best with temperatures around 50-65 degrees Fahrenheit (10-18 Celsius). As mentioned earlier, they can tolerate a couple of frosts, which will improve the flavor profile of the sprouts. Dipping below 15-20 degrees F (-10 – 7 celsius) is typically the death sentence for Brussels sprouts.
They love a well-draining soil with a relatively neutral pH of around 6.5 – 7. They prefer to have full sun exposure during cool weather, but will do better with a little shade during the hottest part of the day if the growing season extends into hotter conditions.
They tend to be a heavy feeding crop, so having fertile soil and regularly side dressing with high-quality organic compost throughout the long growing season is optimal.
There are different varieties of Brussels sprouts, but most have a long growing season between 80-130 days to maturity.
Planting in the late summer in climates with warm summers will ensure a harvest through the winter. Those in colder climates should be planting their Brussel sprouts in spring or early summer for an autumn harvest.
Common Brussels Sprouts Varieties
Here are the most common varieties of Brussels Sprouts that can be grown in the ground or in containers:
- Catskill
- Churchill
- Dagan
- Diablo
- Green Gems
- Hestia
- Jade Cross
- Long Island Improved
- Mighty
- Nelson
- Tasty Nuggets
There are many varieties to choose from. The best one for your homestead will depend on your climate and soil conditions, so researching the various varieties your neighbors are growing can be good idea if you want maximal yields.
Sprouting Brussels Sprouts Seedlings
Brussels sprout seeds are really small. They can be tough to seed directly in the garden due to their size, and to the fact that they only need to be covered by ¼ inch of soil. That, along with the plant’s fickle nature with its preferred temperature means that sprouting in a container may be the best choice.
Plant each seed ¼ inch deep and keep it sufficiently damp. The seed should sprout within a few days to a week in good conditions. Keeping the seed and seedling moist until it develops a couple of mature leaves is imperative to success.
Once the seedling is established and has grown to 6 inches (15 cm) in height, it is ready to transplant to the garden bed or a container. Since you need the plant to grow to 6 inches before transplanting, make sure you pick a container large enough to give the roots room to grow for a week or two.
Transplanting Brussels Sprouts
Transplanting your Brussels sprouts to a container or a garden bed isn’t complicated. In my experience, they handle transplanting well and tend to grow in large numbers in the coming weeks.
In your container or garden bed, dig a hole big enough to support the size of the container that your seedling is in. When in doubt, just place the whole container in the hole and see if it fits.
To loosen the soil and roots in the container, lightly squeeze the sides. Then, place your hand over the top of the container, and allow the plant to rest between your fingers.
Turn the container over, and lightly squeeze the sides until the plant and soil fall into your supporting hand. Then, gently place the seedling in the garden bed or container.
Lightly cover with soil and gently pack it down to help the seedling and soil grab onto the new soil. Water thoroughly but gently. Brussels sprout roots stay close to the soil surface, so too much water pressure will disturb the root structure.
Ensure that each plant has is spaced around 18-24 inches (42 – 60 cm) from each other for enough room to spread while using the garden space efficiently.
Growing It In Containers
I prefer to grow my Brussels sprouts in my garden beds, but growing them in containers can be a good idea. It can allow you to control and change where you grow the plants, and ward off diseases and pests easier since tainted soil is typically where they come from.
Each Brussels sprout plant will need about 12 inches (30 centimeters) of soil wide and deep, as the roots spread wide and boast a long taproot as well. A smaller pot won’t allow the plants to reach their full height, and may limit sprout production.
One benefit of growing Brussels sprouts in containers is that you can control the environment much easier.
If you live in a climate that is too hot to plant it in the summer, you can start them indoors in containers in a cooler environment and then place them outside when the temperatures start to drop.
Or, if you have harsh winters, you can bring containers inside when temperatures will drop below 20 degrees F (-6 C), and put them back out when it warms up, ensuring a longer, more productive harvest.

Growing & Caring For Brussels Sprouts
Brussels sprouts are typically easy to grow. Since cold weather and weeds don’t get along, there is much less weed pressure to take precious nutrients away from this heavy-feeding crop.
Also, weeds tend to harbor diseases and pests, meaning another win for growing Brussels Sprouts.
These plants love rich soils that contain a full line up of nutrients. They need a good amount of nitrogen to continue producing leaves. Remember, each leaf ends up creating another spot for a sprout to grow, and the leaves themselves are edible, so foliage growth is encouraged!
Too much nitrogen will results in larger leaves and smaller sprouts, however.
Brussels sprouts also like Boron more than other crops. Properly decomposed, compost should be rich enough in this mineral if the compost you are making on the homestead is made from a variety of starting materials.
Side dressing your crop every 1-2 months is encouraged to make growth and sprout production as efficient as possible. Fertilizing with compost, manure, or compost teas isn’t necessary, but it will help produce larger sprouts and more of them over the life of the crop.
Brussels sprouts love water, as long as they aren’t standing. They do great with rainwater and irrigation from above, unlike some summer crops.
If you are cultivating the soil around your plants, ensure you don’t dig too deep as the roots stick close to the surface of the soil. Just top-dress your compost instead of mixing it into the soil. The nutrients will still leach to the rootzone to feed the plants.

Harvesting Brussels Sprouts
Harvesting Brussels sprouts is easy, but knowing exactly when to harvest can be a bit tricky. Picking them at the right time will result in sweet and delectable sprouts while letting them stay on the plant too long will cause them to lose flavor and a loss of optimal texture.
Again, they taste better after a light frost or two as well. Picking the sprouts when they are around 1-2 inches (4 cm) in diameter after a night or two of freezing temperatures should result in the best possible sprouts.
When harvesting the sprouts, you should also harvest the connected leaves to encourage more leaf and sprout production. Since the sprouts will mature from the bottom up, you’ll have multiple harvests per season as you work your way up the plant.
Cut off the leaves with a pair of clean scissors or clippers, and twist the sprouts gently off of the main stalk. Each time your sprouts are ready to harvest, you remove the leaves as well. You can eat these as well or throw them to the chickens. Mine love them!
If you have any yellowing leaves before the sprouts are ready, go ahead and pick them off. I haven’t tried eating yellowing leaves, so I’m not going to recommend it.
Try and use your Brussels sprouts within the first day or two after harvest for peak flavor. Otherwise, you can preserve them, as discussed later.
Common Pests & Diseases
Brussels sprouts suffer from the same pests as the rest of the Brassica family. Cabbage Loopers, worms, and maggots are a common issue. So are aphids and the Harlequin bug.
Treating pests with organic treatments, or spraying any noticeable bugs from the plants with a stream of water is encouraged.
Diseases are a bit less common, and are managed effectively with crop rotation in successive seasons. The plants may succumb to black rot or clubroot. Clubroot is easily taken care of by ensuring your soil is a neutral pH.
Ensuring that your plants are spaced out properly, crop rotation is practiced in the garden, weeds are removed, and you care for your soil as much as you care for your crops should reduce most risks for diseases and pests. Knock on wood, I haven’t had a problem yet!
How To Eat Brussels Sprouts
Brussels sprouts may be eaten raw or cooked. Sautéing or steaming are common methods, but you can also boil, bake, or barbeque your Brussels sprouts, or even caramelize them for more variety.
They work well as a side dish for almost any meal and can go great with other winter vegetables and herbs that you have growing on the homestead. The old saying “if it grows together, it goes together” holds for Brussels Sprouts.
For sake of ease, steaming them and mixing them with butter, salt, and pepper can’t be beaten!
How To Preserve Brussels Sprouts
Since Brussels sprouts taste best when eaten within the first day or two after harvest, you may find yourself knee-deep in sprouts without a way to eat them quickly.
Luckily, you can freeze them whole without blanching, and still retain good flavor and texture.
They are also a great candidate for fermentation. Since Cabbage is used to make Sauerkraut, it’s only right to assume that Brussels sprouts can be used as well.
The fermented sprouts are aptly named Sprout-Kraut. Try out different spices and seasonings for more variety if you want more spice in your life!
Seed Saving
After harvesting above 50 sprouts from each plant and enjoying all they have to offer, you may want to start thinking about saving seeds for the next growing season.
After the first crop is produced and temperatures start to warm up in Spring and Summer, the plants will start to bolt.
When this happens, they’ll develop flowers and seed pods. Once the seed pods have turned brown and dried out, you can remove them from the plant.
Then, you need to let the pods dry out for a couple of weeks. After this, you have to break the seed pods open to get the seeds out.
The best way to do this is to place the pods in a cloth bag, and smash them up to open them and remove the seeds. Then you can winnow the plant debris away from the seeds like you would when harvesting wheat berries.
Properly harvested seeds that are kept in cool, dry conditions can last up to 4 years!
Final Words
Brussels sprouts aren’t a common crop found in a beginner’s garden. But, for the homesteaders out there dedicated to healthy food production year-round, Brussels sprouts deserve a spot in the garden!
Cool-weather gardening can be enjoyable and I find it easier than warm-weather gardening!

Milo Martinovich is a small-town guy who has been focused on a healthy lifestyle for the majority of his life. Through a career in Personal Training, he became engulfed in the world of healthy nutrition, which led him to grow and raise his food, and finally, to full-fledged homesteading! Find out more bout our team members.
Excellent article thanks for sharing .
Interesting thoughts here! We struggle to grow Brussels sprouts on our homestead in southern Minnesota. The Brussel sprout doesn’t grow very big, even though the broccoli right next to it flourishes!
Perhaps your point on too much nitrogen was our problem this year!