
My youngest fledgling is studying to be a pastry chef. As luck would have it, last week her class was tasked with dehydrating pears. Everybody needs to know this: at chef school, nothing is supposed to be ‘easy. If it is easy, it will just be awful!
So, my daughter, being who she is, after reading the directions to an international hotel-level dried pear, chirps up and says, My mom’s way is way easier than this, and it probably tastes better too.
The head chef hears her and starts laughing. He immediately responds with, Chef T thinks her mom’s way is easier and better than the way of thousands of top international chefs. Care to put your money where your mouth is?
You do it both your mom’s way and my way – so I know you can do it, switch dishes with anyone in the class, I will grade them and tell the class whose was worst and whose was best.
If the dish I mark as the worst dish is actually your mom’s way, I dock 10% off your grade and you have to clean the kitchen every Friday for the next 2 weeks.
Oh, before you choose to take up the challenge, remember that you are currently the top student of the class, and this score will affect that!”
Chef T says, “Challenge accepted!”
She makes her dish and switches with a student she knows very little about thinking, he probably thinks I will switch with one of my friends.
Long story short, not only is she not cleaning the kitchen, but she also scored the top mark in the class.
If you have pears that are not being eaten fast enough, but you do not want to throw them out and waste food, or if you just want to dehydrate them for trips, lunch boxes, or storage for future recipes that require pears.
Here’s the easy way, to get delicious, dried pears…
Table of Contents
What You Will Need
I am going to focus on using an oven. Many homesteaders do not bother with buying a dehydrator as they are costly and unnecessary if you already own an oven. I have a meat dehydrator which, if needed, can be used to dehydrate fruit by putting a rack at the bottom of the box.
In addition to your oven or dehydrator, you will need your pears (while all pears will work, I prefer Asian pears or honey pears because of their flavor), sugar, water, and lemon juice.
Some prepping tools include a knife to peel the pears, a spoon or apple corer to remove the pips, a colander, baking paper or wax paper, a baking tray or rack, and optionally some honey or cinnamon:
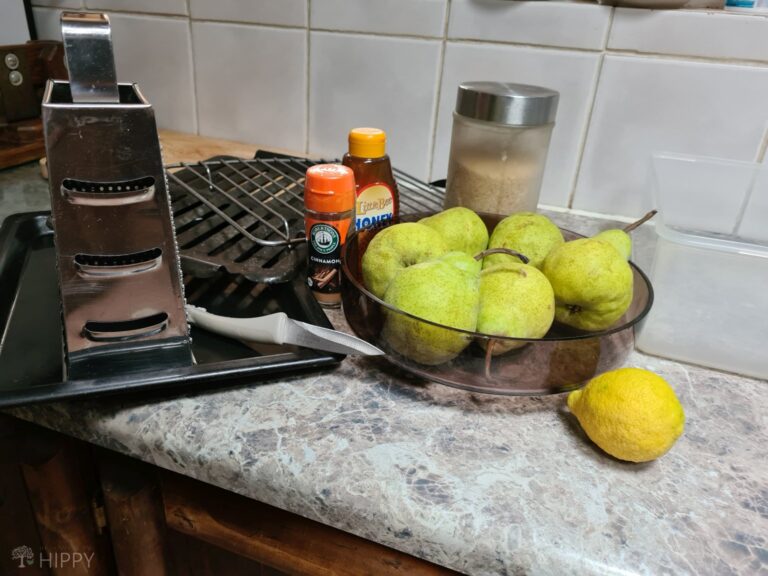
You will also need appropriate storage containers and the correct conditions to store the dehydrated pears.
How to Prepare Your Pears
Step 1. Before you start with your pears, dissolve ½ a cup of sugar in 1 and ½ cups of boiling water. You will need to let this cool down before you can soak your pears in it.
Whether You Use White or Brown Sugar, use a Half Cup of Sugar for Every Cup and a Half of Boiling Water Depending on How Many Pears You are Dehydrating
Alternatively, dissolve ½ cup of honey in 1 and ½ cup of boiling water for a more exotic taste. If you have a very sweet tooth, add the honey to sugar water once it has cooled off.

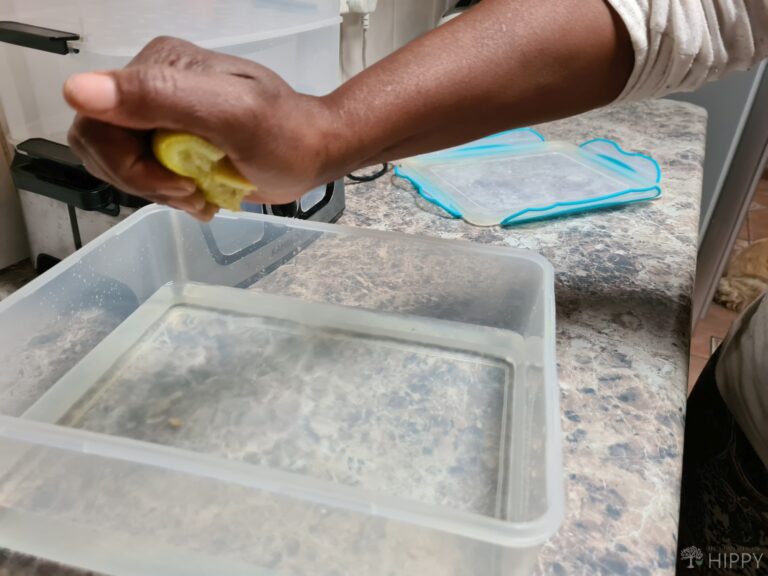
Step 2. Keep a bowl of cool water next to you to put the pears in as you peel them and slice them – optionally you can add a teaspoon of lemon juice or white vinegar stirred in so that they do not turn brown.
Now to get to work on your pears…
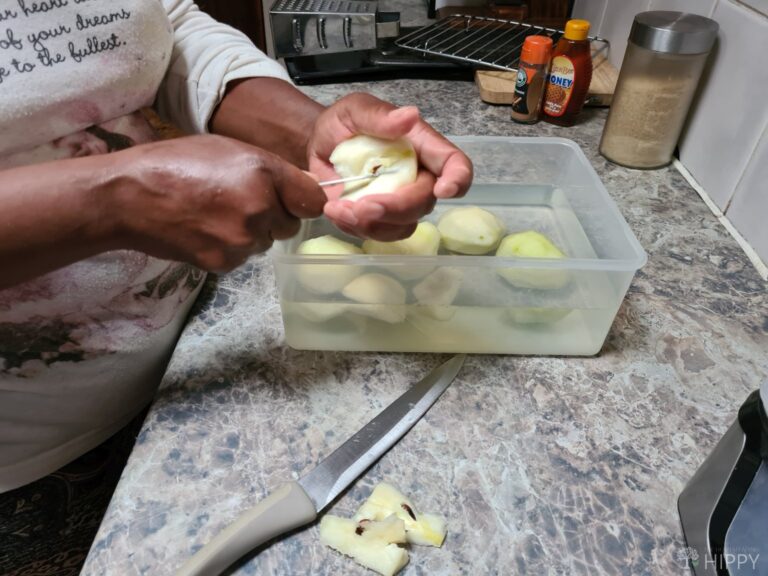
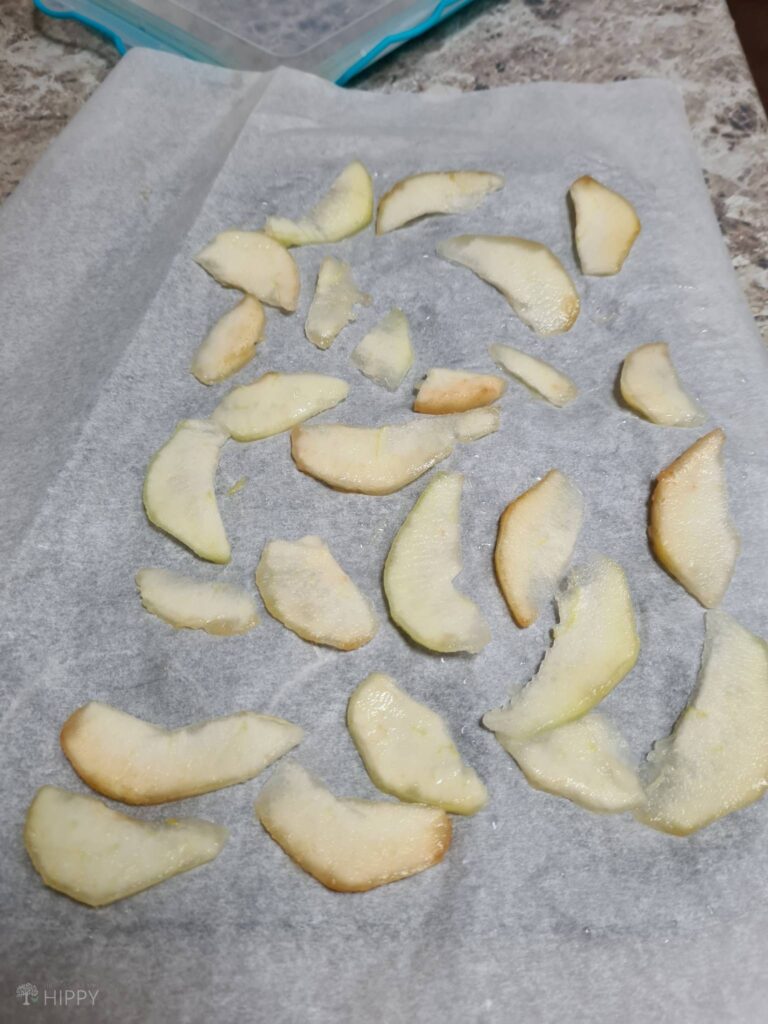
Step 3. First off, you need to peel your pears.

Step 4. As you peel and slice your pears, drop them in your lemon water to stop them from going brown.
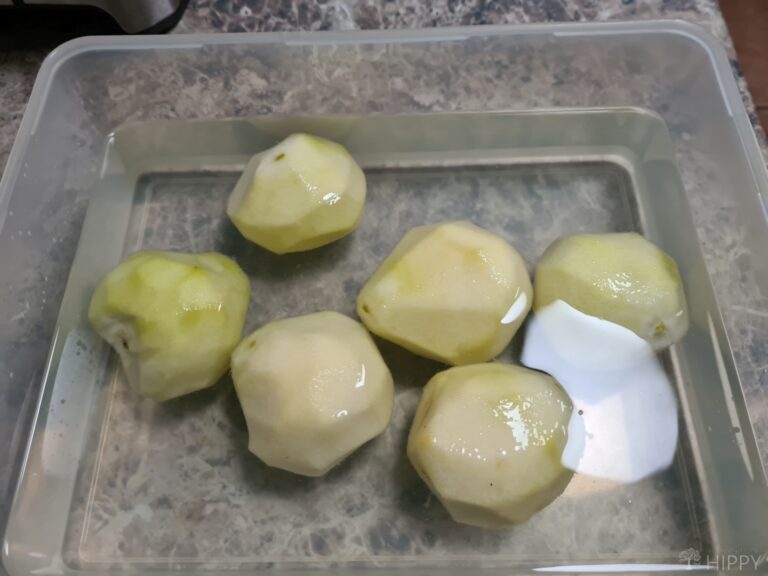
Step 5. Cut off the stem, halve your peeled pears, and remove the pips.
Step 6. Using the slicing part of a standard cheese grater, slice your pears lengthwise or cut them with a knife however you want them – sliced, halved, quarters.
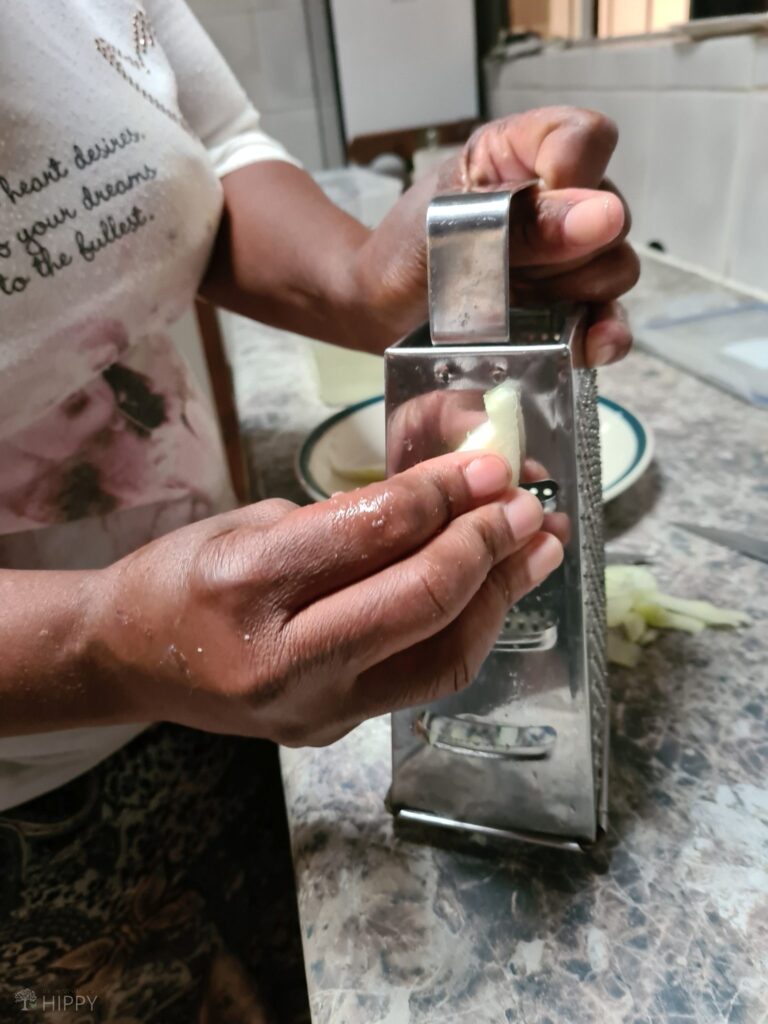
I use the slicer on the grater because keeping the slices even is important to ensure they all dehydrate evenly. It saves me time as I do not have the steadiest hands, so even slices rarely occur if I cut the pears by hand.
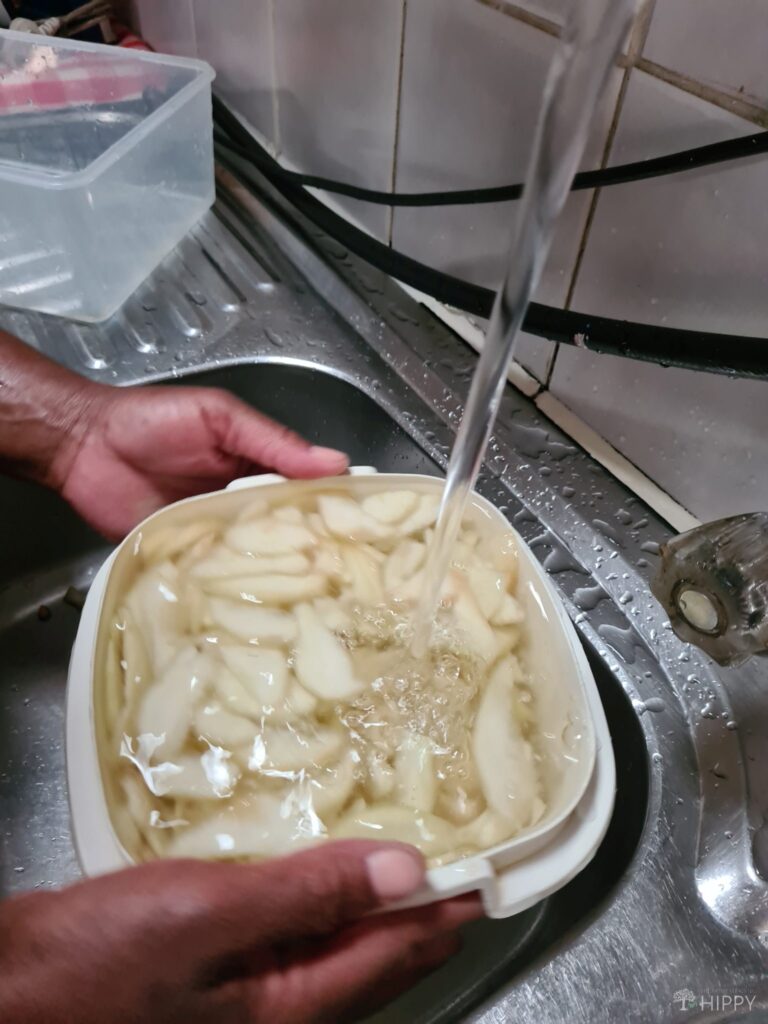
Step 7. Drain the lemon water off of the pears. You will need to remove as much of the lemon or vinegar as possible in this and the next step.
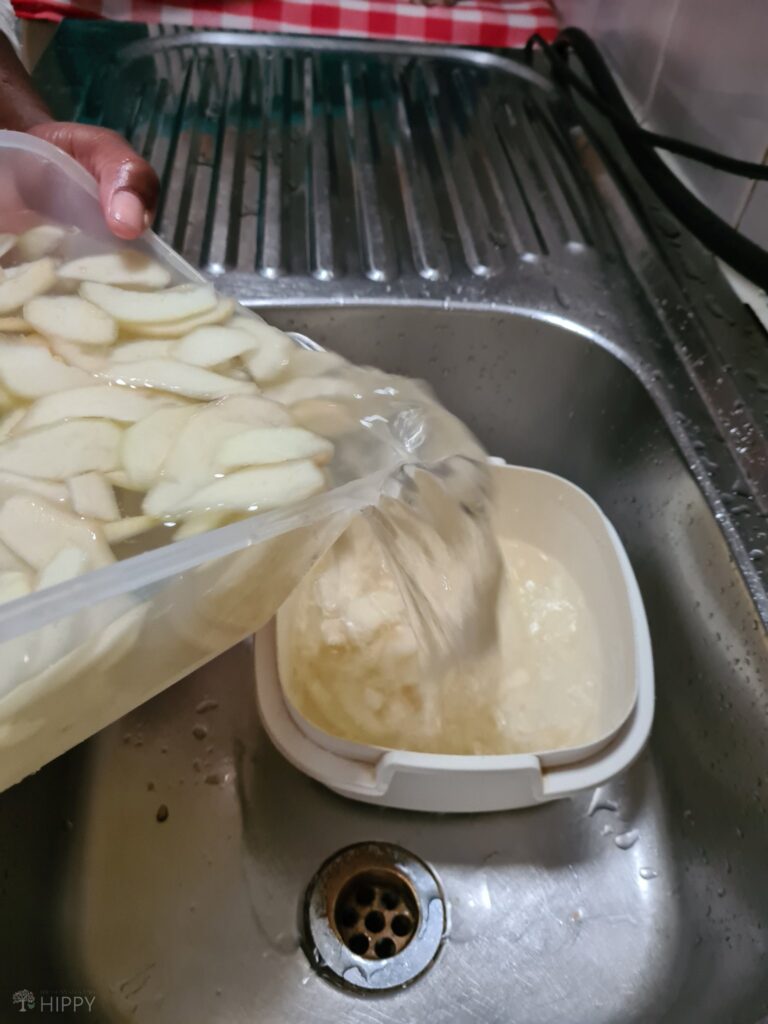
Step 8. Rinse them well before placing them on your baking trays or racks – especially if you have added lemon juice or white vinegar as these will affect the taste.
Step 9. For the final preparation step, you can now choose how you want your pears to taste.
For a completely natural-tasting pear, just rinse them and dehydrate them without adding anything else.
For a sweet but natural taste, soak the slices in a mixture of ½ cup of sugar or honey in 1 and ½ cups of water for 5 – 10 minutes before dehydrating them. Do not rinse them before dehydrating them once they have been soaked.
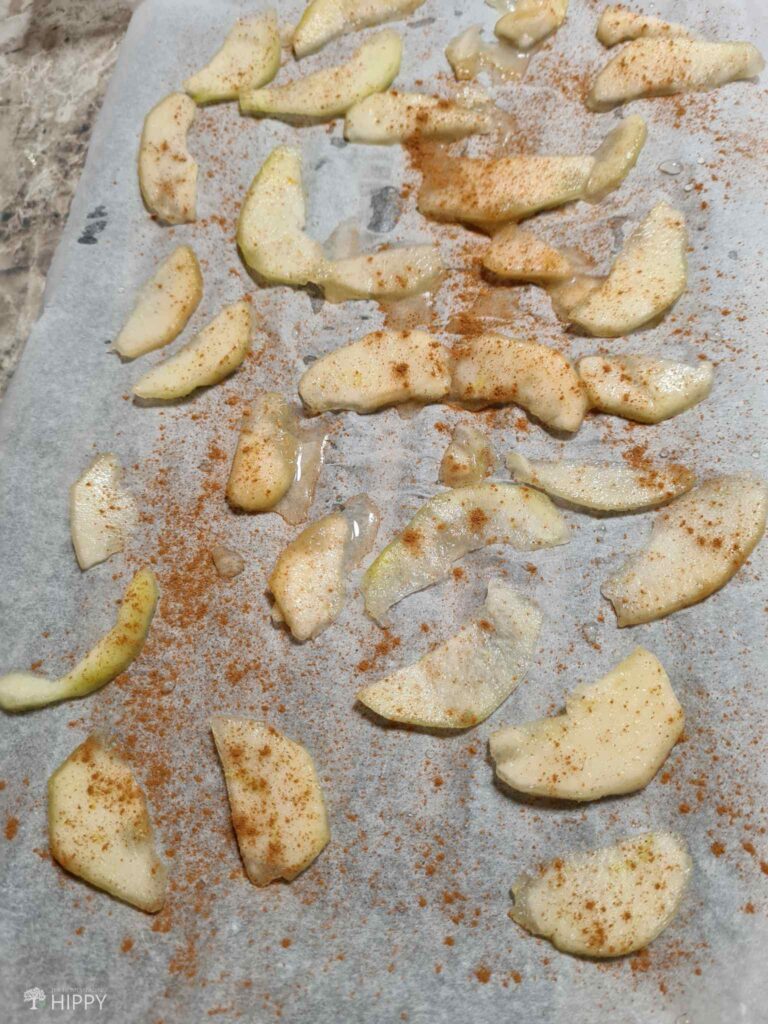
For a spicy taste, lightly sprinkle cinnamon over the slices before dehydrating them. Do not rinse them before dehydrating them.
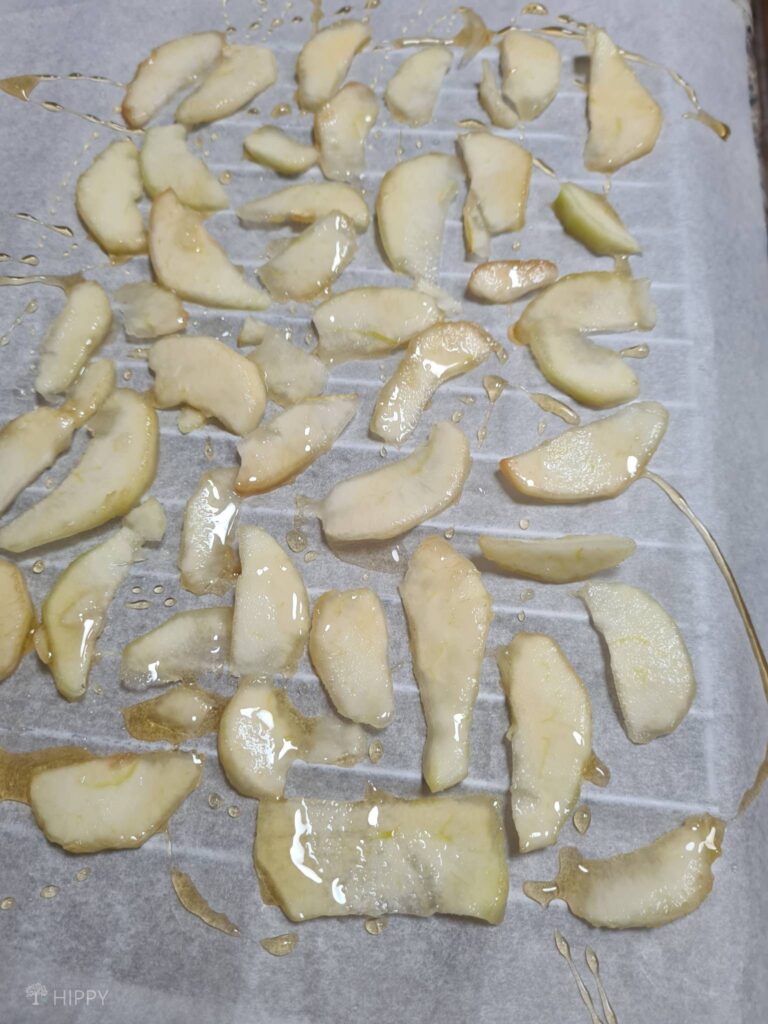
For a sweeter taste, drizzle honey over the slices before dehydrating. Do not rinse them before dehydrating them. It is important to note pears drizzled with honey will not dry out completely.
They will be sticky when you remove them from your oven. This moisture will mean that your pears could spoil quicker; they should be eaten within 3 to 5 days.
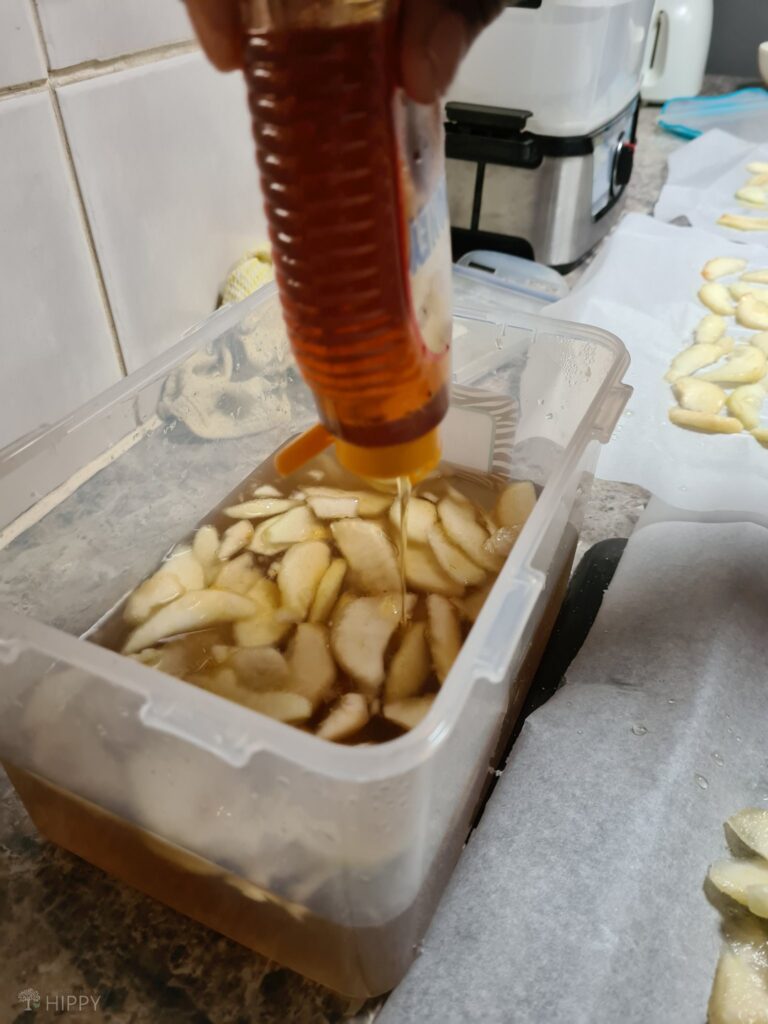
Or, for an absolutely decadent taste (this is how Chef T scored top marks) dissolve ½ cup of sugar in 1 and a ½ cups of boiling water (do this before you start peeling and slicing). Once cooled, add ½ a cup of honey.
Soak the slices of pear in this solution for + / – 10 minutes. Remove the slices and place them on your trays or racks without rinsing them off.
Diluting the honey will ensure the pieces dry out properly without making them sticky, so they will last as long as all but the honey-drizzled pear slices.
How To Dehydrate Pears Steps
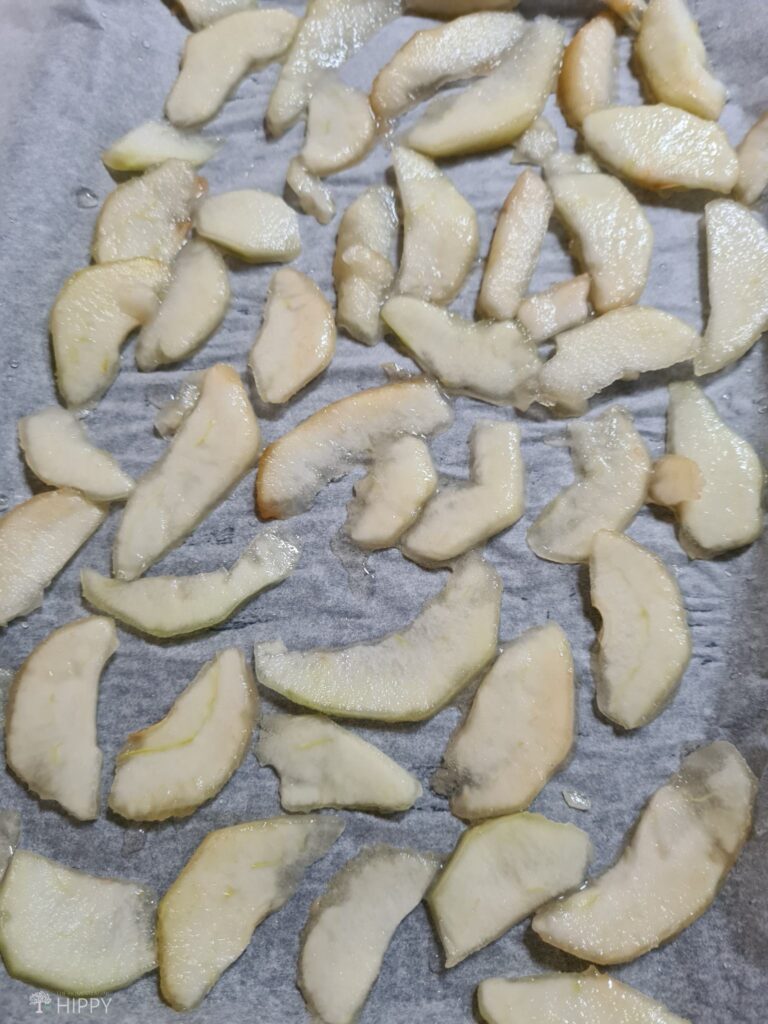
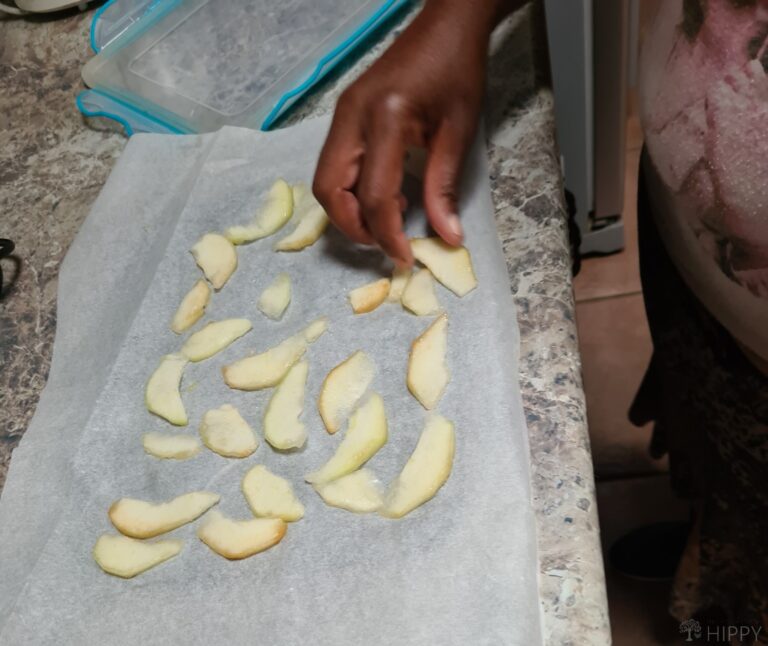
Step 1. Place the slices – whichever method of flavoring them you chose – on a baking tray lined with baking paper or wax paper or on a rack. Make sure the slices do not touch each other, you do not want them sticking together when they are dehydrated.
Step 2. Whether you are dehydrating your pears in the oven or in a dehydrator, you will need to set the temperature to 135 to 140 degrees Fahrenheit (57 to 60 Celsius), the lowest temperature setting.
Step 3. If you are using a dehydrator, place the pear slices on the trays making sure they do not touch each other.
Step 4. If you are using an oven, place your baking trays or racks in the oven. Close the oven door, but not all the way. Leave a small gap to allow steam to leave the oven. If you close the door all the way, you will be trapping the moisture in the oven and therefore the fruit.
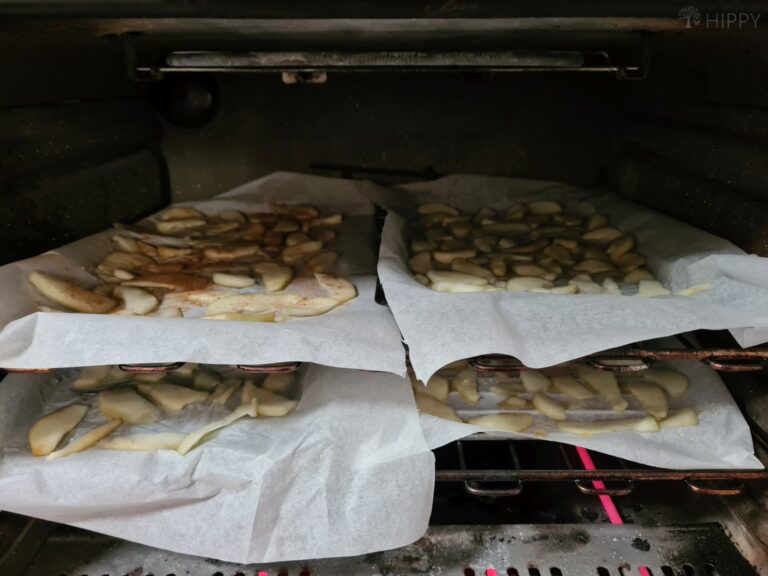
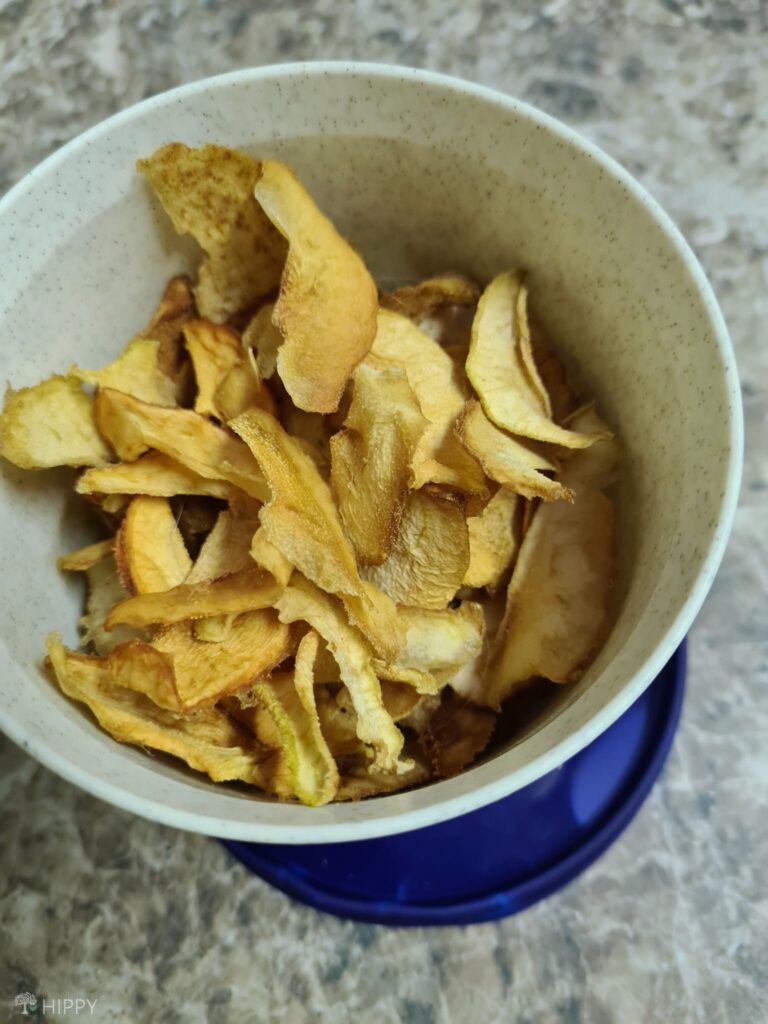
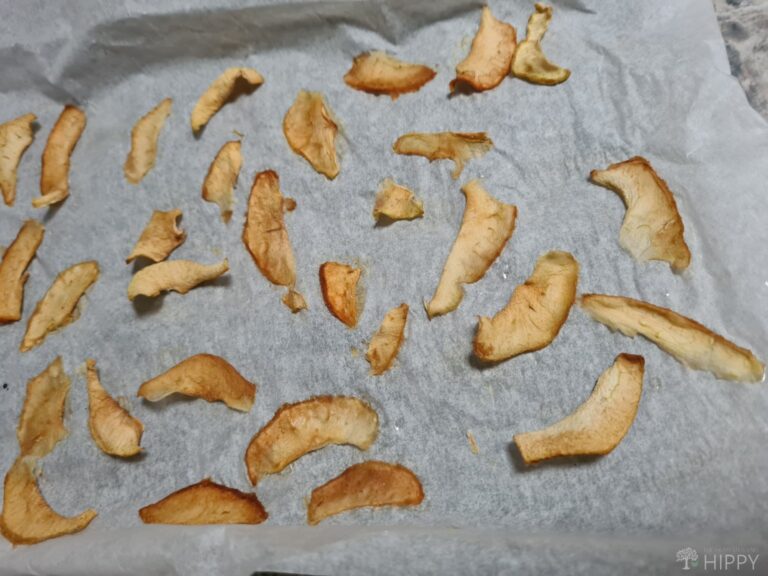
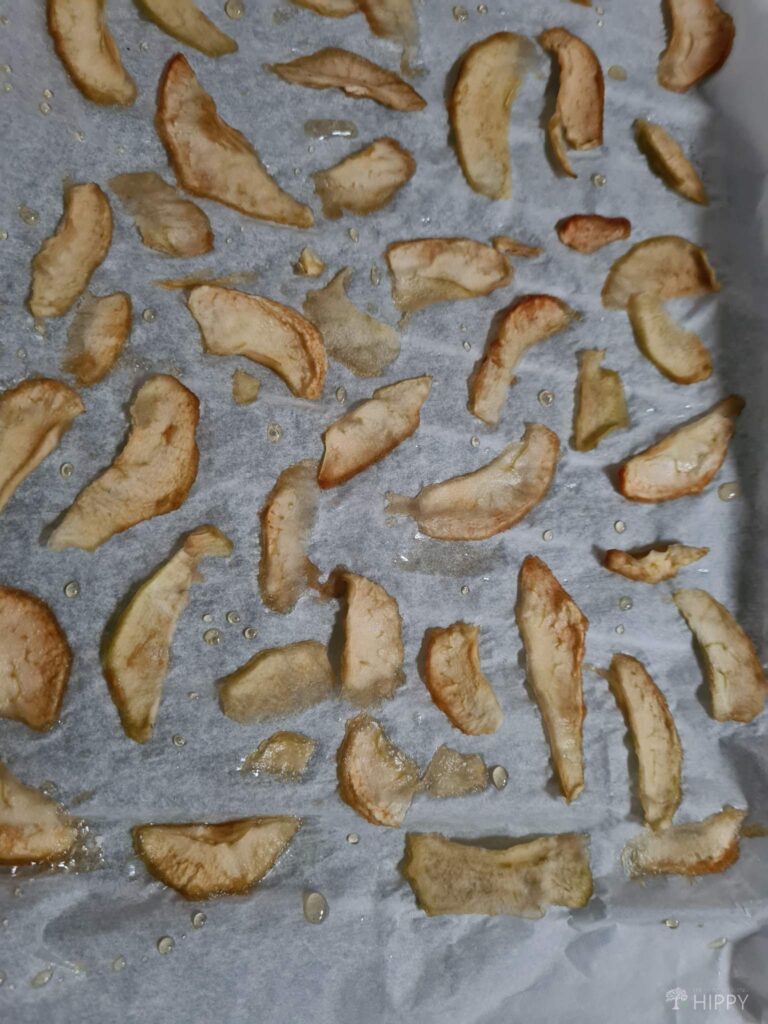
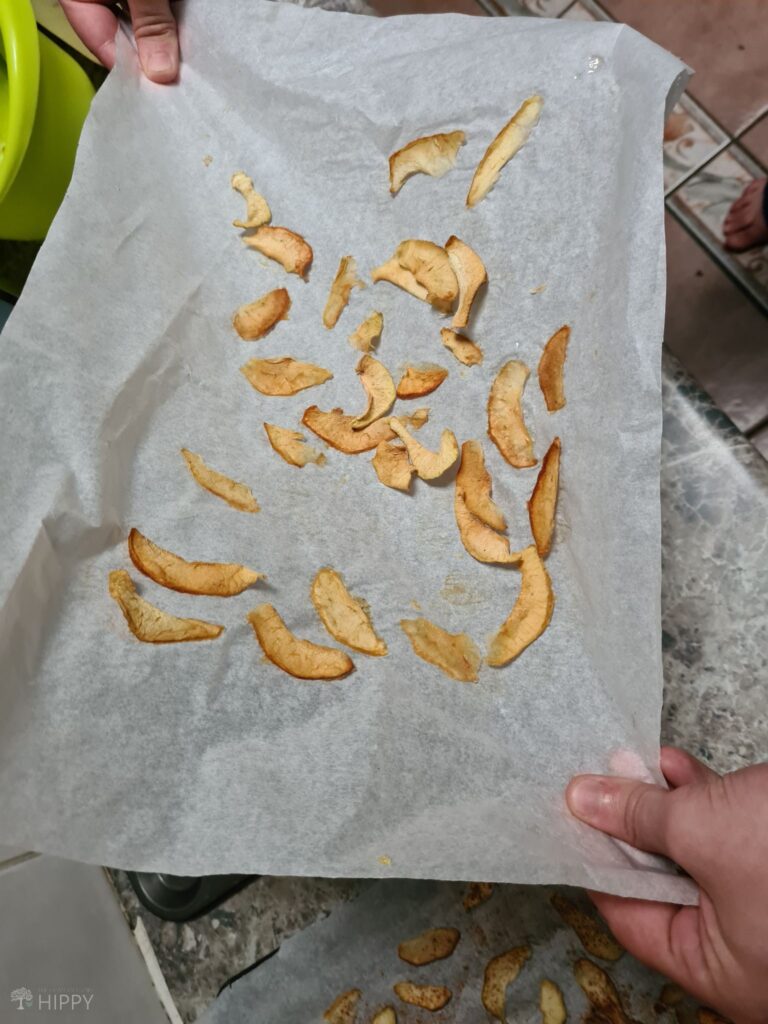
Step 5. Take the pear slices for 8 to 10 hours depending on how dry you want them. Check on them regularly to ensure that the pears are as dry as you want them. Baking them longer will make them a healthier alternative to chips.
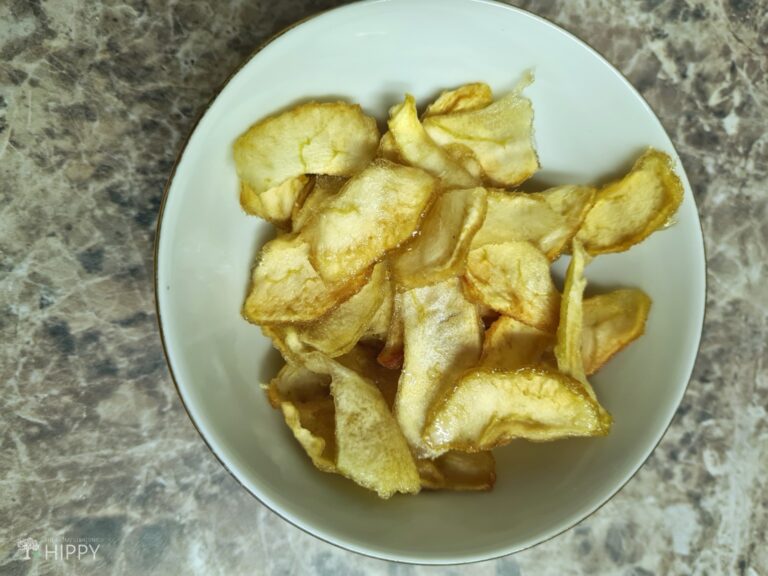
Step 6. Leave the pears on the trays or racks on your counter until they are 100% cooled and then store them in the storage container of your choice. I will tell you in the next section what works and how to store them.
How to Store Your Dehydrated Pears
You will need a suitable airtight container. Exposure to air, light, and heat will all affect the optimal storage time of your dehydrated pears.
Use an airtight bottle, airtight tupper, vacuum pack bag, or zip lock bag. If you are using a zip lock bag, place the bag in a container that will block direct light.
Store your dehydrated pears in a cool dark place like a dark cupboard, dark pantry, or a container that will block out light.
The best way to store dehydrated pears is to freeze them. To do this, you will need to vacuum pack them.
Dehydrated pears are best eaten within 6 months to a year. If you freeze them in vacuum bags, they will last 12 to 18 months.
Tips
- Make sure your slices are not touching as this will make them stick together
- Sprinkle a bit of cinnamon on them before dehydrating them for a melt in your mouth flavor
- Avoid using very bland pears or pears that are overripe
- The sweeter the pear, the better the taste
- Adding a drizzle of honey over the slices before setting them in the oven makes them super delicious
- The longer you leave them in your dehydrator or oven, the more chip-like they will be
Conclusion
At least 2 out of 2 chefs agree that my honey-infused dehydrated pears are heavenly. At least Chef T is still top of her class…
Dehydrated food takes up way less space in your pantry than canned pears. It is convenient to take with you wherever you go for your little ones – and big ones – to snack on when cranky or hungry.
Your family will love you even more than they love you right now when you prepare delicious, dried pears for good snacking year-round.

Di-Anne Devenish Seebregts was raised in an environment where daily life consisted of hiking, environmental conservation, growing fruit and vegetables, and raising poultry for meat and eggs.
She combined her passion for the writing word with her love of the pride that comes with not relying on others. She raised three children (who are now adults) to value the environment, and understand the value of being self-sufficient.
Find out more about Di-Anne on our About Us page.