
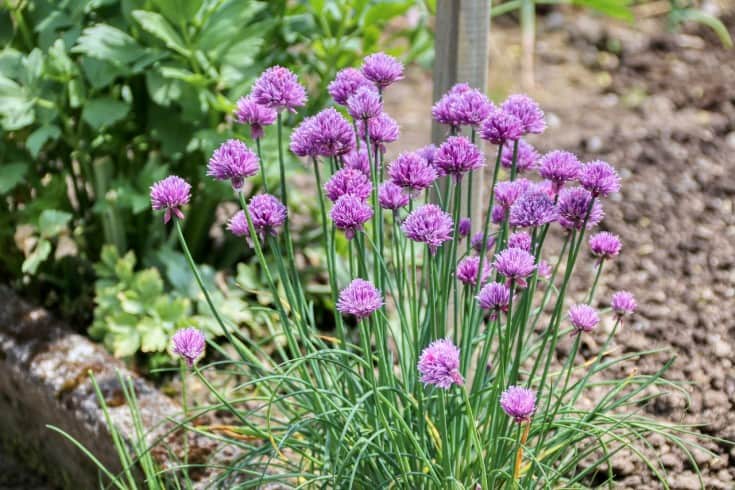
Nothing says spring quite like the appearance of fragrant pink chive blossoms in the herb garden.
If you’ve planted chives just once, you will likely find that they keep coming back, year after year, these plants are hardy, easy to grow perennials that tolerate cool, rainy weather with grace.
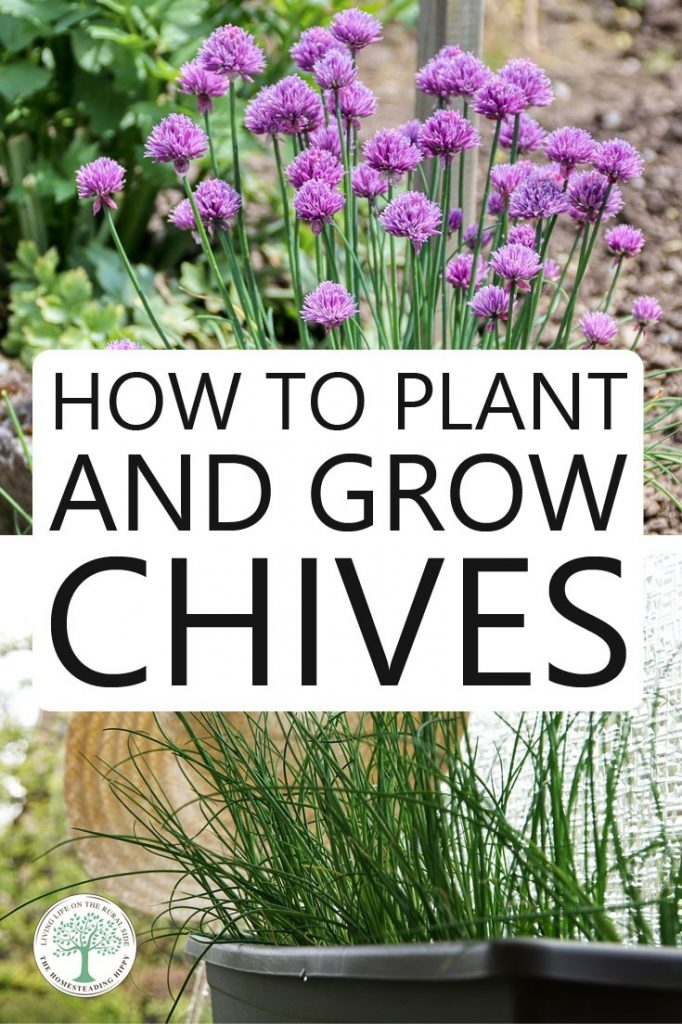
If you’re looking for guidance on how to plant and grow chives (and what to do with them once they’re done growing for the year!) you’ve come to the right place.
Table of Contents
Quick Facts
| Latin name | Allium schoenoprasum |
| Hardiness zones | 3 – 10 |
| Soil pH | 6.0 – 7.0 |
| Sun exposure | full sun |
Types of Chives
Believe it or not, not all chives are built alike! While all chives are considered perennial herbs rated for hardness in zones 3 through 10, there are several cultivars that will perform differently depending on where you are growing.
Here are some of the most popular types of chives:
- Common chives: Common chives, or Allium schoenoprasum, are chives with distinct onion-like flavors. They can be eaten raw or cooked, and do well in salads and soups. These chives can be grown by seed or by division every two to three years (which can help in overcrowded chive beds). These are the telltale chives you see producing pink or purple color flowers early in the summer.
- Garlic chives: Garlic chives are the perfect blend of onions and garlic, typically used in Asian cuisine like meat dishes and stir-fries. Garlic chives can grow up to 24 inches tall, and have tall foliage that looks like grass. They produce white star-shaped flowers in late summer to early fall. These plants spread quickly and also self-seed.
- Giant Siberian chives: These chives are incredibly unique, also referred to as blue chives for their sprightly blue-green foliage. They have pink blossoms that will appear in the middle of summer. These are the best chives to grow indoors and add a sharp onion or garlic-like flavor to any cuisine.
Growing Chives from Seed
Chives usually grow best when grown from seed. These plants will produce hollow grass-like leaves that are approximately six to ten inches long, along with globe-like flowers.
Once your chive plants are established, they will grow well for many years. They can easily be cultivated indoors, in a container, or outside.
Chives are incredibly hardy, too. Plant them in the right spot, and they’ll come back year after year. In fact, mature plants can tolerate temperatures as low as -35 F (-37 C)!
Plant your chives in full sunlight or partial shade – the exact amount of sunlight doesn’t matter much. However, you should make sure the soil is well-draining and soil.
It should be rich in organic matter. Before planting, take some time to prepare your planting beds. Aged compost is the best choice, as it will balance out the soil without creating an imbalance of nutrients.
Chives like to have a pH of around 6.0 to 7.0. Wet soil should be avoided if it doesn’t drain well. Since chives develop a small bulb, they are quite susceptible to various bulb and stem diseases.
You have a couple of options when it comes to starting your chive seeds. You can sow them indoors, potentially as early as the late winter. Sow your seeds in flats and keep them dark until they germinate.
To do this, cover the seed trays with a piece of cardboard, and water from the bottom up by placing your trays in water. You should have seeds in as little as fourteen days.
Once your seedlings have emerged, you can remove the covering. Put your seedlings under a bright light or grow light (although a bright window can work, too).
Allow the plants to grow until they are four to six inches tall. Then, you can transplant them into your garden. They can be transplanted any time between the late spring and the late summer.
Your other option is to sow seeds outdoors. You can sow chives in the garden or put out divisions or transplants as early as four to six weeks before the last expected frost date.
Your seeds should germinate in just two to three weeks, and you don’t need extraordinarily high temperatures for them to do so, either – just 60 F (15 C) degrees or so will do the trick.
Either way, when you sow your seeds, make sure you do so at about ¼ to ½ an inch deep.
Planting Chive Transplants
When you’re putting chive transplants into your garden, you will want to do your best to space them eight to twelve inches apart. It may look like there is too much space between the plants at first but don’t worry – chives multiply quickly, and the plants will fill in before you know it!
If you’re planting divisions, use your shovel to separate existing clumps, and then trim the leaves to about an inch above the ground. You can then replant divisions by covering the tiny little bulbs with soil.
Watering
You will need to water your chive plants regularly, especially when they are first becoming established. Once they have set roots and are in their second season (or later) of growth, there’s not much you will need to do.
They can mostly survive on natural rainfall alone. Just try not to let your chives dry out too much – chives that become overly dry will produce leaves that are brown, papery, and poor-tasting.
You may want to protect your chives from direct, hot sunlight in warm climates. To do this, cover them with shade cloth. You can also deadhead them regularly, which will prevent them from going to seed.
Fertilizing
Fertilizing is not necessary when you are growing chives, but if you are growing them in poor soil, it may be worth the effort. Aged compost is best – simply side-dress your plants halfway through the growing season. One touch-up is likely all you will need.
Weeding
Did you know that, ironically, some people consider chives to be weeds? That’s probably due in part to the nature of chives to spread and sprawl as they grow. However, despite their invasive-like tendencies, it’s still important that you do your best to control weeds.
The best way to do this is to apply a layer of mulch around your plants. Really, the mulch is only necessary for the first year or so of growth.
After that point, your chives will surround themselves with new growth and will choke out weeds on their own. However, mulch is a good idea both to suppress weeds as well as to help the soil retain moisture.
Every few years, divide your chive clumps. This will limit overcrowding and help your existing chive plants grow to the best of their ability.
Companion Plants for Chives
Chives are such hardy, friendly little plants that they are often grown as companion plants for other garden vegetables, herbs, and fruits.
Grow chives next to celery, carrots, tomatoes, grapes, and cress – the chives are believed to help improve their flavors.
However be wary of planting chives next to peas and beans, as they are believed to inhibit their growth. You may also want to avoid planting chives near similar plants like onions and garlic.
Otherwise, chives are useful to have around most other plants. They can deter Japanese beetles along with diseases like mildew on cucumbers, scab on apple trees, and even black spots on several types of roses.
Pests and Diseases of Chives
For the most part, chives are resistant to a majority of pests and diseases. Every now and then, you may have problems with onion thrips. These are most common in areas that produce onions on a commercial scale.
However, as long as you keep your plants mulched and adequately watered, you likely won’t have any issues.
Similarly, you don’t need to worry about most diseases. Fungal issues can become problematic if you aren’t careful about separating and spacing your plants appropriately, particularly in humid climates.
Chives are believed to repel Japanese beetles and aphids. Plant chives near susceptible plants, and you won’t have to worry about these pests being a problem.
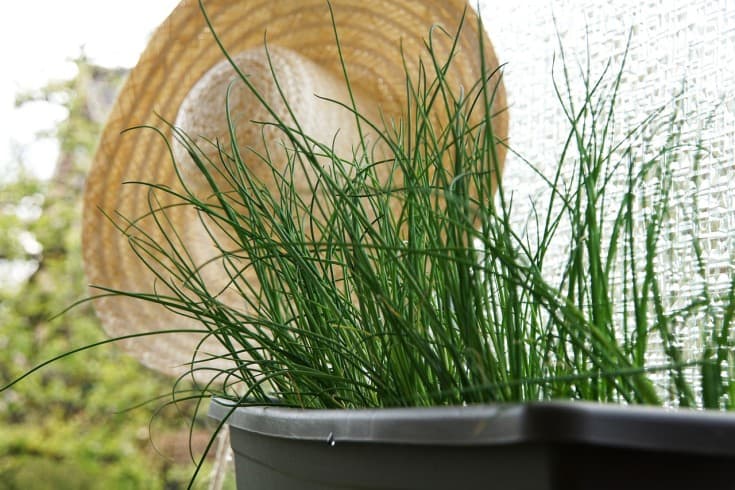
How to Grow Chives in a Container
Most people choose to grow chives directly in the ground since they overwinter so well, and require such little care. However, you can also grow chives in containers.
To do this, plant them in pots that are at least six inches deep. You can plant several containers for a rotational harvest or just one and bring it inside for the winter.
If you want to grow chives during the winter, you can even dig up clumps and repot them before the first frost. Just make sure they’re in a sunny window when they reach their final wintertime destination.
Before you do this, put the clumps in a paper bag and stash them in the fridge. Leave them there for about four weeks. This will create incidents of winter dormancy, which is necessary for the plant to start pushing out new leaves.
How to Harvest Chives
Chives can be harvested continuously early spring until early fall. You will want to wait until the plants are at least six inches tall – usually, this will be about five weeks after planting.
Be a bit gentle when harvesting new plants, but know that those that are a year or more old can handle consistent harvest throughout the growing season.
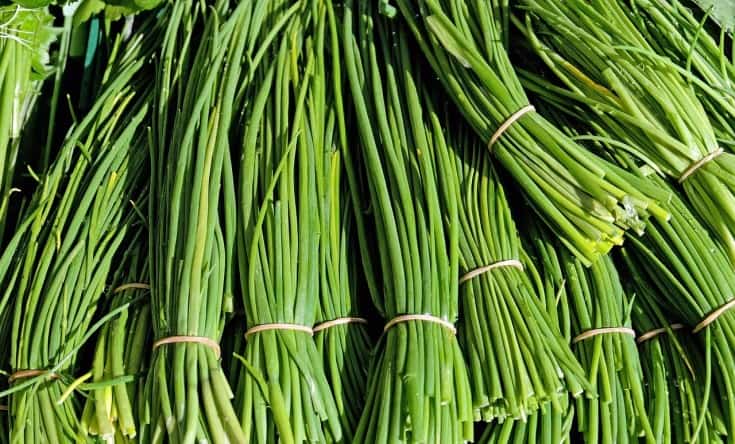
When you’re ready to harvest, you should cut the leaves of your plants with sharp garden scissors or knives. Trim the outer leaves first, harvesting from the base to avoid plants that already have cut tops.
Make sure you allow a few inches of the leaf to remain above the soil – this is necessary if you want the plant to regrow. Try not to harvest for about three weeks before the last frost date so your plants have time to flower and develop strong roots for the upcoming winter.
Try to use your chives as close to harvest time as you can. They’ll taste freshest immediately after harvest, but will begin to lose their flavor shortly thereafter.
Preserving Chives
Chives store remarkably well, making them good candidates for a wide variety of preservation options. You can refrigerate them in a sealed plastic bag for seven days.
To do this, wrap the bunch in a wet paper towel. Make sure you wash the leaves before you store them, though, as it will be difficult to do this after they’ve been refrigerated.
You can also chop up leaves and freeze them. They store well in plastic bags and freezer containers. You can even dehydrate chives!
You can do this in a dehydrator, but if you don’t have that kind of equipment, just put them on a screen in the warm location out of direct sunlight.
Uses for Chives
Chives are almost like onions with their mild flavor and scent. They can be used in any recipe that requires raw green onions, and you’ll enjoy their milder flavor.
These herbs can be used both dried and fresh. They’re perfect in soups, salads, and any dishes involving eggs. Put them on scrambled eggs or even in a pasta salad. They’ll add an onion-like flavor to just about any spread, too.
When adding chives, wait until the last moment during cooking to throw them in. Otherwise, you’ll lose their delicious, pungent flavor. They taste particularly great when paired with basil, oregano, dill, sage, rosemary, and thyme.
Historically, bundles of chives were hung around homes to ward off evil, diseases, and other misfortune. However, you don’t have to be suffering from a bout of bad luck to grow chives – nor do you need to have a green thumb to cultivate these sprightly beauties.
Chives grow well in just about all soil conditions and climates. They reproduce rapidly on their own, so you don’t even have to formally propagate them in order to get new plants. They are virtually undying plants that never fail to impress.
With a little bit of care during the first growing season, you’ll be able to enjoy bountiful crops for many years down the road.

Rebekah is a full-time homesteader. On her 22 acres, she raises chickens, sheep, and bees, not to mention she grows a wide variety of veggies. She has a huge greenhouse and does lots of DIY projects with her husband in her ever-growing homesteading endeavor. Learn more about Rebekah here.