
Whether it’s dill pickles that have your heart, or a dill sauce on crispy grilled salmon, rest assured that dill is an easy herb to grow.
With a little bit of sunlight and plenty of water, dill can easily be grown from seed. It matures quickly, and can be enjoyed during successive harvests throughout the growing season or just once at the end, if you wish to harvest the seeds.
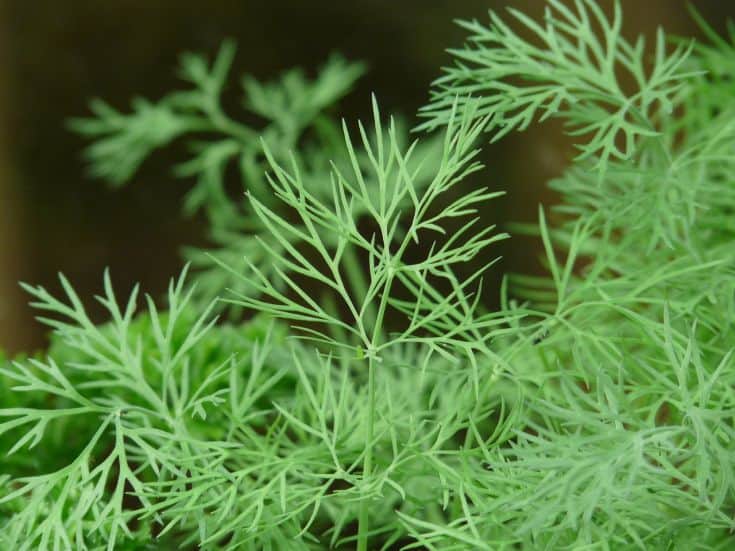
This article will tell you everything you need to know about how to plant, grow, and harvest dill – a hardy plant in the carrot family that is prized for its pungent seeds and bright green foliage.
Types of Dill
There are several different types of dill that you can grow, most of which do quite well in home gardens.
- Dukat: Dukat dill is also known as “tetra dill” and is usually grown for its rich, verdant foliage. It’s perfect in salads but the seeds can also be used for seasonings in various condiments.
- Fernleaf: Fernleaf dill only gets about 18 inches tall, making it a good choice if you don’t want to have to stake. It’s the best kind of dill for floral arrangements.
- Superdukat: A relatively new cultivar of dill, this tall, straight variety has some of the best essential oils.
- Long Island: Also referred to as mammoth dill, Long Island dill can grow up to five feet tall! Both the seeds and leaves can be harvested and it is perfect for pickling.
- Bouquet: Without a doubt one of the most popular types of dill, Bouquet has dark foliage that’s almost blue in color. It produces large seed heads that are ideal for pickling.
Growing Dill from Seed
Ideally, if you want to plant dill for pickling, you should sow seeds several times – every few weeks – during the summer to ensure a consistent harvest. That way, you’ll have plenty of seeds stored up for all of your pickling needs!
And if you let some of your dill go to seed and remain in the ground (you’ll know that it has gone to seed when it flowers) you’ll have all the dill you need the following year.
You can start dill seeds inside, about six weeks before the last expected frost date, but you would be better off cultivating dill outdoors. Sow seeds directly into the garden after the last expected frost.
You should sow your seeds in direct sunlight, ideally in a spot with well-draining soil. Before planting, add plenty of organic matter, like compost.
Your pH should be neutral to slightly acidic. No matter what, you should choose a spot that shelters your dill from strong, gusty winds, as this can topple it over.
When sowing your seeds, do so about ¼ inch deep and 18 inches apart. Dill takes quite some time to germinate – usually ten to fourteen days. You will need to wait an additional two weeks to thin your plants, as it can be tough to provide proper spacing when you plant tiny dill seeds.
That said, you don’t need to be too particular about planting dill in rows. Feel free to plant seeds in clumps and you can always thin them later.
Planting Dill Transplants
Dill does not transplant well, but you can transplant the seedlings if you so choose. If you plan to do this, try to sow your seeds in peat pots rather than plastic containers. That way, you won’t have to disturb the fragile roots of your dill plants.
Make sure the danger of first has passed in the spring. Soil temperature needs to be between 60 and 70 degrees F (15 to 21 C).
Caring for Dill Plants
Watering
You will need to water your dill plants well during the growing season, particularly when they are first getting established. Your plants will need about an inch of water per week.
If your dill is in the second year of growth, you may be able to get by with less frequent watering – but it will still be essential to water your plants during dry spells.
While the seeds are germinating, do your best to keep the soil evenly moist. As soon as the plants begin to grow, they will need roughly one to two inches of rain each week to survive.
Fertilizing
For the most part, herbs don’t require any additional fertilizing – that’s true of dill, too. The best time to amend the soil is before you plant, ideally with a balanced organic fertilizer like compost that will privet the nutrient profile of the soil as well as its structure.
Some people also choose to use a balanced synthetic fertilizer once or twice during the growing season. Just mix it with water so it’s a bit more diluted and doesn’t burn your plants.
Weeding
Do your best to keep your dill beds well-weeded. Weeds compete with dill for nutrients and water, something you definitely don’t want to deal with especially when your dill is just getting started.
You may want to add a bit of mulch to keep weeds expressed, and the ground nice and moist. Any kind of mulch will work, but straw mulch is particularly easy to handle.
Dill often grows tall and somewhat top-heavy. You may want to stake it if you have it planted in a windy garden.
Dill Companion Plants
Grow dill with plants like onions and cabbage. It will provide these plants with a variety of benefits.
Try to keep it away from carrots and fennel, as it is closely related to these two plant species and can attract similar pests, like the carrot rust fly.
You can plant dill near other species like:
Dill attracts a variety of beneficial insects, including wasps and other predatory insects that feed upon garden pests (like aphids). Plus, dill is a host plant for the caterpillar of the black swallowtail butterfly, an important pollinator.
Pests and Diseases of Dill
Occasionally, dill is attacked by pests like tomato hornworms and parsley caterpillars. If you notice these pests, you have a couple of different options.
You can spray them with Bacillus thuringiensis kurstaki, a natural insecticide that will kill the pests immediately, or you can simply handpick them from the plants.
Uniquely, dill has very few disease problems to speak of. You can ensure the resistance of your dill to disease by making sure it is planted with proper spacing – that way, both air, water, and nutrients will be able to move freely, which prevents fungal infections.
Growing Dill from Cuttings
Dill is a unique plant that can even be grown from a cutting! You may not even have to spend any money in order to enjoy a delicious harvest of dill.
Dill cuttings root themselves in water quite quickly. All you need to do is take a snipping of the dill plant and put it in a glass of water. For best results, select a plant with healthy new growth.
Each stem will develop into a new, single plant. In most cases, dill cuttings root quickly, and can be transplanted into pots with soil in just a couple of weeks.
Make sure you put the dill and the container of water in a location where it will get ample amounts of sunlight. You may need to replace the water every day or every other day, depending on how dry and warm it is where you are growing it from cuttings.
How to Grow Dill in a Container
You don’t have to have a spacious herb garden in order to grow dill – all you need is a pot! You can easily keep several containers of dill going on a sunny deck or patio.
All you need is a container that’s approximately twelve inches deep, as dill plants develop a strong, deep taproot. Your spacing still needs to be about 12 to 24 inches (30 to 60 cm) for best results.
Dill won’t do as well as some other plants when planted in an indoor herb garden, but if you really want to grow dill year-round, you’ll still get a modest reward for your time.
Consider starting a few seeds indoors – you can continue to plant in succession for a continuous, year-round harvest here, too.
How to Harvest Dill
Dill is ready to be harvested as soon as the plant has at least four to five leaves. You can harvest by pinching off the leaves or cutting them with scissors.
You can even pinch off entire stalks if you choose, but this will stop the production of the plant (you should only do it if you have multiple plants).
As the weather gets hotter, keep in mind that dill is likely to bolt. This means it will send up flower stalks and set seeds. Once it sets seeds, it dies – if you want to keep the plant going for another growing season, you’ll need to remove the flowers.

You can harvest dill continuously throughout the spring, summer, and autumn months – as long as the plant has plenty of leaves and is eight to nine inches (20 – 22 cm) in height or so. You’ll likely find that your dill leaves have the strongest, most potent flavors just before the flowers open.
This is usually about sixty or seventy days after you have sown seed. You can harvest the seed roughly ninety days after you sowed seeds when seeds are brown and flat.
To harvest your dill, simply snip the stems or leaves with a pair of garden scissors.
Preserving Dill
Unfortunately, dill is going to droop as soon as you clip it. It will still taste fresh, but that pungent, delicious flavor only lasts for a few days. Therefore, you will want to make sure you use it up as quickly as possible. You can store dill in the fridge with the stems stashed in a container of water.
You can also flash freeze dill. All you need to do is place it in some water inside an ice cube trays. When you’re ready to use dill later on, all you need to do is drop the cubes into cooked dishes (like pastas) that need a bit of moisture.
Dehydration is another method of preserving dill. To do this, hang the entire plant to dry, ideally upside down, in a warm, dry location. It needs to stay there until the foliage can be stripped with ease. You can also cut the leaves and let them air dry or put them in a dehydrator.
If you plan on harvesting and preserving dill seeds for canning or pickling, you will need to cut your flower stalks after the yellow blooms begin to fade.
Put a small paper bag over the entire flower head and poke a few small holes in it for ventilation. Hang your plants in a cool, dry location.
Eventually, the seeds will fall from the plant and gather toward the bottom of the bag. You can sistahs the seeds in a glass container in a location that is dry, dark, and cool.
Uses for Dill
Dill has a variety of uses in the kitchen and around the house. Not only is it perfect for making dill pickles, but it also makes a wonderful seasoning on recipes like fish and poultry. It can even give you a better-smelling breath if you chew on the seeds!
Furthermore, dill is often used in floral arrangements, its leaves are elegant and a luxurious green, making it the perfect choice to accent your favorite types of flowers.
Dill has a medley of medicinal benefits, too. It’s high in calcium, essential for promoting strong, healthy bones. It’s also believed to improve milk production for lactating mothers.
It’s also packed with nutrients, vitamins, and minerals, making it an essential ingredient in just about every homesteader’s medicine cabinet.
You can use just about every part of the dill plant, from the leaves to the flowers and the seeds. It has a unique flavor and a gorgeous buttery green color that lends itself well to just about any type of cuisine.
It’s so easy to grow that there’s no reason not to include it in your backyard herb garden this summer!

Rebekah is a full-time homesteader. On her 22 acres, she raises chickens, sheep, and bees, not to mention she grows a wide variety of veggies. She has a huge greenhouse and does lots of DIY projects with her husband in her ever-growing homesteading endeavor. Learn more about Rebekah here.