
It’s an age-old debate, and likely one that you’ve found yourself engaged in with old-fashioned canning enthusiasts and new-age canners alike from time to time.
Do you need to sterilize your canning jars? The short answer is… yes, most of the time.
But if you’re unsure of whether you need to sterilize – or how, exactly, to do it – rest assured that a little bit of preparedness never hurt anyone.
Knowing the exact methods you can use to sterilize your canning jars will help make your life a lot easier when it comes to getting ready for home canning season this fall.
Table of Contents
Why Do You Need to Sterilize Your Jars?
It may seem foolish to sterilize your canning jars before you are going to submit them to boiling hot temperatures during the canning process, but the reality is that sterilizing is a vital step in the food preservation process.
You must sterilize your jars to remove any lingering yeasts, bacteria, or fungi so that the food you place inside the jar is safe and not contaminated. Food that is canned inside dirty jars will spoil more quickly than normal.
Some people argue that you don’t need to sterilize jars for water bath canning as long as the processing time is more than ten minutes, as this sterilizes the food and the jars. Many also believe that sterilization is not necessary for pressure canning.
However, it’s good to get yourself into the habit of sterilizing your jars. According to the National Center for Home Food Preservation, jars, at the very minimum, need to be washed with hot water with detergent or washed in a dishwasher.
You should make sure to remove all detergent to eliminate the likelihood of odd flavorings or contamination, and also keep in mind that washing alone does not serve as a substitute for sterilization.
Don’t skip or rush the process of sterilization. Instead, consider one of these top methods for sterilizing your canning jars before you start canning. Starting with a clean jar is the first step to success!

Do I Need to Sterilize Brand New Jars?
The short answer – absolutely. New canning jars, even when pulled directly out of the box, are not sterile. A box or plastic wrap does not constitute a sterile environment, and packaged jars can be contaminated by microorganisms, dust, debris, and even chips of glass.
Washing is mandatory before every cycle of canning, regardless of the age or condition of the jars. Make a good, thorough washing the bare minimum in your sterilization process. This should be done without fail every time you can your own food.
When you wash your jars, you should inspect them carefully for any cracks.
You should also remove any scales or film from hard water by soaking them for several hours in a mixture of water and vinegar.
The Boiling Water Method
You already need to get your canner ready for the canning process – so why not make good use of that time and double up by sterilizing your jars at the same time? Start by washing your jars as normal before placing them in a water bath canner.
Alternatively, you can place them on a rack set inside a deep pot. Either way, the jars should be then covered with hot water.
Bring the water to a boil and allow the jars to boil for fifteen minutes. Steam will begin to emerge from the pot.
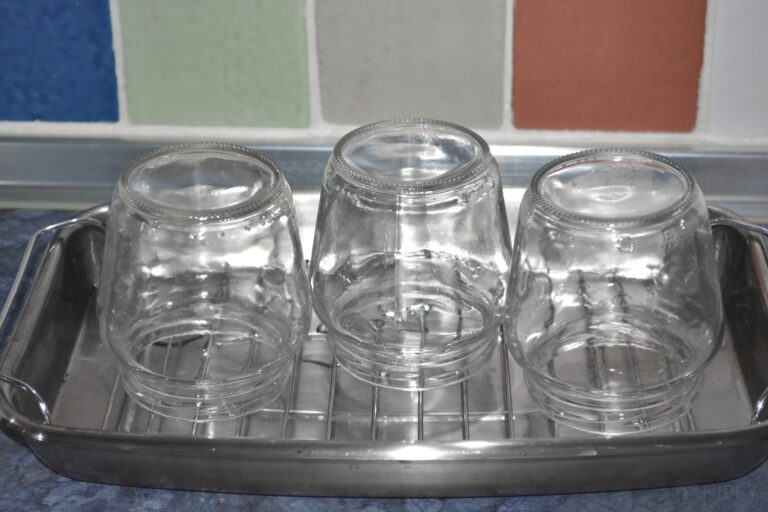
Turn off the heat and let the jars remain in the hot water. When you are ready to fill the jars, you should flip them upside down on a towel to dry – just make sure they remain hot.
If you are using this method at an altitude above 1,000 feet, you will need to add an additional minute of boiling time for every 1,000 feet of elevation.
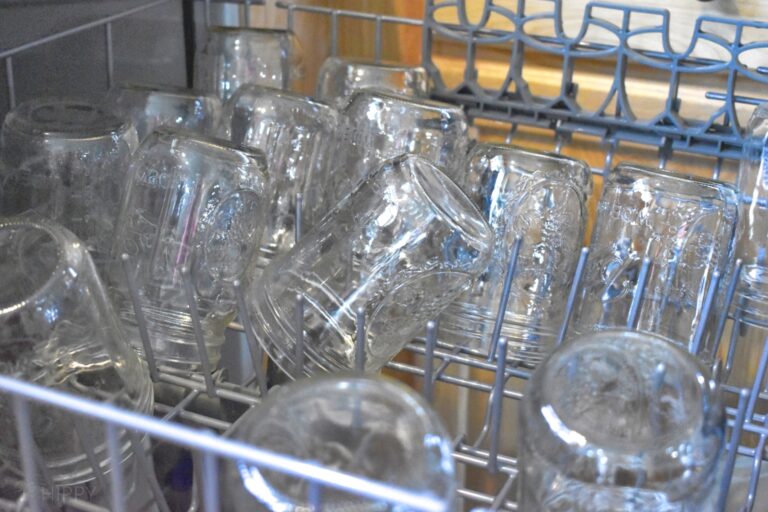
The Dishwasher Method
If you have a dishwasher – particularly one with a high-temperature setting – this is a great option for sterilizing your jars.
You can start by filling your dishwasher with cold jars. Run the dishwasher either on its minimum run time setting or simply a rinse cycle – just make sure the rinse is done at the highest temperature setting possible.
You can then keep the dishwasher closed to lock in the heat. You may pull one jar at a time so that the jars stay warm while you are packing them.
Sterilizing Jars in the Oven
Sterilizing your jars in the oven is one of the easiest and most convenient ways to sterilize your jars. It might take a bit longer than some of the other methods of sterilizing your jars, but despite this, still only takes about half an hour in total.
You can sterilize your jars while you are preparing your other ingredients for caning, which will allow you to make good use of the time spent waiting.
Now, before we move on, we need to address the elephant in the room because I can hear some of you reading cracking your knuckles about to take me to task down in the comments for recommending oven sterilization of canning jars.
Oven sterilization is a highly controversial topic. I know that many people, including people in my own family, who were brought up canning and taught to use the oven to sterilize their jars.
Whether you were taught by your mother or grandmother or someone else, it stands to reason they are a trusted figure who knew what they were talking about, and if you’ve been canning for any length of time using this method and had no trouble you’re probably content going right on with it.
However, there’s a contingent of canners out there, a large contingent, including some very smart people that decry the use of the home oven as a method of sterilization. They have some pretty good reasons which I will list below, and let you make your own choice.
Inconsistent temperature– One of the chief complaints that detractors of oven sterilization level at the technique is that home ovens simply are not that accurate when it comes to heat control.
The temperature indicator on your oven is probably woefully inadequate, and combined with the uneven distribution of heat along with the periodic opening of the door to check on your progress means that your jars might not be held at the prescribed temperature the entire time…
Canning jars not designed for oven heating– Probably the most damning charge against using the oven for sterilizing a glass jar, of any brand, is that the jars themselves are not designed for it.
Specifically, unlike glass bakeware canning jars are not made of tempered glass. this means that they will not withstand uneven heating and temperature shock very well at all, and you’re more likely to shatter your jars in the oven than you would using boiling or another method.
This complaint reached such a fever pitch that mason jar manufacturer Ball has addressed it in an FAQ on their site, and confirmed that their jars, of any size, are not for use in an oven- even at the relatively low temperature needed for sterilization.
Vulnerability to temperature shock- Compared with water bath sterilization which will consistently and evenly heat your jars to the prescribed temperature and keep it there, the nature of using an oven for the same purpose means that once your jars are done they are going to be more vulnerable to temperature shock when you pull them out.
Even setting them down on the countertop might be enough to cause them to crack or shatter entirely. This is still a concern when using water immersion, but it is more pronounced when using the oven.
Ultimately, it is up to you to decide. Oven sterilization, despite these complaints, is still a viable method and one that has been used for a very, very long time with success. If you are worried about it, simply pick another method that works for you.
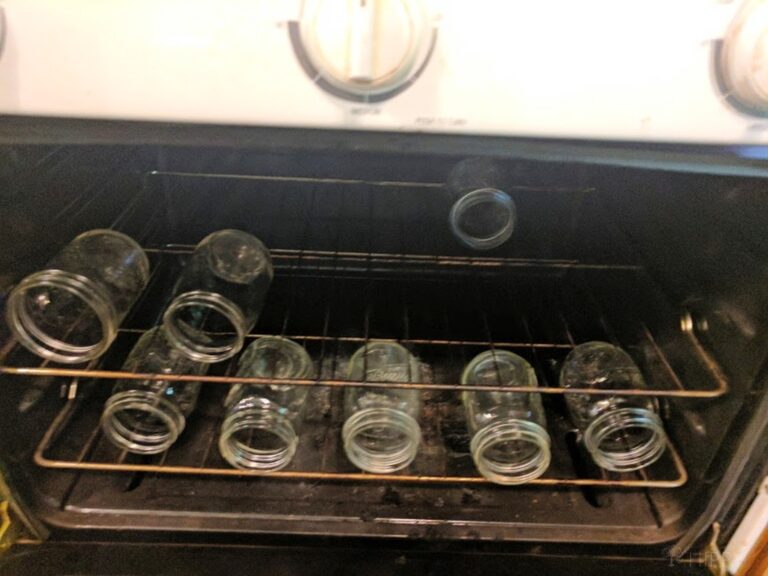
Steps for Oven Sterilization
To get started, heat your oven to 275 degrees Fahrenheit. Don’t heat it any higher – it won’t make the process go by any faster, and you might crack your jars.
Next, lay two layers of newspaper on each oven shelf – just not on the floor of the oven. The newspaper needs to be away from any source of flame.
If you don’t want to use newspaper, a safer alternative is to place your jars on a new, clean cookie sheet – just make sure they are level to prevent breakage and ensure even heating.
Your next step is to position the jars on the oven shelves, ensuring that the jars are not touching each other. Shut the door of the oven and allow them to sterilize for at least twenty minutes. Set a timer so you know how much time has elapsed.
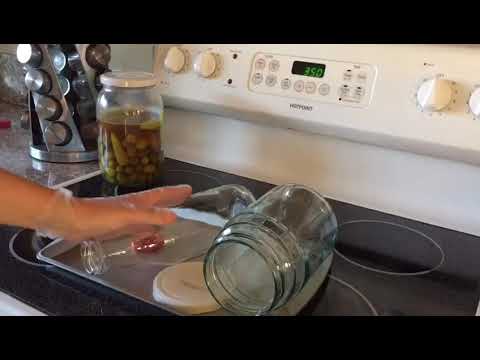
When the jars are finished, you may use oven mitts to gently remove each jar and place it onto a heatproof mat. You will want to fill the jars while your ingredients are as hot as the jars.
The Microwave Method
This is another popular method of sterilizing jars, but keep in mind that it obviously should not be done with any jars that have metal in them.
To do this, clean your jars as you normally would, but allow them to remain a little wet. Microwave them for thirty seconds to one minute, depending on the size of the jar.
Now, the microwave method of sterilization is also controversial, though not as controversial as oven sterilization.
Microwaves, as you well know, have a tendency to heat food and all other surfaces inside them very unevenly…
That’s why that leftover slice of pizza you tried to nuke at midnight comes out with one part that is as hot as the surface of the sun but the other part still is chilly as it was when you pulled it out of the fridge!
Worse, microwaves don’t have thermometers, and any thermometer you have cannot be used inside the compartment when it is turned on.
This is not promising when it comes to sterilizing jars, and is one of the reasons why we leave the jars wet when we put them in; the idea is that the water, as it turns to steam, kills the germs.
It should also be pointed out that sterilization is probably too strong a term, and then a microwave is better at sanitizing jars than truly sterilizing them. What’s the difference?
Sterilization refers to the total obliteration of all microorganisms, whereas sanitization is the reduction of said germs to safe or at least tolerable levels.
know which one I’d rather have when I am preparing my canning jars, but nonetheless, there are plenty of canners living here in the 21st century that use the microwave method with success year in and year out and they are quite enthusiastic about it.
However you feel about it, it is possible to use the microwave to reliably help you in your sterilization efforts because it is possible to boil water inside a microwave-safe container far more quickly than can be done comparably on a stovetop.
Best Practices
When you are sterilizing your jars to be used for canning, there are a few tips and tricks you should keep in mind to maximize your success.
First, you should never use old bands if they are rusty or damaged in any way. Not only do these kinds of bands have a higher risk of contaminating your food, but they will also fail to make a good seal. Toss them, and start over.
You should remove jars from your oven, dishwasher, or other sources of sterilization only when they are ready to be used. Otherwise, they can cool down too much and will be exposed to more bacteria.
On that note, you should always sterilize more jars than you think you might need. You want to have plenty of jars on hand in case you prepare more canning ingredients than you initially thought!
When you are preparing to sterilize your jars, make sure the area around your canning surface is completely clean. There’s no point in spending all this time sterilizing your jars if the rest of the area is filthy!
Your jars can easily pick up bacteria and other contaminants from the surrounding area. Therefore, any place you set your jars down – such as dish towels or bare countertops – should be clean and fresh.
Finally, you should always avoid adding cold food to hot jars, and hot food to cold jars. This can cause cracking and damage.
Selecting the Best Jars for Canning
Making sure your jars are of high quality can also help make your sterilization process a little easier.
Only purchase bottles or jars that are designed specifically for canning, and don’t reuse containers from around the house, as these won’t be able to hold up to the heat. Canning jars are made out of tempered glass and should not have any nicks or cracks.
Jars should have flat, gasket-lined metal lids. These should be accompanied by screw bands that can be reused from time to time. You can sterilize your bands exactly as you would your jars.
They will also come with lids. These cannot be reused, no matter how well they are sterilized, and you will need to purchase new lids for every round of canning.
Lids should be sterilized, too, however, even when they are fresh out of the box. While this is not mandatory, it does help to preheat the lids so that you will have a better seal.
Do not boil these lids, as the boiling water can harm the rubber sealant. This can cause a poor seal that will result in the contamination of the food you have canned.
Instead, just place the canning lids and bands into water that is simmering for about ten minutes. This will clean them enough to be safely used for canning.
Which Method of Sanitizing Canning Jars is Best?
There is no one hard and fast method that will work best for everybody. You can adapt any of these techniques to help suit your specific needs- you can even sterilize your canning jars over wood heat or a grill if you don’t have electricity!
Consider your current canning set-up, and think about what will be the easiest and most hassle-free for you.
If you have a dishwasher, this is perhaps the most hands-off method of sterilizing your jars. However, if you’re living off the grid, this simply may not be practical.
Just remember that while sterilizing canning jars isn’t always absolutely necessary, it’s definitely always recommended.
A little bit of extra cleanliness can never hurt -especially when we’re talking about being able to preserve Grandma’s famous dill pickles. You don’t want to risk those going bad in storage!


Rebekah is a full-time homesteader. On her 22 acres, she raises chickens, sheep, and bees, not to mention she grows a wide variety of veggies. She has a huge greenhouse and does lots of DIY projects with her husband in her ever-growing homesteading endeavor. Learn more about Rebekah here.
Thank you for the information, I would prefer to use my dishwasher to sterilise the jars , What if there is some drops of water in them is it ok to dry them with a clean tea towel or would that contaminate them. Also can I sterilise pasta jars in the oven ?
Regards Ruth
I have good experience placing jars like on your picture on a grille shelf, where heat conduction is less than from a metal sheet. Except the mouths face inward to allow grabbing by the bottom. It’s convenient to sterilize a couple milk containers without boiling a large pot of water, and taking them out of the hot water. Most sources advise to preheat the oven (as with any recipe). I do not do that to lessen the thermal shock, the hurry in placing the jars, and risk of burns.
What is a safe temperature for lids with a plastic lining? Oven burns them.
I boiled my eggs a couple days ago & put them in the fridge, how can i sterilize my 4 L jar and put eggs in a hot jar without damage to the jar. Do I have to heat the eggs up?
To protect jars from breaking when putting hot/relish etc in them I hold a knife inside the jar when ladling the jam into it. It a=sorbs the heat so the jar does not break.