
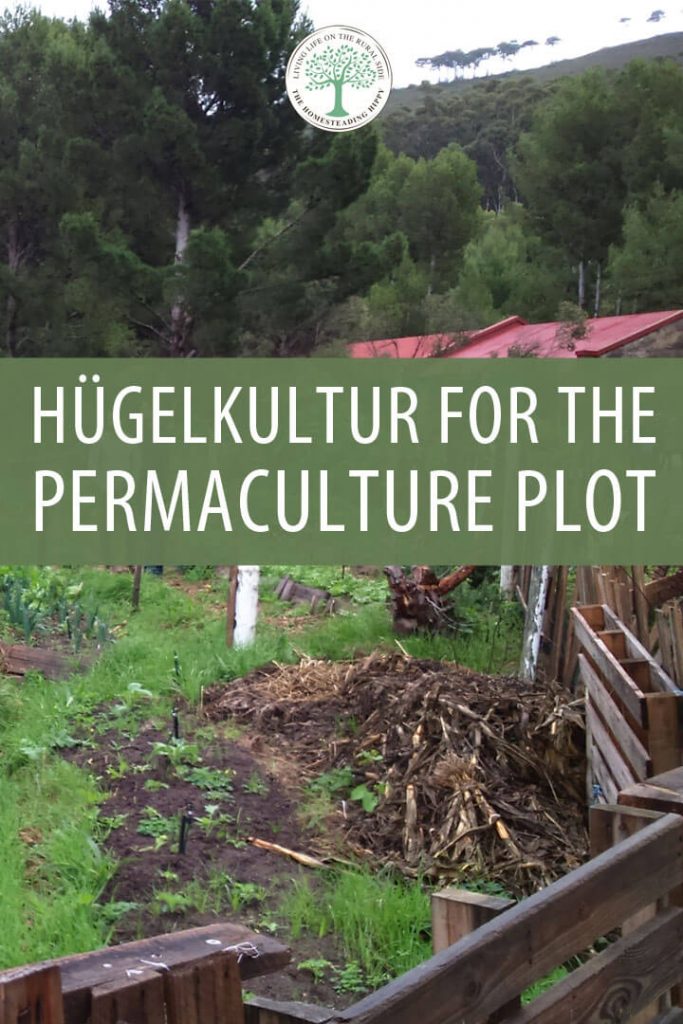
In this article, we will discuss the old-fashioned technique of hügelkultur building on the homestead scale. Hügelkultur is a German word that translates directly to ‘hill culture’, which means growing plants on a mixed mound of decaying wood, plants and soil.
The mound is typically built directly on to the ground, which effectively creates a raised bed once the soil is put on top of the mound.
Finally, seeds and seedlings are placed into the soil, which will, over time, be enriched by the decaying source of carbon beneath it.
While hügelkultur was initially designed for plants to avoid becoming over-watered in a long wet season, it has the benefit of being able to do the opposite also, which is to keep plants hydrated through a long dry season.
Why Hügelkultur?
In the design science of permaculture, practitioners advocate using methods that fulfill multiple functions. More simply, anything that you put in the effort to build should have many uses that complement each other.
Overall, this has the effect of reducing the amount of work you do over time, while keeping yields high. This aids in realizing the principle of ‘the least effort for the greatest result’.

Hügelkultur fulfills the functions of:
- Soil fertility increase – decaying carbon and plant matter function like a compost pile, which makes plants grow more healthily.
- Soil warming – the chemical reactions in a hügelkultur mound result in the soil above the mound being slightly warmer than any soil alongside it.
- Water retention – the plant matter in the hügel holds water relatively well and over a long time period, which leads to a reduction in the amount of irrigation required. After a few years, hügel mounds of sufficient size may not even require irrigation.
- Moderate rainfall protection – the wood acts as a buffer and absorbs water when rains are heavy, yet not extreme. This factor helps to prevent waterlogged soil, but please note that hügelkultur does not qualify as flood protection for your site and can be overwhelmed by very intense rains or floods.
- Use of wood waste – if wood waste is cluttering your field or yard, or that of someone near you, it can now be put to a productive use without burning it.
- Use of kitchen and food waste – instead of sending your food waste to the landfill, it can go in a hügelkultur mound instead.
- The raised height of the mound means that it is easier to interact with plants without bending down. In a video featured later in this article, Jack Spirko suggests building your mounds at roughly your own height for this reason.
Hügelkultur is a well-regarded technique in permaculture, such that it is recommended by at least three distinguished teachers of permaculture – Sepp Holzer, Geoff Lawton, and Paul Wheaton.
While this doesn’t mean that hügelkultur can be used in every situation, it is worth noting that hügelkultur is one of the more adaptive permaculture techniques, and that it works in a wide variety of places and climates.
Which Wood To Use and Which To Avoid
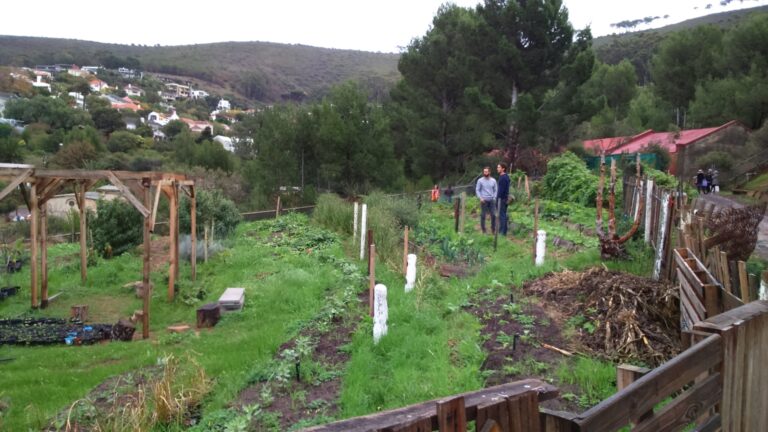
In order to begin a hügelkultur project, it is helpful to have a source of nearby wood, in the form of logs, branches, larger twigs, and leaf piles.
While it is always possible to bring organic matter on to your site from afar, the spirit of permaculture is best applied to the gathering of local materials. This will help keep costs low, as a hügelkultur project is not meant to be expensive.
When selecting which branches and woody material to use, it is best to avoid wood and organic matter from strongly allelopathic species, such as black walnut, pine, maple, and eucalyptus.
If you’ve ever noticed that forestry plantations that strongly feature such trees tend to have far thinner undergrowth, allelopathy may be why.
What this means is that some trees and other plants prevent undergrowth on their forest floors through a kind of ‘natural weed control’.
Such plants do this through chemically reducing the germination rate of seeds that land on the forest floor.
Some species are more vulnerable than others to the allelopathic mechanisms of individual trees, so if you are limited to gathering wood from one kind of allelopathic wood only, then make a point of ignoring leaf and root matter from the tree (as this is where much of the toxins are stored), and research which garden plants are resistant to any particular allelopathic toxins you may deal with.
Another factor that you may wish to take into account is that of climate.
Since hügelkultur can be thought of as an effective way to store water, it is not necessary, and may be counterproductive to build in regions that experience either very regular or particularly powerful bouts of rainfall, such as monsoon climates.
Overly frequent rainfall can lead to waterlogged soil, and flood-level rain storms may lead to hügel mounds being destroyed, flooding, and possible mudslides. For this reason, it may be better to avoid building hügelkultur mounds in the tropics or near the Equator.
Places with a very hot climate may also find that hügelkultur mounds become overheated in the summer or early in fall, and that plants become temperature-stressed earlier in the year than usual. Such gardeners may be better off making conventional compost piles instead.
Overall, it is suggested that the best regions for hügelkultur are in cool to warm climates, with fairly irregular rainfall, or with well-defined wet and dry seasons, and with a nearby source of plant material, ideally coming from a mix of plants that aren’t allelopathic.
One more factor to take into account when locating the best place for hügelkultur mounds is that placing them side by side creates microclimates of protection against high winds, which can be useful both in cold climates and in hot, dry ones.
Therefore, if your site is beset by winds throughout the year and you have space to spare, consider building multiple hügel mounds in rows for the best microclimate benefit.
Once these are built, plant the hardiest species on the outer rows, and the ones requiring more protection can be in the center. If you are short on material for multiple rows, rather shorten the rows and have more rows, than having fewer long rows.
How to Build a Hügel Mound
While you can start building at any time of year, mid to late fall seems the most logical time because there should be plenty of plant matter around, and the mound can be ready for springtime planting after having some time to decompose.
Starting in late fall is especially useful in areas with high winter rainfall, because the woody material will have plenty of time to soak.
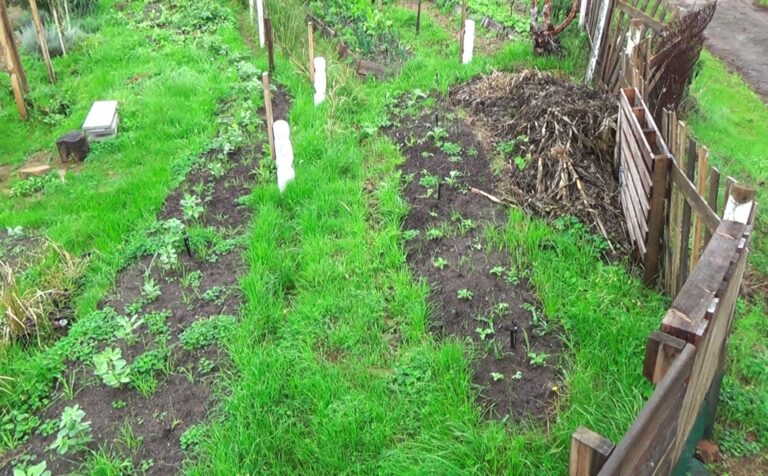
You can begin by gathering branches, plant waste, logs, soil, sod, compost, leaves, straw, and other plant matter.
There is no rush to build it all in one day…
It may be better if you do it over a few weeks, spending the time to gather larger branches to make a stronger base, and setting aside soil material that you would like to put on top. Ideally, choose plant and soil matter without grass seeds in order to reduce competition.
If you will be building your hügelkultur mound on a slope, make sure that it is a very gentle slope, such as below 5 percent. Flattening land can be expensive and time-consuming, so do attempt to find your gentlest slope before you start this project.
It is suggested to build hügelkultur mounds that conform somewhat to a 45 to 70-degree angle pyramid shape. Doing this successfully will slow the rate of soil compaction and help to maintain soil fertility.
The sides should not be so steep that plant matter falls everywhere. As suggested above, it is better to have the thicker wood form the base and build up to thinner wood above.
As a hügel mound functions similarly to a garden bed, it is best to limit the width at the base to 5 feet so that you don’t use an excessive amount of soil or material.
As for height, generally, the higher the better, as more water will be stored, the decomposition will be more efficient, and the irrigation requirements will be less.
For a beginner, 3 to 4 ft. high is a good starting point. The soil layer on top should add another six to twelve inches to the height, too. In general, there is little reason to build it any higher than you are tall.
When you have finished stacking the wood and reached your desired height, you can wet the wood.
While doing so is not strictly necessary and you can wait for the rain, it makes sense to wet the wood so that when you put the soil on top, it sticks to the wood more easily.
You can then also wet the soil when you are done; as this may help you mold the soil into a shape that makes it less likely to run off down the sides of the mound.
Hügelkultur mounds have a lifespan of around five to six years. After this time, the soil will have lost much of its fertility and plenty of the wood will have decomposed, shrinking the mounds considerably.
You can re-use the larger wood pieces for a new mound, but it is better to spread out the wood material around a little and place perennial plants where the hügel mounds used to be. You will now have very high-quality soil here!
Once the weather reaches an appropriate temperature and risk of frost is past, it will be time to plant your seeds and seedlings!
If you are fairly new to gardening, it is recommended to begin with seedling transplants, because irrigation of a hügel mound initially requires more water than a traditional raised bed or a pot, and over-watering has the risk of damaging very young plants.
As Jack Spirko explains in the video featured below, the correct technique for hügelkultur planting is to plant into the side inclines of the mound, rather than on top. This allows you to use both sides of the mound and make the best use of your effort.
The plant roots will wick moisture from the wood when the soil is dry, and the wood wicks moisture when the soil is too wet.
Which Species to Plant
If the wood in your hügel mound is a fairly even mix of large and small branches, and you’ve waited some months to allow decomposition to take place, both of which are ideal, then it is suggested that you begin by planting species that are considered to be heavy feeders, and then follow up with lighter feeders for the next few years.
If you were unable to find many small branches and were stuck mostly with larger ones, you may have to begin with light or medium feeders for the first year or two, and then move on to heavy feeders in the third year, then back to light for the last few.
Below, you will find a list describing eight plants each that can be considered heavy, medium, or light feeders.
Examples of Heavy Feeders
- Asparagus
- Broccoli
- Corn
- Cucumbers
- Large peppers
- Okra
- Pumpkins
- Tomatoes
Examples of Medium Feeders
- Beans
- Brussels sprouts
- Chard
- Cauliflower
- Lettuce
- Small peppers
- Spinach
- Zucchini
Examples of Light Feeders
- Arugula
- Beets
- Carrots
- Kale
- Onions
- Parsnips
- Peas
- Radishes
Limitations of Hügelkultur
Perhaps the most notable limitation of hügelkultur is that it is not a swale, and cannot be used safely as one.
While it is true that permaculturists like to stack functions of a single system, the design methodologies of swales and hügelkultur are too different to be combined.
Swales may function best in Permaculture zones 3 (small swales) and 4 (large, extensive swales), whereas hügelkultur would seem to be a zone 2 function, possibly applicable to zone 3 on fairly flat land.
Hügelkultur is not designed to slow erosion due to water runoff on any significant scale, and hügelkultur mounds should not be built on contour or on a hillside.
Hügelkultur mounds cannot control large rain events, and may even become dangerous in a flood, because they can create mud slides.
If you have a flood risk on your land, consider building swales on contour to mitigate the floods first; and then only building hügelkultur mounds in places that are protected by those swales.
Another possible risk of hügelkultur mounds is that soils can become overly fertilized. Soils that have an excessive concentration of nutrients tend to produce bland, tasteless crops.
What this may mean, if it happens, is that heavier-feeding plants can be planted for a year to correct the problem.
While there is no license required to build hügelkultur mounds, be sure to check with your local government and/or homeowners’ associations if relevant. While it is possible to build an aesthetically pleasing hügelkultur mound, it would be time-consuming to do so.
Hügelkultur can be thought of more as a functional way of saving water and building soil than as a landscape-beautifying technique.
If you have a small property and live in close proximity to neighbors, it may be advisable to build them somewhere they won’t easily be seen.
Conclusion
In this article, you learned what hügelkultur mounds are for and how to build them. Multi-functional and labor-saving, hügelkultur mounds are a great addition to your larger land plot or homestead.
Overall, construction of hügelkultur mounds is one of the simpler, cheaper, and easier builds, as compared to other permaculture techniques.
It may take some time to do and a little bit of heavy lifting, but it doesn’t take any professional know-how, expensive equipment, or many supplies – just a willingness to learn from mistakes. This makes it a true do-it-yourself job.
Do you have any experiences to share about hügelkultur construction? Perhaps you’d like to tell us what you’ve grown in them, or any funny comments people who saw your mounds have made? We’d love to hear from you!

David Dornbrack is a permaculture designer and author from the Austin area of Texas, USA. He first achieved his PDC in South Africa in 2013, and has since traveled to the world’s prototypical intentional community and ecovillage, Findhorn Foundation in Scotland. He has gardened in three different climate types – Mediterranean, Cold Temperate, and Humid Subtropical. His favorite plants are tomatoes, chilies, and potatoes. He believes that humans function best when interdependent – able to take good care of themselves so that they can be generous and giving to others. He would like to gain experience in house-building, carpentry, and solar electricity installation. Meet the rest of the team here.