
Tattie Scones are not like the traditional English scones you may have enjoyed, split and slathered with butter, a dollop of strawberry jam and topped with fresh cream. The scone derives its name from a potato, called a ‘tattie’ in Scotland.
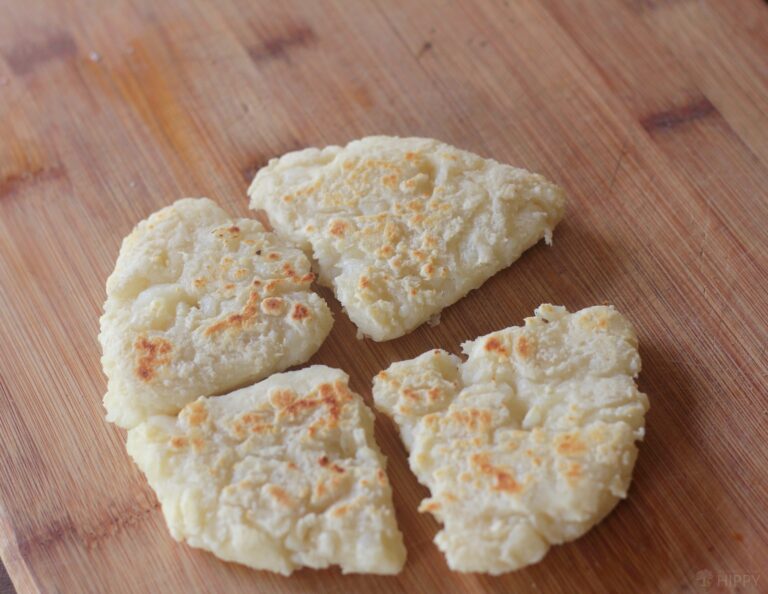
A tattie scone can be served as an accompaniment to a hearty breakfast with eggs and sausage, or can be served with butter and jam. They are pretty flat, and not split through the middle.
Making them is easy for a Scottish person who may have learned from a mother and grandmother the traditional way, with all the little tips and tricks that result in light and tasty tattie scones rather than a heavy, doughy ones which is all too easy when using potato in the recipe.
The recipe is ideal for preppers and campers as you need only three ingredients, four if you count a pinch of salt added to the dough. You’ll need a griddle pan o cook them. No oil is necessary.
Now, although the Scots are known for their frugality, this does not extend to tattie scones when leftover mashed potato simply will not do.
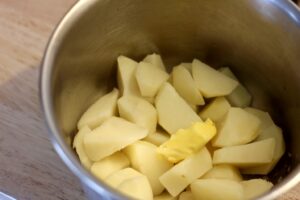
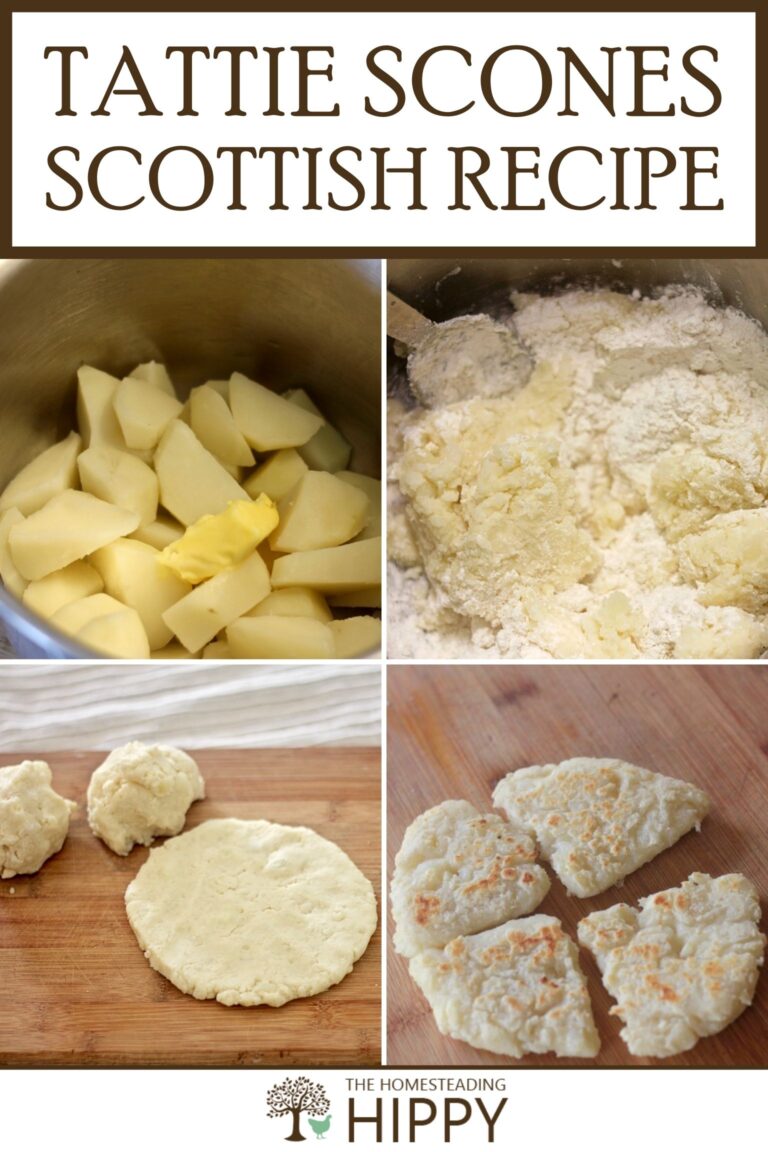
You need freshly boiled potatoes that are still a little warm to make the best tattie scones.
Unlike English scones that need to rise tattie scones need to stay fairly thin and flat – they cook better that way. That means no self-raising flour or separate baking powder is needed.
The best potatoes to use are King Edward because they are so light and floury. You can substitute with Yukon Gold, Onaway or Russet potatoes.
Peel and wash potatoes, then weigh to check you have around 1.1 lb (500g) needed for the recipe.

Traditional Tattie Scones Scottish Recipe
Ingredients
- 1.1 lbs potato (500g)
- 16 tablespoons plain flour (125g)
- 1.5 tablespoons butter at room temperature (20g)
- Pinch of salt – optional
Instructions
- Boil the potatoes until soft, drain in a colander, and leave to air dry for a few minutes to get rid of any excess moisture.
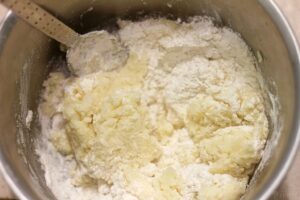
- Add the butter to the potatoes and mash together. At this point you can add salt if you desire.
- Add the flour one tablespoon at a time, mixing in after adding each spoonful.The tattie mix needs to be formed into a stiff dough but not be dry and crumbly – so don’t add too much flour.Ideally you should have a couple of tablespoons of flour left over to spread on the board when flattening out the scones.
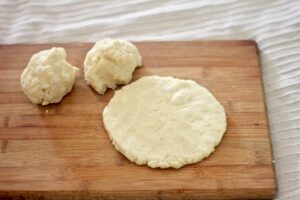
- Separate the warm dough into three lumps and leave to cool a bit more, or else the mix will tend to fall apart when you try to spread it out.
- When cool enough – it should take around 5 to 10 minutes for the dough to cool sufficiently to be workable, ensure the board is floured lightly and press out the dough with your fingers, flipping over and flouring the other side.Continue spreading the dough until it is roughly the size of a side plate, flipping as necessary to ensure it does not stick to the board.If you do decide to use a rolling pin be careful of squashing down with the rolling pin – try to use it lightly to prevent the dough sticking to the board.
- Once your tattie scone dough is roughly circular in shape, cut it into quarters with a sharp knife, and prick with a fork.Now repeat the process with the other two lumps of dough until you have three tattie portions.If you feel you can’t get a circular shape use a side plate turned upside down on the dough to get the size – trim off the dough edges with a knife and add to the next lump of dough.
- Turn the stove plate to medium heat and place a pan on the stove to heat up. Place the tattie quarters onto the pan – no oil is necessary.
- Flip after three minutes or so on one side, then allow the other side to cook.If you find they are starting to burn before the three minutes is up, you can either lower the heat marginally or flip the tattie quarters over to cook on the other side, then flip back, so they are cooked through and golden on the outside.
- Enjoy your tattie scones warm straight from the pan, or set them aside to heat up later with a lttle butter in the pan to add an extra crispness to them.
Notes

As a child I wanted to grow up and marry a farmer… simply because it was so different from my life right on the shores of the ocean. Well, I didn’t marry a farmer but a surfer instead. The urge, however, to grow stuff and make great food for a big family never left. We are on acreage with a sea view and easy access to fresh caught crayfish and other seafood – the best of both worlds. As an artist and writer I enjoy creating new recipes, tweaking traditional ones, and sharing the results not only with family and friends, but online. Mee the rest of the team at this page.