
It’s fall and you know what that means… time to plant your garlic!
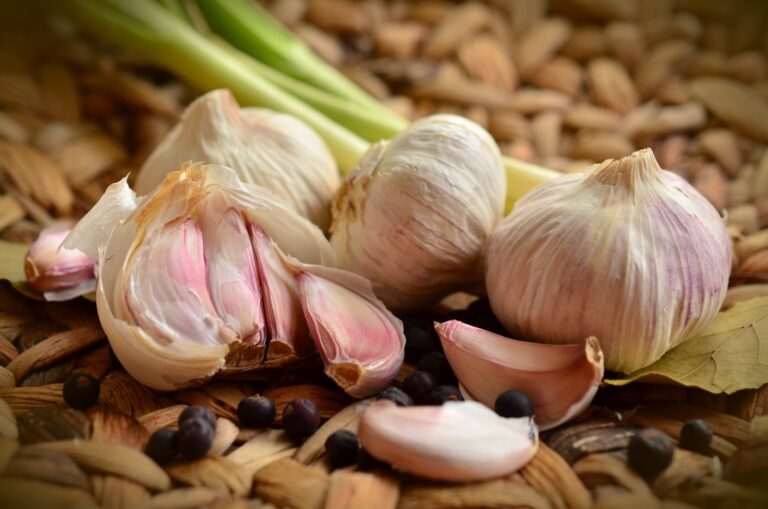
Garlic is hands down the most easy plant to grow and care for. It is beautiful, the smell is intoxicating, and I can’t name a dish I don’t like!
When I first started growing garlic plants, I thought it was a sham. How in the world was the plant going to last through the winter if it had just barely started growing above ground?
As it turns out, all you have to do is choose the right variety, timing, and soil!
One of the best times to plant garlic is right around the time that the temperatures start to cool down in the fall. If you’re looking to get a head start on next year’s garden, now is the time to plant your garlic cloves!
In this blog post, we’ll give you a few tips on how to properly plant garlic, so that you can enjoy plenty of delicious garlic bulbs next year.
Table of Contents
When is the Best Time to Plant Garlic?
If you’re planning on growing garlic, you might be surprised to hear that the best time to do so is when the rest of your garden is winding down – in the early fall.
The general wisdom is that you can plant garlic starting in late September.
Garlic is similar to other allium plants in that it is sensitive to day length. It won’t mature until the days in summer become long, so you need to plant it in the fall to make sure it comes up in the garden in time the following spring.
Don’t worry – the bulls won’t be damaged by the winter weather, even if the ground freezes solid.
Just make sure you choose the right kind of garlic for your growing zone (hard neck varieties of garlic tend to perform best in areas with extreme winter weather).
In fact, some hard neck garlic varieties can even be grown in zone zero with the right planting and care.
If you’re panicking because autumn has passed and you didn’t plant any garlic, don’t worry – you can grow garlic in the spring, too. If you plant in the spring, the bulbs will be smaller and best used as seed garlic for the following year.
You can also grow spring garlic for a crop of greens, which are like scallions. This is called spring garlic and is actually quite tasty.
What Type of Garlic Should I Plant?
Before you can plant your garlic, you need to decide which kind you want to grow. There are a few popular varieties out there, all of which fall into one of two categories – softneck or hardneck.
Hardneck garlic is cold hardy, so it’s the best pick for gardeners who live in northern climates where winter weather is harsh.
These plants produce tall flower stalks, also known as scapes, which you’ll remove midsummer to help your plants focus on bulb formation. You can eat the scapes, though, so don’t throw them out!
Hardneck garlic offers plenty of benefits, namely, that it produces dense, fat cloves in abundance. The downside to hardneck garlic is that it does not store quite as long as softneck garlic.
Popular varieties of hardneck garlic include:
- Korean Red
- German Red
- Chesnok Red
- Purple Stripe
- Duganski
Next up, we have softneck garlic. As you might guess by the name alone, softneck garlic has a neck that remains soft when the plants are harvested.
Most gardeners will actually braid these necks together so they can hang their garlic for long-term storage.
These varieties are best for gardeners in warmer climates, since they aren’t quite as winter hardy and have a stronger, more intense flavor.
The bulbs are generally larger, too, and these varieties hold up well in long term storage. Some popular varieties include ‘Artichoke,’ ‘Inchelium Red,’ and ‘Silverskin.’
Finally, there’s also great-headed garlic or elephant garlic. It’s not a true garlic and doesn’t have a strong taste like most other kinds of garlic. It’s more like an onion.
Otherwise, you’ll plant all great-headed garlic in the same way you’ll go about planting and caring for hardneck and softneck garlic.
Steps to Planting Fall Garlic
Growing garlic is easy! In fact, once you plant, there’s very little you need to do. Soil quality is key if you want the best and healthiest bulbs.
I’ll walk you through the entire process of planting fall garlic below.
Step 1: Prepare the garlic
This step is debatable, but after several failed attempts at this process I swear by it…
Break a Garlic bulb apart (the whole thing) and put the cloves inside a big mason jar with equal parts of baking soda and liquid seaweed (I opt for around 1 TB).
Side note – don’t use store-bought garlic for growing in your garden.
Often, store-bought garlic has been treated so that it lasts longer on the shelf. It may not grow well in your garden, if at all.
When you buy your garlic, you may want to plant a few different varieties. Make sure you’re using quality cloves of garlic from a reputable seller!
Leave the cloves in the jar for at least 2 hours prior to planting (this almost follows the way that you plant potatoes in that you cut them and wait…).
Ideally, you should separate the cloves for no more than 48 hours.
Why? you ask — is this step necessary? Answer: It does an amazing job at preventing bacterial and fungal growth!
Don’t let the cloves stay separated for too long, though, because they can dry out.
Keep in mind that the biggest cloves will produce the largest bulbs!
Step 2: Prepare the soil
Garlic grows best in well drained soil — not sand! Make sure that your space is free of weeds and rocks, then dig 3-4″ down.
Make sure the soil is well-draining and rich. The pH should be around 6.4 to 6.8. I recommend adding three inches of aged compost to the bed a few weeks or months before you plant.
Some people suggest mixing in manure when they amend the soil prior to planting.
You can do this, but if you do, I would try to plan on having it done at least three or four months before you intend to plant.
Because garlic is a root crop, it’s not a great idea to amend with manure and then plant immediately after.
It can increase the risk of various pathogens being spread to the plant and to you – and it can also provide an overabundance of nutrients (namely nitrogen) which can cause an onslaught of green, leafy growth rather than bulb formation.
Again, since garlic is a root crop, you want to focus mostly on root development and not necessarily on the formation of vegetative growth. Too much nitrogen at the very beginning of the growing season can cause the opposite effect.
Therefore, if you add manure, wait a few months to plant. The same goes for adding manure later in the season.
You can add manure as a top dressing but make sure it’s been aged for several months or is heavily diluted.
Once you’ve amended the soil, all that’s left is to plant!
Place the cloves into the spaces about 8″ apart. This will ensure that you do not have anything TOO close together!
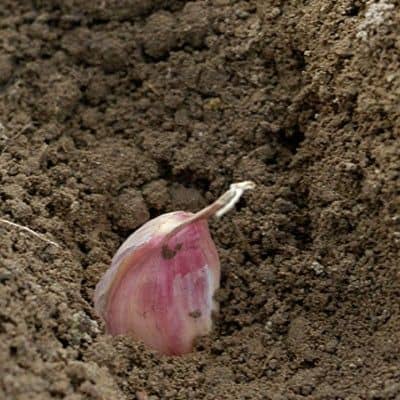
When placing the cloves in the soil be sure that the root end (flat part) is pointed DOWN and the other end UP!
The cloves should be about six inches apart and at least two inches deep.
Step 3: Cover
Once the garlic cloves are comfy in their new homes, cover with soil and add some compost. Where I live we have a local composting facility.
We love this because we know the quality of the soil as we donate with our own compost! Water the bed well, and cover with a good 6″ of straw. This will allow you to see the shoots poking through the straw.
You can use anything you want to cover the garlic, but straw is the best because it repels weeds and will become compressed into the soil by spring.
It will only be about two inches by spring and will serve as a nice mulch once the water warms, helping to keep out weeds.
You may see your garlic form some roots or some small top growth before winter comes, but these should die back over winter.
Step 4: Wait
When the cloves are settled in they will begin to grow and if you have timed it right — you should see shoots poking through in roughly 4-6 weeks
Once this happens you also know that the frost is coming soon– when it does it will look like the garlic has stopped growing and is dying — but it’s not!
You will be happily surprised come spring when the growing resumes.
Step 5: Care for Garlic Plants
Once the little shoots emerge in the spring, it’s go time! Now you just have to care for your plants.
While fertilizing isn’t necessary if you have fertile soil, it can be helpful in making sure your shoots and bulbs get to be the proper size.
Use a natural liquid fertilizer, like fish emulsion or liquid compost tea, about once every other week. Do this until early June.
Make sure you water regularly, too. If you don’t provide the bulbs with enough water, they may become small or misshapen. Provide about an inch of water per week.
If you decide to grow hardneck garlic, a few months into the growing season – usually sometime in midsummer – the garlic will send off a seed stalk.
This is what is known as a scape. It should be removed so that the plants can focus on bulb formation.
You don’t have to throw the scapes out though -you can eat them! They taste great in pasta and make a wonderful pesto, too.
Otherwise, there’s little that you need to do in order to care for your garlic plants. There are few pests – if any – that bother garlic.
That said, being aware of the ones that do exist is important if you want to ensure the health of your plants.
Onion maggots affect garlic along with other allium plants (like onions and shallots). These pests can spread bacterial diseases and feed on all parts of the plant, including the bulb.
You can prevent them by using row covers and rotating your crops each year.
Don’t leave your garlic in the ground for too long – harvest it promptly so that you can prevent these pests from becoming a continuing problem.
Onion thrips can affect garlic, too. These pests primarily affect the leaves and bulbs of garlic plants, causing them to become stunted and distorted.
To prevent them, remove all plant debris after harvest and grow onion thrip-resistant plants. Using mulch and avoiding overhead watering can be beneficial, too.
Occasionally nematodes for wireworms can be an issue, but rotating your garlic crop and planting in a new spot every year can help you get around this. Make sure your soil is well-draining to prevent the vast majority of disease problems.
For the most part, the only major garlic disease you need to worry about is white rot. This fungal disease causes the plants to wilt and die, with cotton-like growth occurring at the bulb or on the base of the stem. It eventually causes the roots to rot out, too.
You can only get rid of it by destroying infected plants – which can be disappointing and devastating – but it is possible to prevent it by rotating your crops and by solarizing the soil prior to planting.
Step 6: Harvest Garlic
Let a few flower talks, or scapes, remain on your plant so you know what the best time is to harvest your garlic.
About a month before you’re ready to do so, the outer peel on the garlic will start to dry. You’ll need to stop watering, therefore, about a month before you want to harvest.
If you don’t stop watering, the bulbs can cause mold. This can make long term storage of your garlic impossible.
You should be able to harvest in July or early August. You’ll know your garlic is ready to be pulled when the bottom third of the leaves are brown and dry (but don’t wait too long – the top leaves should still be green).
Step 7: Storing and Using Your Garlic
After you’ve removed your garlic bulbs from the ground, put them in a cool, shady spot to cure. This curing process will take around three weeks. You’ll know your garlic bulbs are done curing when the wrappers rots, and leaves are totally dry.
Then, all you have to do is cut the roots to a quarter of an inch (and the tops back to an inch above the bulb) and store your garlic.
If you keep your garlic at cold temperatures (near freezing) and with 70% humidity, they should last for five to eight months.
Of course, if you don’t plan on eating all that garlic, you should save some of the bulbs. You can use the largest clove to replant in your garden for next year – after all, it’s now only about a month away from when you’ll need to replant your garlic yet again.
But wait! Don’t replant all of that garlic! Make sure you save some to be used in the kitchen, too. Garlic has plenty of uses and it’s one of the healthiest foods you can eat.
It tastes great in a homemade spaghetti sauce or in fresh, homemade garlic bread.
Roasted garlic can be added to just about any pasta dish or you can whip up a roasted garlic spread to go on bread.
You can even make garlic dressing or garlic oil to spruce up meats and other entrees. Of course, pickled garlic is a great way to preserve your garlic so it lasts for many years.
How Late Can You Plant Garlic in the Fall?
Although you can plant garlic in the spring, fall is the best time to do so if you want to make sure your plants get off to a healthy start.
The latest you can plant garlic in the fall will depend on where you live. If you’re in zones 3-5, you’ll want to plant in late September or early October.
If you live in warmer areas, you can get away with planting fall garlic as late as late October and December.
Fall is the best time to plant garlic. Garlic is a cool weather crop that does well in early spring or fall planting.
If you are looking for an easy way to add some flavor to your meals, consider growing your own garlic. Head to your local garden store and pick up a few cloves of garlic, then get planting!
How do you grow your garlic? Be sure to pin this for later!

last update 04/08/2022

Heather’s homesteading journey started in 2006, with baby steps: first, she got a few raised beds, some chickens, and rabbits. Over the years, she amassed a wealth of homesteading knowledge, knowledge that you can find in the articles of this blog.
Learn more about Heather and the rest of the writers on this page.
Well, that looks totally doable! Thanks for the tutorial. 🙂
What climate are you in? I’m just wondering if this will work in Saskatchewan, Canada, as we have extremely cold winters? (-40 degrees celsius at least)
I just looked up -40*C and its the same as -40*F!
I live in Cleveland Ohio and grow 2 kinds of garlic. though technically one is considered a bulbing leek. you should do fine up north.
Where do you get liquid seaweed? Or is there anything you can use in place of it?
I have gotten it from Peaceful Valley, or you could use a regular compost tea.
Good question, I want to know as well.
I was wondering the same thing as below. I’ve never heard of liquid seaweed. I’ll have to look into it, thanks for sharing on the Homestead Blog Hop!
I’ve gotten liquid seaweed from peaceful valley. groworganic.com
Thanks for the reminder! I need to get planting!
Thanks for linking up with Green Thumb Thursday. I hope to see you back this week!
Lisa
I had no idea you could plant garlic in the fall. (I’m definitely not the green thumb in the family!) Where do you find liquid seaweed?
I use the stuff from Green Pastures.
Just a little early here in Tennessee, still super hot. But very soon. I’ll be putting in my first garlic bulbs next month.
I feel sure there is a way to grow garlic without liquid seaweed. As cheap as garlic is, I may as well shop organic market if I go to all that trouble. Js.
I am sure there is, too…there’s always another way, right? Maybe try a compost tea instead of the seaweed? Let me know how it works! 😉