
I didn’t know a thing about worm castings until I started homesteading. Imagine my surprise when I started searching for organic methods of soil fertilization and discovered worm castings.
The more I researched, the more I became enamored with this secret sauce of gardening. First, I bought a bag, and then another, to mix in my garden and put on my potted plants. I just loved the results. And then I was completely convinced.
I had to farm this amazing stuff for myself, and it was then that my adventure into vermiculture began. Worm castings and vermiculture are becoming increasingly popular and available to homesteaders, hobby gardeners, and professionals alike.
If you want to learn more about this organic fertilizer and soil amendment, then you’ll want to keep reading about everything you need to know about worm castings.
Table of Contents
What Are Worm Castings?
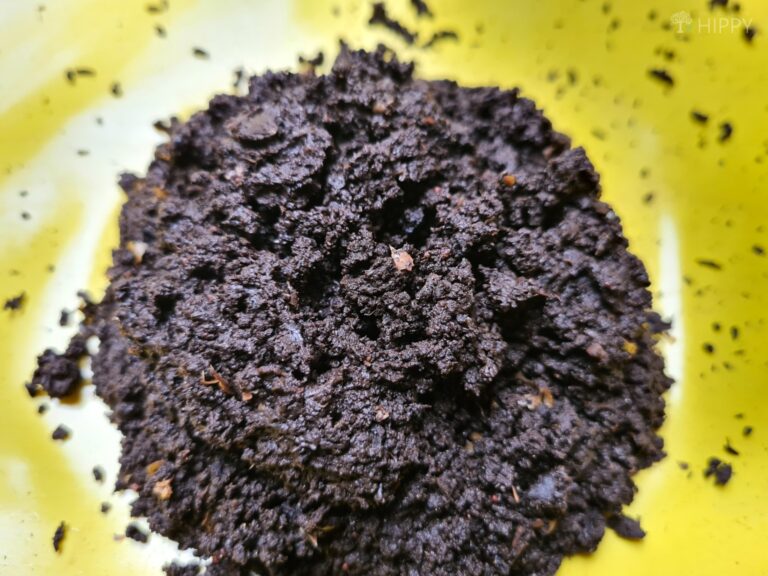
To be completely blunt, worm castings are basically worm poo. Yep, I said it. Worm poo.
Earth worms, red wigglers, and the like eat their way through vegetable matter, compost, animal waste, and soil and excrete a rich waste that is the ideal fertilizer and soil enhancement.
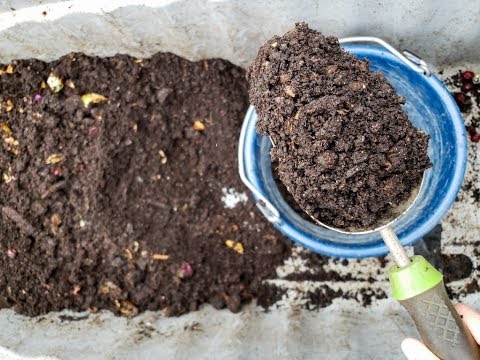
This ideal fertilizer can transform your soil in a ratio of just twenty percent worm castings to eighty percent soil. This secret sauce of gardening is affectionately called ‘black gold,’ worm humus, or worm feces.
Scientifically speaking:
Castings contain a highly active biological mixture of bacteria, enzymes, remnants of plant matter and animal manure, as well as earthworm cocoons (while damp).
The castings are rich in water-soluble plant nutrients, and contain more than 50% more humus than what is normally found in topsoil.
ViteGreenhouses.com
In other words, worm castings are worm manure that contain an amazing amount of plant nutrition, beneficial bacteria, and other substances that will greatly improve your soil and nourish your plants.
The bacteria in the worm castings will continue to work in the soil, transforming the soil as well. Also known as vermicompost, this matter contains calcium, phosphorus, magnesium, and nitrates, all of which are essential to plant health and growth.
The pH of worm castings is neutral, or 7. As the worms digest the compost matter, they secrete a mucus around it.
This mucus coats the castings, giving it a sort of time-release delay. This means all of the nutrients are released slowly and won’t burn the plants. You just can’t overdo it with worm castings.
Surprisingly, worm castings have no bad odor. It certainly doesn’t smell like manure at all. Actually, smelling worm castings smells like fresh earth, like you might find on the forest floor or right after a summer rain. It is a fresh, green, natural scent.
Why Should I Start a Worm Bin?
Starting a worm bin has many benefits. Worm castings will improve your soil, and take the place of purchasing extra potting soil, fertilizer, and other soil amendments that can get pricey.
Also, the food you feed your worms is that much less food waste that will go into a landfill. You’ll have the benefits of increased soil health, and less waste.
- Helps soil retain moisture
- Provides for better soil aeration
- Protects plants from disease
- Protects plants from pests
- Increase plant growth
- Increase plant production
- Speed up germination
Disadvantages Of Worm Castings
There are no major disadvantages to using worm castings because it is an organic fertilizer that will not burn or injure your plants. You really can’t make mistakes with using worm castings.
However, if you use large amounts of worm castings, it could get pricey. The alternative to paying for worm castings is to farm your own.
Disadvantages to farming your own worms might be off-odors if your vermiculture isn’t balanced properly and the time and maintenance to care for your worm farm.
Some scientists will challenge the efficacy of worm castings, because it does not meet the standard NPK rating for fertilizers.
What is the NPK of worm castings?
Fertilizers are measured by NPK: nitrogen, phosphorus, and potassium. This is a means of rating synthetic fertilizers for their uses. Nitrogen is connected to the foliage of the plant – how big and bushy the plant and leaves will grow.
Phosphorus relates to the productivity of the plant – its root system, flowers, and fruit. And Potassium helps the plant to function well. Each of the three are represented by a number. The higher the number, the higher the concentration of that nutrient.
Worm castings have an NPK rating of 1-0-0 because the slow release value of the nutrients doesn’t count for an NPK rating. So while worm castings don’t look good on paper as compared to synthetic fertilizers, rest assured that they boost soil nutrients in biological ways that synthetic fertilizers simply cannot.
How to Use Worm Castings
There are many ways you can use worm castings in your garden, flowerbeds, and potted plants. For example, you could use worm castings:
- As a soil amendment
- As potting soil
- As a seed starter
- As a fertilizer
- As a top dressing
- To revitalize lagging house plants
- To make worm casting tea
- To repel pests and prevent plant diseases
Soil Amendment
A ratio of 80% soil to 20% worm castings will radically improve the health of your soil. How do you make this work in your garden?
If you are planting seedlings, dig your hole a little deeper than it needs to be. Then mix in a shovel-full of worm castings and stir it up a little. Plant your seedling according to its depth and spacing requirements. Fill in the hole with dirt, mixing in a little bit more worm castings as you go.
As Potting Soil
Sometimes, potting soil is just too heavy or gets too waterlogged for the plants you are planting in it. Mix in about a third to one half worm castings to two thirds to one half potting soil.
This will naturally aerate the soil so it isn’t so heavy on the roots of your houseplants. It will also add nutrients and beneficial bacteria that will encourage soil health which in turn grows healthy, hardy plants.

As a seed starter
Worm compost can also help improve seed germination…
To use worm castings as a seed starter, mix it in with your potting soil or sterile seed starting mix. Then plant your seeds as you normally would. This simple step will speed up germination and improve seedling growth early on.
Marty, of martysgarden on YouTube, experimented with starting seeds in 100% worm castings. He showed great success in his video, here, with starting seed in worm casting and in worm tea.
However, he says that while you can grow in 100% worm castings, it is pretty much overkill and you can grow just as well with 10 to 15% worm castings to 85 to 90% potting soil.
As a fertilizer
If you have a large garden, or if your garden is already established, it might be prohibitive to dig up all the plants and replant them with worm castings. However, you can sprinkle some worm castings around the base of the plant and then water it in. This makes a great fertilizer for all kinds of plants.
As a top dressing
A top dressing is a top cover of mulch, rocks, or soil put around the base of plants to make it look nicer. You can sprinkle worm castings around the base of your plants, especially if they are in pots, to create a top dressing that will feed the plant every time it is watered.
To revitalize lagging houseplants
If you have houseplants that are looking depleted, worm castings may be the answer to their problem. Create a potting mix of half worm castings and half potting soil. It works just as well as a liquid fertilizer.
If you need a very well-draining soil, you may want to add some additional vermiculite or perlite as well. Repot your plant in the fresh potting mix and give it a good drink.
Alternatively, you could sprinkle worm castings around the base of the plant and water it in.
Both methods should give your houseplant a nutritional boost. If you are using homegrown worm castings in a pot, be sure that you have screened out all of the worms. If you have worms in your houseplant pots and the worms run out of compost, they will begin to digest the roots of your plant.
As worm casting tea
Worm casting tea is easy to make. You’ll need some kind of a porous bag to put worm castings in. You could use an old t-shirt, a burlap sack, or even cheesecloth if you have it on hand.
Fill your bag up with worm castings and submerge it in a bucket of water overnight. In the morning, your worm tea should be a light brown color. If not, let it steep a little longer. When it is ready, remove the ‘bag’ and you can use the wet castings on a house plant or in the garden.
Dilute your worm tea with 50% water, and use it to water your plants, indoors or out. It’s ok if the worm tea gets on the leaves of the plants, too. Since it isn’t a synthetic fertilizer, it won’t burn your plants.
To repel pests and prevent plant diseases
Castings are rich in nutrients that help plants grow strong and healthy, making them less susceptible to pests and diseases like aphids, spider mites, and other common issues.
Worm castings are an excellent source of nutrients for plants. Nitrogen, phosphorus, potassium, and other essential nutrients are present in high quantities, making castings ideal for use as a fertilizer.
Additionally, worm castings improve drainage and aeration in compacted soils, which helps roots get the oxygen they need to grow. Castings also improve water retention in sandy soils, helping plants stay hydrated during dry periods.
Additionally, castings contain beneficial microbes that help fight off harmful pathogens.
Worm castings can be applied directly to the soil around your plants or added to compost. For best results, incorporate castings into the top few inches of soil before planting.
You can also topdress existing plants by spreading a thin layer of castings on top of the soil and around the base of the plant. Be careful not to add too much, as this can burn the roots. Reapply every few weeks throughout the growing season.
Where Can You Buy Worm Castings?
You can purchase worm castings at your local nursery or plant store, Walmart, or Home Depot. You can purchase them online through amazon.com, as well.
There are plenty of individual retailers online as well, such as Uncle Jim’s Worm Farm. Purchasing worm castings is similar to purchasing soil, in that it comes in large, heavy bags.
So you may want to purchase them from a place that has free shipping or where you can pick them up yourself, as shipping could get expensive fast.
How to Build a Worm Bin
If you don’t want to spend a fortune purchasing worm castings, you can start your own worm farm. For around $60, you can purchase an entire set-up from Uncle Jim’s Worm Farm. Or you can start your own for less! Marty gives a quick tutorial on setting up a worm farm here.
Check out this other vermicomposting method, “the tower method”, and a comparison between it and worm bins here.
Marty starts his beginner worm farm with a Styrofoam container and a tight-fitting lid. First, he puts a few pin holes in the lid for ventilation. Then, he soaks cocoa peat in chlorine-free water, allowing the peat to expand and fill up the container.
He adds his worms, and then puts newspaper on top of the peat. Next, he wets the newspaper and closes up the container.
Some gardeners claim that it will take up to two years to have usable worm castings while others, such as Uncle Jim’s Website, states that you can harvest worm castings several times each year.
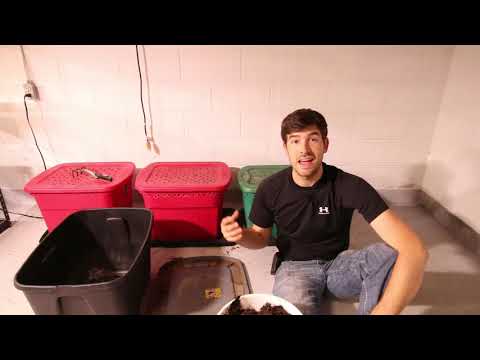
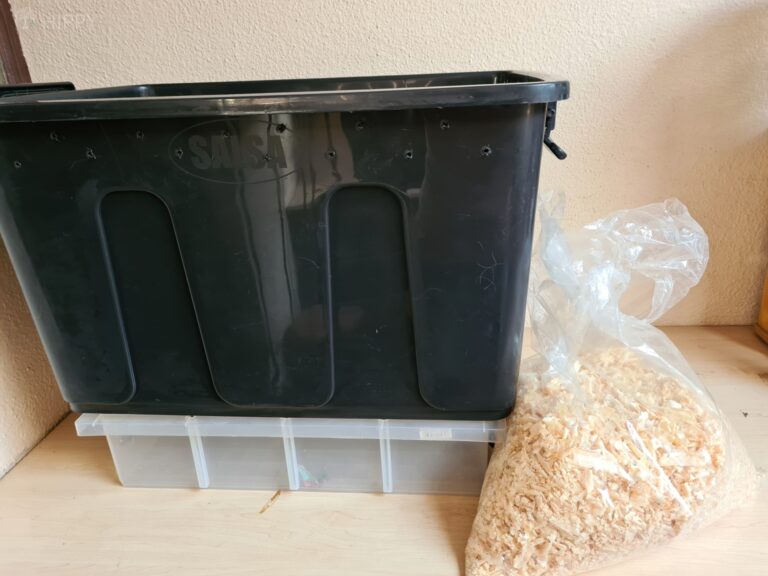
First, Luke purchased 15 gallon discounted bins that were slightly cracked. Luke put some drainage holes in the bottom, some holes for circulation on the side, and set an extra tote lid underneath the bin to catch any leaks.
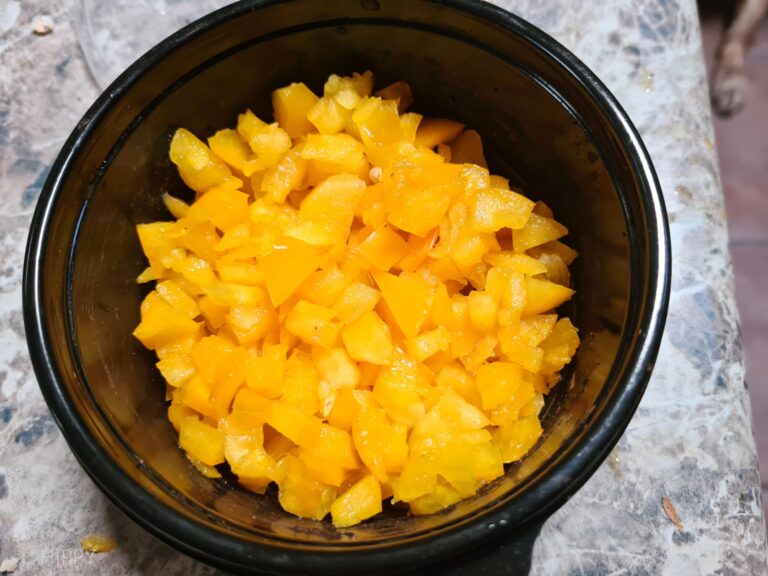
He filled the bin half full with some semi-finished compost. You could mix in some shredded newspaper if you like, but shredded newspaper alone won’t hold enough moisture to keep the warms happy. He put in about ½ pound of pulp from his juicer.
Luke says that if you don’t have a juicer, put some banana peels or citrus or other vegetable waste in a blender with some water and that will work just as well. Just don’t use anything fatty, meat, dairy, or salty.
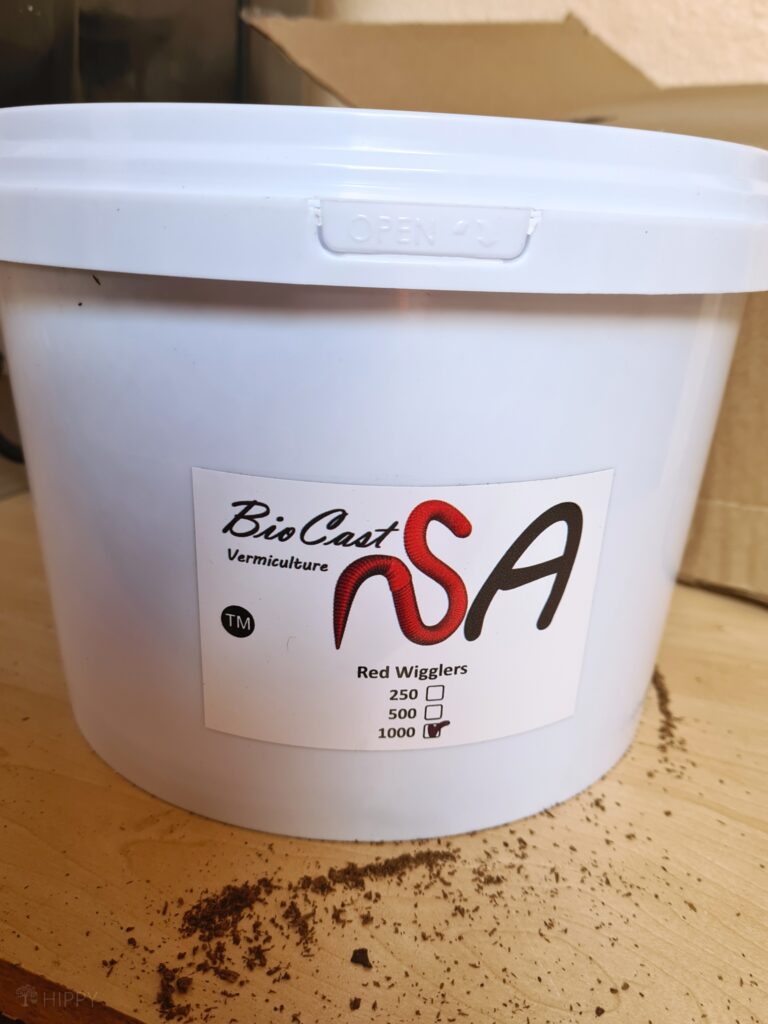
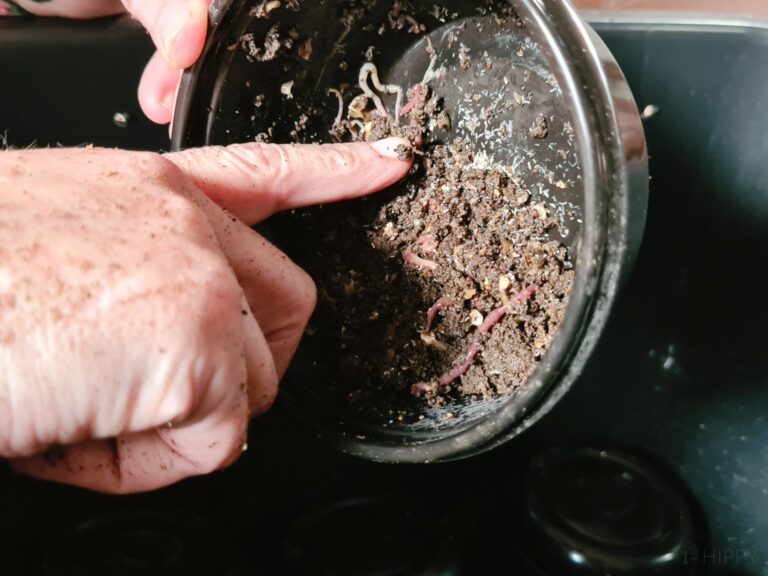
After the worm bin was ready, Luke added his worms from Uncle Jim’s Worm Farm. He used 500 Red Wiggler worms. The worms are a little dehydrated from shipping, but they will perk up once they get rehydrated in the soil.
Lastly, drill some holes in the lid of your bin and put it on top.
You can feed your worms all kinds of food waste, just remember to avoid meat, dairy, salt, and fat. However, they will happily feed on cereals and grains, breads, coffee grounds, tea bags, and fruit and vegetable peels and waste.
Feed your worms every couple of days. The worms may be able to digest the food faster, and create worm castings more quickly, if you put it all through a blender first. This is a personal preference and not necessary.
How Do I Start a New Worm Bin?
If your worm bin has reached capacity, you’ll want to start an additional worm bin. You can keep it for yourself or gift it to a gardener friend!
Set up a new bin according to the directions above, making sure you have all the right conditions: a bin with holes in the bottom and sides, a lid with holes, and damp, partially composted matter for bedding.
You’ll want to find take at least fifty worms from your established bin and move them into your new bin. You may want to use some of the bedding as well, so that the worms feel comfortable and at home in their new bin.
How Do I Feed My Worms?
Your worms can eat about half their weight in food per day. So if you have about a pound of worms, you’ll want to feed them a half pound of food per day. You could feed them vegetable scraps, grains, bread, cereal, tea bags, coffee grounds, and even paper.
Your worms can also eat cardboard, paper egg cartons, and leaves. The smaller the pieces of food, the easier it will be for your worms to digest them. If you want faster worm castings, throw your food in a blender so that it creates much smaller pieces.
You could lay food on top of the bedding or dig a small trench and lay the food in the trench. Your worms will gravitate towards the food.
Do Worms Need Grit?
Yes. Worms digest food in their gizzard, and grit helps make this more efficient. Left over coffee grounds are surprisingly pH neutral and full of nitrogen, making them a good source of grit for your worms.
Also, crushed egg shells will make grit for the worms. Wash your egg shells and microwave them for 30 to 45 seconds to kill bacteria before feeding them to your worms.
Where (and How) to Buy Worms for Your Composting Bin
You can buy worms for your composting bin from a variety of sources. Many garden centers and pet stores sell them, and they can also be ordered online.
One of the most important things to consider when buying worms is the type of worm you want. The two most common types of worms used for composting are red wigglers and earthworms.
Red wigglers are better at breaking down organic matter and generating heat, while earthworms are better at aerating the compost and mixing in soil. Both types of worms are widely available for purchase online or at your local hardware store.
Another thing to keep in mind when buying worms is how many you’ll need. A good rule of thumb is 1 pound of worms for every 30-40 pounds of food scraps.
So, if you’re generating about 3 pounds of food scraps per week, you’ll need about 1/2 pound of worms.
There are a number of benefits to using worms in your compost, including accelerated composting and fewer fruit flies. Worms help to break down organic matter more quickly, resulting in finished compost in as little as 2-3 weeks
Can I Just Dig Up Earthworms From My Yard or Garden For My Worm Bin?
Technically, yes, you could dig up some earthworms from your yard or garden to put in your worm bin. However, red wigglers seem to make the best worms for a vermiculture system.
What we think of as earthworms are actually nightcrawlers. Nightcrawlers prefer to be alone and like to spread out. Red wigglers, on the other hand, are communal worms.
They are happy being close together and will frequently feed in clumps. This makes for happier worms in a small worm bin.
You can purchase worms online from retailers such as Uncle Jim’s Worm Farm. If you can’t afford to purchase worms, ask around to see if any of your friends have worm bins.
If they have healthy, thriving worm bins, they could easily share 50 worms to help you get started. Their worms will rapidly reproduce and so will yours.
Common Problems With Raising Compost Worms
Although raising compost worms can be a fun and rewarding experience, there are a few common problems that worm farmers should be aware of.
Why Are My Worms Escaping?
If the worms aren’t comfortable in their worm bin, they will attempt to crawl away to find something better.
Make sure they are comfortable by providing substrate that is already partially broken down and already damp. Partially broken-down compost mixed with shredded newspaper is ideal.
One of the most common problems is that of overpopulation. If left unchecked, a population of compost worms can quickly become too large for their environment, leading to poor health and decreased growth rates.
Another common problem is that of inadequate ventilation. Poorly ventilated compost bins can lead to high levels of heat and moisture, which can be detrimental to the health of the worms and caucse some escapees.
Why Are My Worms Dying?
If your worms are dying, you’ll need to do a little troubleshooting.
- How is the moisture level? The bedding should like a wrung-out sponge. If it’s too wet, the worms will drown, and if it is too dry, they will die.
- How is the temperature? If the temperature is too hot, the worms can cook. If it is too cold, they will slow down greatly and could freeze. Aim for temperatures between 55 and 75 degrees Fahrenheit.
- How is the air circulation? If there isn’t enough oxygen getting to the bins, the compost could go bad or the worms may not be able to breathe. You may need to fluff up the bedding a little bit to encourage more oxygen in the soil, you could always add some shredded newspaper to assist with this.
- Is there enough food or too much food? If there isn’t enough food, the worms will starve to death. If there is too much food, it may cause mold. To fix this problem, add more food scraps to the bin on a regular basis. Make sure that you are also adding a variety of different types of food scraps so that the worms have a balanced diet.
Your worm bin should not have a strong offensive odor. If it does, you’ll need to check for these issues to make sure your worms stay alive and healthy.
How to Harvest Worm Castings
To harvest your worm castings, you’ll need to use a screen to sift them out. You can purchase one already made or make your own. Just build a small wooden frame, roughly two feet long by a foot and a half long and two and a half inches high.
You could make this out of lightweight pine or any scrap wood you have laying around. Staple ¼ hardware cloth to the bottom of your frame, to create your sifter.
Place your sifter over a bucket or wheelbarrow, and gently scoop some of the worm castings out of the worm bin and into the sifter. The worm casting will fall through and the worms and large pieces of compost will remain in the sifter.
Transfer what’s left into a bucket so you can harvest your entire bin. After you have sifted through all of the worms and worm castings, you can place some more compost in your worm bin and add your worms back in.
From there, you can use your worm castings just about anywhere you want to grow something! In your garden, flowerbeds, and even your houseplants.
Worm castings will improve the health and quality of your soil, prevent pests and diseases, and help your plants grow faster, stronger, and be more productive.
Final Thoughts
Composting with worms is a great way to reduce your organic waste and provide fertilizer for your plants.
For more information on vermicomposting, visit Oregon State University Extension here, but before you do, be sure to pin this article on Pinterest for later!
Worm Bin FAQ
In some limited cases, some gardeners have reported that worm castings can damage their plants.
One theory is that the high levels of nitrogen in worm castings can burn plant roots. Another possibility is that the acidic nature of worm castings can cause problems for plants that prefer a neutral or alkaline soil.
If you are considering using worm castings in your garden, it is important to do some research to see if they are right for your plants.
Worm castings use can help to improve soil quality and drainage. However, it is possible to use too much worm castings, which can smother plant roots and cause problems with drainage. When applying worm castings to your garden, it is important to follow the recommended rate of application, and to avoid applying them directly to plants’ leaves.
Worm castings last for a long time in soil, slowly releasing nutrients over the course of several months. As a result, they are an excellent way to provide your plants with the nourishment they need to thrive.
Both compost and worm castings provide essential nutrients that help promote plant growth. However, worm castings also contain chitin, a substance that helps to discourage pests and disease.
In addition, worm castings have a higher concentration of nutrients than compost, making them more efficient at boosting plant growth.
Ordinarily, you do not need to remove worm castings after putting them in your garden. The exception is if the castings are abnormally dense and you notice that they haven’t broken down over time (which can happen with an imbalanced bin, in some cases).
Many different types of plants can benefit from the nutrients in worm castings, but some of the most popular include tomatoes, peppers, eggplants, and roses. Worm castings can also be used to improve the quality of the soil, making it more fertile and better able to hold moisture.

Amanda is a homesteader and a Jesus-loving, mother of 6 toddlers. She’s raising lots of fancy chickens and goats on her small homestead (among other things). Find out more about the team here.
Very informative Thank you!
We just built a 5 foot by 5 foot 3 foot tall box on top of the side yard soil. We fill it with dry leaves , kitchen waste, and grass clippngs. The worms have filled it for years. They just showed up. There are thousands of them
Very informative! Thank you! Love the JESUS-LOVING!! God is Good…… 😉
Once more, these are just a few of the numerous summer occasions in the Southern Illinois region. Another factor about being a poker on-line pro is the status of the poker market.
I have been a worm man for over 50 years , My 1 in a half acre organic garden is all worms and gets mulched all year around I learned from Ruth Stout many years ago , I collect waste from restaurants , then grind in a large S.S. 20 gal. grinder to feed my worms , plus my compost . After planting I mulch very heavy with rabbit waste ,, I raise rabbits .
With rabbit waste you don’t have to compost it . the NPK is the highest in animal waste ; Allow me just mention one thing:: I raise loads of garlic , hard neck , my bulbs are in weight :: 3-4-5-6 oz. in weight :; That’s some of my story
Keep gardening it’s healthy for you. My dad always said feed the worms and they will feed you:: silverbill
With respect, there is no worry about a few worms getting into your plant pots. They do not eat living tissue, only dead tissue. They will not harm your roots.
As to screening your castings, I strongly suggest double screening. Use a 1/4 screen first to separate your larger worms and unprocessed materials, then screen them again through a 1/8 or 1/12 inch screen to separate out your little, immature worms and cocoons. Put these back in with your larger worms and overs to increase your worm herd unless you are trying to increase the worm population within your garden.
Regular nightcrawlers from your yard do not do well in confinement. They burrow up to six feet underground, and they are not composting worms like red wigglers or European nightcrawlers. (There are other more exotic composting worms, too, but not recommended for newbies to vermicomposting.) Wigglers and Euros inhabit the upper 6 to 8 inches of soil and feed on decaying matter, food scraps included. These are the ones best suited for creating castings for your garden. Nightcrawlers, because they burrow so deeply in the soil, are excellent for aerating the garden, but do little to fertilize it.
Love your info.My internet is acting up today-may have missed info I’m looking for.I am pulling together all needed supplies to raise red wigglers inside..my garden area outside is a good walk from my house..i live in cold snowy New Hampshire…not sure exactly where i should put castings so they don’t get compromised before we plant in spring-our last frost can be as late a s Memorial Day weekend..and somtimes longer .So should I store the castings outside in covered tubs near the house or just dump them on the snow ….seems like their value might get lost not to mention walking through deep snow to get to mhy garden area,