
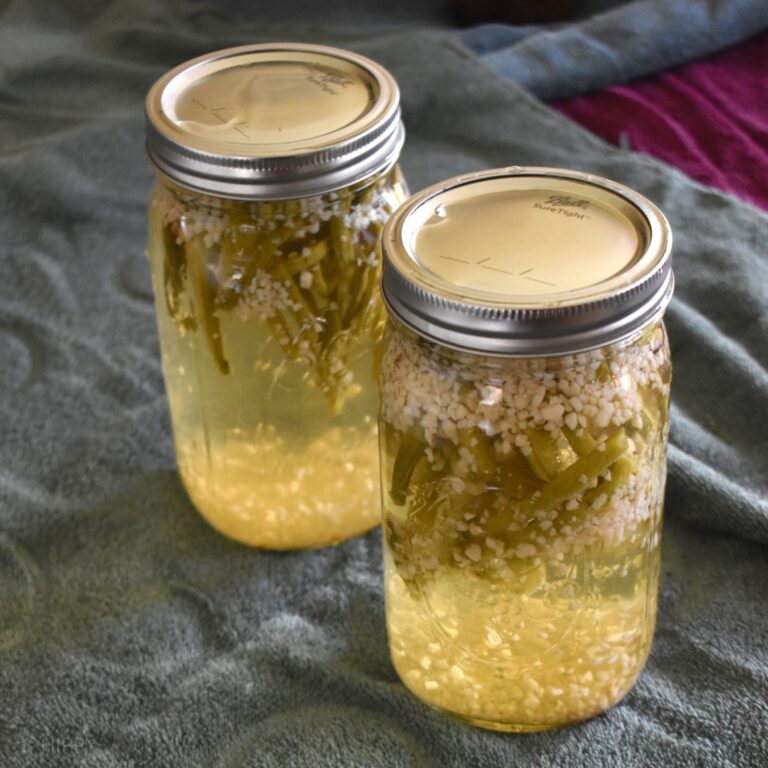
Growing up, my grandparents always used to have tons of dilly beans on hand. As a kid, I used to turn my nose up at the pale green concoctions, swimming in their brine of what, as a child, I deemed as “icky” spices and pungent vinegar.
Want to learn how to make your own dilly beans at home? Luckily, it’s easy to do. Here’s what you need to know.
As an adult, I scoff at that child – because now that I know how delicious dilly beans actually are, I can’t believe I never tried them! Especially because my grandparents had a massive garden filled with all kinds of fresh, tasty produce – green beans included.
Dilly beans are an excellent way to use your fresh green beans. Whether you prefer them on their own, as a side dish, or as the perfect garnish to a meal, you really can’t have enough of these crunchy, tasty treats on hand.
What Are Dilly Beans, Exactly?
Dilly beans are simply pickled green beans. You might hear green beans referred to as green beans, string beans, or snap beans, but really they are all the same thing.
These beans grow best in the spring and early fall but there are some varieties that grow all throughout winter, too.
You can even make dilly beans out of yellow or purple green beans! Just about any variety of green beans will work for making dilly beans, although I advise steering clear of haricots verts.
These are narrow, small French beans that are quite tasty raw or lightly cooked, but they don’t do as well when you pickle them.
Can You Can Un-Pickled Green Beans?
If pickled green beans, also known as dilly beans, don’t sound like your cup of tea, know that you can also un-pickled green beans, too.
However, the process is going to be much different. Since you won’t be adding vinegar to raise the acidity of the beans, you will need to process them in a pressure canner.
This takes a bit more time to do but will yield you unpickled, un-flavored green beans to be used in a more traditional sense. Make sure you look up an appropriate recipe for canning regular green beans in a pressure canner to be safe.
On the flip side, you should know that you can also pickled dilly beans in a pressure canner if you so choose.
Why would you want to do this? For starters, you’ll be able to save some time, as you can fit more canning jars inside a pressure canner, as pints can be double-stacked.
However, you will need to be very careful in doing this, as your bones may become soggy as they will be processed at higher temperatures.
Ingredients
- 3 lbs. green beans
- 6 cloves garlic
- 6 fresh dill sprigs or 6 tsp of dill weed
- 3 c white vinegar
- 3 c water
- 6 tsp pickling salt
- 3 tsp red pepper flakes
- 3 tsp yellow mustard
- 3 tsp coriander
Equipment Used
- Chef’s knife
- Colander
- 7 pint canning jars (make sure these are approved for canning)
- Canning lids (do not reuse these between canning seasons)
- Bands (these can be reused)
- Jar lifter or a set of tongs
- Oven mitts
- Measuring cups and spoons
- Estimated Prep Time: 60 minutes
- Estimated Cook Time: 15 minutes
Nutrition Facts
- Servings Per Jar: 2
- Calories: 50
- Carbohydrates: 9g
- Protein: 2.3 g
- Fiber: 3.2 g
Instructions
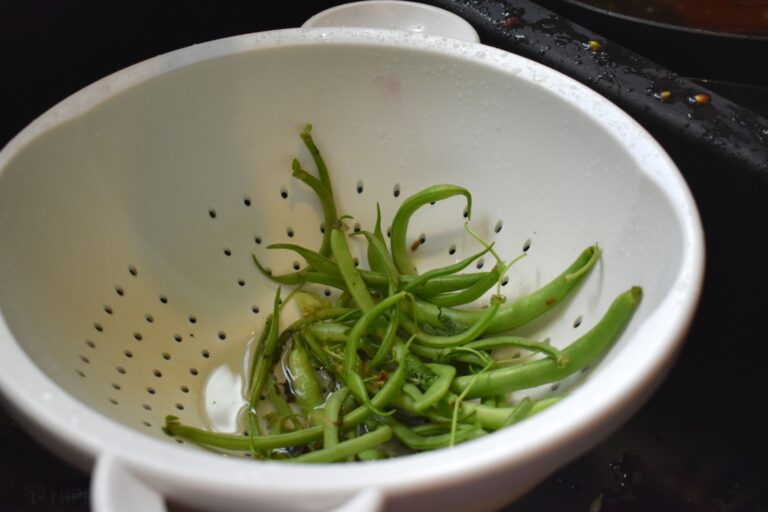
Step 1. Wash Your Beans
The first step to canning anything is to make sure your produce is nice and clean. Even if you’re working with organic produce, it’s important that you get all the grime off your beans.
Any dirt that is on your beans can harbor soilborne pathogens, and you also don’t want any gross bugs inside your canning jars, either.
If you want dilly beans that are a bright green inside your canning jar, you should blanch them by boiling them in water for three minutes and then dunking them in an ice bath. Otherwise, skip this step.
Rinse your beans under cool water and leave them in the colander to be processed.
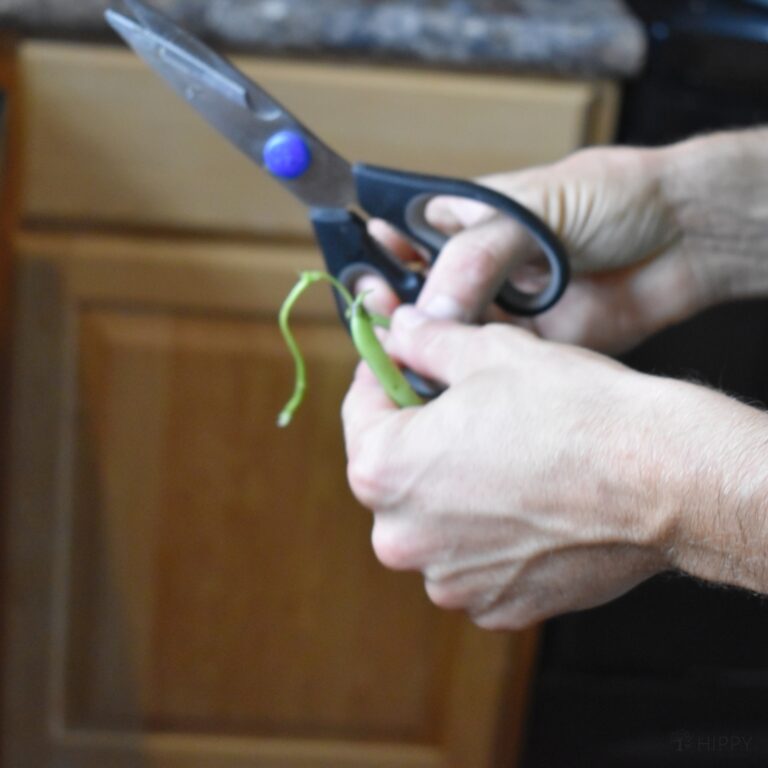
Step 2. Trim Your Beans
It’s really important that you don’t skip this step. Not only do you need to trim the stem ends from the beans (they can impart a poor flavor on your finished dilly beans) but you also need to remove any bad spots.
When you are selecting beans to be used for dilly beans, you can include those of practically any size.
However, I recommend choosing dilly beans that are of a moderate size, as these will have the best crunch and flavor without that “woody” texture that super-sized green beans sometimes get.
If you have any extra-large green beans, it’s not a problem. Simply cut them in half or in thirds before you put them into your jar.
Step 3. Heat Up Your Brine and Add Spices
Next, you should put your vinegar and water on the stove to heat up. You can use just about any type of vinegar for dilly beans depending on the finished product you’re looking for.
The classic recipe calls for whit vinegar, although I’ve also seen recipes that use red wine vinegar or apple cider vinegar.
The important thing is that you make sure your vinegar has at least 5% acetic acid and that you don’t dilute the brine any more than the recipe already calls for.
The recipe my grandmother used to use had a more diluted mixture, but I don’t use that exact recipe because vinegar today has less acetic acid than it did back then. As a result, that old recipe would make my dilly beans less safe for canning.
Combine your vinegar and water in a stockpot and let it heat up on the stove. While this is warming, you can add all of your spices to the jars. Feel free to add other spices to taste; these won’t affect the safety of your final dilly beans.
Step 4. Prepare Your Canning Equipment
Once your spices are ready to go, you can start getting your canning equipment ready. Sterilize your jars, bands, and lids.
I recommend running the jars and bands through the sanitize cycle on the dishwasher to heat them up, even if they’re brand new. This will remove any grime and also get them nice and hot.
It’s important that your jars be hot when you load them into the car because cold jars are apt to crack when exposed to the hot temperatures inside the water bath.
You do not need to put your lids in the dishwasher – in fact, this is not recommended – but you can instead preheat them in a pan of water on the stovetop. This is not required but will sanitize your lids to make them safe for canning.
Give your canner a good wipe down to make sure it’s clean and ready for canning. Fill it about halfway full with water and begin warming it on the stovetop. It’s okay if it comes to a boil before you’re ready to fill it with jars.
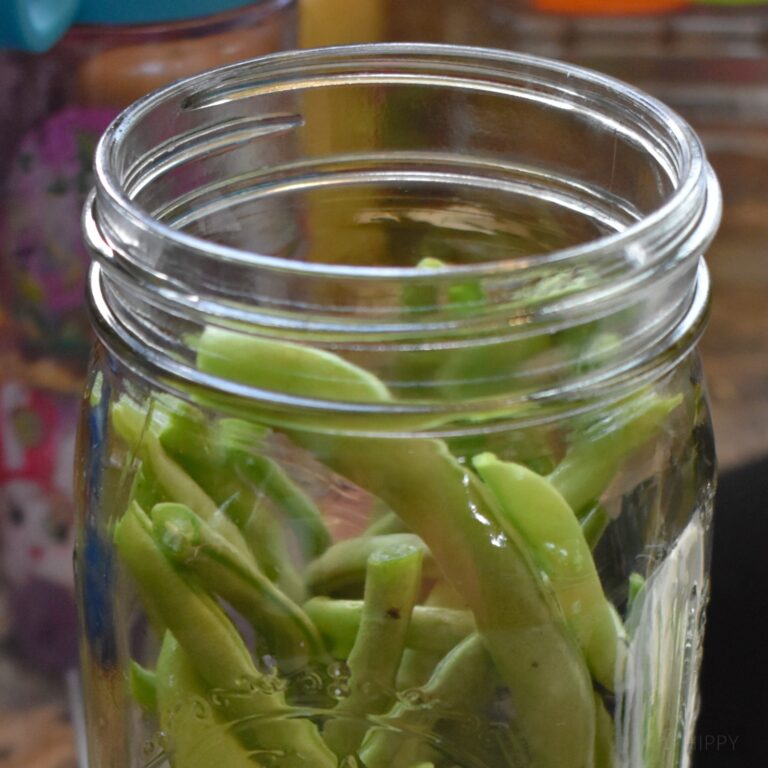
Step 4. Load Your Jars with Beans and Brine
Pack your green beans into the jars, orienting them so that they stand upright when the jar is upright. Pack the beans as tightly as possible without damaging them before pouring the brine atop the beans and spices.
You can usually fit about half a pound of beans in one pint jar, but this will vary depending on your preferences, your bean type, and how you pack the jars.
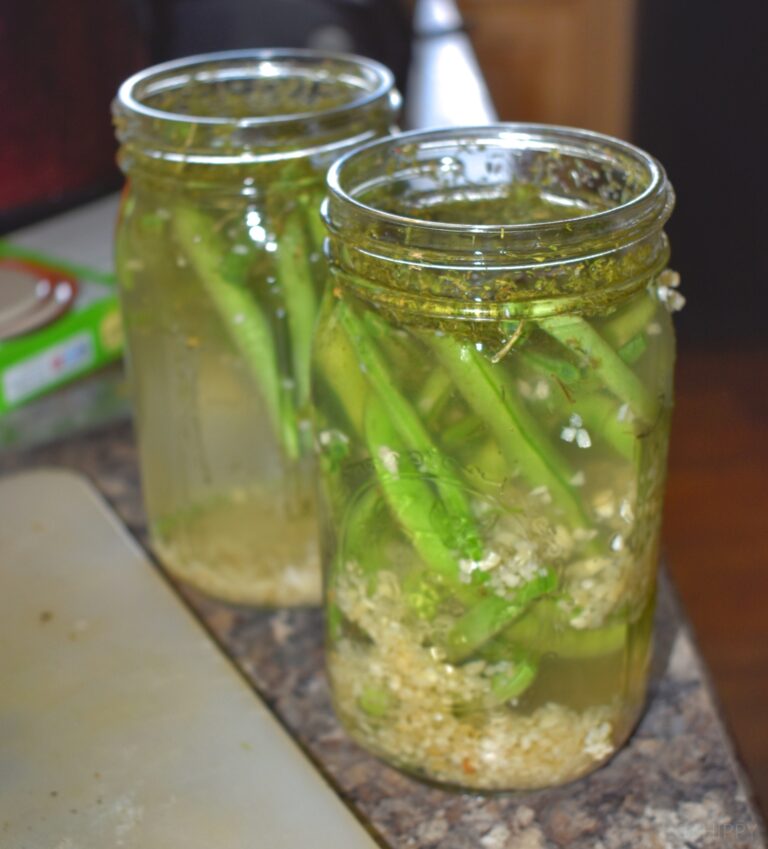
Make sure you allow for about one inch of headspace after pouring in the brine. Then, remove any air bubbles you see with a wooden or plastic bubble remover. Avoid using a metal tool as it can damage the glass and lead to breakage inside the canner.
Clean the rims of the jars to make sure there are no food particles left behind. Put your lids on the jars and screw bands on until they are fingertip tight – don’t feel the need to over tighten them.
Step 5. Can Your Jars
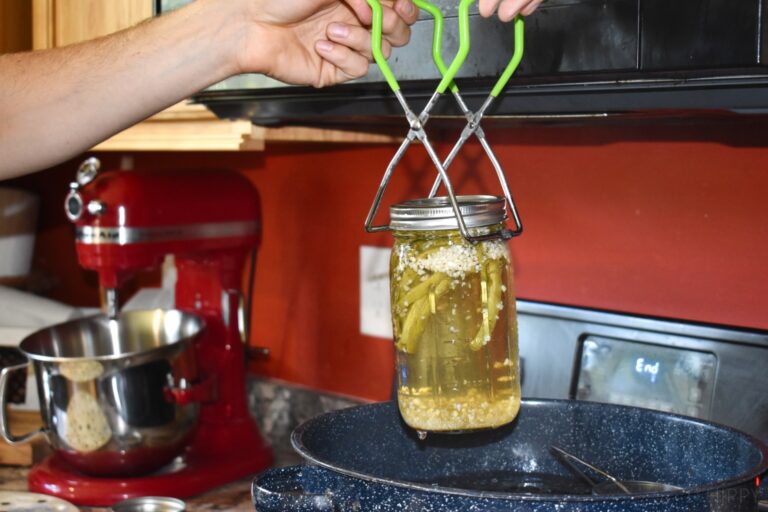
Using your jar lifter, load your jars into the canner. You will be able to fit about seven pints in the canner depending on the size and style of canner you have.
Don’t let them touch! This can cause the jars to crack as they move around during canning. If you’ve lost any water, add more until it covers the jars.
Process the jars in the canner for 15 minutes. Adjust the canning time for altitude and don’t start your timer until the water in the water bath has reached a boil again.
Step 6. Cool The Jars
After processing your dilly beans for fifteen minutes, turn off the jheat and remove the canner’s lid. Let the jars stand for about five minute and then remove them using your jar lifter. Let them cool for 12 to 24 hours.
Put your jars on a clean kitchen towel to cool. Don’t put them on the countertop, as the cold surface can cause your jars to crack. You also need to make sure they are out of the direct path of a cool breeze, which can also cause damage to the jars.
Leave room between the jars for them to cool. If you want to remove the rings, you can. Check that your lids have sealed by pressing down on them with your fingertips.
If they flex, you don’t have a great seal and will need to either refrigerate the dilly beans or try to can them again later. Some popping noises are expected as the jars cool, but you don’t want your lids to move at all.
Step 7. Store The Jars
After your jars have cooled, put them in storage. A dry location like a basement or pantry is best. They will last for up to a year.
Some Final Tips
- If you are canning dilly beans at an altitude lower than 1,000 feet, this recipe can be followed exactly. If you are canning between 1,001 and 6,000 feet, add five minutes to the canning time, and add ten at altitudes above 6,000 feet.
- When you fill your jar, you should tilt it on its side. This will allow more beans to fit into a single jar, and it will give your jars a gorgeous appearance as the beans will be layered perfectly inside.
FAQ
You can – but it may impact the flavor. Any kind of vinegar is safe for canning as long as it has at least 5% acetic acid. Make sure you do not dilute your vinegar of choice with water, because this will affect the canning safety.
If your dilly beans taste too strongly of vinegar and you’d like a sweeter flavor, you can always add sugar – you can add as much sugar as you’d like without impacting the safety of your finished product.
Some recipes will request that you blanch your beans for pickling them. This simply means that you will cook your green beans quickly in boiling water and then dump them into an ice bath. This doesn’t impact flavor or safety but instead helps preserve the crunch and color of the beans after they’ve been pickled.
You are welcome to blanch if you so choose, but I always skip this step because the beans soften when the brine hits them anyway. And frankly, the color of the beans doesn’t matter much to me, either!
I always recommend using canning jars made by Ball or Kerr. These two companies are known for producing canner-safe canning jars that will hold up well to the pressures of canning.
However, any canning-safe jar will do. You can use wide or regular-mouth jars depending on your preferences and you can use quarts or pints – just make sure you alter your recipes to make sure they are safe for canning.
You sure can. There are quite a few canner-safe recipes out there that call for ingredients like bay leaves, kosher or pickling salt, peppercorns, or even sugar.
These are all perfectly safe for the canner. This recipe has no added sugar but the apple cider vinegar adds just the perfect touch of sweetness.
You do not need to can your dilly beans if you are in a rush. You can also incorporate the quick pickling method, by which you put the beans in the refrigerator, including the same ingredients in the jars, and then let them absorb the spices and vinegar there.
You will need to use them in a few weeks but it’s recommended that you wait a couple of days to let them really absorb the flavors of the brine.
Answer: It does not. You can use either one, depending on what you have on hand.
As long as your jars sealed effectively, you shouldn’t have to worry about them going bad in storage. However, it’s always a good idea to be vigilant for signs of spoilage.
For example, look out for jars that gush liquid out when you open them as well as those that have a film atop the product. You should also look out for loose lids or those that flex when you press on them.
You sure can. All you need to do is place your jars right-side up on a rack in a canner> Fill your jars and the canner with enough water to cover them by about an inch. Bring the water to a boil and boil for ten minutes. Let the jars air dry before you use them.
Yes, you can. Just put it in a container and place it in the refrigerator. It should last for several weeks or until you are ready to use it on another batch of dilly beans.
How to Use Dilly Beans
Most people just eat them right out of the jar – just like a regular pickle. However, dilly beans are also a great side dish for a lunch or dinner favorite. You could even put them on burgers!
However you choose to eat your dilly beans, know that you will be making a great choice by canning your own at home. They are absolutely delicious – and great for you, too.
Do you make your own dilly beans at home? What are your favorite ways to snack on them?


Rebekah is a full-time homesteader. On her 22 acres, she raises chickens, sheep, and bees, not to mention she grows a wide variety of veggies. She has a huge greenhouse and does lots of DIY projects with her husband in her ever-growing homesteading endeavor. Learn more about Rebekah here.
I usually water bath fully beans. How long and what pressure level for pressure canner
Thank you for your user friendly instructions! I love to make chicken or tuna salad, then spread it across a lettuce leaf with two dilly beans. Delicious!!