
Would you like your garden to harvest rainwater efficiently?
Would you like to have a garden that is not only flood-proof, but drought-proof too, not to mention that it costs much less to irrigate? If so, then this article will introduce some techniques for making these wishes a reality.
You may be surprised to hear that it is not only roof space that is prime real estate for water harvesting.
If your garden is set up in accordance with permaculture principles, you may well find that your garden stores more water than a tank ever could, and this has the added benefit of increasing groundwater resources in your local area!

Permaculture Principles and Water
The classical Permaculture advice for water follows the 3 S’s – slow, sink, spread.
Firstly, we want your water moving across land as slowly as possible. When water speeds up, it tends to gather sediment and nutrients along with it, and then these nutrients leave your site, wasting the money and energy you spent placing them there in the first place.
Fast-moving water also causes soil erosion, which decreases soil fertility, causes damage to landscapes, and increases the carbon dioxide concentration of the atmosphere.
We want to do the opposite, which is to slow water down. When water slows, it percolates into the ground and recharges our aquifers, it keeps nutrients in place, and feeds our plants.
Secondly, we want to sink the water into the ground, rather than to have it run off the surface.
As above, this recharges aquifers, and can lead to stronger root systems of plants. It also means that we don’t have to water our plants as often, as the soil stays wet for longer.
Finally, we want to spread water around the land. Unless we have constructed a deliberate depression of land, such as in a pond, we don’t want the water to remain stagnant. This can cause it to attract insects and pathogens.
It also doesn’t do use much good to have all the water stand in one spot, because then we have to spend energy to move it around.
Rather, we want a landscape that spreads our water around for us, using gravity to do as much of the work as possible.
Don’t forget this permaculture principle – the least effort expended for the greatest result.
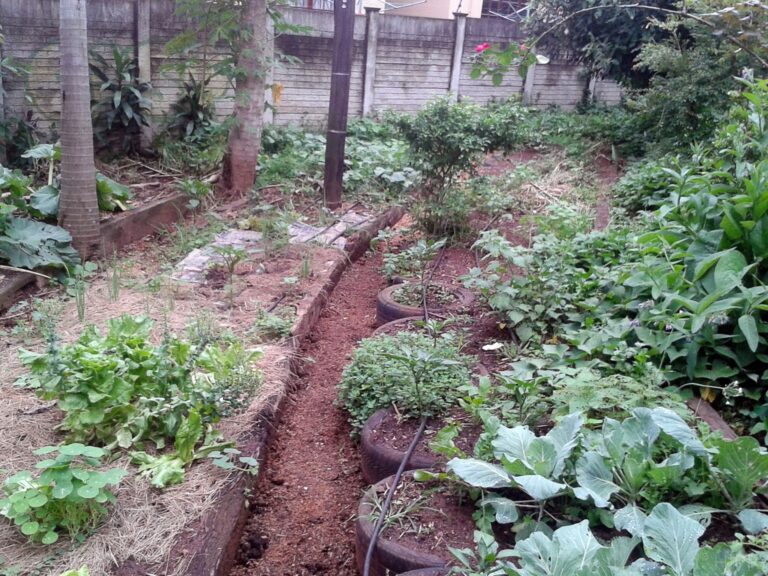
A Water-Harvesting Garden – Soils and Plants
Depending on the soil type that you have in your garden, your water movement will be affected in certain ways. If your soil is predominantly sand, you are not likely to have flood issues, but may struggle to retain water, because sand’s large particles let water through easily.
In the opposite situation, if you have predominantly clay soil, your soil’s tiny particles hold water very easily, become waterlogged quickly, and then tend to let water run off the surface thereafter.
If you’re not sure what kind you have, try picking some up and splashing a small amount of water on to it. If it is clay, it will feel very sticky. If it is sand, it will feel gritty and rough.
The ‘ideal’ type of soil to have for plant growth is loam, which is a mixture of 40% clay, 40% silt (medium-sized soil particles that tend to be found near rivers), and 20% clay. This mixture is what is most likely to retain some water, while letting the rest flow.
You may be able to make some changes to your soil type by adding one or more kinds of different soils in order to get closer to loam. However, this is not cheap, and so many gardeners keep the type of soil they have and learn which plants grow best in it.
Depending on what you’re looking to grow, you can look up your plant online and see whether it prefers well-drained (sandy) or water-retaining (clay) soils.
For example, yarrow, lavender, and gazanias are three examples of plants that prefer sandier soils, and honeysuckle, roses, and junipers prefer clay soils.
If you live in a rainy climate, you will naturally prefer to plant water-loving plants that have evolved to grow in wetland areas – think bamboo, watercress, lilies, and swamp sunflowers.
By contrast, if you expect to receive little water, you want plants that won’t dry out. If you expect that despite your best efforts to harvest water that your garden will still be dry, plants like aloes, verbena, and artichoke will not require much water.
As a final word on soils and their water-harvesting potential, what is on top of the surface of the soil matters as much as the type of soil.
Mulched soils not only slow the speed of water flow, but they also lose much less water to evaporation, so mulching as a technique is highly recommended for water-wise gardens.
Calculating Water Yield
There is a fairly simple formula to determine how much water your site will receive. Average rainfall is measured in inches, and garden space in square feet.
You must then convert the average rainfall over a given space of time (say, one month) into feet, multiply this number by the square footage of your garden, and then multiply by 7.48 to learn the number of gallons of water your site will receive.
Expressed as a formula, this looks like:
Monthly gallons = (Monthly average rainfall in inches / 12) x (Garden space) x 7.48
For the algebraically minded, this could read, where V = volume, g = rain gauge average, and a = area,
V = (g/12) * 7.48a
Let’s do a worked example. In Central Texas where I live, the yearly rainfall varies moderately by month. June is the wettest month, receiving 4.33 inches of rain, and I have a 120 square foot garden.
V = 4.33 / 12 * 7.48 * 120
V = 324 gallons
So, for the month of June, I can expect about 324 gallons of rainwater to fall on my garden, or about 75 gallons per week in June.
July is the driest month, receiving only 1.88 inches of rain.
V = 1.88 / 12 * 7.48 * 120
V = 75 gallons
Throughout July, I will expect only 75 gallons of water to fall on my garden, about as much as one week in June. This works out to just over 17 gallons per week in July.
While this formula won’t give you an exact figure due to microclimates, local variation, and deviation from average rainfalls, it will get you close to your total rainwater yield on your plot.
A good web site to research average monthly rainfall for your area is https://weatherspark.com.
Roof Catchment and Storage Barrels
In the previous paragraph, you learned a way to calculate water yields for a garden plot. The same formula works just as well for a rainwater barrel that is connected by gutters to the roof.
If you already live in a high rainfall zone (or at least, a zone with moderate rainfall throughout the year), have some experience harvesting rainwater in the garden, or use a majority of the techniques covered in this article, you may not require the extra irrigation that a rain barrel can provide.
However, if you live in a water-stressed area, experience large variation in rainfall months, or have need of extra water for irrigation, then a rain barrel can be a welcome addition to a water-wise garden.
The art of installing rain barrels merits its own article, but here is a summary: You must decide roughly how much water you are looking to store first.
A good rule of thumb for this is to store 1.5x as much water as you’ll use during an average dry season. Longer dry seasons merit larger barrels.
You can then decide if you want your rain barrel to be made of concrete or plastic. Concrete barrels can be cheaper, but take longer to set up and are then immovable. It is likely you will want a concrete platform to stand your barrel on.
You must also consider the placement of the barrel – it is recommended that you place the barrel higher up than anywhere you’re going to use the water.
That way, you won’t pay any extra costs when you want to use the water.
Finally, it is important to note that barrels must block out any light that could enter them, to avoid growth of pathogens inside the water.
It is also helpful to install a filter where your gutter connects to your barrel. That way, leaf particulates and sediment are kept out of your water. By this point, water from your barrel should be safe to use for irrigation, filling ponds, bathing, showering, and washing your hands.
However, if you plan on drinking the water or using it for cooking, it is always safest to boil the water first.
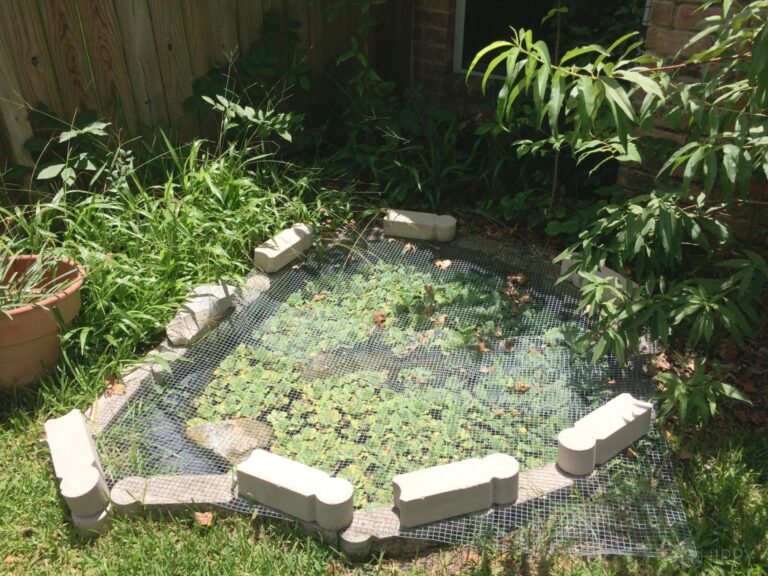
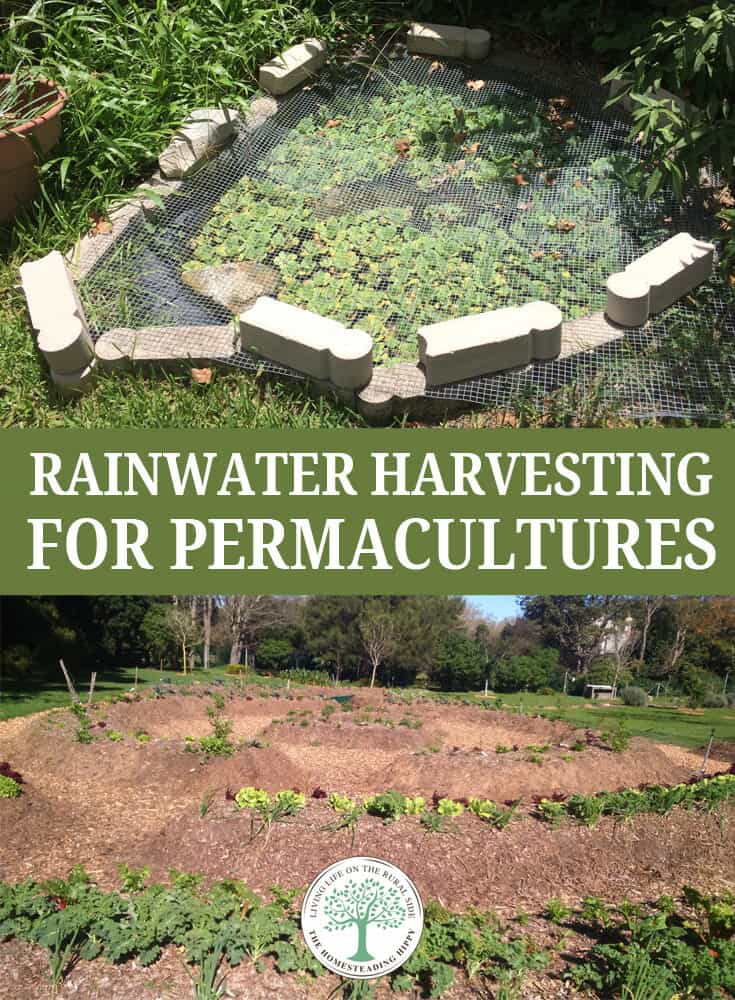
Ponds
Ponds are a great way to use some of the extra water in your garden. Ponds can provide many benefits, including temperature moderation around your site, a predator habitat, edible species, aquaculture, extra edge, and aesthetic value.
A pond is built by digging soil out of a low point in your garden, putting a sheet of plastic or tarp on the bottom of the hole to store water, and placing heavy rocks on top of the tarp when it is folded over your land.
As a source of standing water, it is definitely beneficial to keep ponds clean. The best way to do this naturally is to encourage an ecosystem to bloom within.
Having fish, turtles, frogs, water lilies, and water lettuce plants in the pond helps this ecosystem develop. For larger ponds, you can even consider starting a duck habitat.
The wonderful benefits of encouraging predators to live near and in your pond is that they eat some pest species that frequent your garden.
You can cultivate fish in your pond that you eat, too, such as tilapia, carp, catfish, and trout. They are relatively easy to feed. Doing this will help keep your water clean.
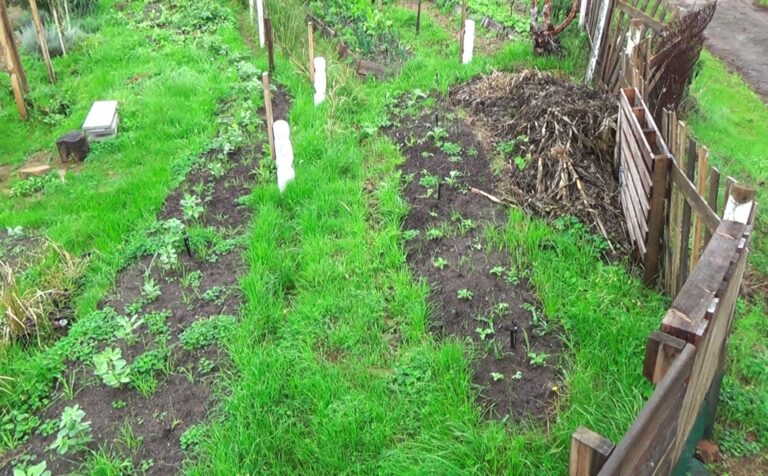
The Water Flow: Using Hügelkultur, Berms, and Swales
While the science of hydrology is complicated, there are simple principles to understand that will help you decide where to place any earthworks that you might decide to use.
Simply put, surface water flows downhill from the highest part of your land (the watershed) to the lowest parts in all directions, and follows the path of least resistance as decided by gravity.
One way that gardeners take advantage of such water flow is to build a mound called a hügelkultur mound, from the German phrase ‘hill culture’.
The intricacies of hügelkultur merit their own article, but here is a basic outline: A mound of soil and rotting wood of various sizes, such as branches, twigs, wood chips, and even sawdust is stacked on the ground.
After the ‘hügel’ is built, seeds and seedlings are then placed into the top of the mound.
Since the mass of rotting wood quickly absorbs and slowly releases water, and the stacked mound, when placed downstream of the watershed, gathers water, after a while, the gardener doesn’t need to water the hügelkultur mound any more.
This saves labor and keeps the plants hydrated even in the dry season.
When land is steep, water tends to run off it faster. Some garden plots have steep areas that tend to rapidly become erosion hotspots.
While berms and swales on contour may be thought of as a farm-based undertaking, smaller berms and swales can be beneficial at a garden scale, too.
It is recommended to build swales on slopes of a gradient between 10% and 30%.
For the uninitiated, a swale is a ditch that, instead of draining water in a given direction, spreads it across its length and slowly allows the water to soak into the ground. A berm is then created out of the earth that has been dug out of the ditch on the downhill side of the slopes.
That berm is now uniquely placed to receive plenty of water, and is a good place to grow plants with long roots, trees, or grasses that prevent erosion and contribute to the production of the landscape if useful plants are grown.
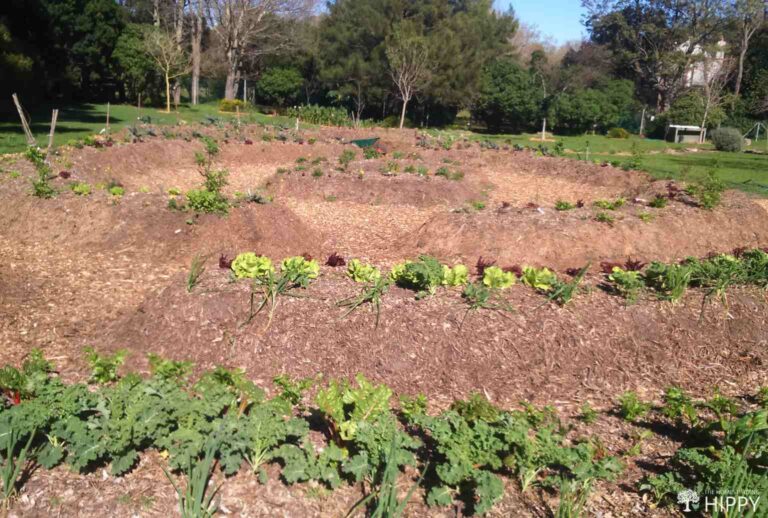
Advanced Techniques –French Drains, Terraces, and Chinampas
One advanced technique you can use on steep land is the French drain. It is similar to a swale, but instead of sinking water into the land at a specific point, it is meant to drain the water in a desired direction.
It is created by digging a ditch, putting a perforated pipe into the ditch, and then stacking gravel and/or rocks on top of the pipe. The rocks are meant to be stacked on top until there is a fairly flat surface to walk across, so that the entire ditch is filled in.
While this approach does not slow water as effectively as swales, it is useful for moving water from one area of the site to another.
One disadvantage of French drains is that many city governments in the United States require permits to install them, because of regulations around redirecting sedimented water into storm drains.
If your land is quite steep, meaning having a gradient of between 30% to 50%, swales as described in the previous section are not your best solution, because even swales can flood in steep land.
At this point, you may want to consider terracing instead. Terraces are labor-intensive to build, but can look more aesthetically pleasing than swales.
However, use caution with this approach – if terraces are not well-built, they can create even more erosion, loss of your plants and soil, and even landslides. Clay soils are at a higher risk for landslides than sand soils.
If you have not built a terrace before, consider consulting a professional, or, at the very least, visit someone else whose terraces have successfully withstood a flood and inquire as to how they were built.
The final technique we will be discussing works best in a wetland area with water that stands year-round. If you have been using the techniques described in this article, you may find that you have more water than you know what to do with!
Chinampas are a traditional Aztec style of gardening. The gardeners wove platforms that would float on the surface of their lakes, and stacked soil on to their platforms. Seeds were then placed into the soil.
The plants that would grow would suck up water through capillary action. If there are fish in the water, the plants gain extra fertilization through fish manure. The systems never needed to be watered, either.
The platforms are best built by weaving straight, even-length, thin branches with twine until you have a square-shaped platform. On each side of the square, a thicker branch can be chosen to be the border of the platform, and then lashed together at the corners.
For reinforcement, it is recommended that you turn the platform over and lash more thick rods one way across the platform – because the platform will be heavy once it has soil on it.
Once reinforced, the platform can be righted and filled in with a mixture of fertile soil and compost.
The chinampa is now ready for planting! Once seedlings or seeds have been put in, the platform can be set to rest in its new home – your source of standing water, such as a pond.
Conclusion
In this article, we have discussed many techniques for harvesting rainwater, and have focused on doing so in the garden. These techniques have included roof catchment, ponds, hügelkultur, swales, berms, French drains, terraces, and chinampas.
Theory discussed includes soil science, mathematical formula for calculating water storage, and some knowledge of construction and earthworks.
These techniques are used in permaculture systems across the world. Combining them in a single garden is a reliable way to make the best use of rain that falls on to the site.
As you can see, rainwater harvesting in the garden is neither cheap and simple, nor is it prohibitively expensive. As an overall method, garden-based water harvesting ranks in permaculture at the lower-intermediate level of difficulty and cost.
Do you know of any other ways to harvest water inexpensively? We’d love to read about them below!

David Dornbrack is a permaculture designer and author from the Austin area of Texas, USA. He first achieved his PDC in South Africa in 2013, and has since traveled to the world’s prototypical intentional community and ecovillage, Findhorn Foundation in Scotland. He has gardened in three different climate types – Mediterranean, Cold Temperate, and Humid Subtropical. His favorite plants are tomatoes, chilies, and potatoes. He believes that humans function best when interdependent – able to take good care of themselves so that they can be generous and giving to others. He would like to gain experience in house-building, carpentry, and solar electricity installation. Meet the rest of the team here.
This is cool, barely know anything so this opened a world I knew little about.