
Maybe you want to get a jump start on the growing season so you can grow more food this year. Maybe you want to grow some food indoors through the winter. Or maybe you just want to have a fun science project for your kids to try.
Regardless of the reason you want to start seeds indoors, you could spend a lot of time and money doing so. You could start seeds the traditional way, with plants and pots and soil, but you could also start seeds the easy way.
Keep reading to find out the easiest way to start seeds indoors and how it compares to the traditional method of starting seeds, which seeds you should start indoors, and how to avoid seed starting mistakes.
The two most important factors in starting seeds indoors are heat and moisture. If you’ve ever grown sprouts on your kitchen counter, you know seeds don’t need a lot of help getting started.
With a sprout tray, you simply load it up with sprout seeds, get it wet, and wait. In two to five days, you’ll have delicious and nutritious greens to add to your diet.
Of course, if you tried to plant the tangled mess of sprouts, you might not get very good results, but the method couldn’t be simpler.
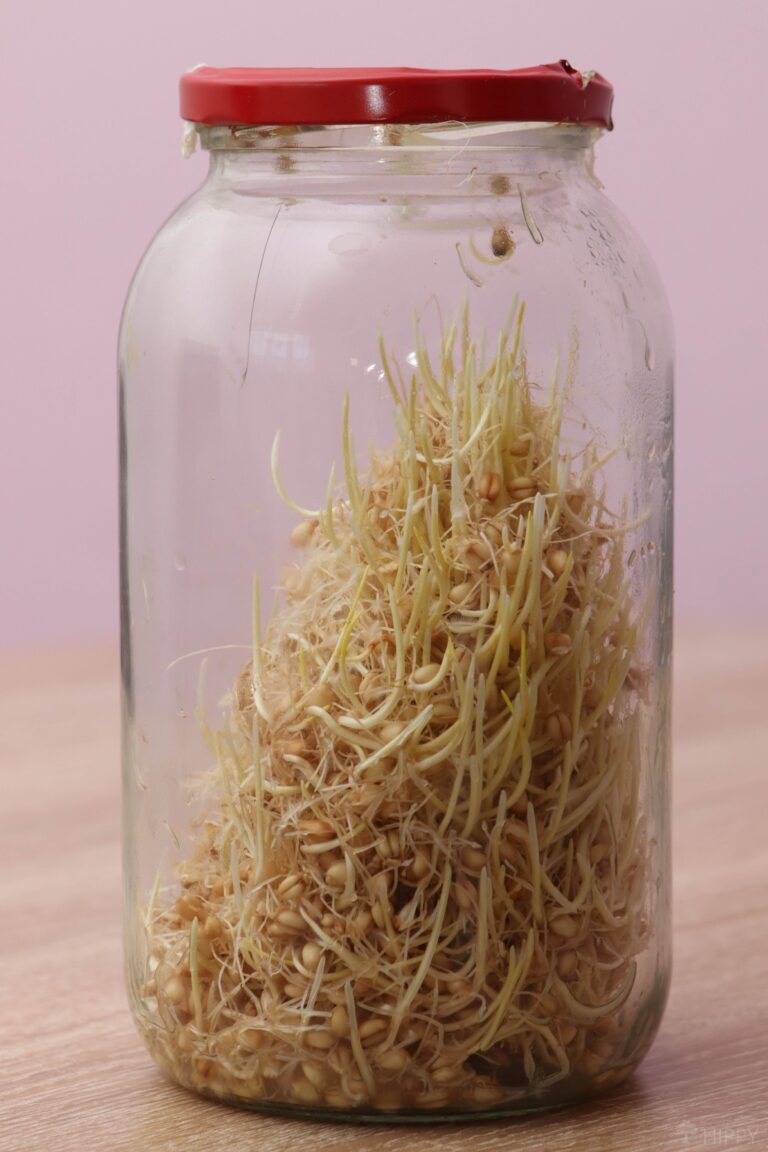
Sprouting seeds shows you just how easily seed starting can be done and you can apply the same principles to make starting seeds easy.
Table of Contents
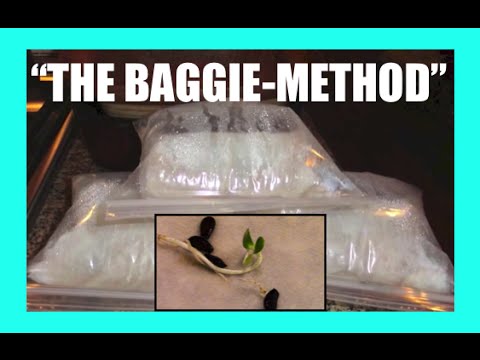
The Baggy Method
The baggy method of seed starting is the easiest way to germinate seeds. You don’t need lights, heat mats, or any fancy equipment. You don’t need to spend a lot of money because you probably already have most of the things you’ll need:
- Baggies
- Marker
- Paper towels
- Seeds
- Water
This simple method of seed starting will speed up the germination rate for most types of seeds, is very quick to put together, and best of all, is easy. Here’s how to start seeds using the baggy method.
Gather your materials and find a solid workspace. Fold a paper towel so that it will fit inside of your baggie.
I like old fashioned Ziploc sandwich bags with the zippers, but you could use larger or smaller ones depending on what you have on hand. Get the paper towel wet, and then ring it out, so it is mostly damp. Put the paper towel inside the baggy and lay it out flat.
Write the name of the seeds you are germinating on the outside of the bag with a permanent marker. You don’t want to forget what you planted! Slide your seeds inside the bag and lay them on the damp paper towel. Then just seal it up. It really is that easy.
Check your seed packet for specifics about your seeds. If the seeds need warmth and darkness to germinate, put them in a drawer and check them every two days.
If the seeds need light, you could tape the baggies to a sunny south-facing window where they will get lots of light and warmth.
If the seeds need cold, just put them in your fridge and check them every five days or so. Make sure the paper towel stays damp but not dripping. You can add more water if needed; you want the paper towel to just be damp.
As soon as your seeds begin to sprout tiny roots, you can carefully transplant them to a small pot of potting soil with tweezers.
Your seeds should germinate quickly – within two to ten days. If not, don’t give up. Just check the moisture levels, light needs, and warmth needs and wait a little longer for tiny roots to appear.
Transplanting Germinated Seedlings
Transplanting your seedlings is easy. Once you see tiny roots, your germinated seeds are ready to move to pots. Carefully open the baggy and slide out the paper towel, if possible.
You can reuse your baggy if you like. If the paper towel won’t slide out easily, you may want to cut the bag open so you don’t damage the fragile seedlings.
Get your pots ready for the seedlings. Choose a small pot, container, or tray that has drainage holes in the bottom. If you don’t have drainage holes, you can drill some into the bottom of plastic containers or fill the bottom with gravel.
You’ll want some kind of a potting mix or seed starting mix with perlite or vermiculite and fill your pots about ¾ of the way to the top. Pre-moisten your soil just a little bit with a spray bottle.
If you used large sized seeds, you can very gently lift each seedling from the paper towel to the pot. At this stage, the seedlings are tiny and you can put several into the same pot, if needed.
If you used tiny seeds, you can turn the paper towel over and gently tap the seeds to make them fall off into the pot. If the seeds are stuck to the paper towel, you can use your spray bottle to loosen them and wash them off the paper towel and into the pot.
Put your pots in a sunny window or under a grow light and watch your little seedlings take off.
Once your seedlings are well established, you’ll want to harden them off before planting them in your garden. This is an easy step that will save you a lot of heartache.
If you don’t harden off your plants, they will probably wither and die when they are transplanted outside.
Don’t skip this easy step or you will have wasted your time and effort and seeds. MIGardener has great advice on how to harden off seedlings, check out his video here.
To harden off your seedlings, you’ll need about a week. For the first day, set the seedlings outside under a tree for about an hour to begin to acclimate to the outdoor conditions.
On day two, leave them outside for about two hours. Keep increasing the amount for about a week until you can leave the plants outside indefinitely. Once you’ve successfully hardened off your seedlings, they are ready to be planted in their spots in the garden.
Baggy germination is the easiest way to germinate seeds. The materials are readily available, inexpensive, and easy to put together.
You probably already have everything you need on hand. An although it is an easy way to germinate seeds, there is another way that doesn’t require transplanting fragile starts.
The Traditional Way to Germinate Seeds
If you want a more traditional but still an easy method to germinate seeds, you’ll need a few items…
When you visit a link in this article that takes you to a different website where you can purchase something, I may earn a commission. Read my full disclosure for more details.
- Peat Pots
- Seed Starting Trays
- Water
- Seeds
- Heat mat (optional)
- Grow light (optional)
If your seeds aren’t starting, you might need to add a little bit of extra help to get them going. This is why the last two items on the above list are optional…
Although these items add an extra step to your seed starting setup, once you put them in place you don’t really have to think about them:
Heat mats add warmth to the soil of the seeds you are starting. These mats put out just a little bit of warmth to help your seeds germinate more quickly. Heat mats usually have a built-in thermostat so they stay at just the right temperature.
Since heat mats put out such low heat, you can probably put your baggies of seeds on a dish towel on top of the heat mat.
This will give them a little extra warmth to increase germination, especially if you are trying to start them in a cold room.
Grow lights mimic sunlight, so if your plants are getting too leggy or aren’t germinating because they don’t have enough light, you may want to add a grow light over top.
You can set grow lights on a timer for as many hours a day as you need, so once you set them up, you don’t have to worry about them. Generally, your seeds in baggies won’t need much light until you transplant them into pots.
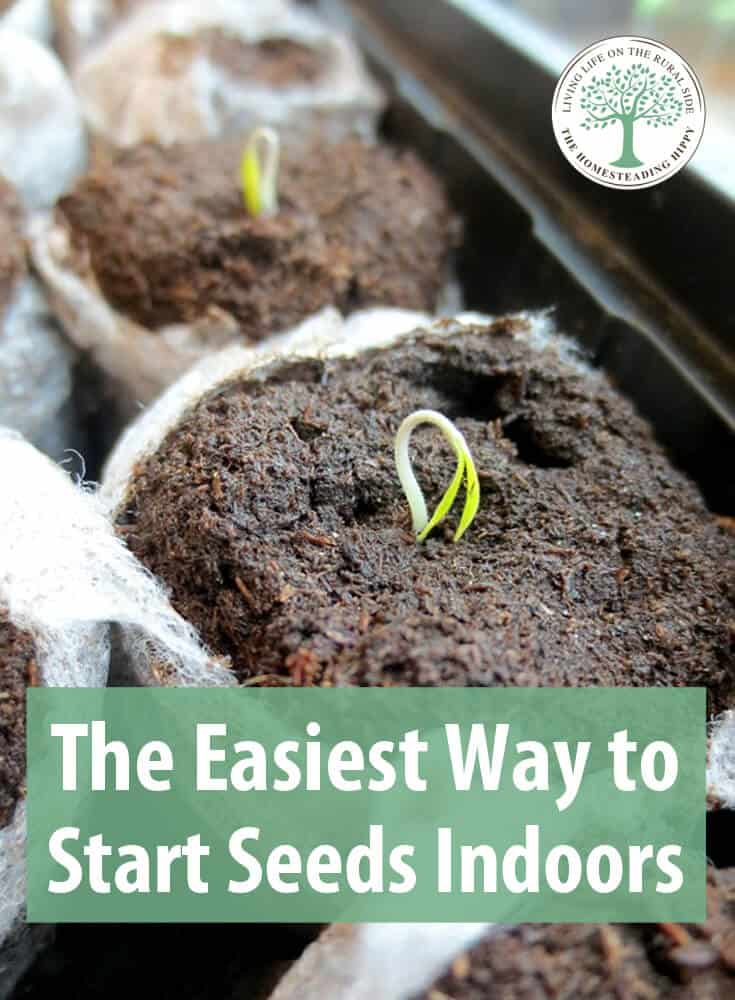
The second easiest way to start seeds indoors is to start them in peat pellets. A peat pellet is a compressed seed growing medium. They are compact, lightweight, and easy to store.
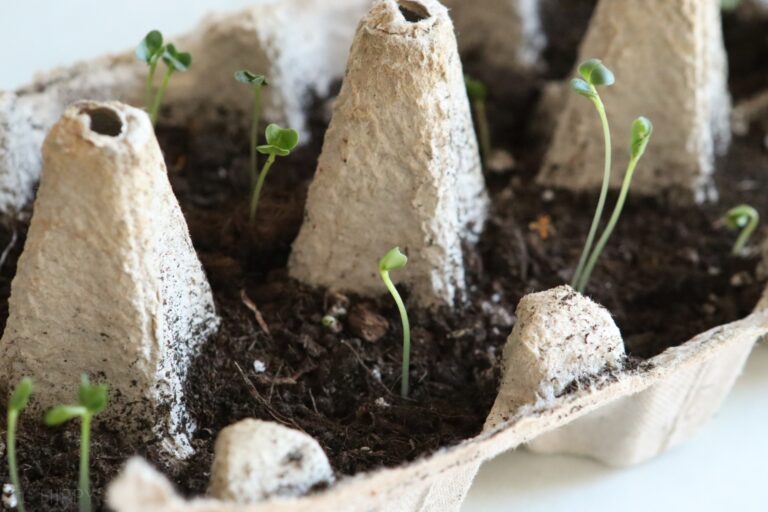
I you don’t have them or don’t want to spend money on them, you can use alternative such as egg cartons to grow your seedlings in before transplanting:
When you are ready to use them, soak them in warm water (according to the directions) and they will expand into a perfectly sized, biodegradable soil pod just right for your seeds.
After you soak your pods and set them in a tray, just push your seeds into the growing medium, following the directions on your seed packets for depth. Keep the pods in a sunny and warm location and wait for the seeds to sprout.
Once the seeds have sprouted and grown their first set of true leaves, you can harden them off and plant the pods directly into your garden. The outside of the pods will bio-degrade and the plant will be able to grow normally.
The traditional method of seed starting is a little more complicated than the baggie method. Whether you choose baggie seed starting or peat pot seed starting, there are a few considerations to research before jumping in.
The Importance of Timing
Timing is important when it comes to seed starting. If you start seeds too early, they’ll get too leggy before you can transplant them outdoors.
But if you start them too late, it won’t be of any benefit because you could have just started them outside anyway.
Generally speaking, start your seeds indoors about 6 weeks before your last frost date. There are some variations to this, so double check the back of your seed packets for specific instructions.
Choosing the Right Container
You can start seeds in just about any container, however, certain types of containers will give you an advantage and make it easier to keep your little seedings alive.
You want your seeds and seedlings to stay moist as they grow without being soaked. Too much moisture will cause your seeds to mold or rot, while too little will cause them to dry out and die.
So pick a container that has good draining but will help keep a little moisture in. Small plastic pots with drainage holes in the bottom are ideal, such as the ones you get when you buy plants from a nursery.
If you have some, reuse them to start your own plants. If you don’t, you can take any kind of plastic container such as a yogurt cup, a butter container, or any small plastic pot and put your own holes into it.
You can start seeds in these containers or transplant your tiny sprouts from the baggies into them.
Choose the Right Soil
If you use a peat pellet to start your seeds, you don’t have to worry about what kind of soil to use or how to mix it up. It’s already done for you, making it the easiest choice to start your seeds. But there are a lot of options for seed starting soil.
Try to avoid taking any old scoop of dirt out of your backyard. It will likely be full of creepy crawlies and not be great for starting seeds.
On the opposite end of the spectrum is prepackaged sterile seed starting mix. Gardeners like this because it has no bugs, no weed seeds, and no germs that could harm your seedling.
However, you can start your seeds with any kind of potting soil you have lying around. You may want to add in some extra perlite or vermiculite to enhance drainage.
You may want to mix some old potting soil with some well-aged compost for extra soil nutrition. The same mix will work well for either method of seed starting.
Planting Considerations
When it comes to planting seeds, I have a terrible habit of planting too many in the same small space. The truth is, you need to check your seed packets for exact planting information because seeds vary greatly.
If your seeds are tiny, you can probably just get away with sprinkling them on the surface of your soil and watering them in lightly. Larger seeds will need to poked down into the soil and covered over before being watered.
If you are starting seeds to transplant, you can put more in a smaller space because you will be separating them later. However, you don’t want to plant them so close together than you cannot untangle them without damaging the roots.
Make sure each seed has enough room to grow so it can be transplanted easily. If needed, you could thin plants by cutting them with scissors or pinching them off at the base of the soil.
Water
Seeds need moisture to sprout, and seedlings need water to stay alive. But it doesn’t take a lot of water to drown them out, either. When you plant your seeds, premoisten your soil so that you don’t risk washing out the seeds by watering them.
And when your seeds have sprouted, you want to keep them damp but not soggy, so that the tiny roots don’t rot before they can become established.
A better way to water seeds and seedlings is to spritz them with a spray bottle rather than pouring water on them from a watering can.
Cover Up
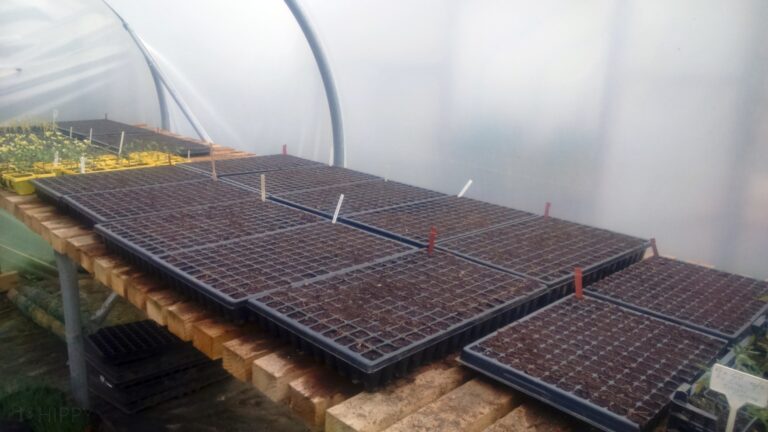
A simple way to keep your plants humidity just right is to cover them with a makeshift greenhouse.
This could be as simple as putting a layer of plastic wrap over your pots while they germinate or by purchasing plastic trays that come with their own clear plastic covers.
In other situations, I have placed a baggie over a small pot to keep the warmth and humidity in. You could even cut the bottom off of a plastic milk jug and place it over a larger pot to help plants stay moist and warm while they germinate.
Light and Heat
Some seeds need bright light to germinate while other seeds prefer darkness. Some seeds need to have warmth and others prefer cold.
The back of your seed packet will tell you which your plants prefer. This will help you determine where to keep your seeds until they germinate.
If your plants need heat and light, keep them in a warm sunny window. If they prefer heat and dark, you could cover them up and put them on top of your refrigerator.
If they prefer cold and dark, the back of your fridge or your basement are great spots. And if they prefer cold and light, you’ll need to find a cooler window.
Once the plants have sprouted, their need for light will increase. After you transplant your baggy seedlings to their pots, you’ll want to keep them in a very sunny, south facing window, if possible.
This will help prevent them from getting too leggy before they can be transplanted.
If they are starting to get leggy, you may want to move them to a cold frame or greenhouse where they will get more light. If this isn’t an option, you may need to use a grow light to get them the extra ‘sun’ that they need to thrive.
Best Plants to Start Indoors
Some seeds are worth starting indoors to extend your growing season, especially if you live in a climate that has a very short growing season.
Other plants will start just as easily outdoors and will catch up quickly, making it unnecessary to start seeds indoors, especially if you live in a warmer climate with a longer growing season.
Any of these seeds that you can sprout indoors will sprout using the baggy method. Once they germinate, simply transplant them to a small pot with good quality potting soil.
| Seeds to Start Indoors | Seeds to Start Outdoors | Seeds that Depend on Your Climate |
|---|---|---|
| Peppers | Summer Squash | Spinach |
| Tomatoes | Zucchini | Kale |
| Eggplants | Sweet Potatoes | Celery |
| Lettuces | Carrots | Cucumber |
| Watermelons | Garlic | Melon |
| Pumpkins | Bean | Peas |
| Broccoli | Beet | Chard |
| Cauliflower | Corn | Winter Squash |
| Brussel Sprouts | Dill Cilantro | Sunflowers |
| Raddichio | ||
| Basil | ||
| Tomatillo | ||
| Okra | ||
| Cabbage |
Common Seed Starting Mistakes
Even if you use the easiest method of starting seeds, seed starting mistakes can still happen. Here are some of the most common mistakes and how to fix them.
Seeds aren’t germinating.
If your seeds aren’t growing, it could be that the seed is too old or it needs to be soaked or nicked ahead of time. It could also be that your seeds need more warmth or more moisture to sprout. Make sure your paper towel or soil is damp but not soggy.
If your seeds need to be at a warmer temperature, try moving them to a warmer room, putting them on top of the fridge, or putting them on a heat mat.
Most seeds need to be between 65 and 75 degrees F. to germinate, so keep this in mind when you decide where to keep your baggies or pots.
Seedlings are leggy.
If your seedlings are leggy, you’ll need to make sure they are getting enough light. Move them to a sunnier window, a cold frame, or under a grow light. If they get too spindly, they may not recover well.
Seeds are getting moldy in the baggies.
If your seeds are molding instead of sprouting, you may need to use less water in your baggies. You could also try keeping the bag open to let more air circulate.
You don’t know what you planted.
It happens to the best of us, we think we’ll remember what we planted but we just don’t. Make sure you write on your baggy or your container exactly what you planted and when. You’ll be thankful for the extra step later on.
Plants die outside.
You need to make sure your seedlings are large enough and have been hardened off before you transplant them outside. Plants may also die if they are taken outside too soon, while the soil is too cool.
If hardening off is a challenge due to your climate, or if you are still having weather that is too cold to transplants your seedlings, try moving them to something like a mid-step such as a cold frame or greenh
No, you don’t need a grow light to start seeds indoors. Most seeds will germinate fine without light as long as they have heat.
Once they have germinated, they will need to be placed in a sunny window or moved to a cold frame or greenhouse if you don’t have a grow light.
ouse.
This will give your plants the extra sun they crave without harming them.
If you think starting seeds the traditional way is just too complicated or leaves too much room for error, you’ll want to consider giving the baggy method a try this year when you start your seeds. It’s the easiest way to start seeds indoors.
FAQ
There could be many factors as to why the seeds did not germinate. It could be old seeds, the seeds were too wet or too dry, the room was too cold, or you didn’t wait long enough.
Don’t give up! Check the requirements on the back of the seed packet and try again. Some seeds may need to be nicked or scraped to allow moisture in, especially using the baggie method.
No, you don’t need a grow light to start seeds indoors. Most seeds will germinate fine without light as long as they have heat.
Once they have germinated, they will need to be placed in a sunny window or moved to a cold frame or greenhouse if you don’t have a grow light.
Sometimes ,leggy seedlings can be corrected. You might try making sure there is at least 15 hours of dayling for your seedlings to grow. You may need to lower the temperature of the room if it is greater than 75 degrees Fahrenheit (23 Celsius).
Another way to correct legginess is to blow a fan near the seedlings to simulate a light breeze. This will help strengthen the stems.
If your tomato seedlings are leggy, you could replant them about 1/3 deeper, so that the soil covers up more of the stem. They’ll fill in roots as they grow.
This is an indication of ‘damping off’ – a soil-born fungus. You can prevent this by providing better air circulation or by using a sterilized potting soil mix.
Moldy soil is a red flag that your soil is too wet. You could transplant the seedlings into new soil, increase air circulation, or allow the soil to dry out before you water it again.
The soil around your seedlings need to be kept moist, but not soaking wet. Too much water will choke off their oxygen, causing plants to wilt. Too little, and they will wilt and die. Water whenever the top of the soil becomes dry.
Not necessarily. It depends on the humidity in your environment and how quickly the soil your plants are in dries out. Watch them closely and only water when the soil begins to dry.
Yes. You can overwater your seedlings. Only water them when the soil begins to dry out, otherwise, spritz them to keep the soil lightly moist. There should never be soggy soil or standing water.
If you overwatered your seedlings, keep them out of direct sun. Make sure there are drainage holes in the containers they have been planted in and wait for the soil to dry out before you water again. You may have better results watering from the bottom up.
Amanda is a homesteader and a Jesus-loving, mother of 6 toddlers. She’s raising lots of fancy chickens and goats on her small homestead (among other things). Find out more about the team here.