
Are you making these mistakes when you are preserving your food? Avoiding common pitfalls will make your home canned food safer… and potentially avoid someone in your family get sick!
Part of the homesteading lifestyle, no matter how large your homestead is, is preserving foods. Things like canning, freezing, dehydrating, or fermentation are all very popular these days…
You grow a garden, have lots of veggies all over, and you need a way to keep eating them even when the gardening season is over. Many of us will turn to canning as the first option to preserve that goodness.
Home canning is fairly easy to learn. It takes some practice, and even some failures to master the skill.
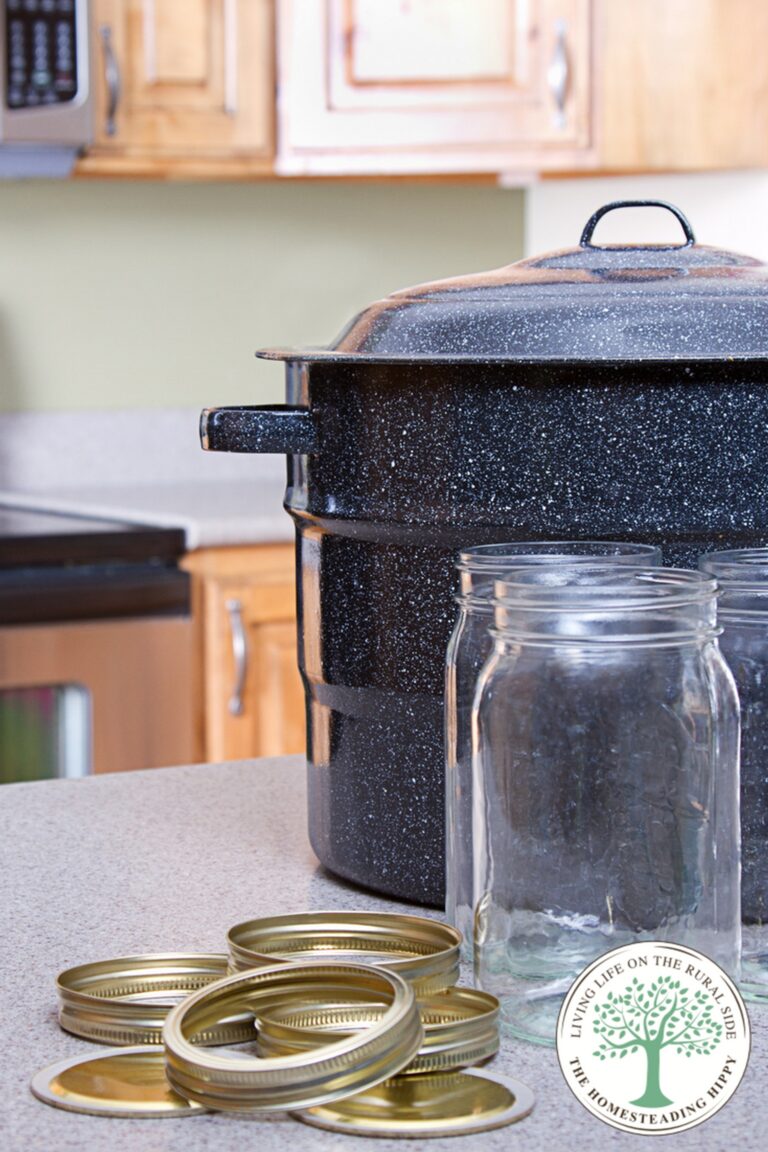
Mistake #1: Using Improper Canning Equipment
One of the first issues for some folks when starting out in home canning is that they don’t have the. proper equipment. The first time I tried canning, I went to the orchard to pick apples to make homemade applesauce.
I only had one large pot, so I cut the apples up, cooked them until they were soft, and put them in the blender bit by bit to turn to sauce.
Since I didn’t have a canner, so I washed the pot out, filled it with boiling water and proceeded to water the applesauce in there.
It took me nearly 18 hours to make that 1/2 bushel of apples into canned applesauce, and I came out with a mere 6 quarts for my efforts.
Lesson learned here was that a proper water bath canner AND a stock pot to cook the apples is necessary.
When you have jars sitting on the bottom of a stock pot without a barrier between the jars and pot, it can create issues. Jar breakage, lack of proper sealing, or burning the pot can occur.
Proper Canning Equipment
When you visit a link in this article that takes you to a different website where you can purchase something, I may earn a commission. Read my full disclosure for more details.
The canning equipment below is what you’ll need for both pressure and water bath canning.
- Water bath canner for high acid foods (fruits, jams, jellies)
- Pressure canner for low acid foods (veggies like green beans, peas, potatoes)
- Canning jars made for the purpose
- New canning lids (cannot be reused, always use new ones)
- Clean bands (can be reused)
- Timer to keep track of processing time
- Jar lifter to remove jars from hot canners
- Metallic lid lifter
- Measuring cups
- Measuring spoons
- Stock pots to cook and prepare food
- Sharp knives
- Cutting boards
- Jar funnel
- Potholders
Mistake #2: Reusing Canning Lids
Canning lids can be a controversial subject, believe it or not. Some are adamant that you can reuse the metal canning lids as long as they are still in the same shape. Others hold the belief that it’s not safe at all to reuse a lid.
The metal, throwaway, canning lids of today are very thin. The seal on the back of the lid (the red ring) is not designed to be heated and used more than once.
If you want to avoid lots of trash, consider using a hard, BPA free plastic lid that is designed to be reused such as these from Tattler lids.
You will also need to know how to test canning lids in home canning situations.
To test canning lids in home canning for a proper seal, you will need to allow the jars to cool completely. This can take 12-24 hours. Once the jar and lid are completely cool:
Push on the center of the lid gently.
- If it “pops”, it hasn’t sealed properly. This will require the food to either be stored in the refrigerator and used within 3 days, or to be reprocessed and recanned using a new lid.
- If it stays “put” and doesn’t pop back up, the lid has formed a proper seal and the jar can be wiped off clean and stored.
Gently pull up on the outside of the lid.
- If the lid moves at all, a proper seal has not been formed. Store the food in the refrigerator or reprocess.
- If the lid does not move at all, a proper seal has been formed and the jar can be wiped clean and stored.
Mistake #3: Using the Wrong Canning Method
In order to keep food safety in home canning, you will need to process your foods correctly.
Modern methods of home canning are quite different from what Grandma used to do. Our bacteria, soils, and even some of the food is also different.
Heirloom tomatoes, for example, can vary in the amount of acid they produce. Each plant can have fruit that can vary in acid levels from vine to vine. Keeping safety practices at the forefront of your mind will be very important.
Water bath canning is for foods that are naturally high in acid, or will have acid added to them. This refers to fruits such as peaches, pears, and berries; jams, jellies, pickles, and salsas and other prepared foods that have sugar or vinegar added to them.
If you decide to use a water bath canner for tomatoes, it is often suggested that you add acid, such as lemon juice to each jar to keep the acid to a safe level. This does not change the flavor of the food at all.
A boiling water bath canner only reaches temps of 212 degrees. This is not high enough to kill botulism bacteria in low acid foods, such as meats, green beans, peas, corn, and many other vegetables. You must use pressure canning to be safe in those situations.
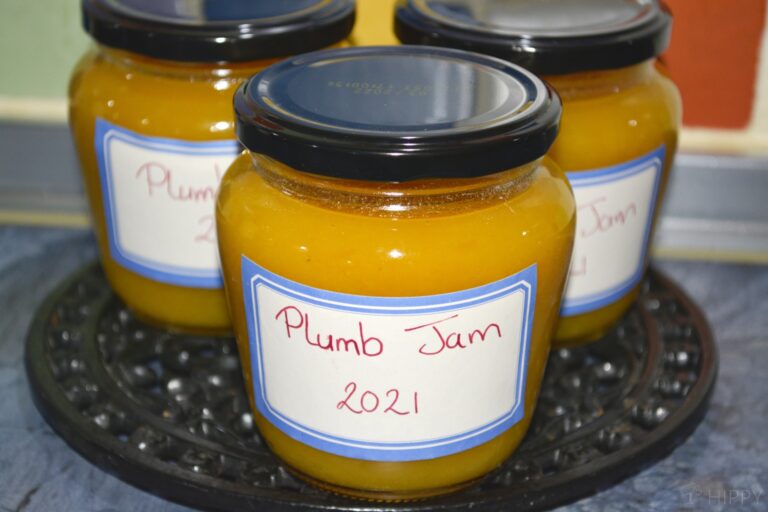
Mistake #4: Forgetting to Label the Jars
Once, when I was canning tomato products, I figured I would remember what they were and not need to label them. One of the jars got stored in the back of the pantry.
It was nearly a year until it was uncovered again. I had no idea what was in it at all. After a couple of days of just staring at the jar, willing the contents to identify themselves, I finally opened the jar to find pizza sauce.
The lesson learned here is to always label your jars. You think you may remember what’s in them, but it’s so easy to forget. Some ideas for how to label your jars:
- Use a sharpie to write on the lid
- Use wash off labels
Mistake #5: Stacking the Jars
Some will disagree with me, but stacking jars on top of each other directly is never safe. This may cause the lid to come loose, even though it appears to still be sealed.
Often referred to as a “false seal”, it can create mold in the food you might not even see. A false seal lets air reach the food, starting decay. Keeping the bands on the canned jars can also cause a false seal, by the way…
Storing the jars in a cool, dry place is also important as extreme temperature fluctuations can also cause false seals. A place where the room temperature is more constant is ideal, such as a basement or storage cellar.
Lesson learned here is to NOT stack your jars upon each other. Use jar boxes if you need the room, or even store the jars under a bed or in a closet to avoid having to do that. Keep them at a constant temperature – such as that in a pantry or root cellar.
Mistake #6: Not Using a Reliable Recipe
When canning, especially your first few times, you will want to use a trusted and reliable canning recipe. A proper recipe is one that has been tested, follows proper canning procedures, and has proven to be safe.
Mistake #7: Adding Thickeners
Another common mistake is to add thickeners like flour or starch to make the food easier to fill into jars. Well, this can actually cause some problems…
The thickeners can make it difficult for heat to penetrate the food, which means that the food may not reach a high enough temperature to kill bacteria.
As a result, canned food that has been thickened with flour or starch may pose a health risk. It’s best to avoid this problem by following directions carefully and only using approved methods for canning fruits and vegetables.
Mistake #8: Using the Oven to Sterilize Jars
One big mistake folks make when canning is using an oven to sterilize the canning jars. Ovens don’t get hot enough to properly sterilize the jars – which can obviously lead to bacteria growth and food poisoning.
Plus, the intense heat can cause the jars to break due to the sudden change in temperature. Water baths, on the other hand, are specifically designed for canning and will ensure that the jars are properly sterilized.
The boiling water will also help to seal the lids on the jars, creating an airtight seal that will prevent bacteria from entering.
Mistake #9: Not Adjusting for Altitude
If you live at an altitude of 1,000 feet or more above sea level, the boiling point of water is lower than 212 degrees Fahrenheit. That means it takes longer to kill bacteria in low-acid foods. The higher the altitude, the longer it takes to sterilize the food.
The USDA established processing times for pressure canning at different altitudes – and wrote some guidelines.
If you don’t adjust the processing time for altitude when canning, you could end up with food that is not properly sterilized. As you probably guessed, this could lead to food poisoning.
To be on the safe side, always consult the USDA guidelines or a trusted canning reference book when canning at high altitudes.
Mistake #10: Adding too Many Peppers, Onions, or Other Vegetables
While it may seem like a good idea to add more of these, they can actually cause the food to spoil. The reason for this is that peppers, onions, and other vegetables have a high acidity.
When these ingredients are added in large quantities, they can increase the acidity of the food and make it more susceptible to spoilage. As a result, it is always best to stick to the recipe when canning foods.
Mistake #11: Cooling the Pressure Canner Under Running Water
Another big one people make when canning is to cool the pressure canner under running water. This can cause the canner to lose pressure too quickly, which can create a dangerous situation.
The best way to cool a pressure canner is to turn off the heat and let it sit for about an hour. This will allow the canner to cool down gradually and safely. Once the canner has cooled, you can release the pressure according to the manufacturer’s instructions.
Mistake #12: Not Adding Acid to Tomatoes
Tomatoes are a favorite food to preserve through canning, but if they are not properly acidified, they can pose a serious health risk. You guessed it – I’m talking about the omnipresent canning boogyman, botulism!
Botulism is a rare but potentially fatal form of food poisoning that can occur when canned goods are not sufficiently acidic. While the risk of botulism is low, it is important to take precautions when canning tomatoes.
One way to acidify tomatoes is to add citric acid, lemon juice, or vinegar to the canning jars before sealing them. This will help to lower the pH of the tomatoes and make them safe to eat.
Mistake #13: Letting “Hot Pack” Cans Cool in the Jars Before Canning
This can cause the food to become overcooked and mushy, and it can also lead to spoilage.
If you’re using a hot pack method, be sure to immediately transfer the cans to a cooling rack or another surface where they can cool quickly. Once they’re cooked, you can then proceed with the canning process.
Mistake #14: Using Paraffin on Jams and Jellies
Paraffin is a wax that can create an airtight seal, but it does not kill bacteria or prevent spoilage. It’s been used for years as a way to preserve food, but it is not an effective method for canning.
If you use this substance to seal a jar of jam or jelly, it may look safely stored on your shelf, but the food inside is still at risk of going bad.
In addition, paraffin can be dangerous to work with, as it melts at high temperatures and can cause burns.
If you are interested in using wax to seal your jars, you definitely want look for a product specifically designed for canning, such as canning wax.
Mistake #15: Not Adding Enough Water to a Water Bath Canner
If there is not enough water in the canner, the jars won’t be fully submerged and the food will not be properly processed – plain and simple. Plus, the lack of water will cause the canner to overheat, which may lead to kitchen fires.
As such, you need to make sure that there is at least two inches of water above the jars before starting the canning process. Keep in mind some of it will be lost due to evaporation. Take a look here:

Mistake #16: Keeping the Caned Food Longer Than Recommended
Canning is a great way to preserve food for long-term storage, but it is important to follow the recommended guidelines for maximum shelf life. storing food longer than recommended can result in spoilage and foodborne illness.
The recommended shelf life for canned food is generally two to five years, depending on the food type and how it was processed. After that time, the food should be used or discarded.
When canning foods at home, be sure to use an up-to-date recipe that includes current recommendations from the U.S. Department of Agriculture (USDA).
Inspect all cans before opening them, and do not use any cans that are damaged or have signs of spoilage.
If you are unsure whether a particular can of food is safe to eat, err on the side of caution and throw it out.
Mistake #17: Using Poor Quality Food for Ingredients
Canning is a great way to preserve food, but it’s important to use high-quality ingredients.
Poor quality food will not only taste bad, but it can also spoil quickly, leading to food poisoning. When selecting fruit and vegetables for canning, look for items that are fresh and free of blemishes.
Avoid overripe produce, as this can reduce the shelf life of your canned goods. In addition, be sure to use a sharp knife when cutting up your ingredients, as dull blades can crush delicate fruits and vegetables.
Mistake #18: Canning Butter
This is a huge one. Butter is a dairy product and has high amounts of fat. When canning it, the fat will rise to the top of the jar and create an airtight seal. This can cause the jars to explode when heated. In addition, canning butter can also cause botulism.
Even with a pressure canner, there is still a risk of botulism.
For this reason, it is always best to err on the side of caution and avoid canning butter altogether.
Mistake #19: Not Testing Your Pressure Canning Equipment
Pressure canners need to be calibrated regularly to ensure that they are working properly. Without proper calibration, the canner may not reach the correct temperature, which could lead to food poisoning.
Plus, you should use fresh, undamaged jars when canning. Old jars or those with cracks or chips can easily break during the canning process and cause serious injuries.
Finally, be sure to follow the directions for your particular canner carefully. Each canner is different and may have specific instructions for safe operation.
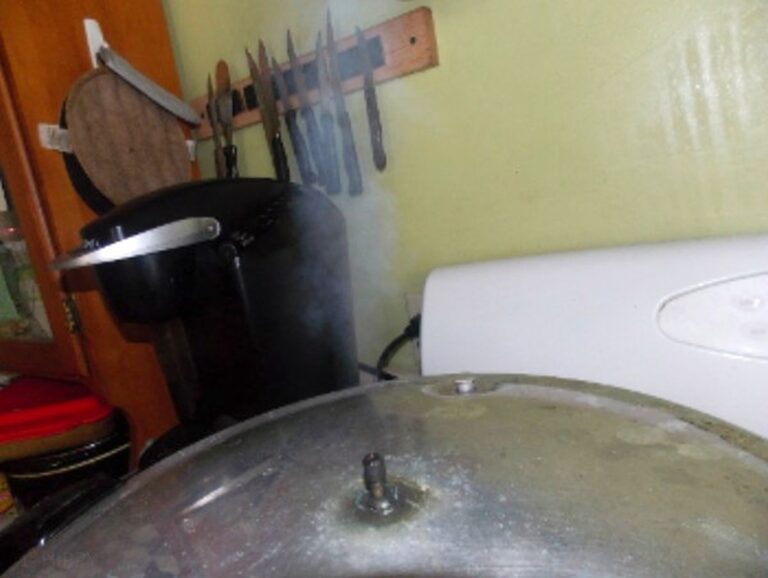
Mistake #20: Failing to Vent the Pressure Canner
If the pressure canner is not vented properly, it can create a dangerous situation. When canning, always make sure to follow the instructions for venting the pressure canner.
Most pressure canners have a valve that must be open during the canning process. If this valve is not open, the pressure will build up inside the canner and could cause it to explode.
In addition, it is important to monitor the pressure inside the canner during the canning process. If the pressure gets too high, open the valve to release some of the pressure.
Mistake #21: Cold Packing for a Hot Pack Recipe
One common mistake people make when canning is cold packing for a hot pack recipe. Cold packing is when you put raw food into jars and then seal them.
This is a method I’ve used for all kinds of recipes and it works well. However, some recipes are hot packs and you need to pay close attention to this.
There was a period of my life where I disregarded this and luckily, I never got sick – but there was definitely the risk. Please pay close attention to the instructions!
Hot packing is when you cook the food first and then put it in jars. Both methods have their benefits, but using the wrong one can lead to food poisoning. Cold packing is faster and easier, but it doesn’t kill bacteria.
Hot packing takes longer, but it’s worth it because it kills bacteria. That means your food will be safer to eat.
Mistake #22: Flipping Jars Upside Down to Seal
OK, so this might seem like it would work, but it actually doesn’t.
The heat from the canning process can cause the air bubbles in the jar to expand, and when you flip the jar over, those bubbles can get trapped under the lid, causing it to not seal correctly.
This doesn’t always happen and I’ve flipped many jars upside down to seal and cool them without problems – but it’s not worth the risk.
You’ll likely notice your mistake as soon as you go to move them into storage, so the risk of getting sick is low, but still – it’s better to avoid this misstep altogether so you don’t have to go back and re-can all of your food.
Mistake #23: Reusing Lids
While it may seem like a money-saving measure, reusing lids can actually be dangerous. Canning lids are designed to create an airtight seal that will prevent bacteria from contaminating the food.
However, over time, the seal on the lid can degrade, making it more likely for bacteria to get in. In addition, reusing lids can also cause them to warp, making it difficult to get a tight seal.
For safety’s sake, always use fresh lids when canning, and make sure that they are properly sealed before storing the jars.

Mistake #24: Not Removing Air Bubbles
Anyone who’s ever canned fruits or vegetables knows that it is important to remove air bubbles from the jars before sealing them. If air bubbles are left in the jar, they can cause the food to spoil and potentially make people sick.
There are a few different ways to remove air bubbles. The most common method is to simply run a spoon or other utensil around the inside of the jar, which will help to release the air bubbles.
Another way is to fill the jars with hot water, which will also help to release the air bubbles.
One note I’ll add here is not to use a metal tool to remove air bubbles. Use one made out of plastic or wood. Metal can etch the glass and cause cracks.
Mistake #25: Overfilling the Jars
When canning, it is important to leave a bit of headspace inside the jar. This is to allow for expansion of the contents during processing and to prevent jars from exploding.
Jars that are overfilled are also more likely to seal improperly, leading to spoilage. To avoid this, fill jars to within ½ inch of the top before screwing on the lid. This may seem like a small amount, but it can make a big difference in the quality of your canned goods.
Mistake #26: Using Chipped or Cracked Jars
Don’t use chipped or cracked jars. These can break during the canning process, causing hot food and liquids to spill out.
This not only makes a mess, but it can also be dangerous. If you’re using old jars, make sure to inspect them carefully before using them. It’s better to be safe than sorry!
During the pandemic, I had a hard time sourcing jars for canning due to shortages. I was tempted to use older jars I had in storage that had a few nicks and dings but ultimately, heeded my own advice. It’s just not worth the risk!
Mistake #27: Using a Pressure Cooker Instead of a Pressure Canner
They may sound similar, but pressure cookers and pressure canners are two very different things. Pressure cookers are designed to cook food quickly by sealing in steam and raising the internal pressure. This high pressure causes the water to reach a higher temperature, cooking the food faster.
Pressure canners, on the other hand, are designed for canning food. Canning involves sealing jars, which sterilizes the food and prevents bacteria from growing.
The problem is pressure cookers do not have temperature gauges, making it hard to know that the food is sterilized.
While a pressure cooker can be used for canning (many are even advertised for both!), I suggest you get a dedicated pressure canner, and use that.
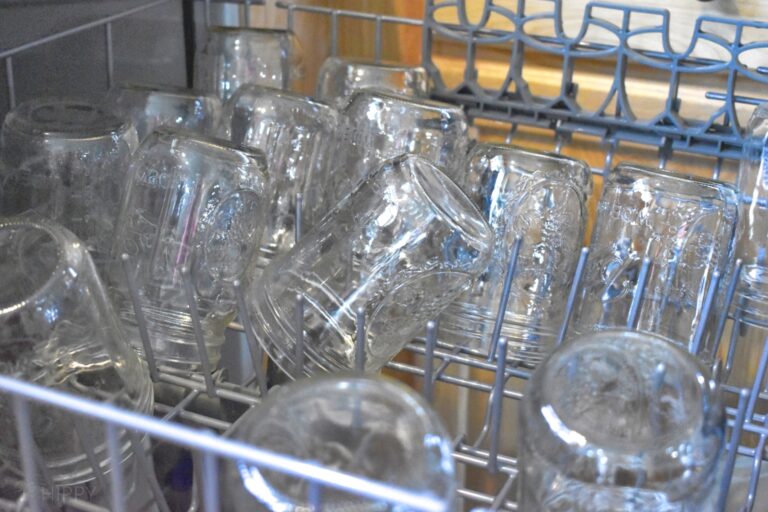
Mistake #28: Using Cold Jars
OK, so If the jars are not properly heated, they can cause the food to spoil. In addition, cold jars can cause the food to lose its flavor and texture.
Be sure to heat the jars before adding the food. You can do this by boiling them in water for 10 minutes or running them through the dishwasher.
Final Thoughts
So, what have we learned? Canning is a great way to preserve food, but it’s important to do it correctly. Avoid these common mistakes and you’ll be on your way to enjoying home-canned goodies all year long!
Grabbing a few canning guides with tried, true, tested recipes will go a long way in your home canning adventures. Here are some of my favorites…
When you visit a link in this article that takes you to a different website where you can purchase something, I may earn a commission. Read my full disclosure for more details.
- “The Organic Canner” by Daisy Luther
- Joy of Cooking (has huge canning sections)
- Ball Blue Book of Canning
Following a few safety guidelines and having proper equipment will be important in keeping your food and family safe. What are some other questions you have about home canning?


Heather’s homesteading journey started in 2006, with baby steps: first, she got a few raised beds, some chickens, and rabbits. Over the years, she amassed a wealth of homesteading knowledge, knowledge that you can find in the articles of this blog.
Learn more about Heather and the rest of the writers on this page.
I think the number one mistake is following anyone’s recipe on the web. I use Ball’s canning book but would love to win this book.
Ball’s canning book is one of my favorite go to books as well!
Great tips for newbie canners (like me!) I’m so afraid of accidentally poisoning my family!
I have canned for years now. Started out doing beets of all things, Kitchen was red as were my hands and the dogs for days.
sounds like my applesauce escapade 😉
Great insights here!
Is there a pressure canner you recommend?
This is the one that I currently use, it’s Presto’s 16 quart.
https://amzn.to/2K1nUqb
I would LOVE to have a larger one, but this still does the job at a very affordable price!
I’ve never canned baked beans, but what I do is can the beans FOR that recipe, then make the baked beans as I am ready to serve. Hope that helps!
One can find, if you’re lucky, to come across a complete pressure cooker, that you can find updated parts and seals. They’ve been around for a reason. Happy canning!