
If you’re a homesteader, you no doubt know the difficulty of storing vegetables, fruits, and meats over the winter months. It’s nearly impossible to grow any sort of produce during cold weather in most states, so it’s necessary to find alternative methods for storing the foods harvested in the early fall.
While freezing is a great option for many homesteaders, frozen foods take up quite a bit of space and, of course, require electricity.
Home canning of is a quick and easy alternative that takes up minimal space and requires zero utilities. There are two types of canners available: water bath and pressure canners.
While water-bath canners are significantly less expensive and easier to run than pressure canners, it should be noted that many foods cannot be canned via water bath systems.
Water-bath canning involves processing your canned foods in boiling water for a certain amount of time, while pressure canning heats your food under steam pressure. This allows for substantially higher temperatures.
Low-acid foods, including most vegetables and meats, cannot be canned using a water-bath system, as they must reach a higher temperature in order to eliminate the risk of contracting food-borne illnesses, such as botulism.
However, high-acid foods, such as fruits, jams, jellies, tomatoes, pickles, and chutneys, can easily be canned with a water-bath system and a little pectin.
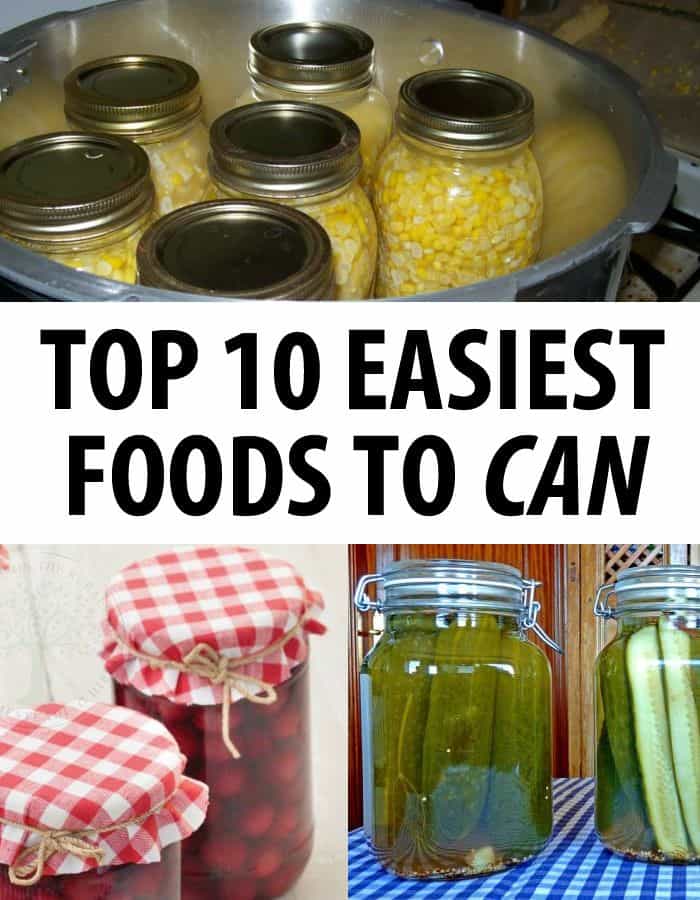
So what are the easiest foods to can? While this may vary depending on your canning system and preferences (and especially the type of canning recipes and canner you prefer to use), there are countless of vegetables, meats, and fruits that are simple to can and store for long periods of time.
However, these are some of the most popular options.
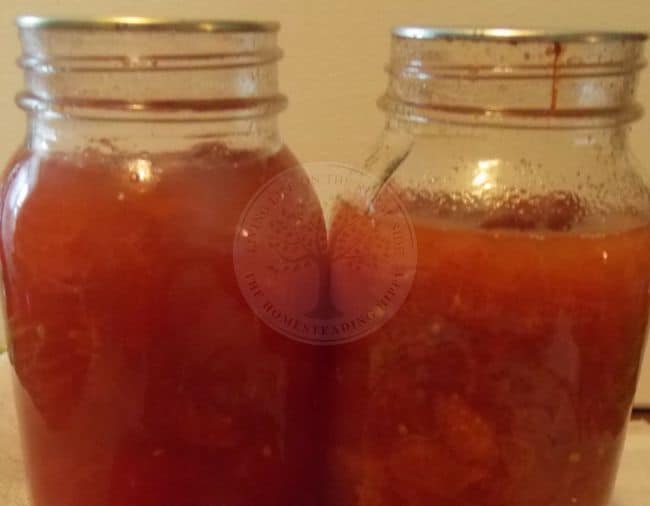
1. Tomatoes
Tomatoes can easily be canned in a water-bath canner, as long as you add extra lemon juice to increase the acidity of the mixture. To can, simply blanch them quickly in hot water, peel, and core.
Then, stuff them into jars, add two tablespoons of lemon juice and a teaspoon of salt, cover with new seals and rings, and then boil in your water bath system for roughly forty-five minutes.
2. Cucumbers
Most people prefer to can cucumbers as dill or sweet and sour (also known as bread and butter) pickles. Pickles allow you to maintain the crunchiness of cucumbers throughout the cold winter months of storage.
The best cucumbers to use for canning are classic pickling cucumbers. These grow to a smaller size and maintain their firmness while they grow. You can also use full-size cucumbers and slice them down to the appropriate size.
After washing and slicing your cucumbers (if needed), add dill, vinegar, red pepper flakes, some cloves of garlic, mustard seed, celery seed, pickling salt, and coriander. You can also experiment with other spices to get the perfect mix for your family.
Just remember that pickles tend to grow more potent the longer they sit in storage, so you may end up with a tangy brew after a few months in the cellar!
After preparing and covering your jars, you only need to process your pickles in a water bath canner for five minutes. The longer you boil, the softer they become, so be sure not to overcook them.
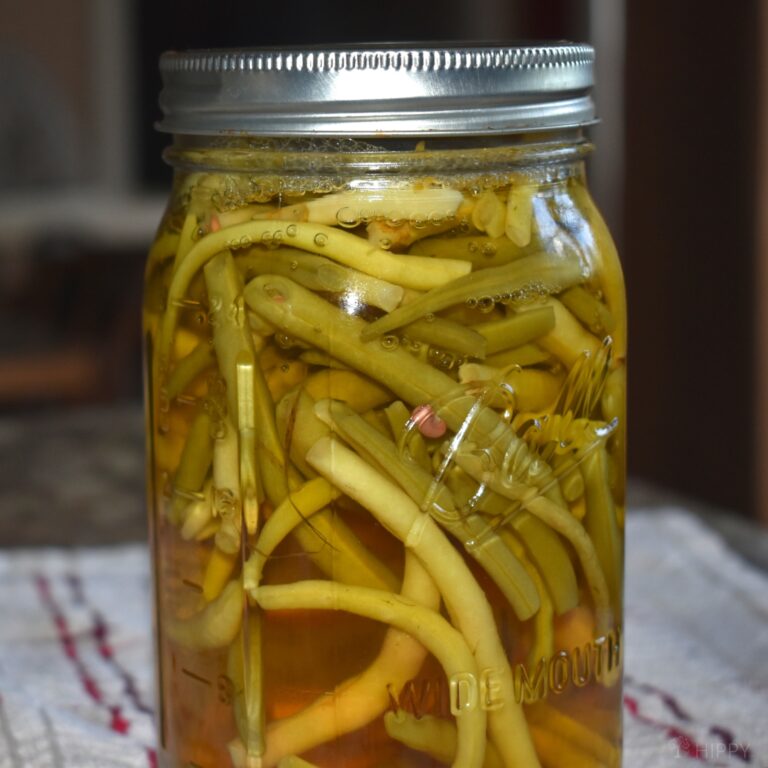
3. Beans
Beans can be canned, but must be done using a pressure-canner, as they have low acidity. Take about two pounds of green beans and pack them tightly into canning jars. Many people blanch their green beans before canning, but this is not mandatory.
Add water and salt to the jars (this is optional, but helps preserve flavor). You must process a minimum of two quart jars or four pint jars in a pressure canner at a time to ensure safe processing.
Then, can the jars at ten pounds pressure for twenty minutes (if canning pints) or twenty-five minutes (if canning quarts).
You can also can dried beans, by the way.
4. Corn
Canned corn is a great option to preserve your harvest, as it maintains similar flavor as the fresh-off-the-cob variety. Corn must also be canned in a pressure canner. Roughly thirty pounds of corn is needed for a full canner load of seven quarts.
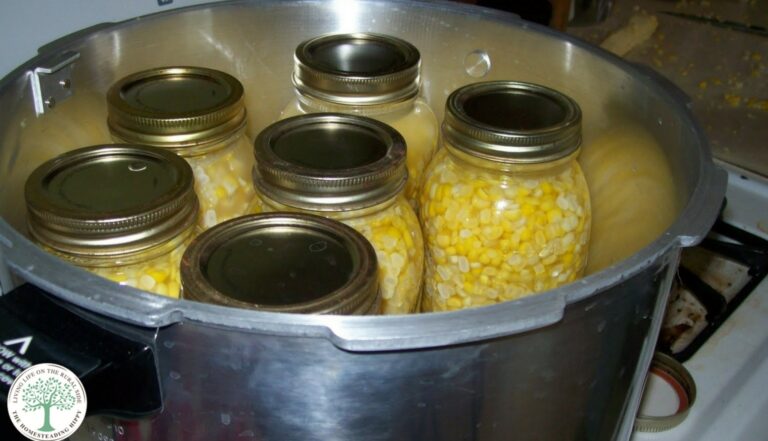
Blanch corn for two minutes in boiling water. Then, cool it immediately in a bath of ice water. Cut the corn off the cob and then pack your jars, leaving an inch or so of head space. You can also add salt, if desired.
Leave the jars in the pressure canner for an hour and twenty five minutes for quarts, or fifty-five minutes for pints. This is a long time compared to other vegetables, but absolutely worth it.
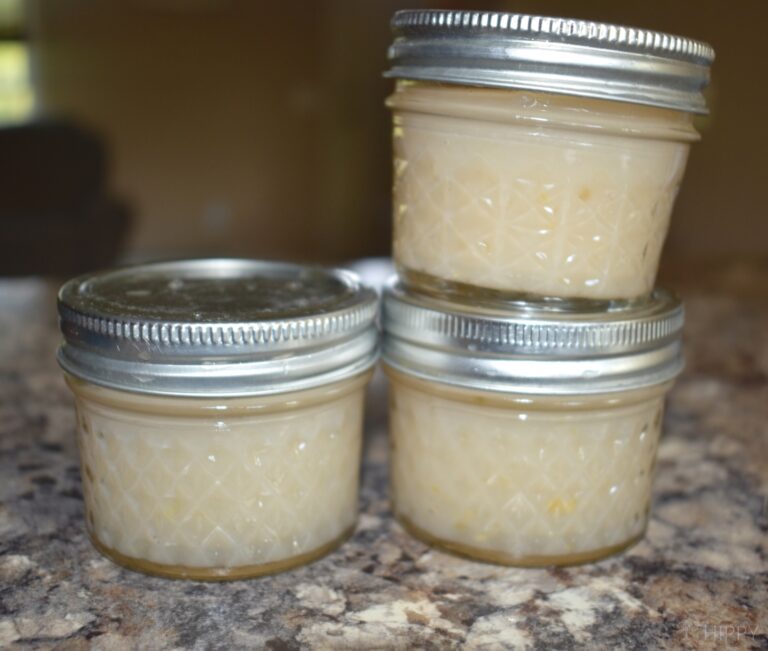
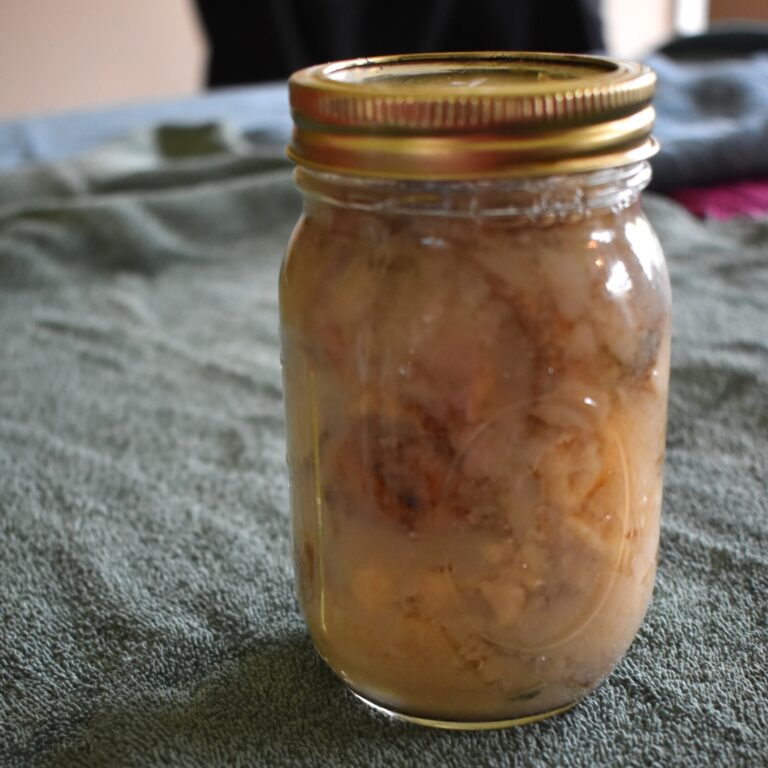
5. Stock
If you own chickens or beef cows, canning extra stock after butchering is a great way to make full use of an animal carcass. Plus, nothing beats chicken stock as a substitute for bouillon cubes or water to spice up a boring recipe!
To can bone broth (or stock), you need a three to four pound chicken, an equivalent amount of beef on the bone, or several leftover carcasses. You also need sixteen cups of water, some spices (such as peppercorns, salt, and bay leaves), and vegetables (optional).
You can either boil your carcasses down overnight in a slow cooker, or put them on the stove in a large sauce pot. Simmer for two to three hours, or until the chicken or other meat is tender.
Strain the stock throw a sieve to allow the fat to solidify and separate. Then, heat the stock back up and ladle it into jars, leaving about an inch of head space. Process the jars at ten pounds pressure for twenty minutes (pints) or twenty-five minutes (quarts).
6. Fruit
Fruit can easily be canned in a water bath canner. Harvest your fruits early in the morning, when they are their freshest. Wash them carefully, then pack raw fruit into jars.
Cover them with boiling hot water or sugar syrup, leaving a headspace of about half an inch deep. Most fruits only require about ten minutes in a water-bath canner.
Some of the easiest fruits to can include:
- peaches
- pears
- cherries
- apples and applesauce
- blackberries
- raspberries
- strawberries
You can also can jams, jellies, preserves and the like:
- Apple butter
- Strawberry jam
- Peach jam
- Raspberry jam
- Pie filling
7. Squash
Both plain pumpkin and winter squash can be canned. This takes up much less space in your freezer, and provides a quick addition for pies and side dishes.
Generally, for each quart jar of canned squash, you will need about two pounds of fresh, unpeeled squash.
Wash, peel, and blanch your squash, then pack into canning jars. Squash must be canned using a pressure canner at ten lbs. for fifty-five minutes (pints).
8. Leafy Greens
While canned greens, such as spinach and collard greens, won’t taste as fresh and crispy as the newly harvested varieties, they will store nicely for use in soups, pastas, and side dishes. These may be canned with or without salt, and must be canned at 10 PSI.
You will need about twenty-eight pounds of greens for a full canner load of seven quarts.
Only can fresh greens, as those that are diseased or wilted will lower the quality of your canned goods. You will need to process these for seventy to ninety minutes, depending on whether you are processing pints or quarts.
9. Asparagus
Although canned asparagus has a softer, milder taste and texture than fresh asparagus, it is delicious in soup or when added to omelets or pastas. Canned asparagus lasts for 1 – 3 years, but does need to be canned using a pressure canner.
Don’t can the base of the asparagus plants (the part on the opposite end of the scaly leaves and pointed tip). This is too tough to can and will not be tender when it’s done. You should add salt, if desired, and water to your canning jars.
10. Carrots
Carrots are a homesteader’s favorite for canning, as they taste deliciously sweet and tender after coming out of a can, and there’s no difference between canned and regular cooked carrots. These are great as a side dish or an addition to stews or soups.
Furthermore, carrots are a great food to can because they are ready later in the season than most of your other canning vegetables.
If you find yourself becoming overwhelmed by a lengthy autumn to-do list, you can breathe easy knowing that carrots can wait until November or December.
Carrots should be washed and peeled, then packed raw into hot jars. Add salt, if desired, and boiling water. You can add a sweet syrup if you choose, or leave them plain for more versatility. They should be processed at ten PSI for 25 to thirty minutes.
11. Okra
Canning okra at home is a great way to use your surplus harvest while ensuring that you will have delicious okra to enjoy all year round. One important thing to note is that you will need to use a pressure canner, not a water-bath canner, to properly process it.
To begin canning, start by washing and trimming the stems off of the fresh okra. Then, slice or leave the pods whole, whichever your preference, and pack them into sterilized jars. For added flavor, you can add spices such as garlic, red pepper flakes or bay leaves to the jars.
Once the processing is complete, allow the jars to cool and check for proper seals before storing them in a cool, dark place. Now you have delicious and flavorful canned okra to enjoy in soups, stews and more!

12. Beets
Canning pickled beets at home is a wonderful way to preserve the bounty of your harvest and unlike okra, beets can be canned using a water-bath canner or a pressure canner. I wrote”pickled” because canning them just like that won’t work.
To begin, select fresh beets with firm, evenly-sized roots. Wash and trim the roots, leaving about two inches of the stem attached. Boil the beets in water until fork-tender, then remove the skin by rubbing with a towel, which should come off easily. You can also roast or steam the beets instead of boiling, depending on your preference.
Next, slice or cube the beets, pack them into sterilized jars, along with your choice of spices such as dill, cloves, or cinnamon sticks. Cover the beets with hot water, leaving one inch of headspace at the top of the jar. Be sure to wipe the rims clean, place the lids and rings on, and process in the water-bath canner or pressure canner for the recommended time and pressure.
Here’s the full recipe with photos included.
13. Peppers
Canning peppers at home is easy and a great way to preserve their flavors. Peppers can be canned in both water-bath canners and pressure canners, but it is best to use a pressure canner…
Start by washing and trimming the peppers, removing the core, seeds, and stems, then slice, dice or keep them whole, according to how you like them. For extra flavor, you can add garlic, onion or cumin before stuffing the peppers into sterilized jars.
Next, combine water, vinegar, and salt into a non-reactive pot, and boil for a couple of minutes. Pour the boiling water mixture into the jars covering the peppers. Leave headspace and process the jars. The processing time varies based on the acidity of the peppers and the method used.
Check the seals before storing them in a dark and cool place to enjoy colorful and flavorful canned peppers all year round.
15. Peas
Peas are low-acidic vegetables, so they require a pressure canner to keep them safe from harmful bacteria blooms.
Start by washing the fresh peas and blanching them for 2-3 minutes. Drain the peas and pack them into sterilized jars. Pour boiling water over the peas, ensuring that each jar has 1 inch of headspace. Use a knife or a spatula to remove any air bubbles and wipe the rims clean. Then place the lids and rings on. Next, process the jars in a pressure canner for the required amount of time, usually around 40 minutes.
Store the jars in a cool and dark place for up to a year. Enjoy them in soups, stews, or even as a side dish with your favorite main course.
16. Mushrooms
Yes, you can can your own mushrooms at home! While there are different methods to can mushrooms, the most recommended approach is through pressure canning.
Start by cleaning your fresh mushrooms and chopping them into your desired size. Cook the mushrooms for 5 minutes in a saucepan with a bit of water, white wine vinegar and salt. This will boost flavor and give the mushrooms an added, pleasant tang.
Pack the mushrooms tightly into sterilized jars, and pour in the cooking liquid over the mushrooms, make sure it covers the mushrooms and there are no air bubbles. Process the jars in a pressure canner for about an hour.
Now you have delicious canned mushrooms that are fresh and perfect for use in pasta dishes, stir-fries, or even as a flavorful pizza topping.
17. Potatoes
Canned potatoes are among very favorite canned dishes; there is just something about the taste and the texture that I love, and you cannot beat the convenience when you need them in a hurry! Canning potatoes is possible with a water-bath canner but it’s not recommended – better to use a pressure canner again for safety reasons.
Start by washing and peeling the potatoes, then cut them into your desired size, whether diced into cubes or slices.
Next, blanch the potatoes in boiling water for 2-3 minutes. Pack the blanched potatoes into sterilized jars, leaving about 1 inch of headspace at the top. Add any seasonings and spices if desired.
Next cover them evenly with boiling water, leaving no air pockets. Process the jars in the pressure canner for approximately 35-40 minutes. The processing time may vary significantly for potatoes based on your altitude, so be aware!
18. Sweet Potatoes
I can’t choose between potatoes and sweet potatoes most of the time, so I keep both in my pantry at all times! I enjoy them heated up as-is with a drizzle of butter, or in casseroles and pies. As with regular potatoes, canned sweet potatoes require a pressure canner for the safest and best preservation and taste.
Begin by washing, peeling, and cutting your sweet potatoes into your preferred size. Then, blanch them by placing them in a pot of boiling water for 2-3 minutes. Pack the blanched sweet potatoes and for an extra touch of flavor, add some spices like cinnamon, nutmeg or ground cloves.
Process the jars in the pressure canner as normal, but know that they take a while because they are so dense: usually 60-90 minutes. Check the lids to ensure that they are sealed before storing them in a cool, dark place for at least a year.
19. Onions
As far as condiments go, pickled, canned onions are second only to onions in my book. The good news is that onions can be safely canned using a water bath canner, so you don’t need to invest in a pressure canner.
The first step is to select fresh, high-quality onions in good condition. Don’t waste your time with subpar produce. Wash them thoroughly and peel off any excess layers of skin. If you are planning to can whole onions, they must be a smaller variety.
To prepare the onions for canning, you can slice or chop them as per your preference. You can also blanch the onions by boiling them for a few minutes and then immersing them in ice water to stop the cooking process. Blanching helps to retain the color and texture of the onions.
Once the onions are prepared, add them to your jars along with salt and water or vinegar. Process the jars in a water bath canner according to the recommended processing times for your altitude. When done correctly, canned onions can last for up to a year in a cool, dark place.
20. Radishes
Just like onions, radishes can also be safely canned using a water bath canner, so there is no need for a pressure canner.
Pick radishes that are firm and free from blemishes. Wash them thoroughly, and trim off any roots and stems. Slice, dice, or quarter the radishes, depending on your preference.
For a crunchier texture, you can skip the slicing and leave them whole or halved. Blanching the radishes by boiling them for a few minutes and then quickly cooling them in cold water will again help preserve their color and texture.
Afterward, pack and add any other flavorings you desire. Finally, process the jars in a water bath canner according to the appropriate processing times and temperatures for your altitude. Keep them cool and dark, you know the drill by now!
21. Artichokes
While canning spiny, dense and oddly-shaped artichokes may seem intimidating, it is actually fairly straightforward. Artichokes must though be pressure canned to ensure safety because they are a low-acid vegetable like so many others on our list.
Always use artichokes that are fresh, tightly closed, and heavy for their size. Discard the outer leaves and any leaves that are yellow or brown. Cut off the stalk and leave 1 inch of stem. Cut off the top 1 inch of the artichoke, and trim off the thorny tips of the remaining leaves.
Then steam, microwave or boil them until they are slightly tender — about 5 to 10 minutes. Pack them along with any desired seasonings.
Be sure to leave the recommended headspace between the artichokes and the lid of the jar. Process the jars in a pressure canner according to the recommended processing times and pressures for your altitude.
A lot of work for a veggie when done correctly, but canned artichokes are a versatile ingredient that can be used in many delicious dishes.
22. Salsa
You can surely can your own condiments and sauces at home, too! It is important to note that recipes with low-acid ingredients such as peppers, onions, and garlic require the use of a pressure canner to ensure safety even when packed with other, acidic ingredients.
Incorrect canning can easily lead to the growth of harmful bacteria responsible for botulism that can cause serious illness or even death.
To can your salsa, fill the jars with the salsa, removing any bubbles, and leave the recommended headspace between the top of the salsa and the lid. Process the jars as normal.
After processing, remove the jars carefully and allow them to cool for 12 to 24 hours before you do a final integrity check on the seal: ensure that it does not flex or pop. Store the canned salsa in a cool, dry, and dark place for up to a year.
23. Vinaigrette Dressing
Another surprising inclusion on our list, and one that is a favorite at my house. To can vinaigrette dressing, you will again require a pressure canner.
Fill the jars with the dressing and leave the recommended headspace at the top of each jar. Process them according to the times and pressures specified for your altitude. That’s all there is to it!
24. BBQ Sauce
Yes, it is possible to can BBQ sauce at home, using a water bath or pressure canner. However, it is important to be aware of the acidity level of the sauce if water bath canning.
To ensure that your BBQ sauce can safely be canned with a water bath, it should have a pH of less than 4.6, which is considered high acid.
If the pH of the BBQ sauce is higher than 4.6, it will need to be processed using a pressure canner. It is recommended that you test the pH of your BBQ sauce to ensure it can be safely canned using a water bath method.
With that known, just process the jars as normal, leaving headspace when filling. Once the processing time has ended, check the seal on the jar lids by pressing the center of the lid to ensure that it does not flex or pop. Store your canned BBQ sauce with your other good for about a year.
Ready to Start?
Canning is a wonderful hobby that also helps you fill your pantry for the cold winter months ahead. Many homesteaders shy away from the endeavor, thinking it too complicated or involved.
However, with a few basic pieces of information and a small amount of know-how, it’s easy to can delicious vegetables, fruits, and meats for use all year long.

Rebekah is a full-time homesteader. On her 22 acres, she raises chickens, sheep, and bees, not to mention she grows a wide variety of veggies. She has a huge greenhouse and does lots of DIY projects with her husband in her ever-growing homesteading endeavor. Learn more about Rebekah here.
Thank you for this. I’m new to canning and this is exactly what I was looking for.
Have a question about this, from asparagus:
process at forty pounds pressure for forty minutes
I haven’t seen too many recipes, but most are 10-15 pounds. Is this a typo?
its a typo. always use the pressure recommended for your altitude… no matter what type food you are canning.
I love the jars that you are using for the pickles. May I ask where you bought them?
First of all Thank you so much for sharing. you are awsome.
question what is and how do I make the sweet syrup for carrots or anything else that needs it?? is it sugar water and what how to make it??
So it seems like if you get a seal everything is a-ok. But looking at this post, that doesn’t really seem to be the case: you seem to say that the process of preparing the food is equally as crucial as the seal part… Is that correct?
I’m new to canning and just canned a thick strawberry compote. It was so thick that while it was hot, I can’t say whether it was boiling because I didn’t want the bottom to burn. 2 out of 3 jars sealed… Think it’s good? I did the water bath for 10min.
Thanks