
Sheet mulching is a simple way to begin a garden bed on top of soil, grass, or weeds. It is inexpensive, simple to build, and usable in a wide variety of situations.
Sheet mulching means to grow plants, seedlings, and seeds in multiple, ordered layers of different soil and plant material, all stacked on top of a cardboard sheet. This method of gardening is much less destructive to soil ecosystems than roto-tilling.
As such, sheet mulching is a popular beginner technique in permaculture that is still used by advanced practitioners.
If you’re looking for a way to begin a permaculture garden, continue reading to learn about how you can use sheet mulch in permaculture design.
Table of Contents
Weed Growth & Suppression
Cardboard blocks light, air, and nutrients to weeds and lawn grass, which suppresses the growth of unwanted plants. By using cardboard for sheet mulching, one can quickly kill weeds and grass to prepare a bed for planting.
Being both compostable and permeable by strong roots, cardboard is ideal to have underneath your growing soil, as it will biologically degrade and not leave waste materials in your soil.
Weeds and grass need sunlight, air, and nutrient chemicals in soil to grow and thrive. When you cut off supply of these elements to weeds, they weaken and die over time, which makes them much less likely to compete with your productive garden plants.
Cardboard is also often cheap or freely available as recycled waste. Many people and some retail stores in cities are prepared to give it away for free, sometimes even in bulk.
This makes it easy to find and to bring on to your site. Transforming waste products into useful supplies follows permaculture principles and contributes to a closed-circle economy.
At some point, weeds are still likely to show up, and cannot be eradicated entirely. With this method, however, the weeds are easier to remove because they should grow slower and more sparsely.
The Difference between Compost and Mulch
In the technique of sheet mulching, plant material is used as a base for garden soil.
The way a sheet mulch bed is built in layers is reminiscent of a compost pile, which converts elemental carbon and nitrogen into humus-rich soil in a chemical reaction, catalyzed by anaerobic bacteria, earthworms, and other decomposers.
The three main differences between compost and mulch are their composition, consistency, and state of chemical change. These three differences change the use case for compost and mulch.
Compost often consists of carbon (C) and nitrogen (N), with some farmers deliberately balancing the inputs close to a ratio of 30 parts carbon to 1 part nitrogen. Such compost can be made from kitchen waste, manure, wood chips, sawdust, and leaves.
The C:N ratio makes a fast chemical reaction where aerobic compost becomes fine and nutrient dense very quickly. Due the increased surface area of fine particles, compost is best used to feed plant roots with nutrients, keeping them healthy and productive.
Mulch, meanwhile, usually has much more carbon than it has nitrogen, and has a rough consistency.
It is plant material at a very early stage of decomposition, and its primary use case is to be used on top of soil to protect plants from environmental shocks, pests, overwatering, and weed encroachment.
Mulching also helps to retain water and slows soil erosion. Mulch is often made with wood chips, leaf cuttings, small twigs and branches, grass cuttings, and straw, making it somewhat resemble a bird’s nest.
In sheet mulching, in the layer immediately on top of the cardboard, the layer of roughest mulch is used as a base. It will decompose slowly, similarly to the way hügelkultur does, and provide some nutrients as it decomposes.
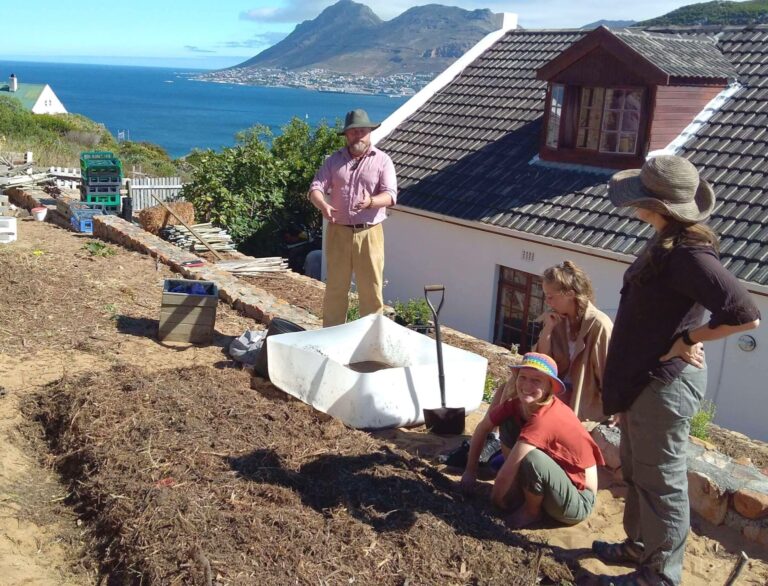
Below, you can see two photographs of a small class that learned sheet mulching as part of a 3-day permaculture site design class taught by this article’s author, David, and a colleague, Peter.
How to Lay Sheet Mulch
This section contains a step-by-step instructional guide showing how to build sheet mulch beds. This section also features a photo series of a class of students volunteering to build a sheet mulch garden in their teacher, Joshua’s yard.
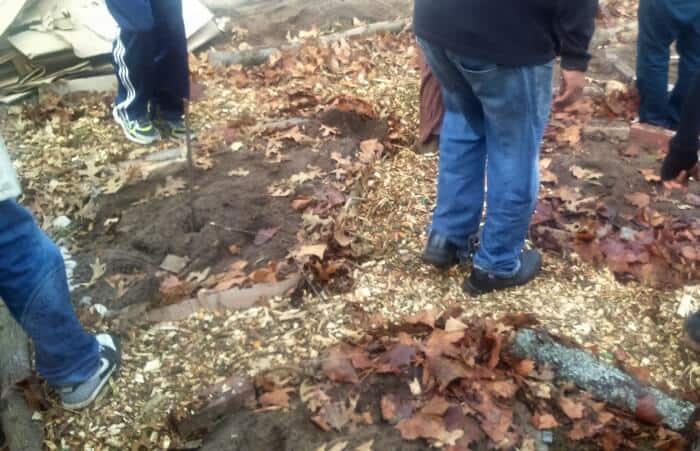
1. Review what is underneath the soil – ‘Dig Safe’
When you plan on digging somewhere, aerating the soil, or having plants put roots into the soil, it is always a good idea to know what is below the soil first.
In the best-case scenario, there isn’t anything human-made under there. However, it is possible to end up digging into something as potentially destructive and expensive to repair as a natural gas pipe or a plumbing line.
Since there are over 100,000,000,000 feet of buried utility lines in the United States, to avoid any such liability, “call 811 before you dig”. Ideally, you should wait no longer than a week to receive information about utility lines from the 811 helpline.
2. Soil Test
Secondly, a soil test is recommended if you’re planning to plant food or medicinal plants, especially if you have never grown food or medicinal plants on this site before.
A soil test can help you discover which nutrients are present and which ones are lacking in the soil, so that you know if nutrients have to be added, or alternatively can be brought to the surface by plants.
A soil test also gives you an idea of the pH rating of the soil, which can be a helpful guide to which plants to put down, or perhaps by guiding your decision of amendments to be made.
Finally, a soil test can inform you if there is excess salt in the soil, which would impede growth or possibly inform your decisions about groundwater use.
3. Mow existing vegetation
Existing vegetation should be mowed so that it is flat and easy to put plants on top of, so that it will support the weight of soil, cardboard, water, and plants better, and to minimize competition from grass and weeds that are already present on the site.
4. Aerate the soil with digging forks
Once moving is complete, use of digging forks is a way to aerate the soil. This counteracts the effects of soil compaction, which can end up choking plants of air and place to grow later.
For the opposite reason that gardeners are advised to avoid walking on their garden beds, aerating the soil can improve growing conditions.
There are other methods of aeration that are more labor-intensive and expensive, such as ripping, or for large tracts of land, using a Yeomans plow.
However, the everyday home-owner and homesteader can probably call up a few friends for an afternoon of enjoyable pitchfork use and make a fun event of the work that it would take to stick some holes in the mowed area with a pitchfork.
If you have particularly sandy soil, it is possible to skip this step, because sandy soil is usually aerated enough already. Instead, your soil amendments will become more likely to be necessary, due to the nutrient poverty of sandy soil.
5. Add a 3” layer of finished compost and extra nutrients as required
After aeration, it is time to load some finished compost on to the site. The best compost for use in this phase of the plan is compost that has stood for a long time and is fine to the touch.
Ideally, gardeners should cover the ground of the site with three inches of fine compost, with any soil amendments that interpretation of the soil test would suggest. Three inches will, in most cases, take around a year to decompose fully.
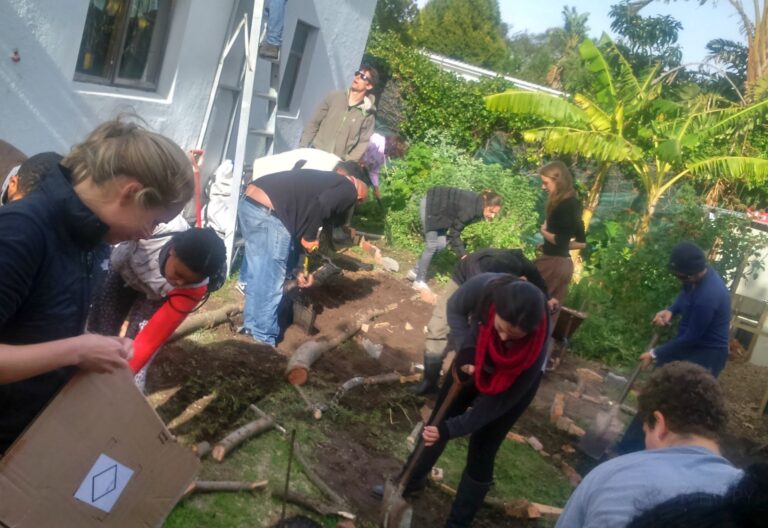
This photograph shows a group of students preparing Joshua’s yard with paths and cleaning up some cardboard:
6. Lay cardboard or newspaper – corrugated, non-waxy, tape, staples removed, 6” overlap, no holes.
Now, it is time to add a layer of cardboard or newspaper. Cardboard is generally a better choice, when available.
This layer serves as a weed barrier by blocking out sunlight and air to weeds, reducing their opportunity to be watered, increasing the temperature to decrease their fertility, and by decomposing so as to leave no trace and not prevent plant roots from making it to the compost below.
By the time such roots are ready, it is intended that competitive weeds would have died.
The cardboard used should be unwaxed, corrugated, and have any stickers, tape, or staples removed. When the cardboard is laid, use pieces that overlap by 6 inches and do not leave any holes or gaps.

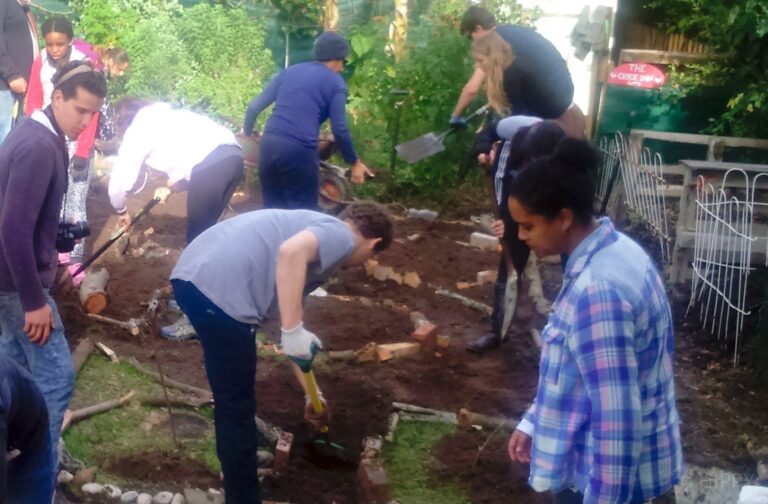
Josh’s colleague, Imraan, directs his class as to where to lay the cardboard. Laying it in the paths of the uniquely shaped garden, which is shaped that way to maximizing edge, will help suppress weed growth.
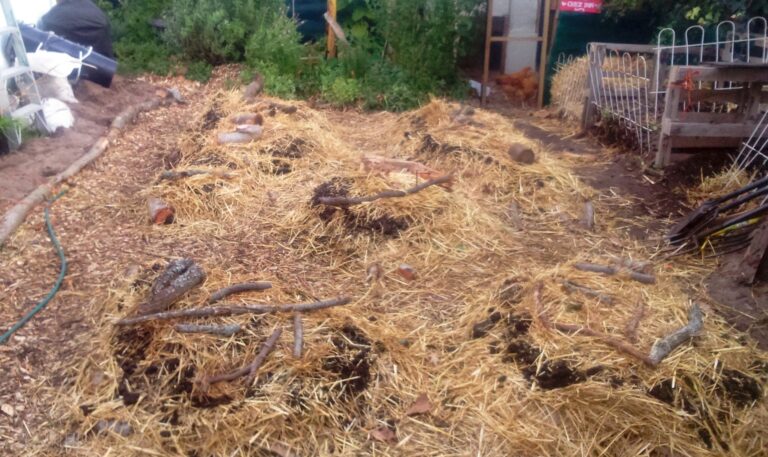
7. Lay the mulch layer – including wood chips, straw, grass clippings, cut leaves
When it is time for the mulch layer, the mulch that you lay should consist of ingredients that contain plenty of carbon. Common choices include:
- straw,
- grass clippings,
- wood chips,
- and crushed leaves
If you live near a saw mill that uses untreated wood, then use of their roughly-ground wastes can be a great way to get such material for free.
Similarly, the cost of hay can be very low if you have nearby sources. Alternatively, making use of a small wood chipper can help you create mulch out of forestry by-products or wastes, possibly even those found on or near to your site.
Wood chips and leaves are added to the site. Most wood chips end up in the path, and leaves are placed on the beds.
Since this landscaping occurred in a frost-free Mediterranean climate similar to that of coastal California, an extra layer of compost helped the beds be ready for planting sooner.
8. Leave this layer to rest.
When leaving the land to rest, don’t leave it to rest very long, unless there is a long cold season before planting time. For those in hot climates or whose growing season is fast approaching, it is not necessary to wait at all in order to begin planting.
However, the fertility of the soil is likely to rise over the next few months as the decomposition of the mulch and cardboard begins, and the compost remediates the soil. If some earthworms make a home in the site, this will further increase the fertility of the soil.
9. Plant into the layer after enough time has passed.
When planting season arrives, you will be ready to turn your new garden bed into a thriving food or medicine production site. Sheet mulch can accommodate seeds, seedlings, or even larger plants, and will require less maintenance and irrigation than a conventional raised bed.
A Large Scale Project
For a much larger project design, see Ryan Harb’s inspirational TEDx Talk about how he led an effort to plant a large garden on a university green.
This TEDx talk was a helpful source for this article, and also features a good discussion of permaculture theory and why sheet mulching hits the high points of permaculture ethics:

This garden, on the grounds of the University of Massachusetts at Amherst, was planned and planted by a community of volunteers, who would all benefit from a large, beautiful garden on their campus.
From this, we can learn that if you are planning a large-scale design, hosting an event that brings friends and community together may be a help in getting the implementation finished.
Disadvantages to Beware
Sheet mulching is a strong permaculture technique, and certainly has its pros. However, as with any technique, there are drawbacks too. Here are three of the most significant of those drawbacks.
Pest Control
The woody habitat of a sheet mulch bed can attract rodents and slugs, and while wet, can provide a comforting home for them. Over time, their presence will surely attract predators that will control them.
However, in the time that this takes to happen, it is possible to lose a significant amount of your crop. This disadvantage can be mitigated, though not entirely solved, through the addition of diatomaceous earth to your beds.
Acidic Chemistry
Some gardeners prefer using heavy mulch material because such beds don’t take as long to construct, and then the mulch is less likely to be blown away by high winds.
However, if the soil products end up being overly compressed by weight, this reduces the air flow, which increases anaerobic composition, acidifying the soil, and possibly damaging plants.
In order to counteract this, make sure to use a mix of light and heavy mulching materials, and keep the heavier mulch near the bottom of the layer.
Inflexibility of Materials Accepted
Sheet mulching requires gardeners to be specific in the cardboard they use. Waxy cardboard will cause water to run off instead of soaking into the cardboard, and it can be time-consuming and labor intensive to remove all staples and tape that are often attached to cardboard too.
Also, while sheet mulch does a great job of making use of woody waste materials and forestry by-products, there is little, if any benefit offered for decomposition of kitchen scraps and food waste.
The extra nitrogen in the mulch would offer no useful available nitrogen to the plants, because sheet mulch piles are much too small to allow for efficient composting.
As a result, sheet mulch piles never become warm, do not kill weed seeds through heat, and do not adequately decompose food waste. There is no direct solution to this limitation, so food waste composting is not an appropriate expectation to have of sheet mulch beds.
Conclusion
Sheet mulching, by itself, is a simple, inexpensive technique that promotes soil remediation and makes gardening easier. Its setup costs, while not negligible, can be minimized through free materials and volunteer help. This makes it a highly recommended technique for beginners to try, and still a useful way of gardening practiced by professionals.
If you would like to practice sheet mulching in your garden or on your homestead, this article can be your impetus to get started. There will be many more learning opportunities on your permaculture journey, and sheet mulching is an excellent beginning to this journey.

David Dornbrack is a permaculture designer and author from the Austin area of Texas, USA. He first achieved his PDC in South Africa in 2013, and has since traveled to the world’s prototypical intentional community and ecovillage, Findhorn Foundation in Scotland. He has gardened in three different climate types – Mediterranean, Cold Temperate, and Humid Subtropical. His favorite plants are tomatoes, chilies, and potatoes. He believes that humans function best when interdependent – able to take good care of themselves so that they can be generous and giving to others. He would like to gain experience in house-building, carpentry, and solar electricity installation. Meet the rest of the team here.